This post contains Amazon affiliate links. As an Amazon Associate I earn from qualifying purchases.
The pencil pouch rested across my knees while late afternoon light moved slowly over the yellow yarn. Each small pull of the hook through a loop made a soft, familiar rhythm, and the little duck shape began to appear before I quite noticed it. This Crochet Duck Pencil Pouch Tutorial is a small project with enough personality to keep your hands interested, yet enough repetition to let your thoughts settle beside it. It takes a few quiet evenings, not a single hurried sitting, and the finished pouch has a cheerful place in a desk drawer, a school bag, or the basket beside your favorite chair.
Why Crochet Duck Pencil Pouch Tutorial Is So Soothing to Crochet
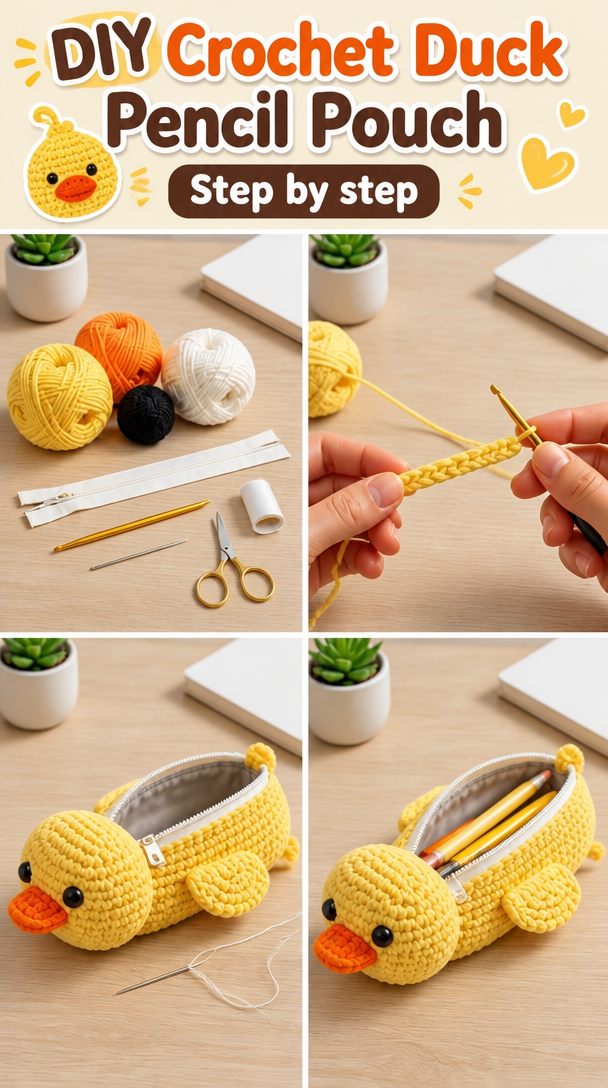
A small pouch gives you a satisfying sense of progress. You can see the fabric grow after every row, turn it in your hands, and notice how the flat rectangle begins to feel like something useful rather than merely a sample. The duck face adds a little attention at the end without making every stitch complicated.
I made this one on the couch during a rainy evening, with a mug of coffee on the table and the yarn basket tucked against my foot. The first rows curled toward themselves, as crochet often does, but the fabric settled once it gained a little weight. By the time I reached the middle, my hands had warmed up and the hook moved with less thought.
That gentle repetition suits slow days. You work a row, pause to look for the last stitch, and hear the quiet click of the hook against the yarn. Many people find crocheting calming because it gives the hands one clear thing to do, without asking you to rush or perform.
The project also stays small enough to carry from room to room. You can work beside an open window on a summer porch, at the kitchen table while the kettle heats, or under a lamp during a long fall evening. There is no pressure to finish quickly. A few rows can be enough for one sitting.
How Crochet Duck Pencil Pouch Tutorial Comes Together
This pouch uses mostly half double crochet, or hdc, a stitch that sits between single crochet and double crochet in height. It makes a fabric with a little substance, so pencils do not poke through easily, while still working up faster than single crochet. The top flap uses simple color changes and a small embroidered duck face.
The pattern uses US crochet terms. UK readers often find these posts too, and the same word can mean a different stitch there, so please check your preferred terminology before beginning. A chain, written ch, means the looped foundation that starts the work; a slip stitch, or sl st, joins or moves across stitches without adding height.
You will make one rectangle from the bottom upward, fold it into a pouch, and sew the sides together. The flap continues from the back edge, which keeps the construction tidy. The duck details are added after the crocheting, when the piece lies flat and is easy to handle.
Give yourself about three to four evenings, or roughly four to six hours of relaxed work. The stitching is beginner friendly, but sewing the sides evenly and placing the face takes a little patience. If your first attempt feels slow, that is normal. Small projects still have fiddly moments.
Pattern at a Glance
Keep this little list nearby while you work.
- Skill level: confident beginner
- Finished size: about 8 inches long by 4 inches wide (20 cm by 10 cm)
- Gauge: 14 half double crochet and 10 rows measure 4 inches (10 cm)
- Yarn: worsted weight (weight 4, medium), about 170 yards per 100 g skein, 120 yards total
- Hook size: H-8 (5.0 mm)
- Other supplies: yarn needle, scissors, stitch marker, tape measure, small amount of black and orange yarn
- Stitch multiple: any multiple of 2 stitches, with 2 extra chains for the turning chain
- Estimated time: four to six hours over three to four evenings
Materials for Crochet Duck Pencil Pouch Tutorial
- About 100 g, or 120 yards, of worsted weight yarn (weight 4, medium) in golden yellow, with about 170 yards per 100 g skein. A smooth acrylic yarn is easy to find and keeps the pouch washable.
- A small amount of worsted weight yarn in cream or white for the eyes, about 8 yards.
- A small amount of worsted weight yarn in black for the pupils and outline, about 5 yards.
- A small amount of worsted weight yarn in orange for the beak, about 5 yards.
- H-8 (5.0 mm) crochet hook. A half size up or down is fine depending on your tension, though the finished size may change.
- Yarn needle for sewing the pouch and weaving in the ends.
- Sharp scissors.
- Two stitch markers, optional, to mark the side stitches and flap placement.
- Tape measure for checking the gauge and finished dimensions.
Make a small gauge swatch before you begin. Work 14 half double crochet across for 10 rows, then measure the center area rather than the curled edge. Those twenty minutes can save you from making a pouch that will not hold your pencils comfortably, and they show whether your fabric has enough body.
You can substitute another smooth worsted weight yarn, such as a cotton blend or wool blend, as long as the yarn gives you a similar gauge. Acrylic is practical here because it stays affordable and machine washable, but it can melt under a hot iron. If you need to shape it, use steam from a distance or block it cold rather than pressing the iron directly onto the fabric.
Step by Step
- Difficulty: confident beginner. The stitch multiple is any multiple of 2 stitches, with 2 extra chains for the turning chain. Begin with a foundation chain of 30.
- For Row 1, work 1 half double crochet, or hdc, in the third chain from your hook and in each chain across. A half double crochet uses a yarn over, inserts into the stitch, draws up a loop, then yarns over and pulls through all three loops. You will have 28 stitches.
- Chain 2 to turn. This is your turning chain, which lifts the yarn to the height of the next row and does not count as a stitch. Work 1 hdc in each stitch across, turning at the end. You will have 28 stitches.
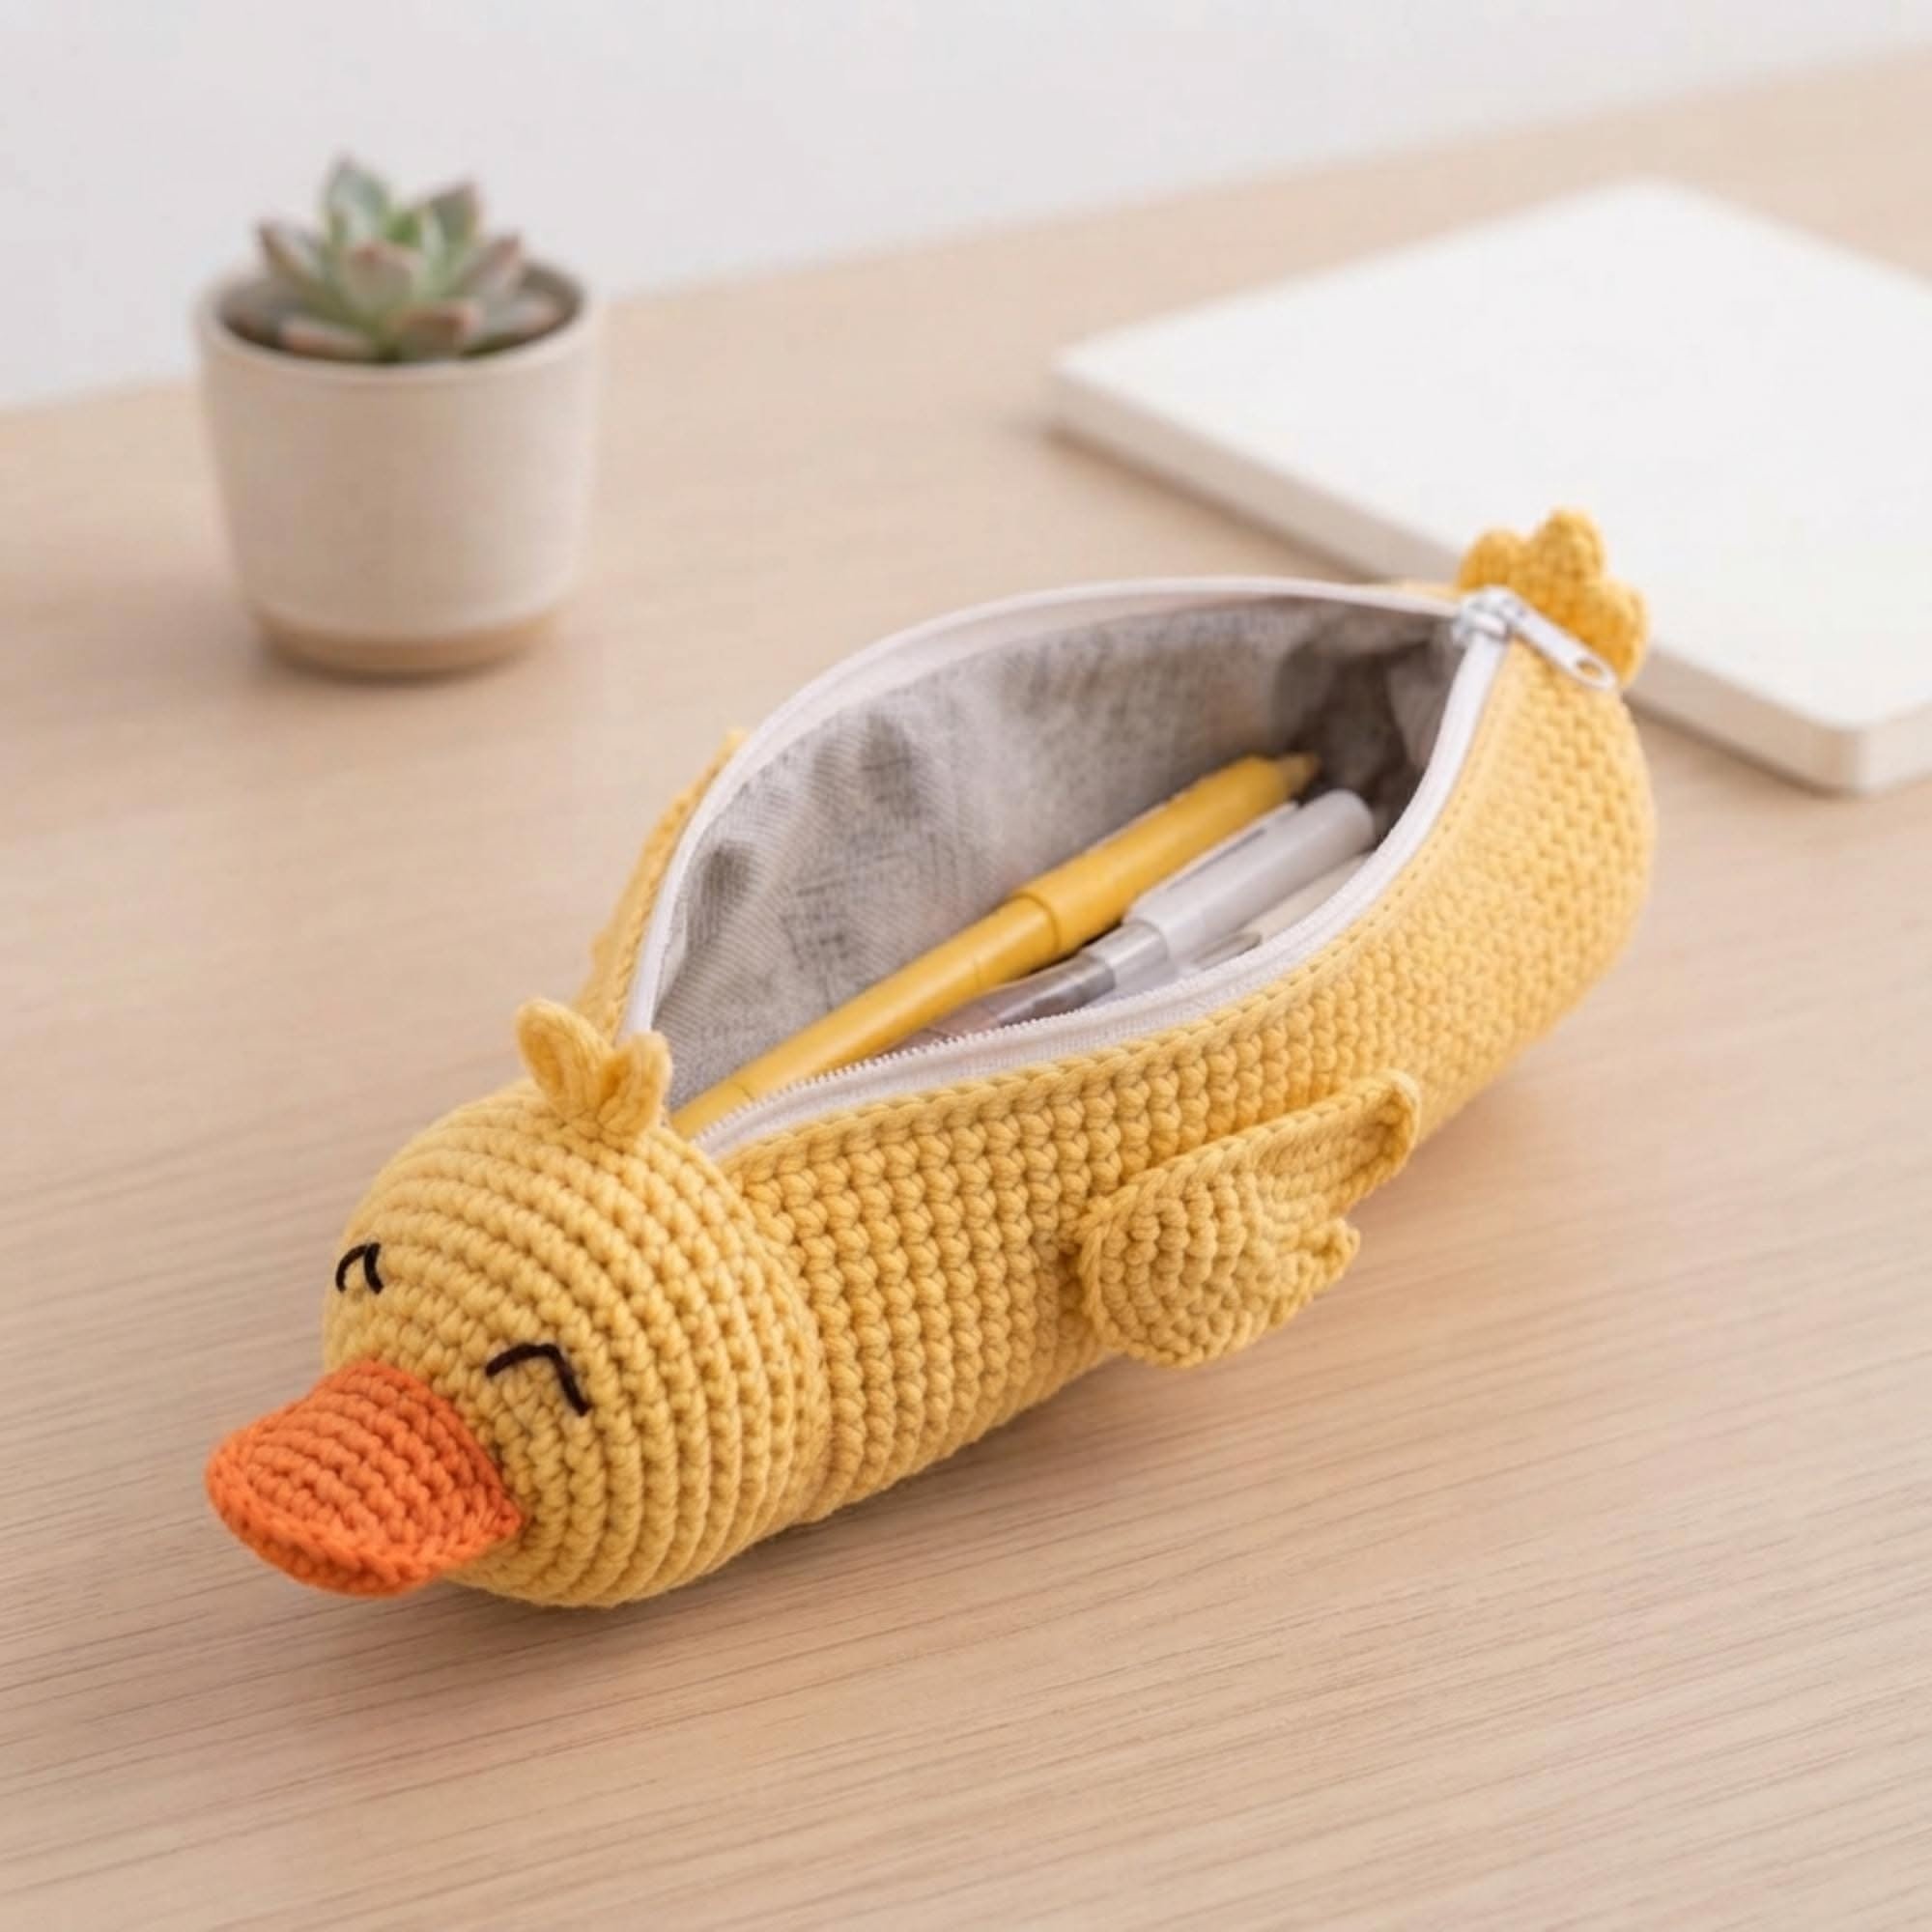
- Repeat Row 2 until you have 20 rows in total. Keep your hook moving through both loops at the top of each stitch. The fabric should measure about 8 inches long by 4 inches wide (20 cm by 10 cm); if it is shorter, check your gauge before adding rows.
- At the end of Row 20, fasten off the yellow yarn and leave a tail about 12 inches long. Weave that tail through the final loop so it does not loosen, but leave enough length to sew later.
- Fold the lower edge upward so it overlaps the back section by 5 inches. The remaining 3 inches form the flap. Match the side edges carefully, using stitch markers if they help you keep the layers aligned.
- Thread the yellow tail onto your yarn needle. Sew the two sides from the bottom fold to the top of the pocket with small whip stitches. Keep your needle passing through both layers, and make the stitches close enough that a pencil cannot slip through the seam.
- Continue sewing around the edge of the flap if your tail reaches that far, or use a fresh strand of yellow yarn. Do not pull too tightly. The side seam should lie flat rather than gather.
- For the flap edge, attach yellow yarn at one corner and work 1 round of single crochet, or sc, around the flap only. A single crochet is made by inserting the hook, drawing up a loop, then yarning over and pulling through both loops. Place 1 sc in each row end across the flap and 2 sc in each corner when needed to prevent curling.
- Join the edging with a slip stitch in the first single crochet. Fasten off and weave in the end. If the edge looks wavy, remove a few stitches and try again with a slightly lighter hand.
- Make the duck eyes with cream yarn. Use a yarn needle to stitch two small oval shapes on the front of the flap, leaving about 1 inch between their centers. Add black pupils with short satin stitches, keeping the yarn snug but not tight.
- Stitch the orange beak between the eyes. A small horizontal diamond works well: make two short diagonal stitches meeting in the middle, then add a second pair below if you want a fuller beak. Keep the stitches secure on the wrong side, which is the back of the work.
- Check the front, or right side, of the pouch and trim any long loops on the wrong side. Weave in every remaining end by changing direction through several stitches. The yarn tail I forgot once showed up weeks later from inside a pencil case, so this quiet finishing step is worth doing carefully.
- Lay the pouch flat and gently shape the flap. This is blocking, which means easing crochet into its intended shape with moisture and a little patience. Acrylic can be shaped with light steam held well away from the fabric or with a cold damp block; never touch acrylic with a hot iron.
Where This Piece Works Best
The finished pouch fits pencils, colored pencils, pens, a small ruler, and a few crochet notions. I like it in the top drawer of a desk, where the duck face appears when I reach for a pencil, but it also works in a school bag or the basket beside an armchair.
Because the pouch measures about 8 inches long by 4 inches wide (20 cm by 10 cm), it feels useful without becoming bulky. You can leave the flap loose for quick access or add a small crocheted loop and button closure if you want more security. If you add a button, sew it firmly and keep it away from a young child who may pull it loose.
It makes a sweet gift for a teacher, a child who loves drawing, or a friend who keeps lists on every available scrap of paper. For a holiday gift, tuck in two sharpened pencils and a tiny notepad. A handmade pouch feels especially personal when the color matches the recipient’s desk or favorite season.
Making It Last
This version uses acrylic worsted weight yarn, so you can wash it on a gentle cycle with cold water and a mild detergent. Place it in a mesh bag if you want to protect the stitched face, then reshape it and dry it flat. Never hang the pouch wet, because the weight of the water can stretch the seams and flap.
If the pouch needs fresh shaping, dampen it lightly and press it into place with your fingers. Let it dry flat on a towel. Acrylic can melt under direct heat, so avoid a hot iron and keep a steamer several inches away from the surface.
Store the pouch folded or lying flat in a breathable drawer rather than hanging it by the flap. Acrylic does not attract moths in the same way wool can, but a clean, dry storage place still helps. Keep leftover yarn with its label so you have the fiber information and dye lot if you later need to repair the pouch.
If you make this pattern in untreated wool, wash it by hand in cool water and avoid agitation because it can felt. Superwash wool tolerates a washing machine better, but I would still use a gentle cycle and dry the pouch flat.
Small Ways to Make It Your Own
Try a different yarn weight if you like. A lighter yarn creates a slimmer pouch with a softer drape, while bulky yarn makes a larger, sturdier case and may need a larger hook. Change the finished size by measuring as you go rather than relying only on the stitch count.
For a wider pouch, begin with any even number of chains plus 2. For example, a foundation chain of 34 gives you 32 stitches in the first row. Keep the same row structure, then fold the piece when the rectangle reaches the length you want.
You can replace the half double crochet with single crochet for a denser fabric. The pouch will take longer to make and feel less flexible, but it will hold small items securely. If you use double crochet, the fabric grows faster and drapes more, so consider adding a lining if you carry sharp objects.
Color blocking gives the duck a different mood. Work the first 10 rows in yellow and the next 10 in pale blue for a little sky-and-sun combination, or use cream for the flap and yellow for the pocket. Change colors at the final yarn over of the last stitch in a row for a cleaner transition.
A simple border in cream can frame the pouch, while a green border gives it a spring garden feeling. You might also embroider tiny feet below the beak or add a small crocheted loop for hanging. Keep any button, bead, or loose decoration firmly attached, and avoid these details on anything intended for a child under three.
Frequently Asked Questions About Crochet Duck Pencil Pouch Tutorial
Can I use a different hook size for the Crochet Duck Pencil Pouch Tutorial?
Yes, you can use a different hook size, but check your gauge after changing it. A smaller hook makes a denser fabric and helps keep pencils from peeking through, while a larger hook creates a looser, slightly larger pouch. H-8 (5.0 mm) gives the stated gauge of 14 half double crochet and 10 rows measuring 4 inches (10 cm).
What yarn can I substitute for the worsted weight yarn?
Choose another smooth worsted weight yarn, listed by the Craft Yarn Council as weight 4, medium. Acrylic, cotton, or a washable blend can work if your swatch reaches the same gauge. Cotton usually feels firmer and may shrink slightly, while acrylic keeps the pouch light and easy to wash. Avoid fuzzy yarn because it hides the small face details.
What should I do if I find a mistake several rows later?
First, decide whether the mistake affects the shape or only one stitch. If you missed a stitch at a row edge, you may see the side narrowing or the last stitch sitting without a clear top loop. If the problem changes the pouch size, pull back calmly to the mistake, place the hook in the live loop, and rebuild the row.
Is this pouch suitable for a beginner?
Yes, this project suits a confident beginner who knows how to make a chain, half double crochet, single crochet, and slip stitch. The crocheting stays simple, but sewing the seams and embroidering the duck face require care. Work slowly at the corners and count the 28 stitches at the end of each row to keep the rectangle even.
How long does the Crochet Duck Pencil Pouch Tutorial take?
Plan on about four to six hours spread across three to four evenings. Your time will depend on your tension, how often you pause, and how carefully you stitch the face. The rectangle works up steadily, while the side seams and embroidered features take the most attention. A few rows at a time still move the project forward.
Does this pattern use US or UK crochet terms?
This pattern uses US crochet terms. In this version, hdc means half double crochet, sc means single crochet, and sl st means slip stitch. UK patterns use different names for some of these stitches, so compare the abbreviation list before beginning if you normally crochet with UK terminology.
Take the Time You Need
Let the pouch grow at the pace your hands prefer. A missed stitch does not erase the quiet work that came before it, and pulling back a few rows is simply another part of learning the fabric. Set it beside your chair, return when you can, and let this small duck carry a little of the day’s softness into whatever comes next.
—META—
SEO Title: Crochet Duck Pencil Pouch Tutorial
Meta Description: Make a cheerful Crochet Duck Pencil Pouch Tutorial with simple US stitches, calm steps, washable yarn, and a useful handmade finish.
Slug: crochet-duck-pencil-pouch
Category: Crochet
Tags: crochet, pencil pouch, duck crochet, beginner crochet, handmade gifts
Image Alt Text: Crochet duck pencil pouch worked in yellow yarn on a calm craft table
Close view of half double crochet rows forming a yellow crochet pouch
Finished duck pencil pouch with embroidered eyes and orange beak
Pinterest Title: Crochet Duck Pencil Pouch Tutorial
Pinterest Description: Make a sweet duck pencil pouch with simple crochet stitches and a gentle, unhurried process. It is a useful handmade gift for desks, school bags, and creative corners.

Crochet Duck Pencil Pouch Tutorial
- Total Time: 260 minutes
Description
A small pouch gives you a satisfying sense of progress and adds a little attention at the end with a cheerful duck face. This crochet project is perfect for beginners and is completed over several relaxed evenings.
Materials
- 100 g (about 120 yards) of worsted weight yarn in golden yellow
- 8 yards of worsted weight yarn in cream or white for the eyes
- 5 yards of worsted weight yarn in black for the pupils and outline
- 5 yards of worsted weight yarn in orange for the beak
- H-8 (5.0 mm) crochet hook
- Yarn needle
- Sharp scissors
- Two stitch markers (optional)
- Tape measure
Instructions
- Chain 30 stitches to create the foundation chain.
- In the third chain from the hook, work 1 half double crochet (hdc) in each chain across to have 28 stitches.
- Chain 2 to turn and work 1 hdc in each stitch across for Row 2, repeating this until you have a total of 20 rows.
- Fold the lower edge upward, overlapping the back section by 5 inches for the flap; align the side edges.
- Use the yellow tail on a yarn needle to sew the sides from the bottom fold to the top of the pocket with small whip stitches.
- If the tail reaches, continue sewing around the edge of the flap or use a fresh strand of yellow yarn.
- Attach yellow yarn at one corner of the flap and work 1 round of single crochet (sc) around the flap only.
- Make two small ovals with cream yarn for the duck's eyes and add black pupils with short satin stitches.
- Stitch the orange beak between the eyes, forming a small horizontal diamond shape.
- Trim any long loops on the wrong side and weave in remaining ends.
- Gently shape the flap using blocking techniques with moisture.
Notes
This project is suitable for confident beginners who can perform basic crochet stitches. The pouch can be personalized with different yarn colors or additional embroidery.
- Preparation Time: 20 minutes
- Active Time: 240 minutes