

This post contains Amazon affiliate links. As an Amazon Associate I earn from qualifying purchases.
A handmade baby pullover is a practical, comforting project with a sweetly personal finish. This crochet baby pullover pattern uses single crochet for its main fabric, then brings the pieces together with shaped sleeves, a front neck, and a buttonhole panel. It’s a satisfying make for crocheters who enjoy creating useful baby clothing, whether for a new arrival, a baby shower, or a special handmade wardrobe.
Why you’ll love this pattern
This pullover gives you the pleasure of making something wearable while helping you practice useful garment skills. The main stitch is single crochet, a familiar stitch that creates a sturdy, close fabric. The shaping and assembly offer a chance to build confidence with garment construction, including keeping pieces aligned and sewing seams neatly.
The button panel makes the pullover easier to put on and take off than a closed neckline. It’s also a thoughtful handmade gift: baby clothes are often used frequently, and a crocheted garment can become a cherished keepsake. Choose a soft baby yarn and a color that suits the recipient, or make a neutral pullover that pairs easily with other outfits.
“I liked that the body was worked in straightforward single crochet. Taking time to check the measurements as I went made the shaping and seaming much less stressful.”
Before you begin
You’ll make a baby pullover from crocheted sections, beginning with the Back and working the sleeves in relation to the body. The Front follows the Back’s measurements, with shaping at the sleeves and neckline. A buttonhole panel and four buttons complete the opening, and the final steps are pinning, damp-cloth finishing, and sewing the shoulder and sleeve seams.
Single crochet is the main technique. You’ll also need to follow the size options shown in the starting chain counts, work the pieces to the stated measurements, join sections as directed, and assemble the garment. The pattern gives four size options in its stitch counts and Back lengths, but does not identify the corresponding ages or provide a gauge or yarn quantity. Check the original pattern details for those specifications before you begin.
The pace depends on your experience, the size you choose, and how quickly you work. Single crochet is steady but creates a firm fabric, so allow time for the body, sleeve shaping, button panel, and careful finishing. This project is best suited to someone comfortable with basic stitches who is ready to follow garment shaping instructions. If you’re newer to crochet, take it one section at a time and keep the pieces clearly labeled.
Materials you’ll need
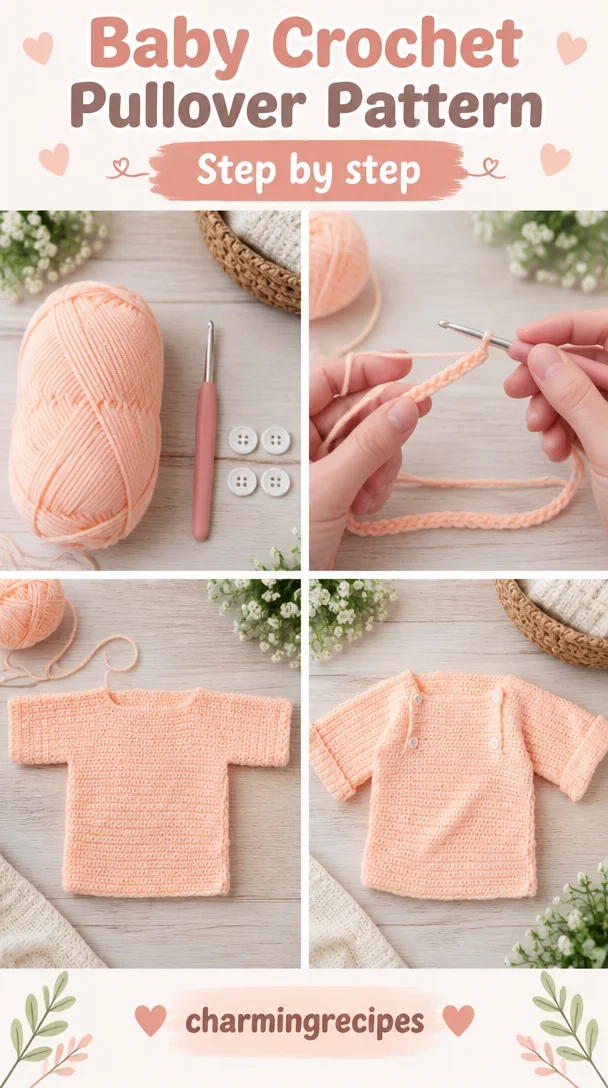
- Bernat® Baby Sport™ yarn — The pattern names this yarn, but the amount and color are not provided here. Check the original pattern for the required quantity before starting.
- Crochet hook, U.S. G/6 (4 mm)
- Buttons — 4
A measuring tape is useful for checking the Back length and comparing the Front as you work. Stitch markers can help identify section boundaries and keep track of joins, while a yarn needle is handy for sewing seams and weaving in ends. These are helpful tools, not additional specified pattern materials.
Use the yarn label to confirm the yarn’s care instructions and fiber content. If you substitute yarn, choose a similar weight and check your gauge against the original pattern if available. A different yarn or hook can change the pullover’s size, drape, thickness, and button-panel fit. Always make sure the four buttons are securely attached and suitable for a baby garment.
Step-by-step instructions
The source instructions give starting chains and Back lengths for four size options, but do not include a gauge, complete stitch counts for the shaping, or detailed buttonhole placement. Follow any additional shaping information in the original pattern where required; don’t guess at missing decreases, increases, or buttonhole spacing.
-
Start the Back. Chain 41 (43-45-47). Work rows of single crochet (sc) until the Back measures approximately 6 (7-7½-8) inches, using the size option you selected. End on a Wrong Side (WS) row, then fasten off. Measure the piece rather than relying only on the number of rows, since crochet height can vary with tension.
-
Begin the sleeves. Chain 26 (28-32-34) for a sleeve, matching the same size option used for the Back. Join the chain to the Back as directed, then work single crochet across the Back and the chain. The source does not specify the joining method or further row counts here, so follow the complete pattern directions if you have them.
-
Repeat for the second sleeve. Make the second sleeve chain using the same size option and join it to the Back in the same way. Try to keep the two sleeves consistent in chain length, tension, and placement.
-
Work toward the Left Sleeve shaping. Slip stitch to position your work for the Left Sleeve shaping. A slip stitch moves the yarn along without adding the height of a regular stitch. Use the original pattern’s shaping details at this point; the brief instructions do not provide the exact stitch counts or shaping sequence.
-
Make the Front. Follow the Back instructions for the Front, working to the corresponding Back measurements. Keep the selected size consistent, and compare the Front and Back as you go so their lengths match where the pattern intends them to meet.
-
Shape the left sleeve and front neck. Join the chain to the Front as directed, then work the left sleeve and front-neck shaping according to the full pattern. Pay close attention to the specified placement and stitch counts. These details are not included in the summarized instructions, so don’t add shaping by guesswork.
-
Complete the right sleeve and front neck. Work the matching right sleeve and neckline shaping, following the original pattern’s instructions. Compare both sides as you go to keep the sleeve and neck shaping balanced.
-
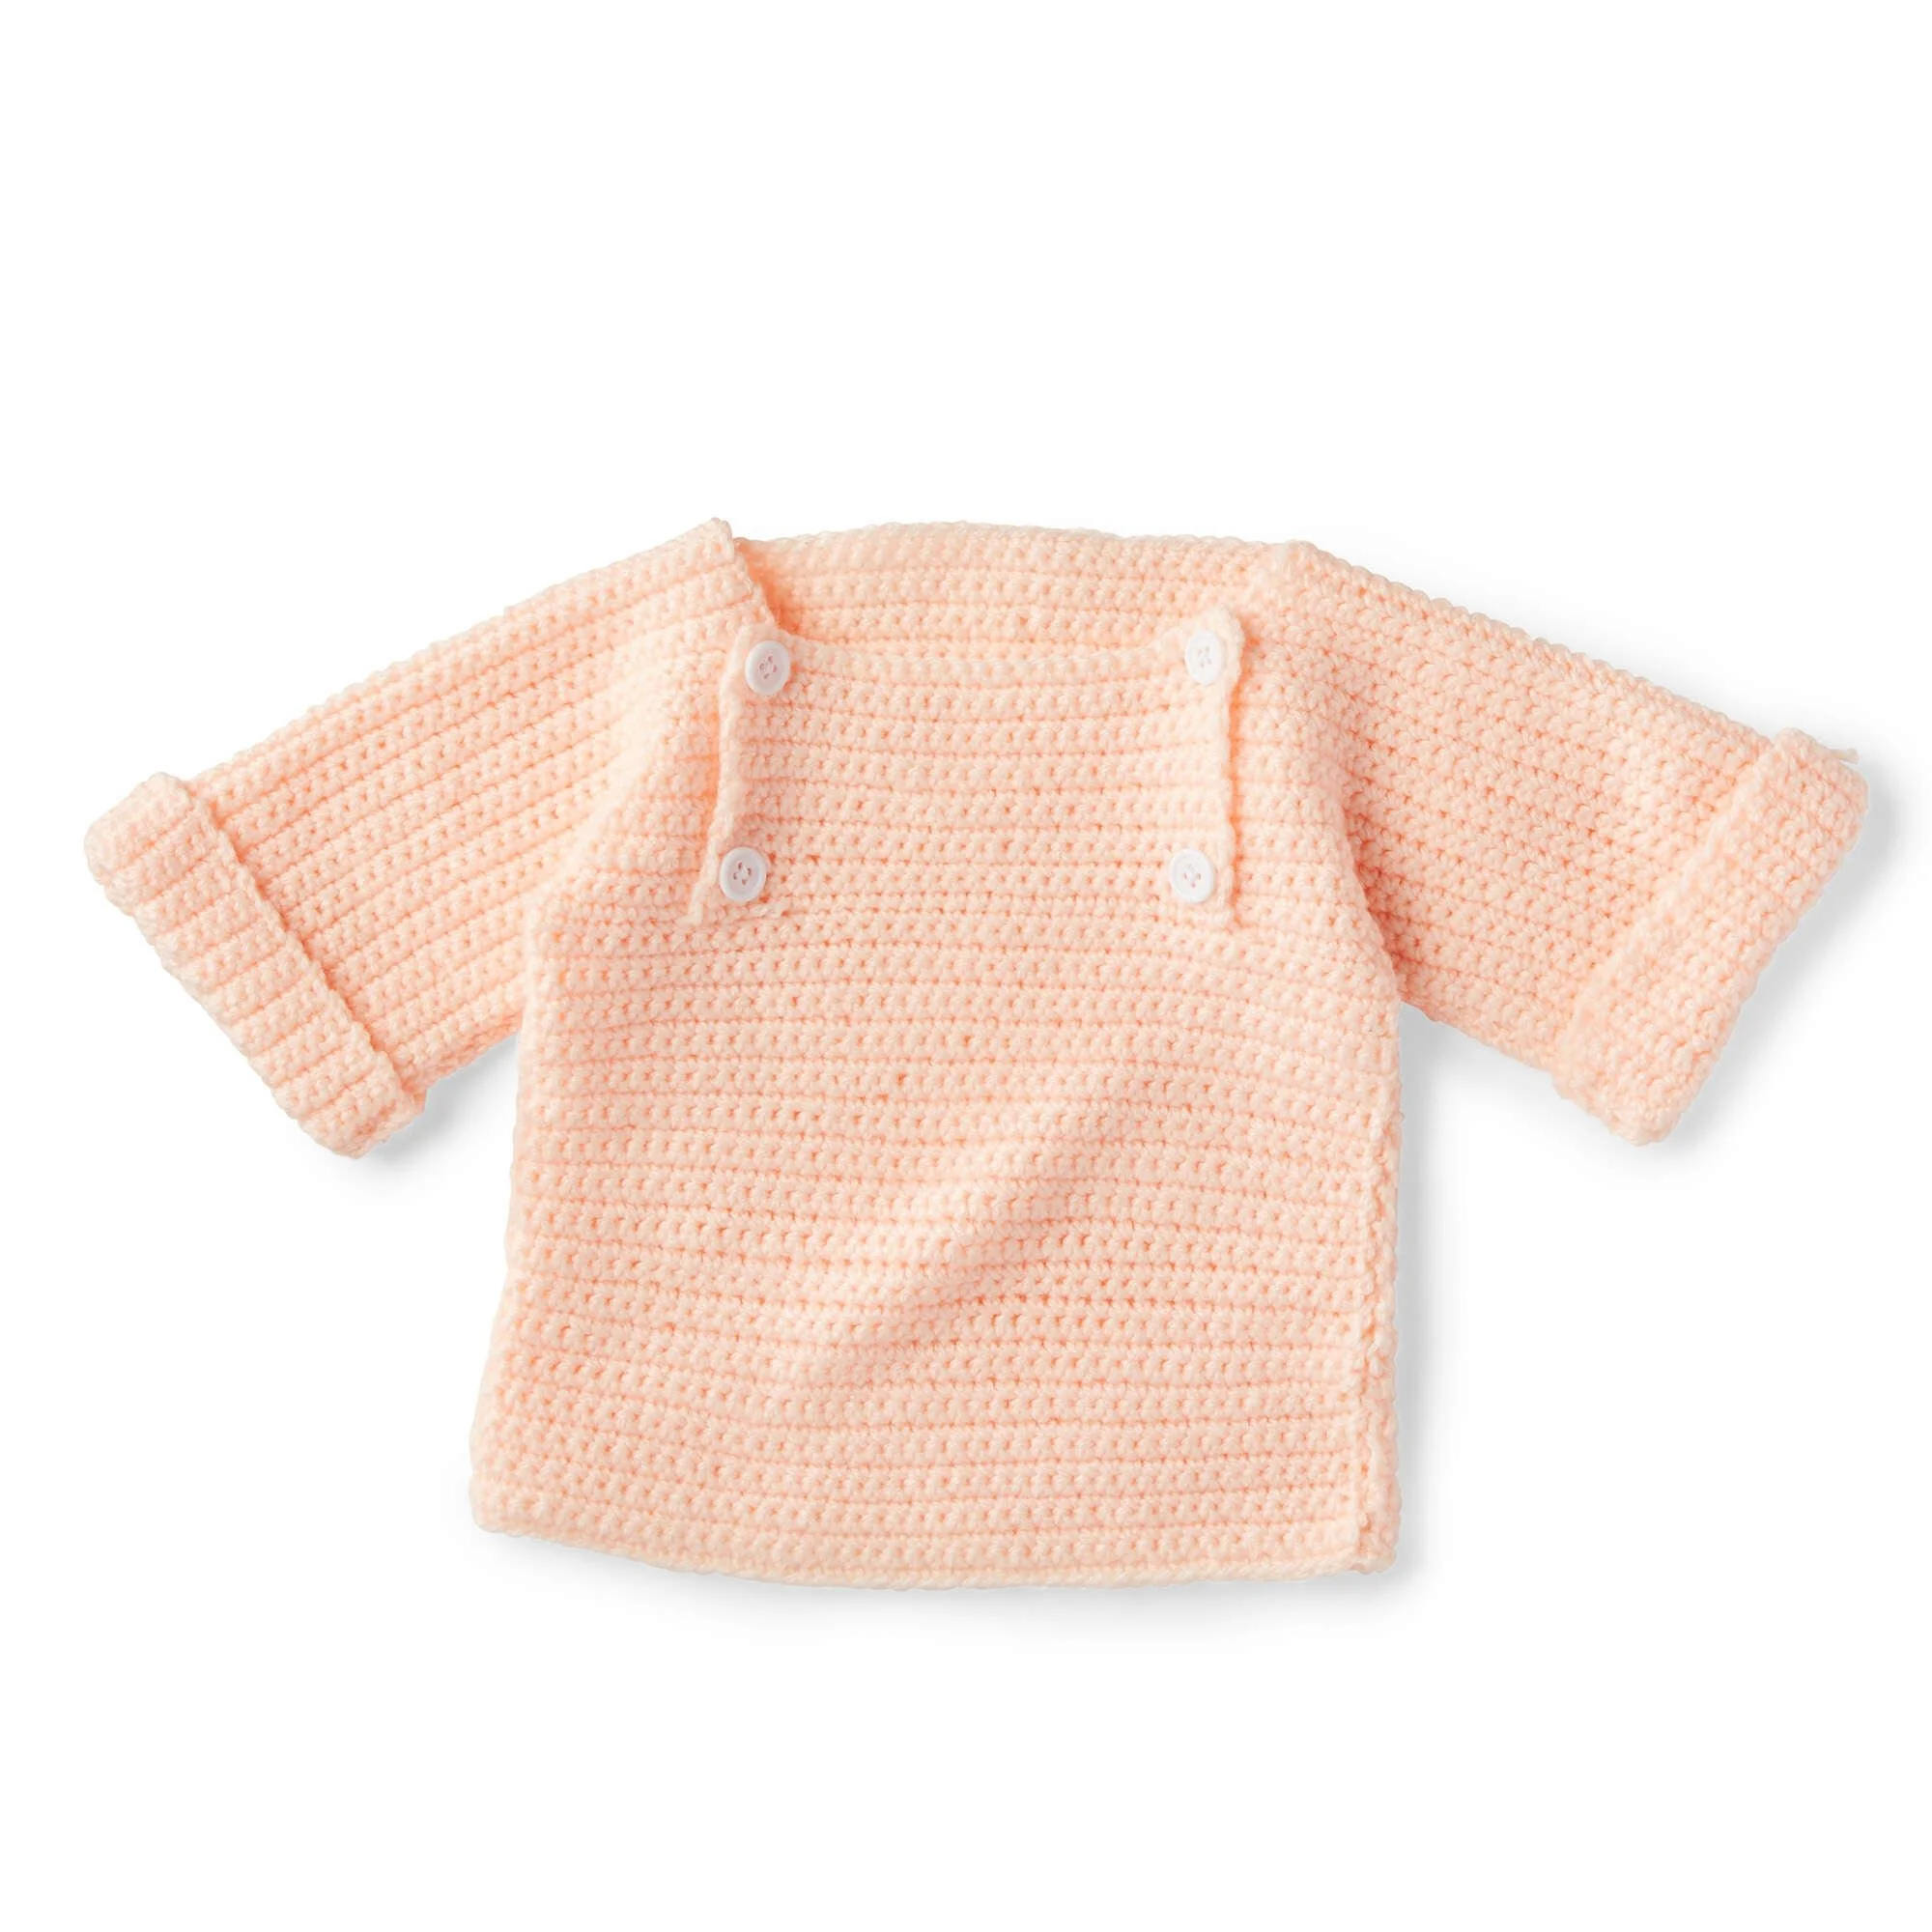
Make the Buttonhole Panel. Work the panel with the buttonholes positioned to suit the four buttons. The source calls for the required buttonholes but does not give their spacing or stitch sequence. Use the original pattern’s buttonhole details, and check that the buttons line up with the openings before sewing them on.
-
Pin and damp-finish the pieces. Pin the work to the measurements and shape specified for the selected size. Cover it with a damp cloth and allow it to dry. Avoid stretching the fabric while pinning, and let it dry fully before removing the pins.
-
Sew the seams and attach the buttons. Sew the shoulder and sleeve seams as directed. Keep the edges aligned and the seam tension even so the garment lies smoothly. Sew on all four buttons securely, matching their positions to the buttonholes. Weave in any remaining ends neatly.
Ways to use your finished pullover
The finished pullover is a wearable baby layer for everyday outfits and cooler days. Pair it with soft trousers or leggings, or use it as an extra layer over a simple bodysuit. A neutral shade makes it easy to coordinate; a cheerful color can make the pullover stand out in family photos or at a gathering.
It also makes a personal baby-shower or new-baby gift. If you’re giving it away, include a note with the yarn care instructions and explain that the buttons should be checked regularly for secure attachment. Handmade baby clothes can be treasured long after they no longer fit, so the pullover may also become a keepsake for the family.
How to care for your crochet pullover
Check the Bernat® Baby Sport™ yarn label for its specific fiber content and care instructions before washing. Yarn fibers and finishes can respond differently to heat, agitation, and detergent, so the label is the best guide for routine care. When in doubt, use gentle handling and avoid harsh washing conditions.
- Wash according to the yarn label, using a gentle cycle or careful hand washing if recommended.
- Use cool or lukewarm water unless the label says otherwise, and choose a mild detergent.
- Avoid twisting or wringing the pullover. Press out excess water gently with a clean towel.
- Reshape the garment and dry it flat if the yarn label permits. Hanging a wet pullover can stretch the fabric, especially around the shoulders and sleeves.
- Keep it away from direct heat while drying, unless the care label specifically allows heat.
- Store it clean and fully dry in a breathable place. Avoid compressing it under heavy items for long periods.
- Check the buttons and their attachment before each use, and repair any loose button promptly.
If you need to refresh the shape after washing, pin the pullover to its intended measurements and let it dry as directed for the yarn. Don’t use aggressive blocking or high heat without checking the fiber-care instructions first.
Tips for success
- Choose one size option and stick with it. The Back and sleeve chains each list four choices. Use the same position in the sequence throughout; mixing numbers from different options can make the pieces difficult to join.
- Measure as you work. The Back is measured in inches, which is more reliable than estimating the number of rows. Lay it flat and measure without pulling the fabric.
- Keep a simple progress note. Record which size you chose, the Back length, and where you paused. This is particularly useful when working the two sleeves and matching the Front.
- Count stitches at the row ends. Single crochet edges can gain or lose stitches if the first or last stitch is missed. Counting helps you catch a change early, before it affects the garment width.
- Mark joins and shaping points. Place stitch markers at important boundaries if the pattern identifies them. This makes it easier to locate sleeve and front-neck sections accurately.
- Use the full shaping instructions. The abbreviated directions do not give all shaping counts or buttonhole placements. Refer to the complete original instructions for these details rather than inventing decreases or moving buttonholes.
- Check the pieces before sewing. Compare the Front and Back at the points where they should align. Confirm the sleeve sections are consistent and the edges are oriented correctly before beginning the seams.
- Sew with even tension. A seam that is too tight can pucker; one that is too loose may gape. Use a yarn needle and sew steadily, keeping the fabric edges matched.
- Test the button placement. Before sewing buttons firmly in place, line them up with the buttonholes and check that the panel closes comfortably. Secure them well for a baby garment.
Creative variations
A different color is the simplest way to personalize the pullover. Try a soft neutral for a versatile everyday layer, a bright shade for a playful look, or a gentle seasonal color. If you use more than one color, plan the placement before you begin so the Front, Back, and sleeves coordinate.
You can also add a contrasting edge or a small embroidered detail, provided it does not interfere with the neckline, seams, or buttonholes. Keep any embellishments securely attached and avoid small decorative pieces that could come loose. For a baby garment, simple details that lie flat are generally the most practical.
Changing the yarn or hook can alter the finished size and feel. A thicker yarn may produce a larger, heavier pullover; a finer yarn may make it smaller and lighter. A different fiber can also affect drape, warmth, and care needs. If you make a yarn substitution, check gauge and consider whether the button panel and sleeve shaping still fit as intended. Size adjustments should follow the original pattern’s grading or a reliable gauge-based plan, not just a larger hook.
Frequently asked questions
Is this crochet baby pullover pattern suitable for beginners?
The main fabric uses single crochet, which is approachable for a crocheter who knows the basic stitch. The sleeve, neck, and button-panel shaping require careful attention. Beginners may find it easier to work with the complete pattern instructions available, since the summarized directions here do not include all shaping counts or buttonhole placement details.
What yarn is specified for the pullover?
The materials list specifies Bernat® Baby Sport™ yarn. The amount is not included in the information provided here, so check the full original pattern before purchasing yarn. If choosing a substitute, compare its weight and gauge, and expect changes in size or drape if it differs significantly.
Can I use a different crochet hook?
The specified hook is U.S. G/6 (4 mm). A different hook can change stitch size and, as a result, the pullover’s measurements and fabric density. If you need to change hooks to match the required gauge, make and measure a swatch if the original pattern provides a gauge. Don’t assume a hook change will preserve the same fit.
How many size options are included?
The starting chain and Back length are provided in four options: Back chains of 41 (43-45-47) and approximate lengths of 6 (7-7½-8) inches. The sleeve chains are 26 (28-32-34). The information provided here does not identify those options by age or finished garment measurements, so consult the full pattern for sizing guidance.
How much yarn do I need?
The yarn quantity is not stated in the supplied material list. Check the original pattern for the required amount for your chosen size, and consider having a little extra if you are substituting yarn or cannot easily obtain more of the same dye lot.
How do I make sure the Front and Back match?
Use the same size option for both pieces and follow the instruction to make the Front in accordance with the Back measurements. Measure both pieces on a flat surface without stretching them. Compare the corresponding edges before sewing so you can correct any length difference in advance.
How should I wash the finished pullover?
Follow the Bernat® Baby Sport™ yarn label, since the fiber content and care instructions determine the safest method. Use gentle handling, avoid wringing, and reshape the garment after washing. Dry it flat if permitted by the label to reduce stretching.
Can I sell a pullover made from this pattern?
The supplied instructions do not state whether finished items may be sold. Check the original designer’s usage terms before selling a pullover made from the pattern.
Print
Crochet Baby Pullover
Description
A handmade baby pullover is a practical, comforting project with a sweetly personal finish. This crochet baby pullover pattern uses single crochet for its main fabric and includes shaped sleeves, a front neck, and a buttonhole panel.
Materials
- Bernat® Baby Sport™ yarn – amount and color not provided
- Crochet hook, U.S. G/6 (4 mm) – 1
- Buttons – 4
Instructions
- Start the Back. Chain 41 (43-45-47). Work rows of single crochet (sc) until the Back measures approximately 6 (7-7½-8) inches, using the size option you selected. End on a Wrong Side (WS) row, then fasten off.
- Begin the sleeves. Chain 26 (28-32-34) for a sleeve, matching the same size option used for the Back. Join the chain to the Back as directed, then work single crochet across the Back and the chain.
- Repeat for the second sleeve. Make the second sleeve chain using the same size option and join it to the Back in the same way.
- Work toward the Left Sleeve shaping. Slip stitch to position your work for the Left Sleeve shaping.
- Make the Front. Follow the Back instructions for the Front, working to the corresponding Back measurements.
- Shape the left sleeve and front neck. Join the chain to the Front as directed, then work the left sleeve and front-neck shaping according to the full pattern.
- Complete the right sleeve and front neck. Work the matching right sleeve and neckline shaping, following the original pattern’s instructions.
- Make the Buttonhole Panel. Work the panel with the buttonholes positioned to suit the four buttons.
- Pin and damp-finish the pieces. Pin the work to the measurements and shape specified for the selected size. Cover it with a damp cloth and allow it to dry.
- Sew the seams and attach the buttons. Sew the shoulder and sleeve seams as directed. Sew on all four buttons securely, matching their positions to the buttonholes.
Notes
Check the original pattern for the required yarn quantity and additional shaping details not included in these instructions.