

The phone holder settles into your palm with a little more weight after each row, while late afternoon light moves across the yarn beside your chair. This Crochet Phone Holder Free Pattern is a small, useful project for the quiet spaces in a day, when coffee cools nearby and the hook makes its soft, steady pull through each loop. I made mine over a few evenings, keeping it beside the couch so I could pick it up without preparing a whole craft table. The fabric grows quickly, the shaping stays simple, and the finished pouch gives your phone a resting place near an armchair, bedside table, or kitchen counter.
Why Crochet Phone Holder Free Pattern Is So Soothing to Crochet
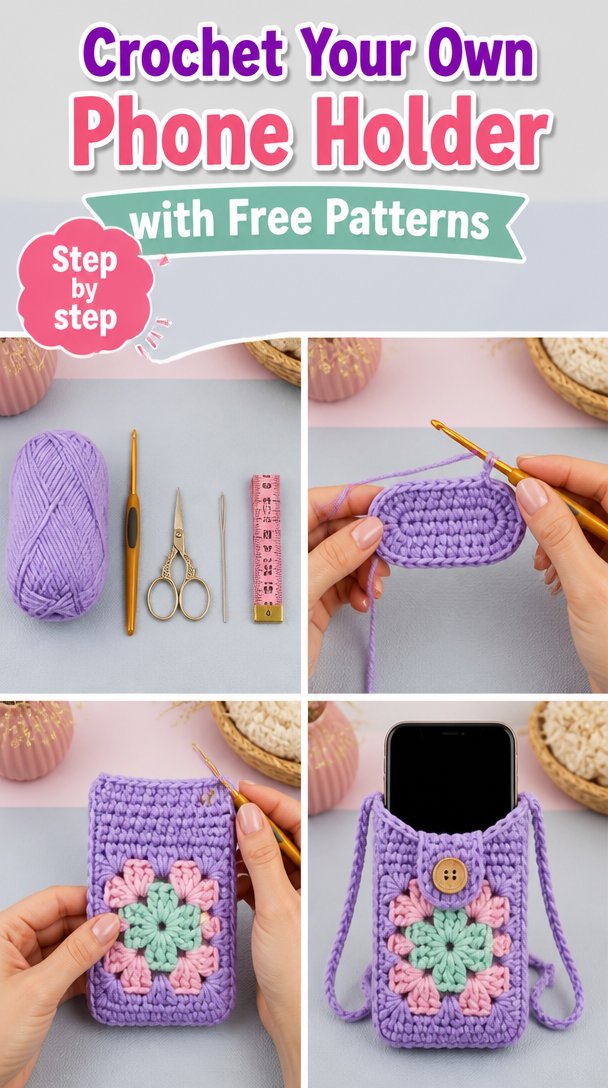
This project has a pleasing kind of repetition. You work across a narrow rectangle, turn, and come back again. The half double crochet fabric feels substantial without becoming stiff, and the small ridges made by working in the back loop only give your fingers something easy to recognize as the rows pass beneath them.
It is a good companion for a rainy evening on the couch or a warm morning on the front porch. You do not need a large basket of supplies, a complicated chart, or a long stretch of uninterrupted time. The yarn rests in a small ball near your knee, and the work can pause whenever the kettle whistles or someone needs your attention.
I noticed my hands warming up after the first ten minutes. The first rows curled slightly at the edges, as crochet often does, but the piece grew heavy enough to settle flat as I continued. That small change felt reassuring. Nothing needed forcing.
The holder also offers a useful stopping point. You can finish a few rows and set it down without losing your place in a large blanket. Many people find crocheting calming because the hands follow a familiar rhythm, and this pattern leaves enough quiet around that rhythm for your mind to wander gently.
How Crochet Phone Holder Free Pattern Comes Together
The holder begins as a simple rectangle worked in half double crochet. A half double crochet, abbreviated hdc, sits between a single crochet and a double crochet in height. It gives you more coverage than single crochet without making the fabric as tall and open as double crochet.
After the rectangle reaches the right length, you fold the lower portion upward and join the sides with slip stitches. A slip stitch, or sl st, moves the hook through the fabric without adding much height. That makes it useful for a neat side seam and a gentle top edge.
This pattern uses US crochet terms. UK readers often find these posts too, and the same word can mean a different stitch there, so the wording matters. In this pattern, a chain is abbreviated ch, a slip stitch is sl st, a single crochet is sc, a half double crochet is hdc, a double crochet is dc, and a treble crochet is tr. You will only need chains, half double crochet, and slip stitches for this holder.
The finished piece takes about two to three evenings, or roughly three to four hours of relaxed crocheting. The difficulty is easy. The only fiddly part comes when you fold and seam the pouch, because keeping both side edges aligned makes the finished holder look tidy.
Pattern at a Glance
Here is the whole project in a small, quiet list.
- Skill level: Easy
- Finished size: 4 inches wide by 7 inches tall (10 cm by 18 cm)
- Gauge: 14 hdc and 10 rows measure 4 inches (10 cm)
- Yarn: Worsted weight (weight 4, medium), about 120 yards total
- Hook size: H-8 (5.0 mm)
- Other supplies: Yarn needle, scissors, tape measure, and one stitch marker
- Stitch multiple: Any multiple of 2 stitches, plus 1 extra chain for turning
- Estimated time: Three to four hours, worked over two to three evenings
Materials for Crochet Phone Holder Free Pattern
- Worsted weight yarn (weight 4, medium), cotton or acrylic, about 120 yards total, or about 70 g. A skein sold as about 170 yards per 100 g skein gives you plenty for one holder. A medium-weight cotton yarn is easy to find, and a smooth acrylic yarn also works well.
- H-8 (5.0 mm) crochet hook. A half size up or down is fine depending on your tension and how firm you want the holder to feel.
- Yarn needle for weaving in the ends (a blunt tapestry needle works well)
- Scissors
- Tape measure
- One stitch marker, optional, for marking the first row or the fold line
I used a smooth worsted weight cotton for my sample because cotton gives the holder a firm hand and handles everyday handling well. A cotton example from Lily Sugar’n Cream can work if your tension matches the gauge. Smooth worsted weight acrylic, such as an easy-care option from Red Heart, is another reasonable choice when you want a lighter pouch that washes simply.
The gauge is 14 hdc and 10 rows measuring 4 inches (10 cm). The swatch takes about twenty minutes, but it tells you whether your phone will sit comfortably inside the finished piece. If your fabric looks loose and you can see large gaps, try a smaller hook. If the foundation chain feels tight or the fabric feels board-like, try a larger hook for the whole project.
You can substitute another worsted weight yarn as long as it produces a stable fabric. A soft, loosely spun yarn may stretch more, while a firm cotton will hold its shape better. Keep the yarn label with the project if you may need more later. Different dye lots can vary, even when the color name looks the same.
Step by Step
- Check the difficulty and stitch multiple. This is an easy pattern worked in rows and then seamed. The stitch multiple is any multiple of 2 stitches, plus 1 extra chain for turning. For the stated size, chain 29.
- Make the foundation chain. A foundation chain is the starting chain that supports the first row. Make 29 chains, keeping your loops relaxed. If your chain pulls tight, go up one hook size just for the chain, then return to H-8 (5.0 mm) for the rows.
- Work the first row. Yarn over, insert the hook into the second chain from the hook, yarn over again, and pull up a loop. Yarn over once more and draw through all three loops on the hook. That makes one half double crochet, or hdc. Work 1 hdc in each chain across. You will have 28 hdc.
- Turn and begin the texture. Chain 1 for the turning chain, then turn your work. The turning chain does not count as a stitch in this pattern. Work 1 hdc in the back loop only, or BLO, of each stitch across. BLO means you insert the hook under the loop farthest from you, which creates a soft horizontal ridge. You will have 28 hdc.
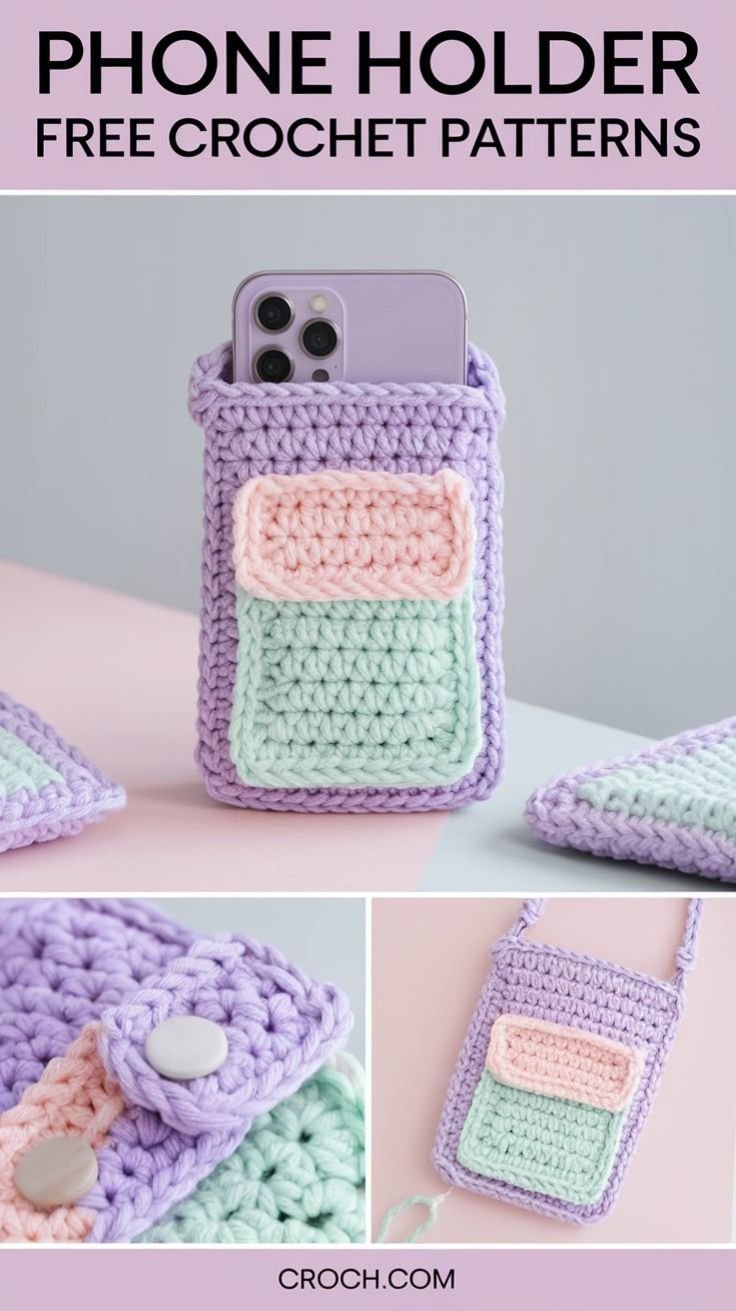
- Repeat the row. Chain 1 and turn. Work 1 hdc in the BLO of every stitch across. Repeat this row until you have 18 rows total. The fabric will begin to show small ridges, and the yarn may slide more smoothly through your fingers as the rectangle grows.
- Measure before folding. Lay the rectangle flat and measure it. It should be about 8 inches wide by 7 inches tall (20 cm by 18 cm), although small differences in tension are normal. If your rectangle measures close to this, you are ready to fold. Do not stretch it while measuring.
- Fold the pouch. Place the rectangle with the ridged side facing outward. Fold the lower edge upward by 4 inches (10 cm), leaving the upper 3 inches (8 cm) open as the flap. Match the side edges carefully. A stitch marker can hold each side while you prepare to seam.
- Join the first side. Insert your hook through both layers at the lower side edge. Make a slip stitch, or sl st, by yarning over and pulling through the fabric and the loop already on your hook. Continue with 1 sl st through both layers in each side-edge space until you reach the fold. You will make about 18 side slip stitches.
- Join the second side. Repeat the same slip-stitch seam on the other side, checking that the top opening stays even. Work about 18 side slip stitches. The exact number can vary slightly if your row edges are compact, but keep the seam spaces evenly distributed from bottom to fold.
- Shape the flap. Leave the upper flap open. If you want a simple closing tab, chain 12 from the center of the flap edge, then slip stitch back into the same edge to make a small loop. This loop is optional and works with a small button sewn securely to the front of the pouch.
- Look for missing stitches. At the end of every row, count 28 hdc before turning. The last stitch can hide along the edge, especially when working into BLO. If a mistake appears several rows back, pull out the work calmly one row at a time, place the hook back into the live loop, and continue. A quiet correction now is easier than carrying a missing stitch through the finished piece.
- Finish the yarn. Cut the yarn, leaving a 6-inch tail. Pull the tail through the final loop and thread it onto the yarn needle. Weave in the ends, meaning pass the needle back and forth through the wrong side of the fabric so the tails stay secure. Trim only after the yarn feels anchored.
- Block if needed. Blocking means shaping the finished crochet with moisture and gentle handling. Lightly dampen cotton, smooth the holder to 4 inches by 7 inches, and let it dry flat. Acrylic can be shaped with cool water and gentle smoothing, but acrylic can melt under a hot iron, so never press it directly with heat.
Where This Piece Finds Its Place
The finished holder fits naturally beside the couch, where a phone tends to disappear beneath a cushion. You can keep it in the basket beside an armchair, near the bed, or on a kitchen shelf where the charging cord reaches without tangling across the counter.
The flap helps keep the phone from sliding out when you move the holder from room to room. If you add the small button loop, sew the button firmly and check that no thread creates a loose loop inside the pouch.
For a gift, make the holder in a color that suits the recipient’s reading chair or desk. It makes a thoughtful small present tucked into a holiday stocking, placed in a housewarming basket, or paired with a handwritten note for someone who likes useful handmade things.
I keep one near my own armchair during cool fall evenings. It holds the phone, a pair of earbuds, and sometimes the yarn needle I forgot to return to the notions tin.
Making It Last
Care depends on the fiber you choose. For cotton, hand wash or use a gentle machine cycle with cold or warm water, then reshape the holder and dry it flat. For acrylic, use a gentle cycle with cold water and mild detergent, then dry flat rather than hanging it wet.
Do not hang the holder while it is wet. The weight of the water can stretch the side seams and make the pouch longer than you intended. If the fabric needs fresh shaping, smooth it flat while damp and let it air dry.
Blocking is safe with cool water and gentle pinning. Acrylic can lose its texture or melt under a hot iron, so keep direct heat away from it. Cotton tolerates a little more warmth, but you still do not need an iron for this small project.
Store the holder folded or resting flat in a breathable drawer or basket. Do not store it compressed in plastic for long periods. If you make the holder from wool, add cedar or lavender nearby for moth protection, and remember that untreated wool can felt while superwash wool usually tolerates a washing machine more easily.
Keep leftover yarn with its label so you have the fiber information and dye lot. That small paper band can save uncertainty if you decide to repair a seam or make a matching holder later.
Small Ways to Make It Your Own
Choose a thicker yarn if you want a more padded holder. A bulky yarn will make the piece larger and may fit a tablet-sized device, but it will also reduce the amount of drape and make the seams more prominent. A thinner yarn will create a smaller, lighter pouch, so measure your phone before committing to the full rectangle.
Try two colors for a quiet color-blocked design. Work the lower portion in one shade and the flap in another, changing colors at the end of a row. Carry the unused color only if the inside will stay tidy, or cut the yarn and weave in the extra ends as you go.
If you replace the half double crochet with single crochet, or sc, the fabric will become denser and shorter. Single crochet uses a smaller stitch height, so you will need more rows to reach the same 7-inch height. The result will protect the phone well but may feel less flexible.
For a wider holder, adjust the starting chain while keeping the stitch multiple. Add or remove an even number of chains, remembering that the final stitch count is two fewer than the starting chain because the second chain becomes the first stitch. For example, chain 31 to make 30 hdc across, then measure your phone before folding.
A simple border can give the flap a more finished edge. Work one round of single crochet around the open flap, placing one stitch in each row edge and two stitches in each corner when needed. For gifting, pair the holder with a short charging cable, a small notebook, or a handmade card.
Frequently Asked Questions About Crochet Phone Holder Free Pattern
Can I use a different hook size for this crochet phone holder?
Yes, you can use a different hook size to match your tension and phone size. H-8 (5.0 mm) gives this holder a firm worsted weight fabric, but a G-6 (4.0 mm) may suit loose crocheters, while I-9 (5.5 mm) may help if your stitches feel tight. Always measure the rectangle before folding.
What yarn can I substitute for the recommended yarn?
Choose another smooth worsted weight yarn, classified as weight 4, medium. Cotton creates a firm, washable holder, while acrylic creates a lighter easy-care fabric. Check the yardage and buy at least 120 yards. Avoid very loosely spun yarn if you want crisp seams, because it may stretch more during use.
What should I do if I find a mistake several rows later?
Pull back only to the row where the mistake began. Remove the hook, gently unravel one row at a time, and place the hook through the live loop before continuing. If the missing stitch sits near an edge, count from the first stitch and last stitch to find it. The fabric will forgive careful undoing.
Is this phone holder suitable for a beginner?
Yes, this project suits a beginner who knows how to make a chain, half double crochet, and slip stitch. The rows repeat, and the stitch count stays at 28 hdc. Folding and seaming take a little care, but you can work slowly and use stitch markers to hold the layers together.
How long does the crochet phone holder take to make?
The holder takes about three to four hours of crocheting, usually spread over two to three evenings. A practiced crocheter may finish sooner, while a beginner may pause to check the stitch count or redo a tight edge. The small size makes it manageable without turning it into a rushed project.
Does this pattern use US or UK crochet terms?
This pattern uses US crochet terms. The main stitch is US half double crochet, abbreviated hdc. In UK terminology, familiar stitch names can refer to different heights, so check the label carefully if you usually follow UK patterns. The hook size is listed as H-8 (5.0 mm), which stays the same across both systems.
Taking It Slow
Let the holder grow at the pace your hands choose. Some rows will feel smooth, and one may ask you to pause, count, and pull back a little. That is part of making something by hand. Set the project beside a favorite chair, return to it when the day quiets, and let the small, useful shape come together without needing to hurry.
—META—
SEO Title: Crochet Phone Holder Free Pattern
Meta Description: Make a calm crochet phone holder with simple US stitches, clear counts, easy shaping, and gentle care for a useful handmade pouch.
Slug: crochet-phone-holder-free-pattern
Category: Crochet Patterns
Tags: crochet phone holder, easy crochet pattern, crochet pouch, slow crafting, handmade home
Image Alt Text: Crochet phone holder rectangle worked in half double crochet
Finished crochet phone holder with folded flap and side seams
Crochet supplies with worsted yarn, hook, scissors, and yarn needle
Pinterest Title: Easy Crochet Phone Holder Pattern
Pinterest Description: Make a simple crochet phone holder with a steady stitch rhythm and useful everyday shape. A quiet handmade project for a few peaceful evenings.

Crochet Phone Holder Free Pattern
- Total Time: 240 minutes
Description
This Crochet Phone Holder Free Pattern is a small, useful project that creates a handy resting place for your phone. The project is easy to follow and can be completed over a few evenings.
Materials
- Worsted weight yarn (weight 4, medium), cotton or acrylic, about 120 yards total, or about 70 g
- H-8 (5.0 mm) crochet hook
- Yarn needle
- Scissors
- Tape measure
- One stitch marker (optional)
Instructions
- Check the difficulty and stitch multiple. This is an easy pattern worked in rows and then seamed. The stitch multiple is any multiple of 2 stitches, plus 1 extra chain for turning. For the stated size, chain 29.
- Make the foundation chain. A foundation chain is the starting chain that supports the first row. Make 29 chains, keeping your loops relaxed.
- Work the first row. Yarn over, insert the hook into the second chain from the hook, yarn over again, and pull up a loop. Yarn over once more and draw through all three loops on the hook. Work 1 hdc in each chain across.
- Turn and begin the texture. Chain 1 for the turning chain, then turn your work. Work 1 hdc in the back loop only of each stitch across.
- Repeat the row. Chain 1 and turn. Work 1 hdc in the BLO of every stitch across. Repeat this row until you have 18 rows total.
- Measure before folding. Lay the rectangle flat and measure it. It should be about 8 inches wide by 7 inches tall.
- Fold the pouch. Place the rectangle with the ridged side facing outward. Fold the lower edge upward by 4 inches, leaving the upper 3 inches open as the flap. Match the side edges carefully.
- Join the first side. Insert your hook through both layers at the lower side edge. Make a slip stitch through both layers in each side-edge space until you reach the fold.
- Join the second side. Repeat the same slip-stitch seam on the other side, checking that the top opening stays even.
- Shape the flap. If you want a simple closing tab, chain 12 from the center of the flap edge, then slip stitch back into the same edge to make a small loop.
- Finish the yarn. Cut the yarn, leaving a 6-inch tail. Pull the tail through the final loop and weave in the ends.
- Block if needed. Lightly dampen cotton, smooth the holder to 4 inches by 7 inches, and let it dry flat.
Notes
The holder is a great gift idea and can be made in different colors or with different yarn types for a personal touch.
- Preparation Time: 20 minutes
- Active Time: 180 minutes