

This post contains Amazon affiliate links. As an Amazon Associate I earn from qualifying purchases.
Late afternoon light rests across the yarn basket while the small shapes of Crochet Halloween Appliqués gather beside your coffee cup. The hook makes a quiet pull through each loop, and the work grows in little, satisfying pieces rather than one long stretch. I made these on a cool October afternoon, with a pumpkin, a tiny ghost, and a black cat taking shape one round at a time. They are small enough for a pocket of attention, yet useful enough to turn into gift tags, garland, cards, or a little seasonal decoration for the living room.
Why Crochet Halloween Appliqués Is So Soothing to Crochet
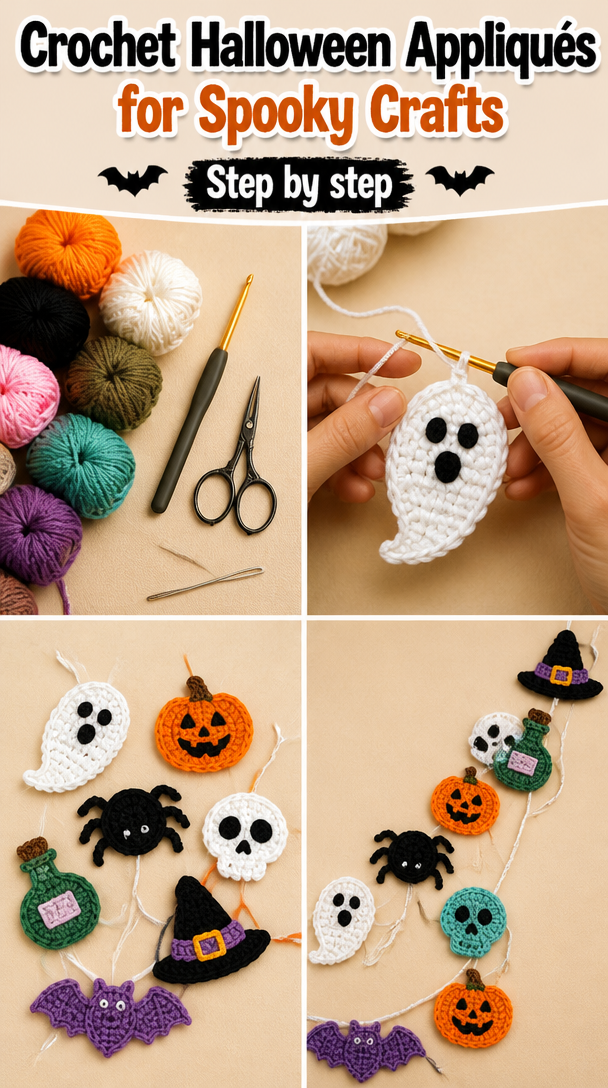
Small crochet projects have their own gentle rhythm. You make a few stitches, turn the piece, check the edge, and watch a recognizable shape appear in your hand. Nothing asks you to hold a large blanket across your lap or keep track of many repeating rows. The work stays close and manageable.
These appliqués suit a rainy evening on the couch, a quiet Saturday morning, or the first cold snap when you bring the yarn basket back beside the armchair. The yarn slides through your fingers, the hook clicks softly against the stitches, and your attention settles on the next loop. Many people find crocheting calming because the hands have something steady to do, and these small motifs offer that steadiness without demanding a whole afternoon.
I especially like making them in a small group. The first pumpkin helps your hands warm up, the second moves more smoothly, and the little ghost gives you a chance to practice the same round shape with a different personality. My first few rows curled until the piece grew heavy enough to settle. That felt reassuring rather than troublesome, because the fabric relaxed as the rounds built upward.
You can make one while a pot of soup simmers or keep several in a project pouch for a porch afternoon. They also give you an easy place to use small amounts of yarn left from other projects. A few yards of orange, cream, charcoal, or green can become something cheerful instead of sitting forgotten at the bottom of the basket.
How Crochet Halloween Appliqués Comes Together
This pattern uses US crochet terms. That note matters because UK readers find these posts too, and the same word can mean a different stitch in UK terminology. The main stitch here is the single crochet, or sc, a compact stitch made by inserting the hook, pulling up a loop, and drawing yarn through both loops on the hook.
You will begin with a magic ring, also called a magic circle, so the center of each motif closes neatly. A chain, or ch, creates the small starting loop and helps the first round sit at the right height. Each round grows through increases, which means working two stitches into one stitch, and the stitch counts stay easy to check.
The pumpkin, ghost, and cat all use the same six-round base. You will work in continuous rounds, so a stitch marker helps you see where each round begins. The last round shapes the edge, and a few embroidered details give each piece its seasonal expression.
The project feels simple, but the final round can be fiddly around the curves. Give yourself about two to four evenings for a set of six appliqués, depending on how much time you spend sewing on faces and stems. The difficulty is easy, with a few basic shaping steps and simple embroidery.
Pattern at a Glance
Here are the details I used for the set shown in this post.
- Skill level: Easy
- Finished size: about 3.5 inches (9 cm) tall and 3.25 inches (8 cm) wide
- Gauge: 16 single crochet and 16 rounds measure 4 inches (10 cm)
- Yarn: worsted weight (weight 4, medium), about 115 total yards from one 100 g skein plus small scraps
- Hook size: H-8 (5.0 mm)
- Other supplies: yarn needle, scissors, stitch marker, tape measure, small amounts of black and cream yarn, and optional fabric glue for paper cards
- Stitch multiple: the base uses 6 stitches in Round 1 and increases by 6 stitches each round
- Estimated time: two to four evenings for six appliqués
Materials for Crochet Halloween Appliqués
- About 115 yards total of worsted weight (weight 4, medium) cotton or acrylic yarn, using one 100 g skein of about 170 yards plus small scraps in orange, cream, green, charcoal, and black
- One H-8 (5.0 mm) crochet hook, with half a size up or down fine depending on your tension
- Yarn needle for sewing details and weaving in the ends
- Sharp scissors
- One stitch marker, optional but useful for marking the beginning of continuous rounds
- Tape measure for checking the finished size and gauge
- Small scraps of black and cream yarn for faces, optional
- Small scraps of green yarn for pumpkin stems, optional
- Fabric glue for attaching appliqués to paper or fabric, optional and used according to the item’s care needs
I used worsted weight cotton for the pieces in these photographs because cotton gives the appliqués a firm surface and clean embroidered details. A cotton yarn from Lily Sugar’n Cream works well as one easy-to-find example, though you can use another worsted weight yarn with a similar yardage. The firm fabric helps the little shapes hold their edges instead of becoming floppy.
Make a small gauge swatch if you can spare twenty minutes. Work single crochet until you have at least 16 stitches and 16 rounds, then measure the center four inches (10 cm). Gauge matters less for a wall decoration than for a garment, but it tells you whether your appliqués will land near 3.5 inches (9 cm) tall. If your fabric feels loose and the stitches look open, try a smaller hook so the details stay defined.
For a substitution, choose another worsted weight yarn with about 170 yards per 100 g skein. Acrylic is easy to find and machine washable, while cotton gives a crisper shape. A thicker yarn will make a larger appliqué, and a thinner yarn will make a smaller one. Keep safety in mind if you add buttons or safety eyes, since small parts and long loose stitches are unsafe for children under three.
Step by Step
- Difficulty and repeat: This is an easy pattern. The base grows by 6 stitches per round, and the main stitch is single crochet, or sc. A stitch marker is optional, but it makes the continuous rounds much easier to follow.
- Make a magic ring, also called a magic circle. Chain 1, then work 6 single crochet into the ring. Pull the yarn tail gently to close the center, but leave the ring loose enough that the stitches do not pucker. You should have 6 stitches at the end of Round 1.
- Round 2: Work 2 single crochet in each stitch around. An increase means working two stitches into one stitch. You should have 12 stitches at the end of the round.
- Round 3: Repeat “1 single crochet in the next stitch, 2 single crochet in the next stitch” around. Move the stitch marker to the first stitch as you finish the round. You should have 18 stitches.
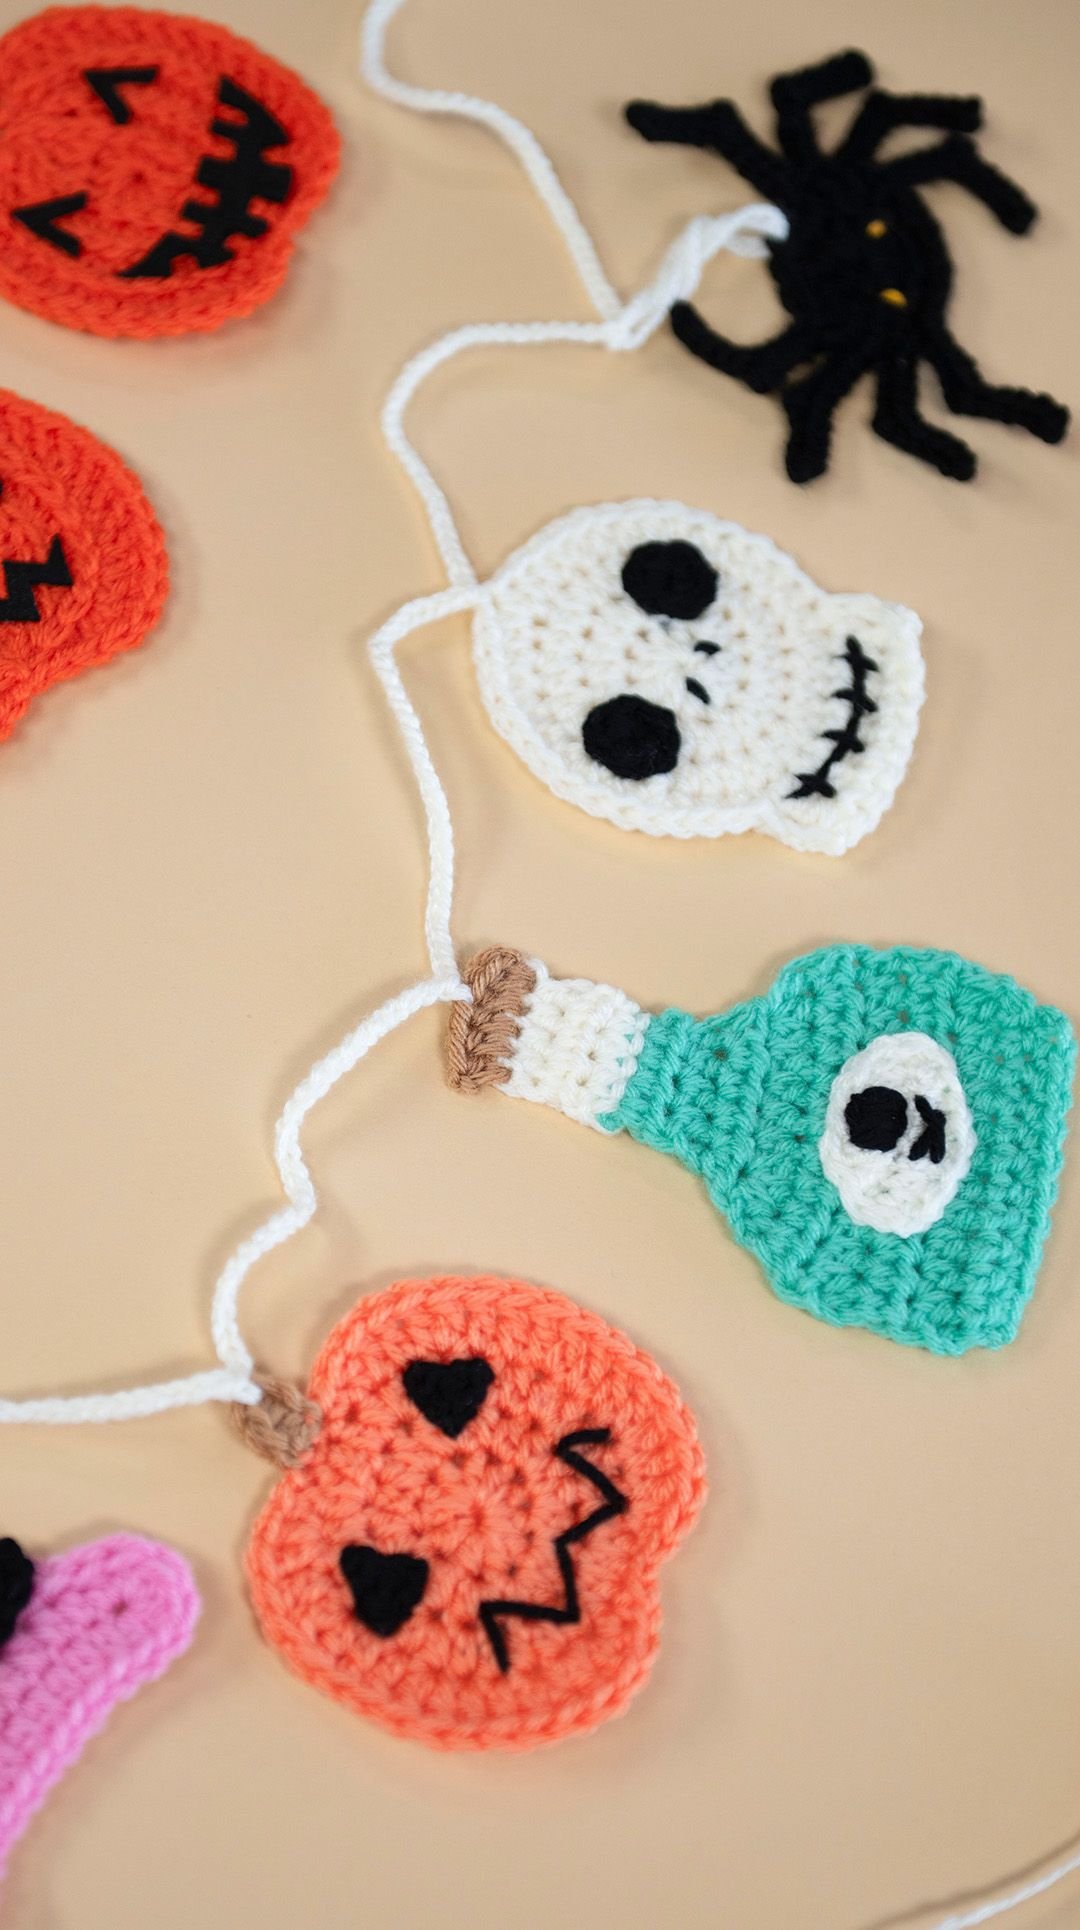
- Round 4: Repeat “1 single crochet in each of the next 2 stitches, 2 single crochet in the next stitch” around. The circle will begin to flatten and widen under your fingers. You should have 24 stitches.
- Round 5: Repeat “1 single crochet in each of the next 3 stitches, 2 single crochet in the next stitch” around. Keep your tension even rather than pulling tightly on the yarn. You should have 30 stitches.
- Round 6: Repeat “1 single crochet in each of the next 4 stitches, 2 single crochet in the next stitch” around. This gives you 36 stitches and the full base size.
- Round 7: Work 1 single crochet in each stitch around, with no increases. You should still have 36 stitches. The fabric will soften and settle now, and the edge should look like a small, even disk.
- Shape the top edge: slip stitch in the next stitch, chain 1, then work 1 single crochet in each of the next 8 stitches. Skip 1 stitch, then slip stitch in the next stitch. Repeat this small curve around the piece until you reach the beginning. Fasten off with a long tail for sewing. The exact placement can vary slightly for the pumpkin and ghost, since the motifs use simple surface details rather than a strict shaped outline.
- For the pumpkin, weave the orange yarn tail toward the back. With green yarn, chain 4 for the stem, then slip stitch back across the chain. Sew the stem to the top edge. Add three loose vertical lines with orange yarn, working from the top toward the bottom so the round shape becomes more pumpkin-like.
- For the ghost, use cream yarn and keep the base plain. With black yarn, embroider two small eyes using short straight stitches. Add a tiny open mouth if you like. For a soft wavy bottom, sew three shallow curves along the lower edge rather than trying to cut or pull the crochet fabric into points.
- For the cat, use charcoal yarn and add two small triangular ears with surface stitches. Make each ear with three straight stitches that meet at the top. Embroider two eyes in cream or green, then add a short black nose and three whiskers on each side.
- If a mistake shows up, pause at the end of the round and count before pulling back. A missing stitch often makes the edge dip, while an extra stitch creates a small bump. Remove your hook, gently pull the yarn back one stitch at a time, and replace the hook when you reach the mistake. I pulled back an entire round on my first cat because one stitch had disappeared near the marker; the shape corrected itself quickly once I stopped trying to work past it.
- Weave in the ends with the yarn needle, passing each tail through several stitches on the back before trimming it. If your cotton looks a little uneven, block the motif by pinning it to the finished measurements and misting it lightly with water. Let it dry fully before removing the pins. Acrylic can also be shaped gently, but it can melt under a hot iron, so use steam from a distance or block it cold.
Where Crochet Halloween Appliqués Finds Its Place
These little motifs work wherever a small seasonal touch feels welcome. You can tuck them into a bowl on the entry table, sew them to a plain canvas tote, or arrange them across a length of ribbon for a short garland above the couch. They also sit nicely in a basket beside the armchair, ready to become a card decoration when October birthdays or neighborhood gatherings appear.
I like using one pumpkin on a brown paper gift bag and keeping the cat on the refrigerator with a small magnet attached to the back. A ghost looks sweet on a wrapped book, especially when you make the face by hand rather than using plastic pieces.
For a simple gift, make a set of three in a small cotton pouch with a handwritten note suggesting uses for cards, napkins, or a seasonal table setting. If you give them to a child, sew every detail securely and avoid loose parts. Anything placed in a crib or car seat needs to stay snug and secure, with no loose embellishments.
Care and Storage for Crochet Halloween Appliqués
Because these appliqués use cotton yarn, wash them by hand or on a gentle cycle with cold or warm water. Place them in a mesh bag if you use the washing machine, especially when the pieces have embroidered details. Press out water with a towel and dry them flat so the circles keep their shape. Do not hang them wet, since the weight can stretch the stitches.
If a motif needs reshaping, pin it to the original 3.5-inch (9 cm) height and 3.25-inch (8 cm) width while it is damp. Let it dry completely before moving it. Cotton responds well to gentle blocking, but avoid a hot iron directly on the yarn or any fabric glue you used.
Store the appliqués folded or lying flat in a breathable box rather than hanging them from a hook. Keep them away from damp closets and strong sunlight, which can fade darker colors. Cotton does not need moth protection in the same way wool does, but cedar or lavender can still make a storage box pleasant. If you use wool for another set, remember that untreated wool can felt, while superwash wool tolerates the washing machine more easily.
Keep leftover yarn with its label so you have the fiber information and dye lot if you want to make matching pieces later. A small labeled bag saves time when the next October project comes around.
Small Ways to Make Crochet Halloween Appliqués Your Own
You can keep the pattern exactly as written, or let the materials shift the feeling of the finished set. These are small invitations, not rules.
- Try a thicker yarn if you want larger motifs for a mantel garland. A bulky yarn will increase the size and make the pieces softer and heavier, while sport weight yarn will create smaller, finer appliqués with more delicate details.
- Change the palette to match your home. Rust, cream, and deep green feel quiet and autumnal, while orange, purple, and black make the shapes more traditional. You can also work the base in one color and add a contrasting border.
- Swap the single crochet for half double crochet, or hdc, if you want a taller, softer fabric. The pieces may grow faster, but the stitch texture will look more open. A double crochet, or dc, will make them taller still and may need a smaller hook to keep the edges tidy.
- Resize the base by continuing the increase pattern. Each round adds 6 stitches, so the piece grows in a predictable way. Stop one round earlier for a smaller motif, or add one plain round after Round 7 for a wider shape.
- Add a simple border by working slip stitches around the outside in a contrasting color. A slip stitch, or sl st, creates a low, neat edge without adding much size. For a gift, make three matching appliqués and attach them to a card, a wrapped candle, or a cloth napkin ring.
I would not use front post double crochet, or FPdc, or back post double crochet, or BPdc, for this small design because those raised stitches add bulk to an appliqué that already has enough shape from the rounds. You also do not need a treble crochet, or tr, here. Keeping the stitch vocabulary small makes the project easier to pick up after a few days away.
Frequently Asked Questions About Crochet Halloween Appliqués
Can I use a different hook size for Crochet Halloween Appliqués?
Yes, you can use a different hook size if your tension needs it. H-8 (5.0 mm) gives a firm cotton fabric, but an I-9 (5.5 mm) can help if your stitches feel tight, while G-6 (4.0 mm) can close open spaces. Check that the fabric feels smooth and that the embroidered details have a stable surface.
What yarn can I substitute for the cotton?
You can substitute worsted weight acrylic, wool, or a cotton blend with about 170 yards per 100 g skein. Acrylic makes an affordable, washable set, while cotton gives crisper edges. Untreated wool may felt with warm washing, so handle it gently. Avoid yarn so fuzzy that the small faces and stems disappear into the surface.
What should I do if I find a mistake several rows later?
Pull back calmly to the row where the mistake began. Remove the hook, loosen one stitch at a time, and count the stitches again before continuing. If the mistake does not change the outline and the piece will become a gift tag or card decoration, you can leave it. If the edge dips or bumps, correcting it will usually take less time than disguising it.
Is this project suitable for a beginner?
Yes, this project suits a beginner who knows how to make a chain and single crochet. The magic ring may feel fiddly at first, so you can chain 2 and work the first 6 single crochet into the second chain if you prefer. The continuous rounds stay short, and the stitch counts give you regular places to check your work.
How long does it take to make the appliqués?
A single motif usually takes about 20 to 35 minutes, depending on your experience and how much embroidery you add. A set of six takes about two to four evenings when you work at a relaxed pace. The crochet itself moves quickly, but sewing on faces, stems, ears, and tails adds time.
Does this pattern use US or UK crochet terms?
This pattern uses US crochet terms. Here, single crochet means sc, while UK patterns use that same phrase for a different stitch. The pattern also uses chain, slip stitch, half double crochet, double crochet, treble crochet, front post double crochet, and back post double crochet in their US meanings when those terms appear.
Taking It Slow with Crochet Halloween Appliqués
Let the small size of these appliqués give you permission to work slowly. Count when you need to, pull back when the edge tells you something changed, and let the quiet rhythm of the hook carry the project forward. A few uneven stitches will still become a pumpkin, ghost, or cat in your hands, and that is enough for a peaceful piece of making.
Print
Crochet Halloween Appliqués
- Total Time: 120 minutes
Description
Create small and cheerful crochet Halloween appliqués to use as gift tags, garlands, cards, or seasonal decorations.
Materials
- About 115 yards total of worsted weight (weight 4, medium) cotton or acrylic yarn, using one 100 g skein of about 170 yards plus small scraps in orange, cream, green, charcoal, and black
- One H-8 (5.0 mm) crochet hook, with half a size up or down fine depending on your tension
- Yarn needle for sewing details and weaving in the ends
- Sharp scissors
- One stitch marker, optional but useful for marking the beginning of continuous rounds
- Tape measure for checking the finished size and gauge
- Small scraps of black and cream yarn for faces, optional
- Small scraps of green yarn for pumpkin stems, optional
- Fabric glue for attaching appliqués to paper or fabric, optional and used according to the item’s care needs
Instructions
- Make a magic ring, also called a magic circle. Chain 1, then work 6 single crochet into the ring. Pull the yarn tail gently to close the center, but leave the ring loose enough that the stitches do not pucker. You should have 6 stitches at the end of Round 1.
- Round 2: Work 2 single crochet in each stitch around. An increase means working two stitches into one stitch. You should have 12 stitches at the end of the round.
- Round 3: Repeat “1 single crochet in the next stitch, 2 single crochet in the next stitch” around. Move the stitch marker to the first stitch as you finish the round. You should have 18 stitches.
- Round 4: Repeat “1 single crochet in each of the next 2 stitches, 2 single crochet in the next stitch” around. The circle will begin to flatten and widen under your fingers. You should have 24 stitches.
- Round 5: Repeat “1 single crochet in each of the next 3 stitches, 2 single crochet in the next stitch” around. Keep your tension even rather than pulling tightly on the yarn. You should have 30 stitches.
- Round 6: Repeat “1 single crochet in each of the next 4 stitches, 2 single crochet in the next stitch” around. This gives you 36 stitches and the full base size.
- Round 7: Work 1 single crochet in each stitch around, with no increases. You should still have 36 stitches.
- Shape the top edge: slip stitch in the next stitch, chain 1, then work 1 single crochet in each of the next 8 stitches. Skip 1 stitch, then slip stitch in the next stitch. Repeat this small curve around the piece until you reach the beginning. Fasten off with a long tail for sewing.
- For the pumpkin, weave the orange yarn tail toward the back. With green yarn, chain 4 for the stem, then slip stitch back across the chain. Sew the stem to the top edge. Add three loose vertical lines with orange yarn.
- For the ghost, use cream yarn and keep the base plain. With black yarn, embroider two small eyes using short straight stitches. Add a tiny open mouth if you like.
- For the cat, use charcoal yarn and add two small triangular ears with surface stitches. Make each ear with three straight stitches that meet at the top. Embroider two eyes in cream or green, then add a short black nose and three whiskers on each side.
- Weave in the ends with the yarn needle, passing each tail through several stitches on the back before trimming it.
Notes
Ensure to use cotton yarn for a firm surface and clean embroidered details. If using a different yarn, be mindful of the texture and weight, especially when designing small motifs. Store completed appliqués properly to maintain their shape.