

This post contains Amazon affiliate links. As an Amazon Associate I earn from qualifying purchases.
The first rows sit lightly in your lap, almost too small to notice, while the hook makes its soft pull through each loop. By late afternoon, the little fall gnome begins to take shape, and the yarn has gained enough weight to rest across your knees. Turn Plastic Water Bottles into Adorable Fall Gnomes 🍁 is a playful crochet project for that quiet space between seasons, when a mug of coffee cools beside the yarn basket and the house feels ready for a small touch of autumn.
Why Turn Plastic Water Bottles into Adorable Fall Gnomes 🍁 Is So Soothing to Crochet
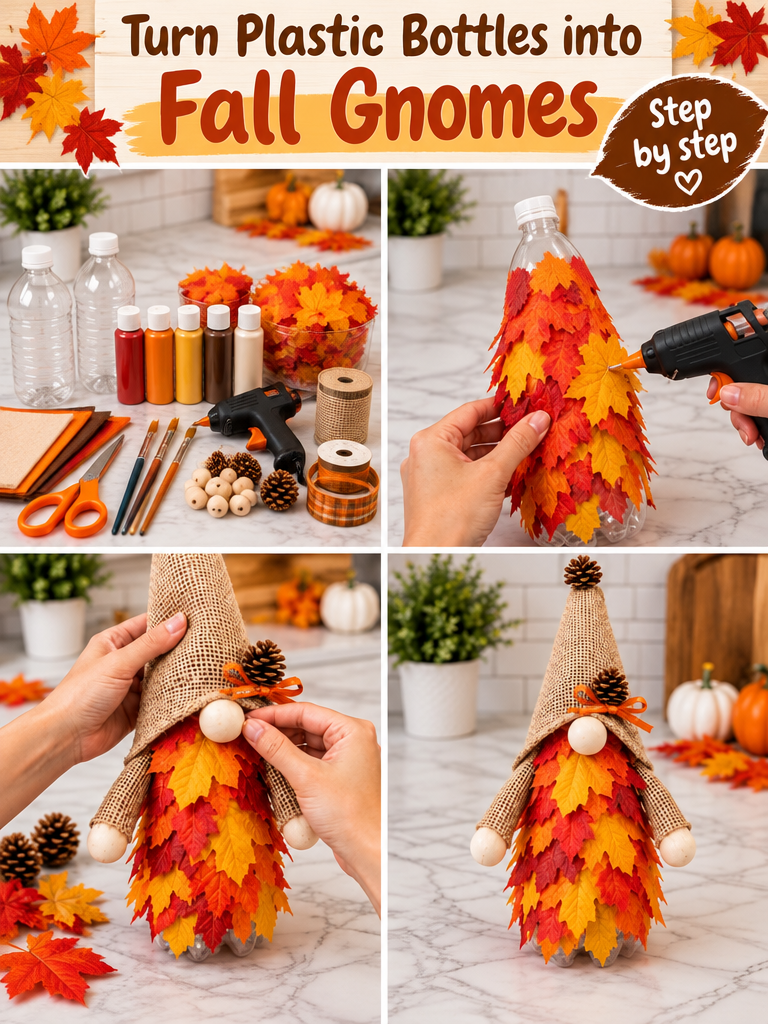
This project has a gentle rhythm because the body uses simple rounds of single crochet. The stitch is familiar, steady, and easy to feel with your fingertips, even when you look away for a moment. You work around a recycled plastic bottle, so the piece has a clear purpose from the beginning instead of becoming an open-ended swatch that may or may not turn into something useful.
I made mine on the couch during a rainy evening, with the bottle tucked under one hand and the yarn sliding over my index finger. The first few rounds curled slightly around the base, then settled as the fabric grew taller. That small change felt satisfying. The shape became visible before the project demanded much thought.
The repeated rounds leave room for the ordinary sounds of home. You can hear the quiet click of the hook, the washing machine turning in the next room, or the kettle coming to a simmer. Many people find crocheting calming because repetition gives the hands something kind and uncomplicated to do. This project offers that rhythm without asking you to count a complicated lace chart.
It also suits the way many of us use our homes through the year. You might crochet one on the front porch in early fall, beside a basket of yarn in the living room, or at the kitchen table while the first cold snap arrives. The finished gnome can sit on a mantel, a bookshelf, or the corner of a coffee table without taking over the room.
How Turn Plastic Water Bottles into Adorable Fall Gnomes 🍁 Comes Together
You will crochet a small tube around an empty plastic bottle, shape the top with a few decreases, and add a simple hat and beard. A decrease joins stitches together so the round becomes narrower, while an increase adds stitches when you need the fabric to widen. The main stitch is single crochet, which creates a firm fabric that supports the bottle and keeps the stuffing from showing through.
This pattern uses US crochet terms. UK readers often find these posts too, and the same word can mean a different stitch there, so please use the US terms listed here. You will use a chain, abbreviated ch, to begin, a slip stitch, or sl st, to join rounds, and single crochet, or sc, for most of the body.
The project has a few fiddly moments, especially when you shape the hat and tuck the beard into place. Still, the construction stays approachable because the stitch counts remain small and visible. Allow about two to three evenings if you like to work slowly, or roughly four to six hours of total crochet time with assembly.
Pattern at a Glance
Here are the details to keep beside your yarn basket.
- Skill level: Easy, with basic shaping and simple assembly
- Finished size: About 5 inches tall by 3 inches wide (13 cm tall by 8 cm wide)
- Gauge: 16 single crochet and 18 rounds measure 4 inches (10 cm)
- Yarn: Worsted weight (weight 4, medium), about 120 yards total from one 170-yard per 100 g skein
- Hook size: H-8 (5.0 mm)
- Other supplies: One clean 16-ounce plastic bottle, polyester fiberfill, yarn needle, scissors, stitch marker, tape measure, and a small piece of felt
- Stitch multiple: Body begins with 30 stitches and works in continuous rounds
- Estimated time: Four to six hours, usually spread over two to three evenings
Materials for Turn Plastic Water Bottles into Adorable Fall Gnomes 🍁
- Worsted weight yarn, weight 4 medium, in about 120 yards total. Use one main color with about 80 yards and one hat color with about 40 yards. A typical skein has about 170 yards per 100 g, so one skein is enough if you use leftovers for the contrast color.
- Soft acrylic yarn, such as a widely available worsted weight option from Lion Brand or Red Heart. Acrylic keeps this small home decoration affordable, light, and easy to wash.
- H-8 (5.0 mm) crochet hook. A half size up or down is fine depending on your tension, but changing the hook may change the finished size.
- One clean, dry 16-ounce plastic bottle, with the label and cap removed (easy to find and recycled for the project)
- Polyester fiberfill, about 2 ounces (57 g), for filling the hat and softening the shape
- Small piece of tan or cream felt for the beard (can be swapped for a crocheted beard)
- Yarn needle with a wide eye for weaving in ends and sewing the pieces together
- Sharp scissors
- One stitch marker, optional but helpful for marking the first stitch of a continuous round
- Tape measure for checking gauge and the finished height
- Small amount of craft glue, optional, for securing felt if you do not want to sew it
Gauge is worth the twenty minutes here because the bottle determines the body width. Crochet 16 single crochet and 18 rounds in a small swatch, then measure across the center rather than along the edge. If your fabric feels loose and the bottle shows through, try a smaller hook. If the swatch feels stiff or the bottle will not slide inside, try a larger hook.
You can substitute another worsted weight acrylic yarn without changing the pattern. A cotton yarn will make a firmer, heavier gnome, while wool may relax after blocking and can felt if washed roughly. Keep the fiber in mind if you plan to wash the finished piece, and remember that acrylic can melt under a hot iron, so use only cool blocking or steam from a distance.
Step by Step
- Difficulty and foundation: This is an easy pattern worked in a stitch multiple of 30 stitches for the bottle body. The foundation chain is the starting chain that forms the base edge. Chain 30, then join with a slip stitch to the first chain, taking care not to twist the chain.
- Chain 1 to bring the hook up to working height. This is a turning chain, but it does not count as a stitch in this pattern. Work 1 single crochet into each chain around, then join with a slip stitch to the first single crochet. You now have 30 single crochet stitches.
- Place a stitch marker in the first single crochet. Work 1 single crochet in each stitch around, moving the marker upward as you begin each new round. Continue for 18 rounds, checking the tube against the bottle after every few rounds. The fabric should slide over the bottle with a little resistance, not stretch so tightly that the stitches open.
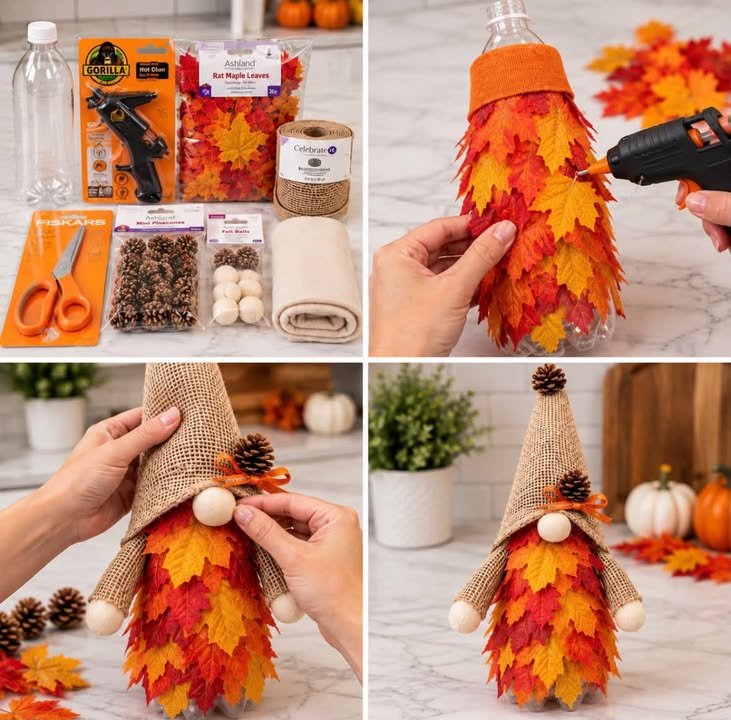
- After round 18, work one more round of single crochet if the bottle needs extra coverage at the shoulder. Stop when the crocheted tube reaches about 4 inches (10 cm) tall. The exact height can vary slightly with bottle shape, but keep the lower edge level.
- Begin the top shaping. Work 1 single crochet in the next 3 stitches, then work a decrease over the next 2 stitches. To make the decrease, insert the hook into the next stitch and pull up a loop, insert it into the following stitch and pull up another loop, then yarn over and draw through all 3 loops. Repeat around for 24 stitches.
- Work one single crochet in each stitch around for the next round, keeping 24 stitches. On the following round, work 1 single crochet in the next 2 stitches, then decrease over the next 2 stitches. Repeat around for 18 stitches.
- Stuff a small amount of polyester fiberfill between the bottle and the crochet at the top. Do not pack it hard. The bottle gives the gnome its structure, and too much stuffing can stretch the stitches and make the top look lumpy.
- Work 1 single crochet in the next stitch, then decrease over the next 2 stitches. Repeat around for 12 stitches. Cut the yarn, leaving an 8-inch (20 cm) tail. Thread the tail onto a yarn needle, weave it through the front loops of the remaining stitches, pull gently to close, and secure the end inside the piece.
- Make the hat with the contrast yarn. Begin with a magic ring, also called a magic circle, by wrapping the yarn into a loose loop and crocheting into the center. Work 6 single crochet into the ring, pull the starting tail to close the center, and mark the first stitch.
- Work the hat in continuous rounds. Round 2: work 2 single crochet in each stitch around for 12 stitches. An increase means working two stitches into one stitch. Round 3: work 1 single crochet in the next stitch, then increase in the next stitch, repeating around for 18 stitches.
- Round 4: work 1 single crochet in each stitch around for 18 stitches. Round 5: work 1 single crochet in the next 2 stitches, then increase in the next stitch, repeating around for 24 stitches. Round 6: work 1 single crochet in each stitch around for 24 stitches.
- Rounds 7 through 12: work 1 single crochet in each stitch around for 24 stitches. The hat will begin to lean and lengthen. If you want a softer bend, lightly fill the lower half with polyester fiberfill as you go. Leave the tip unfilled so you can shape it with your fingers.
- For the hat brim, work 1 single crochet in each stitch around for 24 stitches, then work one final round through the back loop only, abbreviated BLO. Working in the BLO means you insert the hook under the loop farther from you, which creates a small ridge. Slip stitch to the first stitch and fasten off.
- Position the hat over the bottle body. Sew the hat brim to the top edge of the body with the yarn needle, using small stitches that do not show on the outside. Add the felt beard below the hat, centered on the front. Sew it in place, or use a small amount of glue if the gnome will remain decorative and out of reach of children.
- Look over the piece before you finish. If a mistake appears several rows back, do not yank the whole project apart. Count the stitches at the end of the row or round first, locate the missing stitch, and calmly pull back one round at a time until the count returns to 30, 24, 18, or 12 as expected. A yarn needle can help repair a small gap with a few matching stitches.
- Weave in every remaining end by passing the yarn needle through several stitches on the inside, changing direction once, and trimming the tail. Shape the hat with your hands. Because acrylic does not respond well to direct heat, skip a hot iron. If you want to block the brim, dampen it lightly, shape it flat, and let it dry completely before placing the gnome on a shelf.
Where Turn Plastic Water Bottles into Adorable Fall Gnomes 🍁 Finds Its Place
The finished gnome feels happiest in a small, visible spot. Mine sits beside the living room lamp, where the hat catches the warm light in the evening. You can place yours on a mantel with a few pinecones, in a basket beside an armchair, or on a covered porch table where it stays protected from rain and strong sun.
The recycled bottle gives the piece enough weight to stand without a separate base. That makes it useful as a seasonal accent rather than something you need to prop against another decoration. The felt beard softens the shape, while the simple hat adds color without requiring a complicated colorwork chart.
These gnomes also make thoughtful small gifts. Crochet one in the recipient’s favorite fall colors and tuck it into a gift basket with tea, a candle, or a handwritten note. It works well as a hostess gift, a small holiday exchange, or a quiet handmade addition to a new-home package.
If you sell finished items, my own policy is simple: I am happy to sell pieces I make from my own written pattern, with credit to the pattern designer when another designer’s pattern is involved.
Keeping Turn Plastic Water Bottles into Adorable Fall Gnomes 🍁 Looking Good
Because this version uses acrylic yarn and a felt beard, spot cleaning is usually the gentlest choice. Dab small marks with a cloth dampened in cool water and mild soap, then blot with a clean towel. Avoid soaking the bottle-filled piece, since water can collect inside the crochet and take a long time to dry.
For a deeper clean, hand wash in cool water and press the water out with a towel. Do not wring the gnome, and never hang it wet because the weight can pull the stitches out of shape. If you use a washing machine, choose a cold gentle cycle inside a mesh bag, then reshape and dry flat.
Lay the gnome on a dry towel with the brim and hat positioned as you want them. Acrylic does not need hot blocking, and a hot iron can melt or flatten the fibers. If the hat loses its bend, use cool steam from a distance or dampen the fabric lightly and let it air dry in shape.
Store the gnome upright or folded gently in a breathable cotton bag, away from damp areas and direct sunlight. Do not compress the hat under heavy decorations. If you make a wool version, add cedar or lavender nearby for moth protection, and remember that untreated wool can felt while superwash wool tolerates machine washing more easily.
Keep leftover yarn with its label so you have the fiber, color name, and dye lot if you need to repair the gnome later. The dye lot matters when you want a replacement shade to blend with the original.
Small Ways to Make Turn Plastic Water Bottles into Adorable Fall Gnomes 🍁 Your Own
Try a thicker yarn if you want a larger, more sculptural gnome. A bulky yarn will increase the size and create a heavier fabric, but you may need a larger hook and a wider bottle. Check the fit often instead of relying only on the gauge swatch.
Choose two close colors for a quiet look, or use a deep green, rust, mustard, or cranberry hat against a neutral body. Color blocking can happen at the brim, hat, and beard without changing the stitch counts. Changing colors at the slip stitch join keeps the stripe edge fairly tidy.
If you replace the single crochet with double crochet, the piece will grow faster and feel more flexible, but the fabric may show the bottle and stuffing more easily. Double crochet, abbreviated dc, uses a yarn over before inserting the hook and creates a taller stitch. For a denser gnome, stay with single crochet.
You can resize the body by changing the starting chain in a multiple of 6, then checking the chain around your chosen bottle. For example, 36 stitches will make a wider tube than 30 stitches. Keep the shaping even by reducing the same number of stitches in each decrease round.
A simple border can finish the hat brim. Work one round of slip stitches in a darker shade, or add a few short strands of yarn as a fringe beard instead of using felt. For a child’s room, avoid buttons, safety eyes, and other small parts for children under three. Anything placed in a crib or car seat needs to stay snug and secure, so this decorative gnome belongs on a supervised shelf instead.
Frequently Asked Questions About Turn Plastic Water Bottles into Adorable Fall Gnomes 🍁
Can I use a different crochet hook size?
Yes, you can use a different hook size, but check the fit around the bottle as you work. The pattern calls for H-8 (5.0 mm), and a half size smaller creates denser fabric while a half size larger creates a looser, slightly larger tube. If your stitches feel tight or the bottle will not slide inside, go up one hook size.
What yarn can I substitute for the worsted weight acrylic?
You can substitute another worsted weight, weight 4 medium yarn with about the same yardage. Acrylic makes this gnome light and easy to clean, while cotton creates a firmer, heavier fabric. Wool can work, but untreated wool may felt when washed. Check the gauge and test the yarn against the bottle before committing to all the rounds.
What should I do if I find a mistake several rows later?
First, count the current stitches and identify where the shape changed. If a stitch went missing, pull back one round at a time instead of undoing everything at once. Look for the small gap where the hook skipped a stitch, then redo the round and recount. For a tiny visible gap, use the yarn needle and matching yarn to make a discreet repair.
Is this gnome pattern suitable for a beginner?
Yes, this project suits a beginner who knows how to make a chain, single crochet, slip stitch, increase, and decrease. The bottle helps you judge the size as you go, so you do not need perfect measuring at every point. The hat shaping takes the most attention, but the stitch counts are short and easy to check.
How long does it take to crochet one gnome?
Plan on four to six hours of total work, usually spread over two or three evenings. The body works fairly quickly once you settle into the rounds, while sewing the hat and beard takes extra time. Your first one may take longer because you are checking the bottle fit and shaping the top carefully.
Does this pattern use US or UK crochet terms?
This pattern uses US crochet terms. The main stitch is US single crochet, abbreviated sc, which is called double crochet in UK terminology. The hook size is H-8 (5.0 mm), and the pattern also uses US terms such as slip stitch, increase, decrease, back loop only, and foundation chain.
Take the Time You Need
Let the gnome grow at the pace your hands choose. Some rounds will feel smooth, and one may ask you to pause, count, and pull back a little. That belongs to the making too. Set the hook down when you need to, return when the light feels right, and let this small fall project become a quiet companion rather than another task to finish.
Print
Turn Plastic Water Bottles into Adorable Fall Gnomes
- Total Time: 240 minutes
Description
A playful crochet project to create small fall-themed gnomes using recycled plastic bottles.
Materials
- Worsted weight yarn, weight 4 medium, about 120 yards total (80 yards main color, 40 yards hat color)
- H-8 (5.0 mm) crochet hook
- One clean, dry 16-ounce plastic bottle (with label and cap removed)
- Polyester fiberfill, about 2 ounces (57 g)
- Small piece of tan or cream felt for the beard
- Yarn needle
- Sharp scissors
- One stitch marker (optional)
- Tape measure
- Small amount of craft glue (optional)
Instructions
- Chain 30, then join with a slip stitch to the first chain, being careful not to twist the chain.
- Chain 1, work 1 single crochet into each chain around, then join with a slip stitch to the first single crochet.
- Place a stitch marker in the first single crochet, work 1 single crochet in each stitch around for 18 rounds.
- Work 1 single crochet in the next 3 stitches, then work a decrease over the next 2 stitches; repeat around for 24 stitches.
- Work one single crochet in each stitch around for the next round.
- Work 1 single crochet in the next 2 stitches, then decrease over the next 2 stitches; repeat around for 18 stitches.
- Stuff a small amount of polyester fiberfill into the top, not hard packed.
- Work 1 single crochet in the next stitch, then decrease over the next 2 stitches; repeat around for 12 stitches.
- Cut the yarn, leaving an 8-inch tail, and pull the tail through the remaining stitches to close.
- Make the hat using contrast yarn with a magic ring, work 6 single crochet into the ring.
- Work the hat in continuous rounds, increasing as specified until the desired length is achieved.
- Position the hat over the bottle body, sew the hat brim to the body, and add the felt beard below the hat.
Notes
Use caution with direct heat on acrylic. For cleaning, spot clean or hand wash gently. Store upright or folded gently.