

Late afternoon light rests across the yarn while the little case grows warm in your hands. The hook makes a soft pull through each loop, and the fabric gathers into a neat, sturdy rectangle beside your coffee mug. This Personalized Crochet Phone Case for Every Phone gives you a small project with a useful ending, the kind you can carry from the living room couch to the front porch without filling an entire weekend. You will make a simple textured pouch, add a flap, and finish it with a button or snap so your phone has a gentle handmade place to rest.
Why Personalized Crochet Phone Case for Every Phone Is So Soothing to Crochet
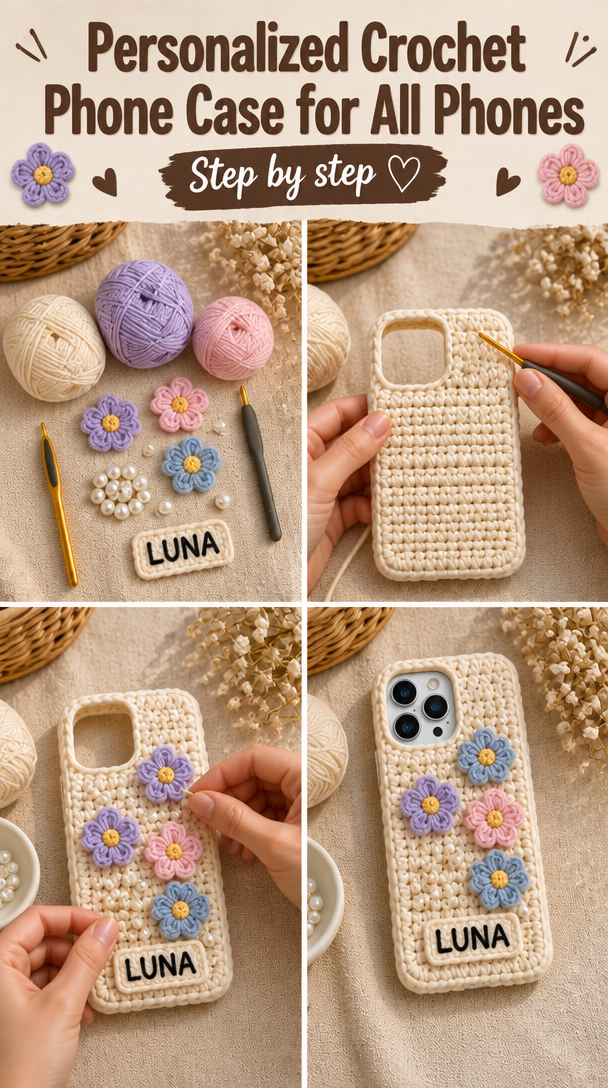
A phone case asks for just enough attention to keep your hands occupied without demanding that you solve a complicated chart. The rows move in a steady rhythm, and the fabric becomes recognizable quickly. I like that sense of progress. After the first ten minutes, my hands usually feel warmer, and the yarn begins to slide through my fingers at an even pace.
This project fits neatly beside ordinary home moments. You can work a few rows on the couch while rain taps the windows, beside a basket of yarn on a summer porch, or at the kitchen table while a pot warms on the stove. The finished piece stays small enough to tuck into a project bag, so it does not ask you to clear a whole room or protect a large blanket from the family dog.
The case also gives you a quiet reason to choose color thoughtfully. A muted blue can feel calm against a winter sweater, while a warm mustard or berry shade brings a little life to a fall coat pocket. You can personalize the flap with a contrasting button, a narrow stripe, or the recipient’s favorite two colors without changing the simple construction.
There is one practical pleasure here, too. The case protects a phone from scuffs inside a purse or tote, and it gives a handmade gift a useful daily purpose. You are not making something that has to sit untouched on a shelf. You are making a small companion for errands, coffee shop visits, school pickup, and slow walks to the mailbox.
The Rhythm of This Crochet Project
You will begin with a foundation chain, which is the first row of connected chain stitches, and work back and forth in half double crochet. A half double crochet, abbreviated hdc, creates a fabric with more height than single crochet and less openness than double crochet. That balance suits a phone case because the fabric grows steadily while remaining soft and fairly dense.
On the first row, you will work into the second chain from the hook. After that, each row begins with a turning chain, which lifts the yarn to the right height before you turn the work. The stitch repeat stays simple: work one half double crochet into every stitch, then add a few rows of single crochet for a firm flap and tidy top edge.
This pattern uses US crochet terms. UK readers often find these posts too, and the same word can mean a different stitch there, so please keep that distinction in mind. Here, single crochet means sc, half double crochet means hdc, and double crochet means dc.
The project suits a confident beginner and remains pleasant for an experienced crocheter who wants a useful small make. Set aside about two to three hours, including sewing on the button and weaving in the ends. The first rows may curl a little until the piece gains enough length and weight to settle. That is normal.
Pattern at a Glance
Keep this small summary nearby while you work.
- Skill level: Confident beginner
- Finished size: 4 inches wide by 7 inches tall (10 cm by 18 cm)
- Gauge: 14 hdc and 10 rows measure 4 inches (10 cm)
- Yarn: Worsted weight (weight 4, medium), about 170 yards per 100 g skein; use about 45 yards total
- Hook: H-8 (5.0 mm)
- Other supplies: Yarn needle, scissors, tape measure, one stitch marker, and one 1-inch button
- Stitch multiple: Any number of stitches, with the starting chain set at 24 for this size
- Estimated time: Two to three hours
What You Need for This Project
- Worsted weight yarn (weight 4, medium), preferably washable acrylic, about 45 yards total from a 170-yard per 100 g skein. A small amount remains for sewing the button. Red Heart is one easy-to-find example.
- H-8 (5.0 mm) crochet hook (a half size up or down is fine depending on your tension)
- Yarn needle with an eye large enough for your yarn, for weaving in ends and sewing on the button
- Scissors (small and sharp enough to trim the tails neatly)
- One stitch marker (optional, useful for marking the first stitch when the work starts to feel familiar)
- Tape measure (helpful for checking the width before you add the flap)
- One 1-inch button (can be swapped for a snap, wooden button, or small crocheted loop closure)
A gauge swatch takes about twenty minutes, but it can save you from making a case that your phone cannot enter. For this pattern, 14 half double crochet and 10 rows should measure 4 inches (10 cm). If your swatch comes out smaller, try a larger hook. If it comes out larger, try a smaller hook.
You can safely substitute another worsted weight yarn with a similar yardage and a smooth surface. A cotton blend will feel firmer and may hold its shape well, while acrylic will feel lighter and wash easily. Avoid a very loose or fuzzy yarn for the first try because it can hide the stitches and make the flap harder to measure.
Step by Step
- Check the difficulty and stitch multiple. This is a confident beginner project worked with a chain, half double crochet, and single crochet. The body uses any number of stitches, and this finished size starts with 24 chains. Keep your phone nearby for occasional checks.
- Make the foundation chain. Create a slip knot and place it on your H-8 (5.0 mm) hook. Make 24 chain stitches, abbreviated ch; each chain is a loop pulled through the previous loop. Keep the chain relaxed rather than tight. If the chain pulls inward, go up to a 5.5 mm hook just for the foundation chain. You should have 24 chains.
- Work the first row of half double crochet. Yarn over, insert the hook into the second chain from the hook, yarn over again, and pull up a loop. Yarn over once more and pull through all three loops on the hook. Repeat in each remaining chain. This creates 23 half double crochet stitches. Chain 1 to turn, then turn your work.
- Build the phone pocket. Work one half double crochet in each stitch across. At the end of every row, you will have 23 hdc. Make 16 rows total for the pocket, always using chain 1 to turn. The fabric may curl at first, but the sides will straighten as the rows build. Place a stitch marker in the first stitch if you sometimes lose track of the edge.
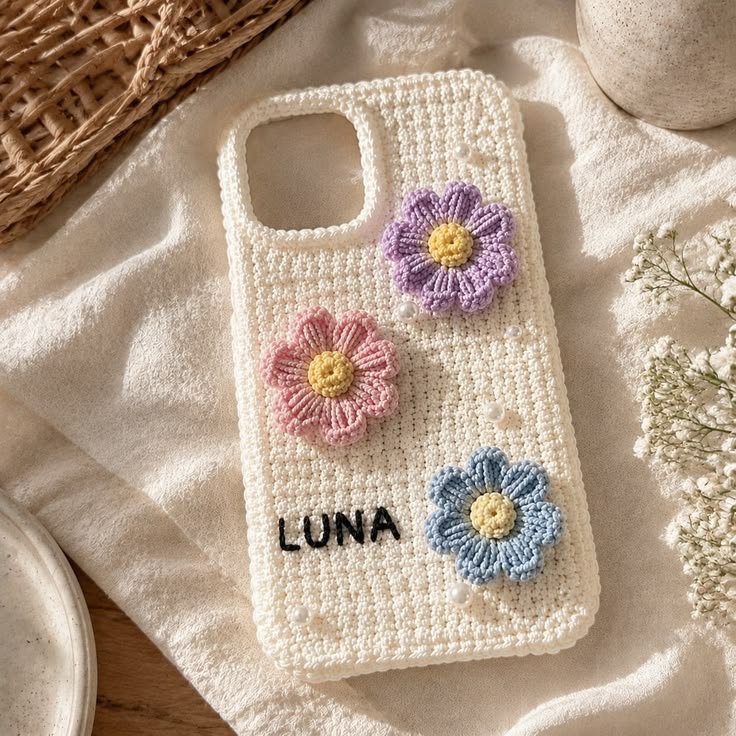
- Check the pocket length. After row 16, measure from the bottom edge to the top edge. It should be about 6 inches (15 cm). Slide your phone into the fabric without forcing it. The pocket should feel close but not tight, since the case will relax slightly with use.
- Shape the flap with single crochet. Chain 1 and turn. Work one single crochet, abbreviated sc, in each of the 23 stitches. A single crochet uses fewer loops and creates a firm fabric. Make 5 rows of single crochet, with 23 sc at the end of each row. The flap will begin to stand above the phone pocket.
- Make the buttonhole row. Chain 1 and turn. Work 8 sc, chain 3, skip 3 stitches, then work 12 sc. The chain space forms the buttonhole. Your row still spans 23 stitch positions: 8 single crochet, 3 skipped stitches covered by the chain, and 12 single crochet. Make sure the opening lines up with the center of the flap.
- Firm the top edge. Chain 1 and turn. Work one sc in each of the 23 stitch positions, working 3 sc into the chain-3 space. You will again have 23 sc. This closes the buttonhole neatly while leaving an opening under the new stitches. If the buttonhole feels too small for your button, pull back this row calmly and make the chain space with 4 chains instead.
- Finish the flap. Chain 1 and turn. Work one sc in each stitch across for 2 more rows, keeping 23 sc in each row. Fasten off with a tail about 8 inches (20 cm) long. The total piece should measure close to 7 inches (18 cm) from the bottom edge to the flap tip.
- Sew the sides. Fold the pocket upward so the bottom edge meets the line where the flap begins. Thread your yarn needle with a matching yarn tail or a fresh strand. Use a simple whip stitch through both layers along each side, taking care not to sew across the pocket opening. The phone should slide in from the top without catching.
- Add the button. Place the button beneath the buttonhole and mark its position with the tip of your hook. Sew it on firmly with several passes of yarn. Test the closure with the phone inside, but do not make the fit so snug that the flap pulls hard against the stitches.
- Handle a mistake gently. If a stitch goes missing, look at the row edge first. A straight side should show 23 stitches across, with a clear little V at the top of each stitch. If you discover a mistake several rows later, remove the stitches one at a time back to the problem, then rebuild the row. Pulling back is not wasted work. It is simply part of listening to the fabric.
- Weave in the ends and finish. Thread each tail onto the yarn needle and weave it through the back of several stitches in more than one direction. Trim the excess close to the fabric. Acrylic usually needs no blocking, but you can smooth the case flat with your hands. If you use cotton or wool, lightly dampen it, shape it to the finished measurements, and let it dry flat before attaching the button.
Where This Piece Finds Its Place
The finished case works best when you give it a regular little home. Mine would sit in the basket beside the armchair, ready for a walk to the porch or a quick trip to the grocery store. It also slips comfortably into a tote without adding much weight, and the button keeps the phone from sliding out when the bag tips on its side.
For a gift, match the yarn to a favorite jacket or choose the recipient’s school colors. You can sew a small fabric label inside the flap, add a contrasting button, or make a second case in a softer color for earbuds or a small charging cord. A pair of matching cases makes a thoughtful stocking stuffer or a simple birthday gift that feels personal without taking several days to finish.
The case is also a gentle way to use leftover yarn. Since it takes about 45 yards, a partial skein can become something useful instead of remaining in the bottom of the yarn basket. Just make sure the yarn is sturdy enough for regular handling and that any button is sewn securely.
Caring for Your Crochet
For the washable acrylic yarn named in the materials list, wash the case in cold water on a gentle cycle. Place it in a small mesh bag if you want to reduce rubbing against zippers or heavier clothing. You can also hand wash it in cool water with a little mild detergent.
Press out excess water in a towel and dry the case flat. Do not hang it while wet because the flap and side seams can stretch. Reshape the edges with your fingers while it dries. Acrylic can soften with gentle warmth, but it can also melt or become shiny under a hot iron, so never press it directly with a hot iron.
If the case loses its shape, lightly mist it and smooth it flat, or use steam from a distance without touching the hook or iron to the fabric. Acrylic usually responds best to gentle shaping rather than a heavily wet block. Store the case folded or lying flat somewhere breathable instead of hanging it by the flap.
Keep the leftover yarn with its paper label, including the dye lot, in a small bag. Even a tiny remaining strand can help you match the color later. If you choose wool for another version, remember that superwash wool tolerates the washing machine better, while untreated wool can felt. Wool also benefits from blocking as it dries, and cedar or lavender can help discourage moths in storage.
Small Ways to Make It Your Own
Try a different yarn thickness. A bulky yarn will make a larger, warmer case with a quicker fabric, while sport weight yarn will create a slimmer case with more flexible drape. Change the hook to suit the yarn and measure the phone pocket as you work rather than relying only on the row count.
Play with two colors. Work the pocket in one shade and the flap in another for a clear color-blocked finish. You can also change color after every four rows, carrying the unused yarn loosely up the side and covering it with the side seam later. A dark button against a light flap gives the closure a simple focal point.
Use single crochet for the whole case. Single crochet creates a denser, firmer fabric than half double crochet, so the case may feel more protective but less flexible. The fabric will also grow more slowly. Make a new gauge swatch and check the phone pocket after several rows.
Resize by measuring, not guessing. Add or remove starting chains to change the width, then keep the stitch count even on every row. For this simple pattern, any number of foundation chains works, but remember that the first row contains one fewer stitch than the starting chain. Add rows to make the pocket taller, and add matching flap rows so the buttonhole lands where you want it.
Give it a different purpose. A slightly wider version can hold sunglasses, a small notebook, or a pair of reading glasses. Skip the button and add a crocheted loop if you prefer a softer closure. For a holiday gift, tuck in a handwritten note and a favorite tea bag, keeping the tea outside the case until the recipient opens it.
Frequently Asked Questions About Personalized Crochet Phone Case for Every Phone
Can I use a different hook size for this phone case?
Yes, you can use a different hook size if your tension needs it. Start with H-8 (5.0 mm), then move to G-6 (4.0 mm) for a denser fabric or I-9 (5.5 mm) for a looser fabric. Always measure the pocket against your phone because changing the hook changes both the stitch size and the finished dimensions.
What yarn can I substitute for the worsted weight acrylic?
You can substitute another worsted weight, weight 4, medium yarn with a similar smooth texture. Cotton will make a firmer case, while acrylic keeps the piece light and easy to wash. Check your gauge before continuing, and avoid very fuzzy yarn until you feel comfortable reading the stitch tops and finding the edges.
What should I do if I notice a mistake several rows later?
Pull back only to the row where the mistake began, rather than undoing the whole case. Remove the stitches slowly, one row at a time, and place your hook back into the live loop. If the mistake does not affect the fit and you can live with it, you may leave it. A useful handmade case does not need perfect rows.
Is this phone case suitable for a beginner?
Yes, this case suits a confident beginner who knows how to make a chain and basic stitches. The main fabric uses half double crochet, and the flap uses single crochet. The buttonhole is the fiddliest part, but it only requires skipping three stitches and making a chain space. Work slowly at the edges, where missed stitches most often happen.
How long does this crochet phone case take?
Plan on two to three hours from the first chain to the final woven end. Your time may vary with tension, interruptions, and how carefully you sew the sides and button. The crocheting itself moves quickly, but the finishing deserves a quiet few minutes so the seams sit flat and the button stays secure.
Does this pattern use US or UK crochet terms?
This pattern uses US crochet terms. In this version, sc means single crochet and hdc means half double crochet. UK patterns use different names for several of the same-looking stitches, so a UK reader should check the terminology before beginning. The hook sizes are given in US letters with millimeters to make the supplies clear.
Take the Time You Need
Let the case grow at the pace your hands choose. A missed stitch, a slightly uneven edge, or a pause to remake one row does not take away from the quiet usefulness of the finished piece. Set your phone aside, listen for the small click of the hook, and trust that a few calm stitches can be enough for this evening.
—META—
SEO Title: Personalized Crochet Phone Case Pattern
Meta Description: Make a calm personalized crochet phone case with simple US stitches, clear sizing, gentle tips, and an easy button closure for everyday use.
Slug: personalized-crochet-phone-case
Category: Crochet
Tags: crochet, phone case, beginner crochet, handmade gifts, slow living
Image Alt Text: A crochet phone case resting beside yarn and a crochet hook
A close view of half double crochet rows forming the phone case
Pinterest Title: Personalized Crochet Phone Case
Pinterest Description: Crochet a useful phone case with simple stitches and a button closure. This small project suits quiet afternoons, thoughtful gifts, and leftover yarn.

Personalized Crochet Phone Case for Every Phone
- Total Time: 140 minutes
Description
This Personalized Crochet Phone Case project provides a soothing and simple way to create a useful case for your phone, perfect for everyday use.
Materials
- Worsted weight yarn (weight 4, medium), about 45 yards total
- H-8 (5.0 mm) crochet hook
- Yarn needle with an eye large enough for your yarn
- Scissors
- One stitch marker (optional)
- Tape measure
- One 1-inch button (or snap)
Instructions
- Create a slip knot and place it on your H-8 (5.0 mm) hook. Make 24 chain stitches.
- Yarn over, insert the hook into the second chain from the hook, yarn over again, and pull up a loop. Yarn over once more and pull through all three loops on the hook. Repeat in each remaining chain to create 23 half double crochet stitches.
- Chain 1 to turn, then turn your work. Work one half double crochet in each stitch across for a total of 16 rows.
- After row 16, measure the pocket length from the bottom edge to the top edge; it should be about 6 inches (15 cm).
- Chain 1 and turn. Work one single crochet in each of the 23 stitches for 5 rows.
- Chain 1 and turn. Work 8 single crochet, chain 3, skip 3 stitches, then work 12 single crochet to create the buttonhole.
- Chain 1 and turn. Work one single crochet in each of the 23 stitch positions, working 3 single crochets into the chain-3 space.
- Chain 1 and turn. Work one single crochet in each stitch across for 2 more rows. Fasten off with a tail about 8 inches (20 cm) long.
- Fold the pocket upward so the bottom edge meets the flap. Use a whip stitch to sew along each side.
- Place the button beneath the buttonhole, mark its position, and sew it on firmly.
- Weave in the ends, trim the excess, and smooth the case flat.
Notes
The project is suitable for a confident beginner and allows for personal touches like color choice and button selection. The case provides a gentle protective layer for the phone and is a practical gift.
- Preparation Time: 20 minutes
- Active Time: 120 minutes