

This post contains Amazon affiliate links. As an Amazon Associate I earn from qualifying purchases.
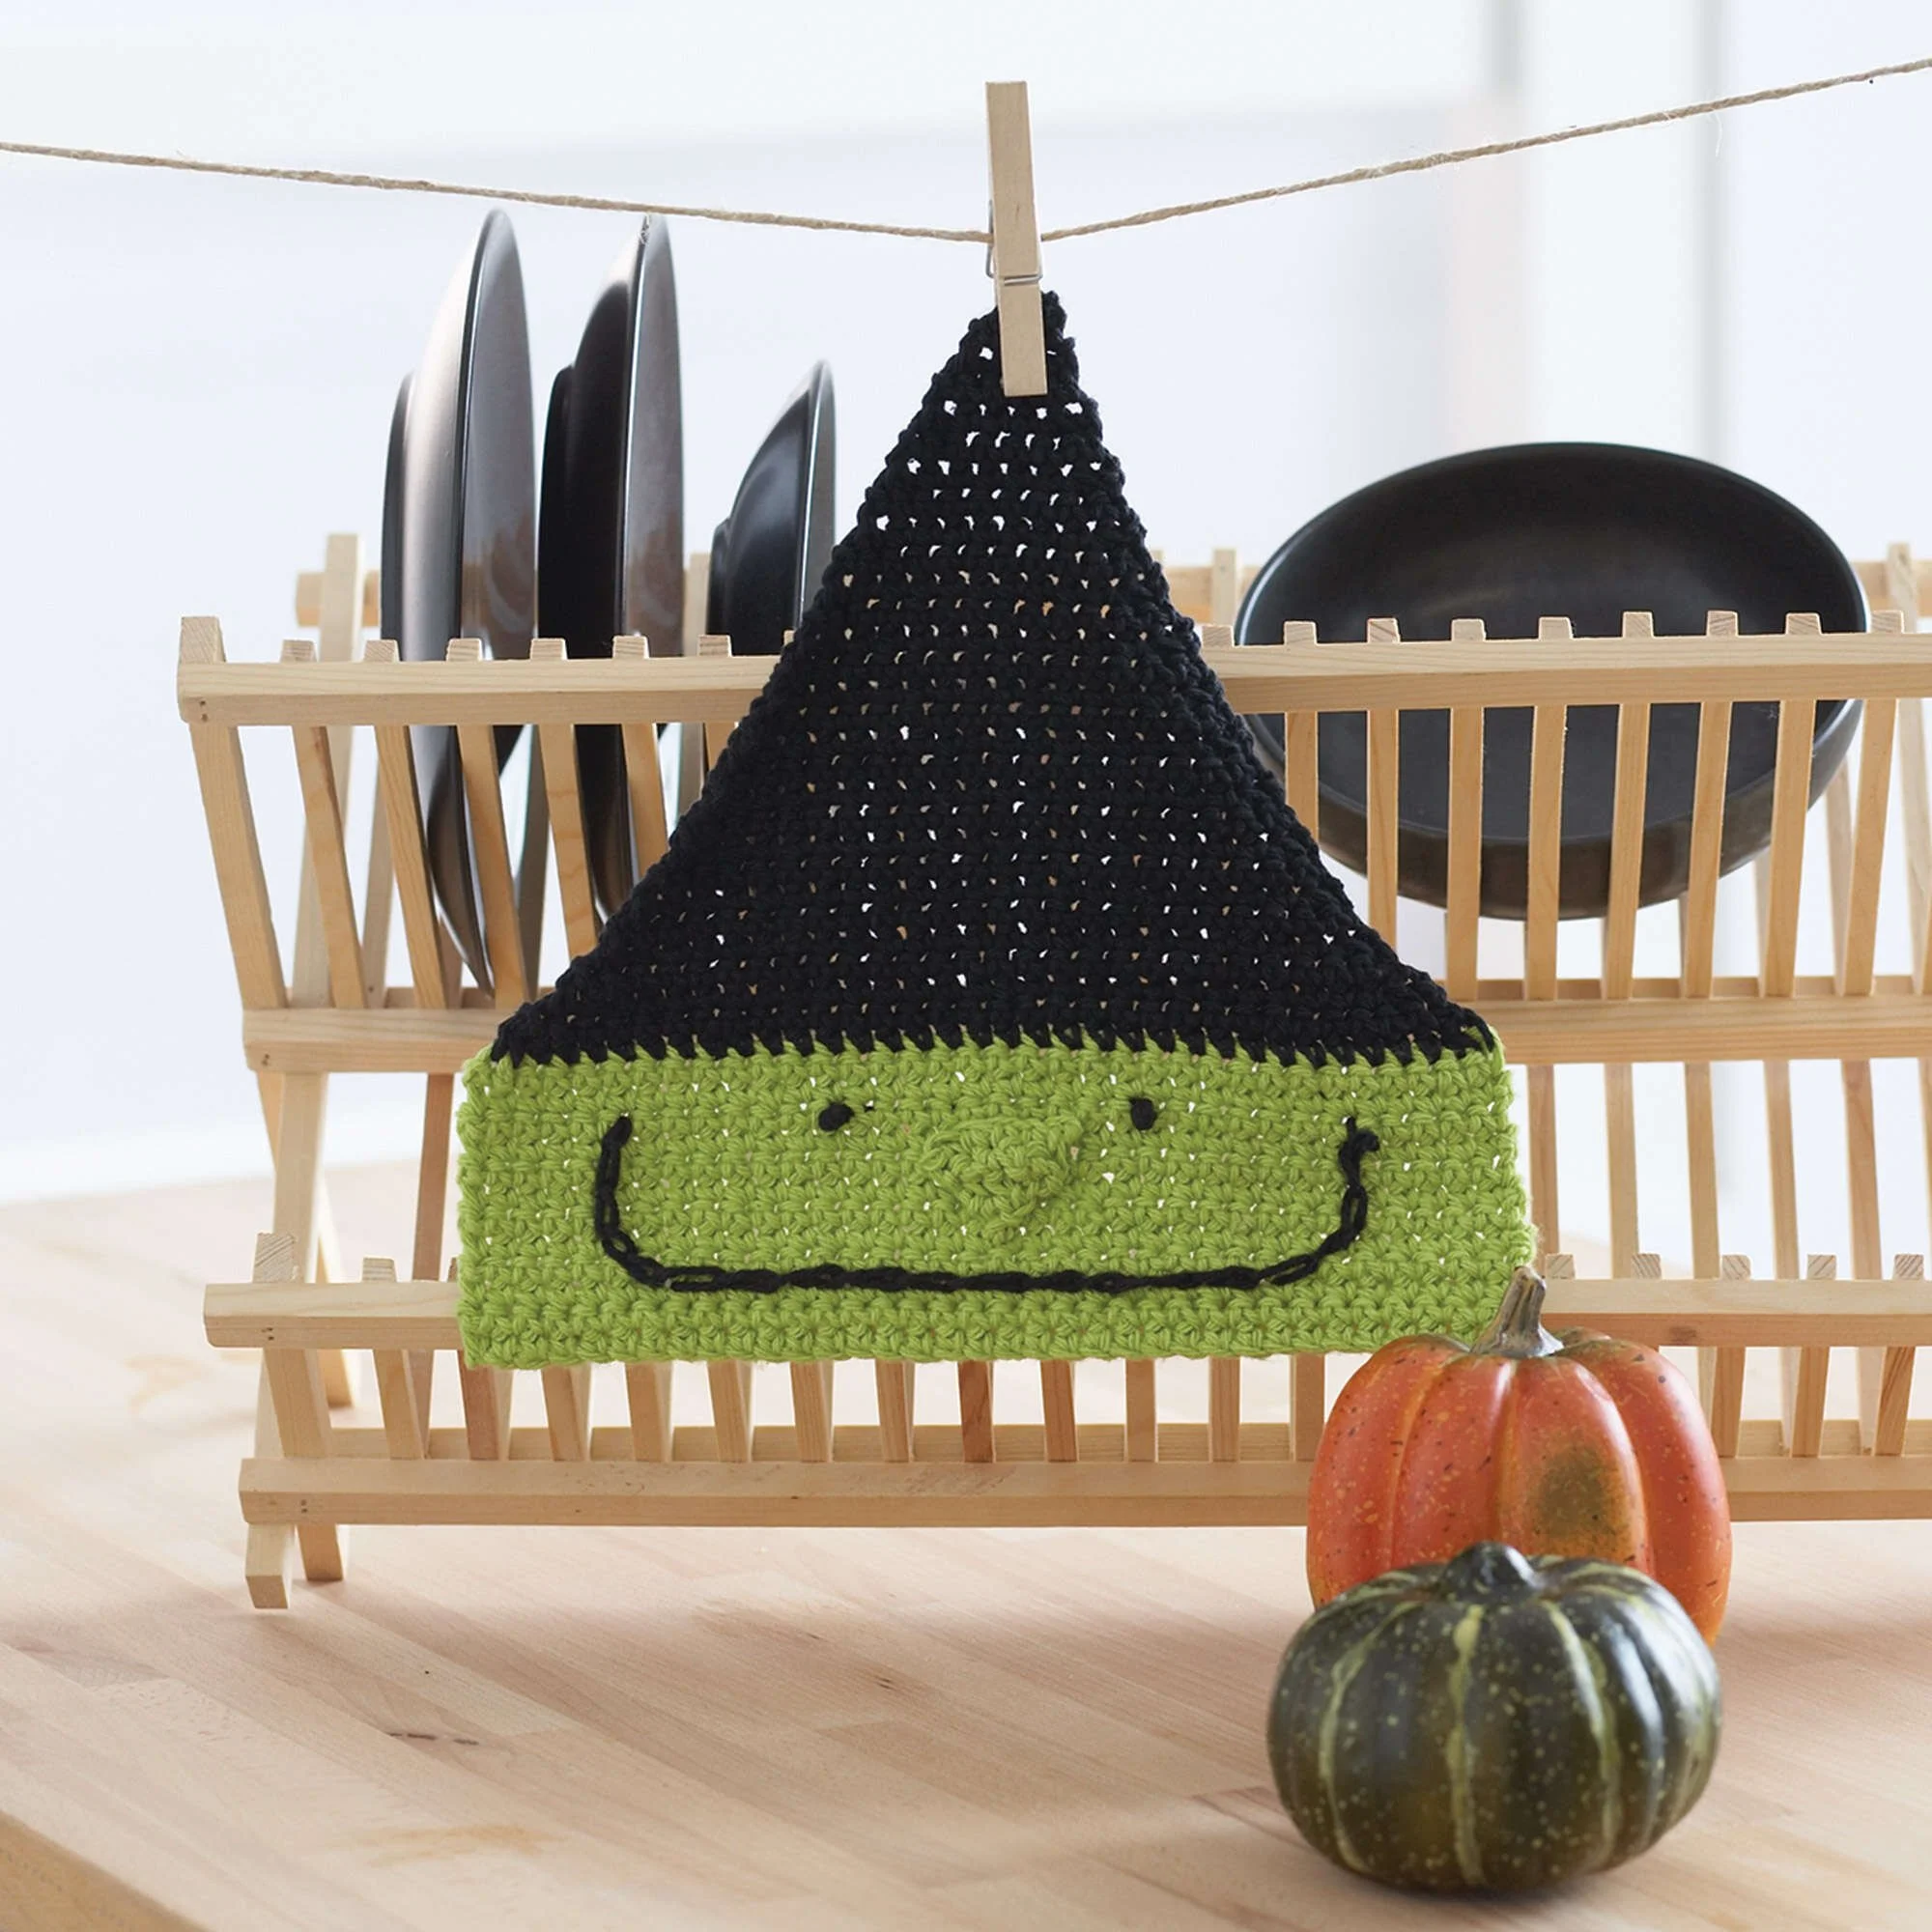
This Witch Dishcloth is a fun Halloween crochet project featuring a bright green base, a black hat shape, and embroidered facial details. Its simple single crochet construction makes it approachable for beginners, while the color change and shaping provide useful practice. Make one for seasonal kitchen décor, a festive bathroom cloth, or a handmade Halloween gift.
Why you’ll love this pattern
- Beginner-friendly construction: The main body uses simple single crochet stitches.
- Quick seasonal project: The rectangular base works up steadily without complicated lace or textures.
- Great skill practice: You’ll practice chaining, turning rows, changing colors, and decreasing with single crochet two together.
- Festive handmade appeal: Hot Green and Black create an unmistakable witch-inspired design.
- Useful gift idea: Pair it with Halloween kitchen towels, soap, or other seasonal accessories.
- Portable crochet: The small, flat project is easy to take along for travel or relaxing evenings.
“The single crochet rows were easy to follow, and the green-and-black color combination made the witch design come together beautifully. Embroidering the face was my favorite part.”
Before you begin
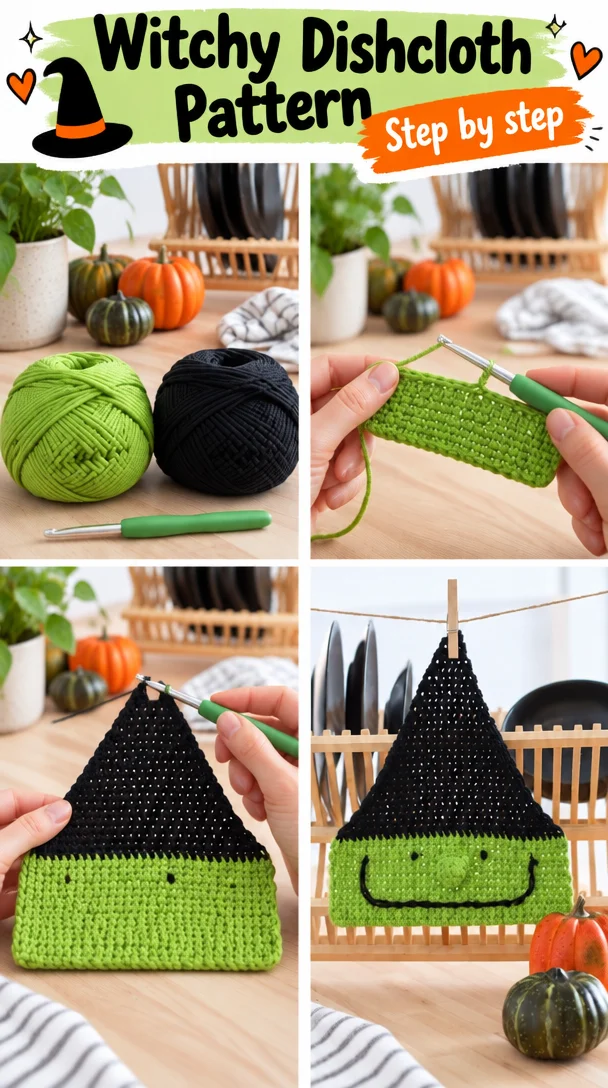
You’ll crochet the dishcloth from the bottom upward, beginning with Hot Green and a foundation chain of 36 stitches. The first rows form the green base. After the green section is complete, join Black and shape the upper portion by working decreases at both edges.
The project primarily uses chain stitches, single crochet, turning rows, and single crochet decreases. The written instructions do not provide a finished size or exact yarn amount, so the final dimensions will depend on your tension and yarn choice. Allow extra time for embroidering the mouth and eyes, sewing on the nose, and weaving in ends.
Materials you’ll need
- Lily® Sugar’n Cream yarn in Hot Green
- Lily® Sugar’n Cream yarn in Black
- Crochet hook, 5 mm
- Yarn needle for weaving in ends and sewing on the nose
- Scissors
- Black and contrasting embroidery thread, if needed for the facial details
- Stitch marker, optional
Lily® Sugar’n Cream is commonly used for practical kitchen projects because it has a firm cotton texture and is washable. Keep your tension even so the dishcloth lies flat. If you use another yarn, choose a similar cotton yarn when possible; changing the fiber, weight, or hook size may alter the finished size and absorbency.
Step-by-step instructions
Abbreviations
- ch: chain
- sc: single crochet
- sc2tog: single crochet two together, a decrease
Crochet the green base
- With Hot Green, chain 36.
- For the first row, work 1 single crochet in the second chain from the hook. Work 1 single crochet in each remaining chain to the end. Turn.
- For the second row, chain 1. Work 1 single crochet in each single crochet across. Turn.
- Repeat the second row 10 more times.
- Join Black at the end of the last green row. Secure the color change neatly so the edge remains tidy.
Shape the black hat section
- Begin the hat shaping with Black. Chain 1.
- Draw up a loop in each of the next 2 stitches, then complete a single crochet two together. Continue working 1 single crochet in each stitch across until the last 2 single crochets.
- Work a single crochet two together over the final 2 stitches. Turn.
- Repeat the shaping row until 25 stitches remain.
Finish the face and assembly
- Continue shaping and finish the remaining upper section according to the original pattern layout.
- Embroider the mouth and eyes.
- Sew on the nose as shown in the pattern design.
- Weave in all loose ends securely on the wrong side of the dishcloth.
The supplied instructions do not include the remaining stitch-by-stitch shaping details or a separate nose pattern, so use the original pattern image or layout for those final shaping and assembly steps. Avoid guessing the missing decreases if an exact matching shape is important.
Ways to use your finished project
- Display it in the kitchen throughout October.
- Use it as a decorative cloth beneath a Halloween centerpiece.
- Give it as a small handmade hostess gift.
- Pair it with coordinating black, orange, or green kitchen accessories.
- Make several for a seasonal craft-fair collection.
- Use it as a festive cloth for wiping counters or handling light kitchen cleanup.
Because the design includes embroidered facial details, reserve it for ordinary household use rather than placing it near high heat or using it as an oven mitt.
Washing and maintenance
Lily® Sugar’n Cream cotton is generally washable, but always check the yarn label for the exact care instructions.
- Wash gently in cool or warm water.
- Use similar colors, especially during the first few washes, because strong black and bright green may release excess dye.
- Avoid harsh bleach, which can damage the color and weaken the fibers.
- Reshape the dishcloth while damp if the edges look uneven.
- Lay it flat or hang it carefully to dry according to the yarn-label instructions.
- Do not stretch the fabric aggressively.
- Store it completely dry in a clean, well-ventilated place.
- If the embroidered features loosen, reinforce them from the wrong side with a yarn needle.
Helpful crochet tips
- Count the stitches at the end of the foundation row and each straight row to avoid accidental increases.
- Place a stitch marker in the first or last stitch if you tend to miss edge stitches.
- Keep the turning chain consistent. It helps maintain straight sides.
- When changing from Hot Green to Black, avoid pulling the new yarn too tightly.
- Check that each decrease is worked over the intended stitches. Missing one edge decrease will make the hat shape uneven.
- Lay the project flat occasionally to check that it is not widening or curling.
- Use a yarn needle to weave in ends securely rather than leaving short tails that can work loose.
- Embroider the eyes and mouth after the crochet has been flattened so the face stays centered.
- Sew the nose on firmly, but do not pull so tightly that the fabric puckers.
Customize your project
- Replace Hot Green with orange, purple, white, or another Halloween color.
- Use a different dark shade for the hat, such as charcoal, navy, or deep purple.
- Add a narrow contrasting border around the finished dishcloth if the original shape allows it.
- Change the embroidered expression to create a friendly, spooky, or surprised witch.
- Make a coordinating set in several seasonal color combinations.
- Add a small embroidered star or moon detail to the hat.
- Adjust the size by starting with a longer or shorter foundation chain and adding or removing straight rows. This will change the yarn requirement and may require adjusting the shaping so the top remains balanced.
- Use a different yarn weight only with care. A thicker yarn will create a larger, heavier cloth, while a thinner yarn will make a smaller and possibly less absorbent piece.
Frequently asked questions
Is this Witch Dishcloth pattern beginner-friendly?
Yes. The main body uses chain stitches and single crochet, making it suitable for beginners who are comfortable working in rows. The black shaping and embroidered face add a little more practice.
What yarn works best for this crochet dishcloth?
A sturdy cotton yarn such as Lily® Sugar’n Cream is a practical choice. Cotton is durable and suitable for kitchen cloths. Follow the yarn label if you choose another fiber.
Can I use a different crochet hook size?
You can, but the finished size and fabric density will change. A larger hook may create a looser, larger cloth, while a smaller hook may produce a tighter, smaller fabric. Make sure the stitches remain comfortable to work and the cloth lies reasonably flat.
How much yarn do I need?
The supplied pattern information does not state an exact yardage. Have Hot Green and Black available in sufficient amounts, allowing extra yarn for color changes, embroidery, sewing on the nose, and weaving in ends.
How can I make the dishcloth larger or smaller?
Adjust the starting chain for the width and add or remove straight rows for the height. The hat shaping will also need to be adapted so the decreases remain balanced and the top fits the new dimensions.
Why is my dishcloth curling?
Curling can result from tight tension, uneven edge stitches, or pulling too firmly during color changes. Check your stitch count, relax your grip, and gently reshape the finished piece while damp.
How do I keep the edges even?
Work the first and last stitch of every row carefully, and count across the row before turning. A stitch marker can help identify the edge stitches, especially in single crochet.
How should I wash the finished project?
Follow the care instructions on the yarn label. Gentle washing in cool or warm water, careful reshaping, and thorough drying are sensible choices for a cotton dishcloth with embroidered details.
Can I sell finished Witch Dishcloths made from this pattern?
The supplied information does not state the designer’s rules for selling finished items. Check the original pattern’s usage terms before listing or selling completed dishcloths.
Print
Witch Dishcloth
Description
This Witch Dishcloth is a fun Halloween crochet project featuring a bright green base, a black hat shape, and embroidered facial details. It’s a great beginner-friendly project that combines crafting with seasonal decoration or gifting.
Materials
- Lily® Sugar’n Cream yarn in Hot Green
- Lily® Sugar’n Cream yarn in Black
- Crochet hook, 5 mm
- Yarn needle for weaving in ends and sewing on the nose
- Scissors
- Black and contrasting embroidery thread, if needed for the facial details
- Stitch marker, optional
Instructions
- With Hot Green, chain 36.
- For the first row, work 1 single crochet in the second chain from the hook. Work 1 single crochet in each remaining chain to the end. Turn.
- For the second row, chain 1. Work 1 single crochet in each single crochet across. Turn.
- Repeat the second row 10 more times.
- Join Black at the end of the last green row. Secure the color change neatly so the edge remains tidy.
- Begin the hat shaping with Black. Chain 1.
- Draw up a loop in each of the next 2 stitches, then complete a single crochet two together.
- Continue working 1 single crochet in each stitch across until the last 2 single crochets.
- Work a single crochet two together over the final 2 stitches. Turn.
- Repeat the shaping row until 25 stitches remain.
- Continue shaping and finish the remaining upper section according to the original pattern layout.
- Embroider the mouth and eyes.
- Sew on the nose as shown in the pattern design.
- Weave in all loose ends securely on the wrong side of the dishcloth.
Notes
The supplied instructions do not include the remaining stitch-by-stitch shaping details or a separate nose pattern, so use the original pattern image or layout for those final shaping and assembly steps.