

The late afternoon light has a soft way of finding a skein of yarn, especially when it rests beside a quiet chair. You feel the small pull of the hook through each loop, and the fabric gathers gently in your palm. This Crochet Mini Pouch Tutorial – Old Library grew from that kind of afternoon, with a warm brown yarn, a simple stitch rhythm, and enough structure to hold a few small treasures. It is a small project, but it gives your hands somewhere peaceful to go while coffee cools on the table or rain taps against the windows.
Why Crochet Mini Pouch Tutorial – Old Library Is So Soothing to Crochet
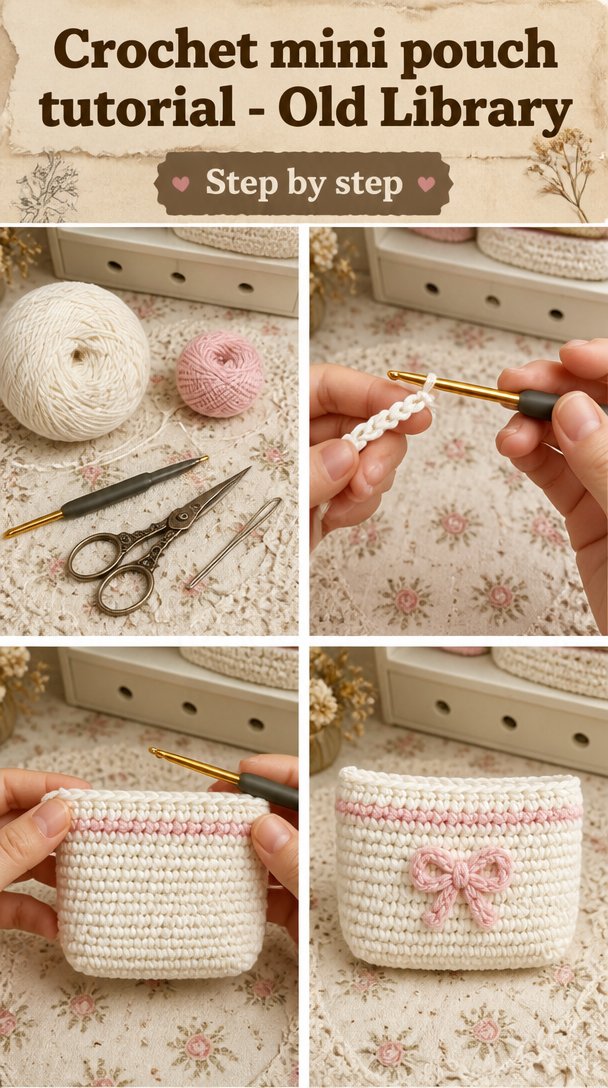
This pouch has a steady rhythm that feels easy to return to. You work a flat base first, then continue around the sides without turning the fabric back and forth. The piece starts out a little floppy, and then the walls begin to rise. By the time you reach the final rounds, it has enough shape to sit quietly in your hand.
I made mine during a rainy evening on the couch. The first rows curled until the base grew wide enough to settle, and my hands warmed up after about ten minutes. That small change mattered. I stopped watching the clock and began listening for the quiet click of the hook against the wooden arm of the chair.
The pouch uses double crochet, a taller stitch that builds fabric quickly while leaving a gentle, flexible texture. You can make one while sitting on the front porch in summer, beside a mug of coffee on a Sunday morning, or during the long fall evenings when the yarn basket stays within reach.
Small projects also offer a kind kind of attention. You can see nearly every decision as it happens, and a missed stitch does not hide inside a large blanket. If something looks wrong, you can pull back a round, smooth the yarn, and begin again without losing an entire afternoon.
How Crochet Mini Pouch Tutorial – Old Library Comes Together
The pouch begins with a foundation chain, which is the first line of connected loops. You join that chain into a ring, crochet around both sides of it for the base, and then build upward in rounds. A round means you work all the way around the piece before starting again at the beginning.
The main stitch is double crochet, abbreviated dc. A double crochet gives the pouch height without making the fabric too dense, so the finished piece feels soft but still holds its shape. The base uses increases, which means you work two stitches into one stitch to make the circle grow flat instead of pulling inward.
This pattern uses US crochet terms. UK readers often find these posts too, and the same word can mean a different stitch there, so check your usual terminology before beginning. Here, double crochet means the US stitch made with one yarn over, not the UK treble crochet.
The pattern suits a confident beginner and gives an intermediate crocheter a restful little project. Allow about two to three evenings, or roughly four to six hours, depending on your pace and whether you add a lining or decorative button. The only fiddly part comes when you join the base and begin the first side round, because the edge may twist until you place a few stitches.
Pattern at a Glance
Keep this little outline nearby while you work.
- Skill level: confident beginner
- Finished size: about 5 inches wide by 6 inches tall (13 cm wide by 15 cm tall)
- Gauge: 14 double crochet and 8 rows measure 4 inches (10 cm)
- Yarn: worsted weight (weight 4, medium), 210 yards total, about 1.25 skeins or 210 g
- Hook: H-8 (5.0 mm), with half a size up or down fine depending on your tension
- Other supplies: yarn needle, scissors, tape measure, stitch marker, and one 0.75-inch wooden button
- Stitch multiple: base begins with 24 chains; side rounds contain 48 stitches
- Estimated time: four to six hours over two to three evenings
Materials for Crochet Mini Pouch Tutorial – Old Library
- 210 yards of worsted weight yarn (weight 4, medium), preferably cotton or a cotton-acrylic blend, about 1.25 skeins or 210 g total. A skein with about 170 yards per 100 g is a useful guide. A worsted cotton example is Lily Sugar’n Cream, while a smooth acrylic example is I Love This Yarn.
- H-8 (5.0 mm) crochet hook. A half size up or down is fine depending on your tension, though the finished width may change slightly.
- Yarn needle with a large eye for weaving in the ends.
- Sharp scissors.
- One stitch marker, optional but helpful for marking the first stitch of each round.
- Tape measure for checking the gauge and finished size.
- One 0.75-inch wooden button, or a button you already have that can be swapped in.
- A small scrap of matching yarn for sewing on the button.
Gauge is 14 double crochet and 8 rows measuring 4 inches (10 cm). A gauge swatch takes about twenty minutes, and that small pause can save you from making a pouch that feels too loose or too narrow. Work a square in double crochet, measure across the center rather than the edge, and adjust your hook if needed.
You can substitute another smooth worsted weight yarn, including an easy-care acrylic or a cotton blend. Cotton gives the pouch a firmer hand and suits frequent handling, while acrylic keeps it light and washable. Avoid a very fuzzy yarn for this design because the stitch definition disappears, and remember that acrylic can melt under a hot iron.
Step by Step
- Difficulty and stitch multiple. This is a confident beginner pattern. The base begins with 24 chains, and the side rounds settle at 48 stitches. The finished pouch measures about 5 inches wide by 6 inches tall (13 cm wide by 15 cm tall).
- Make the foundation chain. With your H-8 (5.0 mm) hook, chain 24. A chain, abbreviated ch, is made by drawing a loop of yarn through the loop already on your hook. Keep these chains relaxed. If the foundation chain pulls tight, go up one hook size just for the chain, then return to H-8 for the stitches.
- Work around the chain. Skip the first 3 chains from the hook, then work 1 double crochet into each of the next 20 chains. A double crochet, abbreviated dc, begins with one yarn over, then you insert the hook, yarn over and pull up a loop, yarn over and pull through two loops, and yarn over and pull through the last two loops. Work 5 dc into the last chain, then turn the chain so you can work into the unused loops on the opposite side. Work 1 dc into each of the next 20 unused loops, then work 4 dc into the final unused loop. You now have 50 stitches around the base because the beginning turning chain counts as one stitch on this round. Place a stitch marker in the first dc if that helps you see the round.
- Join the base. Join with a slip stitch, abbreviated sl st, into the top of the beginning turning chain. A slip stitch moves the yarn without adding height: insert the hook, yarn over, and pull that loop through every loop on the hook. The base may look slightly oval, which is correct. Count the edge carefully before you continue.
- Work the first side round. Chain 2 for the turning chain, then work 1 dc in each stitch around. The turning chain does not count as a stitch in this round. Join with a sl st to the first dc. You have 50 dc. The fabric will begin to cup at the edges, and the yarn should slide steadily through your fingers without a hard tug.
- Build the pouch walls. Chain 2, then work 1 dc in each stitch around. Join with a sl st to the first dc. Repeat this round 7 more times, for 8 side rounds total. Each completed side round contains 50 dc. The pouch should measure close to 5 inches tall (13 cm) from the base to the top edge.
- Check for a missed stitch. If your count is 49 or 51, look first at the join and the two stitches beside it. A missed stitch often leaves a small V-shaped gap along the top edge. If you spot the mistake several stitches back, pull out the round calmly by easing the hook free and tugging the working yarn one loop at a time. It is much easier to correct now than after adding the button.
- Shape the top edge. For the final round, chain 1, then work 1 single crochet in each stitch around. A single crochet, abbreviated sc, is a shorter stitch made by inserting the hook, yarning over, pulling up a loop, then yarning over and pulling through both loops. Join with a sl st to the first sc. You have 50 sc. This lower edge gives the pouch a neat finish and keeps the opening from feeling too loose.
- Make the button loop. Slip stitch across the next 20 stitches until you reach the center back of the pouch. Chain 12, then skip the next 10 stitches and slip stitch into the following stitch to form a loop. Continue with sc around the remaining stitches, joining with a sl st when you reach the start of the loop. Fasten off. The loop may look narrow at first, but it will relax slightly after you sew in the ends.
- Weave in the ends. Cut the yarn, leaving a 6-inch tail, and pull it through the final loop. Thread the tail onto your yarn needle and weave it back and forth through the wrong side of the fabric, changing direction once or twice. Weave in the foundation tail as well. Trim only after the yarn feels secure.
- Sew on the button. Place the button on the front of the pouch, directly below the loop. Use the scrap yarn and your yarn needle to sew through the button holes several times, then secure the thread on the wrong side. Test the loop before trimming the sewing tail.
- Block if needed. Blocking means gently shaping the finished crochet and allowing it to dry in that shape. Lightly dampen the pouch, smooth the base and sides, and let it dry flat. If you use acrylic, block cold or use steam from a distance without touching the yarn with a hot iron, since acrylic can melt and flatten under direct heat.
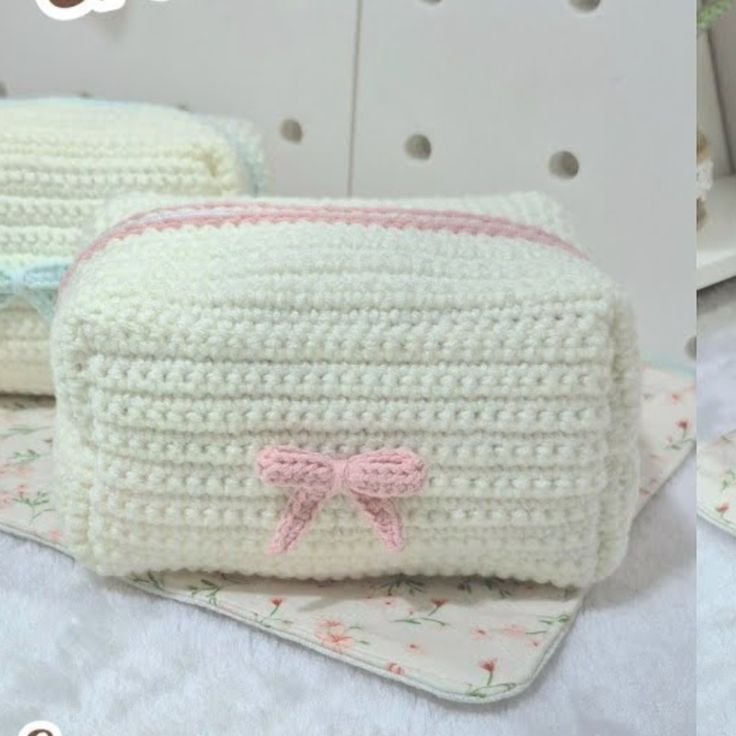
Where This Piece Finds Its Place
The finished pouch works well wherever small things tend to gather. Keep stitch markers and a tape measure inside your project basket, tuck lip balm and keys into it near the front door, or use it to hold earbuds in the side pocket of your bag.
On the living room couch, it can sit beside the armchair with a few sewing notions inside. In summer, the pouch feels at home on a porch table with sunglasses and a folded note. During cool fall evenings, it can hold the small tools for your next crochet project without adding much weight to the basket.
It also makes a thoughtful small gift. Fill it with tea sachets, a favorite hand cream, or a gift card for a friend who enjoys quiet mornings. For a holiday gift, choose a deep green, rust, or cream yarn and sew on a simple wooden button.
If you sell finished items, my policy is simple: I sell only pieces I made myself, and I credit the pattern source when the designer asks for it.
Caring for Crochet Mini Pouch Tutorial – Old Library
Care depends on the fiber you choose. For a cotton or cotton-acrylic blend, hand wash or use a gentle machine cycle with cold or warm water. Place the pouch in a mesh bag if you wash it with other items, and use a mild detergent rather than bleach.
Reshape the pouch and dry it flat. Do not hang it wet, because the weight of the water can stretch the side walls and pull the button loop out of place. If the pouch needs blocking after washing, smooth it into shape while damp and let it dry completely before storing.
Fold the pouch rather than hanging it, and keep it somewhere breathable. A drawer or basket works better than a sealed plastic bag, especially if the yarn contains wool. For wool, add cedar or lavender nearby for moth protection, but keep scented materials from pressing directly against the crochet.
Store leftover yarn with its label so you have the fiber content, care instructions, and dye lot if you later need more. Untreated wool can felt in warm water or a washing machine, while superwash wool tolerates machine washing more easily. If you use either wool option, follow the label before choosing the cycle.
Small Ways to Make It Your Own
You can keep the pattern exactly as written, or let a small change shift the feel of the pouch. These are invitations rather than rules, and each one gives you a different kind of finished fabric.
- Try a thicker worsted weight yarn or a bulky yarn with a larger hook for a roomier pouch. The fabric will grow in both width and height, and the thicker yarn will give it a heavier, more substantial drape. A thinner yarn with a smaller hook creates a smaller pouch with a finer texture.
- Use two colors for a simple color-blocked design. Work the base and the first four side rounds in one shade, then change colors at the join for the remaining rounds. Keep the yarn tails tidy by weaving them in as soon as each color change appears.
- Swap the double crochet for single crochet if you want a denser fabric. The pouch will feel sturdier and less flexible, but it will take longer because single crochet builds height more slowly. You may need additional rounds to reach 6 inches tall (15 cm).
- Resize the base by adjusting the starting chain in multiples that preserve the oval shape. Add or remove 4 chains, then adjust the end groups so the two rounded ends grow evenly. Check your stitch count before beginning the side rounds.
- Add a simple border in a contrasting color. One round of single crochet around the top edge gives the opening a crisp outline, while a round of slip stitches creates a flatter, quieter finish.
- Change the button to suit the recipient. A wooden button feels natural and understated, while a bright ceramic button can turn the pouch into a small birthday or holiday gift.
Frequently Asked Questions About Crochet Mini Pouch Tutorial – Old Library
Can I use a different hook size for the pouch?
Yes, you can use a different hook size, but it will change the fabric and finished measurements. A smaller hook creates a denser pouch and may make the opening feel tighter, while a larger hook creates a looser fabric and a slightly larger piece. Make a gauge swatch first, especially if you want the finished size to stay near 5 by 6 inches.
What yarn can I substitute for the recommended worsted weight?
You can substitute any smooth worsted weight yarn with a similar yardage, such as cotton, acrylic, or a cotton-acrylic blend. Cotton gives the pouch more structure, while acrylic makes it light and easy to wash. Avoid fuzzy or highly split yarn for your first try because it can hide the stitch tops and make counting harder.
What should I do if I find a mistake several rows later?
Pull back only as far as the mistake, even if that means removing several rounds. Insert a spare hook or stitch marker through the active loop before you unravel, then ease the yarn out slowly. Check the stitch count at the end of the corrected round. A calm repair usually takes less time than trying to disguise a missing stitch.
Is this mini pouch suitable for a beginner?
Yes, this project suits a confident beginner who knows how to chain, work a double crochet, join rounds, and weave in ends. The oval base and button loop offer a little practice without making the project overwhelming. If joining rounds feels new, place a stitch marker in the first stitch so the beginning stays visible.
How long does the crochet pouch take to make?
Plan on four to six hours, usually spread over two or three evenings. Your pace, yarn thickness, and comfort with double crochet will make the biggest difference. The base takes the most attention because you count the increases, while the side rounds settle into a simple repeated rhythm.
Does this pattern use US or UK crochet terms?
This pattern uses US crochet terms. The main stitch is US double crochet, abbreviated dc, which is called treble crochet in UK terminology. The other abbreviations here are chain, slip stitch, single crochet, and stitch counts written in the US system, so check a conversion chart if you normally follow UK patterns.
Take the Time You Need
Let the pouch grow at the pace your hands choose. Some rounds will feel smooth, and one may ask you to pause, count, and pull back a little. That belongs to the making too. Settle into the small movement of yarn through loop, let the piece rest in your palm, and trust that a quiet project can still become something useful and lovely.
—META—
SEO Title: Crochet Mini Pouch Tutorial – Old Library
Meta Description: Make a calm Crochet Mini Pouch Tutorial with clear US terms, worsted yarn, and a simple button loop for a useful handmade pouch.
Slug: crochet-mini-pouch-tutorial-old-library
Category: Crochet
Tags: crochet pouch, mini crochet project, slow crochet, crochet tutorial, handmade gift
Image Alt Text: A worsted weight crochet pouch beside a wooden button and yarn
A crochet base and double crochet side rounds shown on a work table
Finished crochet mini pouch with a button loop and small supplies
Pinterest Title: Crochet Mini Pouch Tutorial
Pinterest Description: Make a small crochet pouch with a steady double crochet rhythm and a simple button loop. A peaceful project for slow evenings and useful handmade gifts.

Crochet Mini Pouch Tutorial – Old Library
- Total Time: 270 minutes
Description
This pouch uses double crochet to create a soft but structured fabric, perfect for holding small treasures.
Materials
- 210 yards worsted weight yarn (weight 4, medium), preferably cotton or a cotton-acrylic blend, about 1.25 skeins or 210 g total.
- H-8 (5.0 mm) crochet hook
- yarn needle with a large eye for weaving in the ends
- sharp scissors
- one stitch marker, optional
- tape measure for checking the gauge and finished size
- one 0.75-inch wooden button
- small scrap of matching yarn for sewing on the button
Instructions
- Make the foundation chain. With your H-8 (5.0 mm) hook, chain 24.
- Work around the chain. Skip the first 3 chains from the hook, then work 1 double crochet into each of the next 20 chains. Work 5 dc into the last chain, then turn the chain so you can work into the unused loops on the opposite side. Work 1 dc into each of the next 20 unused loops, then work 4 dc into the final unused loop.
- Join the base. Join with a slip stitch into the top of the beginning turning chain.
- Work the first side round. Chain 2 for the turning chain, then work 1 dc in each stitch around. Join with a sl st to the first dc.
- Build the pouch walls. Chain 2, then work 1 dc in each stitch around. Join with a sl st to the first dc. Repeat this round 7 more times, for 8 side rounds total.
- Shape the top edge. For the final round, chain 1, then work 1 single crochet in each stitch around. Join with a sl st to the first sc.
- Make the button loop. Slip stitch across the next 20 stitches until you reach the center back of the pouch. Chain 12, then skip the next 10 stitches and slip stitch into the following stitch to form a loop.
- Weave in the ends. Cut the yarn, leaving a 6-inch tail, and pull it through the final loop. Thread the tail onto your yarn needle and weave it back and forth through the wrong side of the fabric.
- Sew on the button. Place the button on the front of the pouch, directly below the loop, and secure the thread on the wrong side.
- Block if needed. Lightly dampen the pouch, smooth the base and sides, and let it dry flat.
Notes
A gauge swatch takes about twenty minutes. Check your stitch count before beginning the side rounds. The loop may look narrow at first, but it will relax slightly after you sew in the ends.
- Preparation Time: 30 minutes
- Active Time: 240 minutes