

The yarn has a soft, steady pull as it moves through your fingers, and the little fabric panel rests lightly across your palm. A phone slips into the finished Handmade Crochet Phone Cover with a satisfying, gentle snugness, the stitches giving just enough to make room without feeling loose. I made mine beside a mug of coffee on a quiet afternoon, when the light had turned honey-colored and the first rows still curled at the edges. A few simple rows later, the fabric settled into itself. This is a small project, but it gives your hands a pleasant place to go.
Why Handmade Crochet Phone Cover Is So Soothing to Crochet
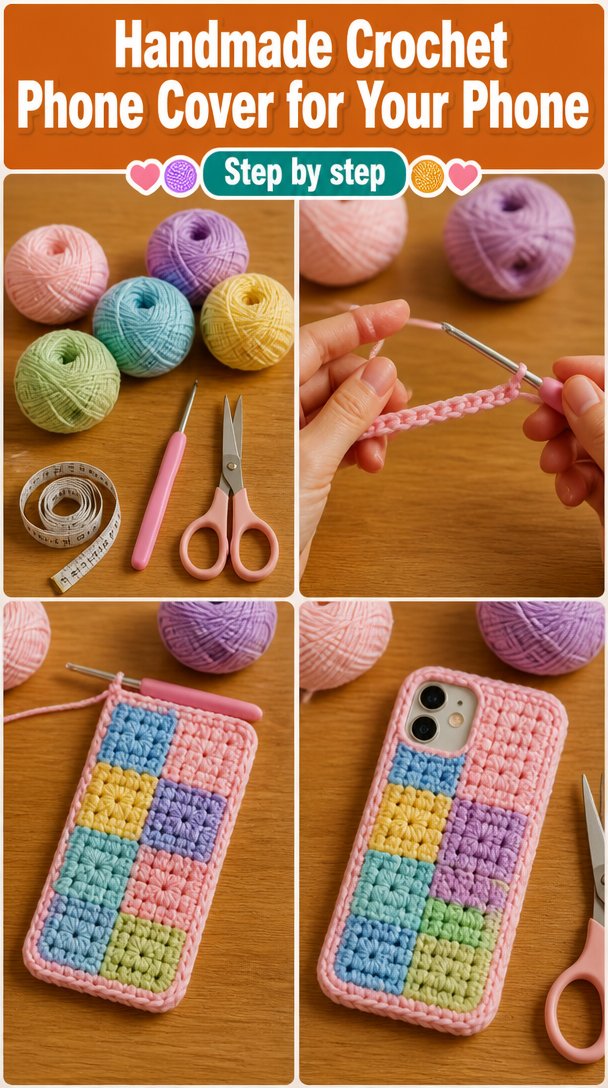
A small phone cover has a comforting kind of rhythm. You do not need a large table, a long uninterrupted evening, or a basket full of special tools. The yarn, hook, and growing rectangle can sit beside you on the couch while a rainy evening moves quietly past the windows.
The main fabric uses double crochet, a tall stitch made by wrapping the yarn over the hook, inserting the hook into the stitch, and working the loops off in stages. Double crochet grows quickly, so you can see the cover take shape without waiting through dozens of tiny rows. Its small spaces also give the fabric a soft, flexible texture.
I like projects that show a little progress each time I pick them up. After the first ten minutes, my hands usually feel warmer and the hook begins its quiet click against the stitches. The first rows may curl, especially if your foundation chain is firm, but the piece relaxes as it grows heavier.
This cover also gives you useful practice without making you commit to a large blanket. You can learn to read the top loops, count the end of a row, and recognize what a missed stitch looks like. If you need to pull back a few stitches, the small size keeps the correction manageable.
It works well for slow days at home. Keep the project in a basket beside your armchair, carry it to the porch in summer, or work a few rows during a quiet Sunday morning. The finished cover adds a handmade touch to the coffee table without asking for much space.
How Handmade Crochet Phone Cover Comes Together
This cover begins with a foundation chain, which is the first line of chain stitches that sets the width. You will work double crochet stitches back and forth in rows, then fold the rectangle and sew the sides together. A simple single crochet border gives the opening a neat edge.
The pattern uses US crochet terms. UK readers often find these posts too, and the same word can describe a different stitch there, so this note matters: the double crochet in this pattern is the taller US stitch, not the shorter UK double crochet.
The stitch repeat stays simple. After the foundation chain, each row holds 24 double crochet stitches. The finished piece measures about 4 inches wide by 6.5 inches tall (10 cm by 16.5 cm), which suits many standard phones, though you should compare the measurements with your own phone and case before sewing the sides.
Plan on two to three evenings, or about three to four hours of relaxed crochet time. The sewing and border take a little more attention than the rows, but nothing feels complicated once you identify the front and back of the rectangle. Beginners can work this pattern steadily, while experienced crocheters may enjoy it as a quiet project between larger pieces.
Pattern at a Glance
Here are the details to keep beside you while you work.
- Skill level: Easy beginner
- Finished size: 4 inches wide by 6.5 inches tall (10 cm by 16.5 cm)
- Gauge: 14 double crochet and 8 rows measure 4 inches (10 cm)
- Yarn: Worsted weight (weight 4, medium), about 110 yards total, or about 65 g
- Hook size: H-8 (5.0 mm)
- Other supplies: Yarn needle, scissors, tape measure, and one stitch marker
- Stitch multiple: Any multiple of 2 stitches, with 2 extra chains for the turning chain
- Estimated time: About three to four hours over two to three evenings
Materials for Handmade Crochet Phone Cover
- Worsted weight yarn (weight 4, medium), cotton or acrylic, about 110 yards total, or about 65 g. A skein with about 170 yards per 100 g is more than enough.
- H-8 (5.0 mm) crochet hook. A half size up or down is fine depending on your tension.
- Yarn needle for sewing the sides and weaving in the ends.
- Small scissors for trimming yarn tails.
- Tape measure for checking the gauge and finished size.
- One stitch marker, optional, for marking the first stitch of the border.
I used a smooth worsted weight cotton for my sample because cotton gives the cover a little body and handles regular handling well. Lily Sugar’n Cream is one easy-to-find example of worsted weight cotton, although any yarn that matches the weight and gauge can work. Cotton also suits a phone cover because it does not become overly slippery in your hand.
You can use worsted weight acrylic instead if you prefer a lighter feel or already have it in your yarn basket. Red Heart is one example of a widely available acrylic yarn type. Acrylic keeps the project affordable and washable, but remember that acrylic can melt under a hot iron, so use cool blocking or steam from a distance rather than pressing the iron onto the fabric.
The gauge swatch is worth twenty minutes here. Make a small swatch with 14 double crochet and 8 rows, then measure the middle rather than the curling edge. If your fabric has more stitches in 4 inches, your tension is tighter and you may need the larger hook. If you have fewer stitches, your tension is looser and the smaller hook may help.
For a safe substitution, choose another worsted weight yarn with a similar yardage and make the gauge swatch before beginning. A thinner yarn will make a smaller, lighter cover, while a thicker yarn will make a larger and denser one. Do not rely on the label alone, because fiber, twist, and personal tension all change the fabric.
Step by Step
- Difficulty and repeat: This is an easy beginner project. The stitch multiple is any multiple of 2 stitches, with 2 extra chains for the turning chain. For this cover, chain 26 to create a starting foundation chain of 24 working chains plus 2 turning chains.
- To make a chain, or ch, yarn over and pull the yarn through the loop on your hook. Keep the chain relaxed rather than tugging it tight. A tight foundation chain can pull the bottom edge inward, so go up to I-9 (5.5 mm) for the chain only if needed.
- For Row 1, work one double crochet, or dc, in the third chain from the hook. The two skipped chains count as the first double crochet. Continue with one double crochet in each remaining chain across. You will have 24 double crochet stitches.
- Turn your work. A turning chain gives the next row enough height, so chain 2. The turning chain counts as the first double crochet in this pattern. Work one double crochet in each stitch across, placing the final double crochet into the top of the previous row’s turning chain. You will still have 24 double crochet stitches.
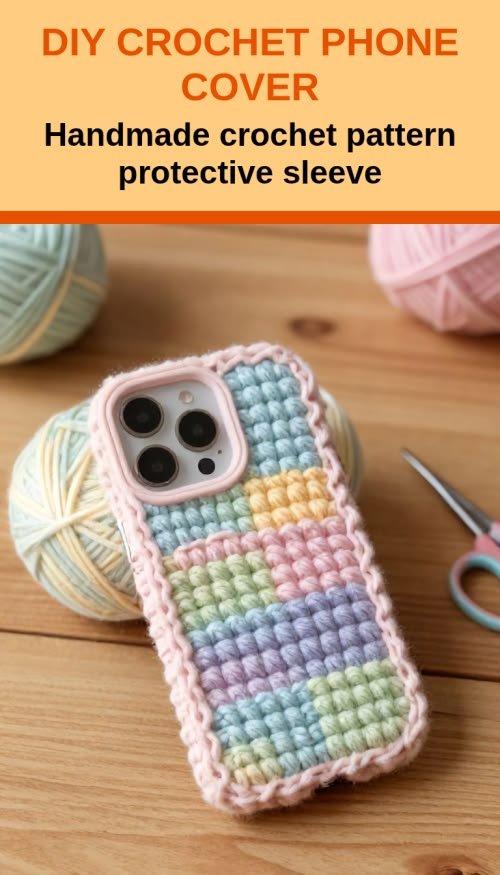
- Repeat Row 2 until you have 13 rows total. Each row has 24 double crochet stitches, and the rectangle should measure close to 4 inches wide by 6.5 inches tall (10 cm by 16.5 cm). Let the fabric rest flat for a moment before measuring, because the stitches may relax after you remove your hands.
- As you work, check the last stitch of every row. The top of a double crochet row looks like a small line of V shapes, and the final turning chain can look slightly different from the other stitches. If the edge slopes inward, you may have missed that last stitch.
- If a mistake appears, pause before pulling hard. Count backward from the edge and compare the row to the one below it. Slip the hook out, gently pull the yarn back one stitch at a time, and place the hook into the live loop again. I have pulled back a whole round because one stitch disappeared near the edge, and the fabric always looked better for taking those few quiet minutes.
- When Row 13 is complete, fasten off by cutting the yarn with a tail about 18 inches long. Pull the cut end through the final loop and tighten it gently. Keep this tail for sewing one side if you like, or weave it in later with the yarn needle.
- Fold the rectangle so the shorter edges meet and the right side faces inward. The right side, or RS, is the side you want to show on the outside. The wrong side, or WS, is the inside-facing side while you sew.
- Thread the yarn needle with a long yarn tail. Sew the two side seams using a whip stitch or mattress stitch, working through the matching edge stitches. Keep the bottom edges even, and leave the top open. Do not sew across the opening.
- Turn the cover right side out and check the fit with your phone nearby, without forcing the phone into a tight opening. If the cover feels too snug, you can loosen the side seams and resew them with a smaller seam allowance. The fabric should hold the phone gently rather than squeeze it.
- For the top border, attach yarn at one side seam. Make one single crochet, or sc, in each stitch around the opening. A single crochet is a shorter stitch made by inserting the hook, yarning over, pulling up a loop, and yarning over once more to pull through both loops.
- Join the border with a slip stitch, or sl st, into the first single crochet. A slip stitch moves the yarn without adding height. Fasten off, cut a 6-inch tail, and pull it through the loop.
- Use the yarn needle to weave in all the ends. Weave each tail through several stitches on the inside, change direction once, and trim the extra yarn. This is called weaving in the ends, and it keeps the seams from loosening during regular use.
- If you used cotton, lightly block the cover by dampening it, shaping it flat to the finished measurements, and allowing it to dry completely. Blocking means gently shaping the fabric while it dries. Acrylic can be shaped with cool water and a flat towel, but do not press a hot iron against it.
Where Handmade Crochet Phone Cover Finds Its Place
The finished cover works well when you want your phone protected from rubbing against keys, pens, or the loose change that gathers at the bottom of a tote. It also gives you a small handle on the phone, making it easier to spot in a deep basket or beside the armchair.
I keep a cover near the living room couch, where my phone tends to disappear under a book or a folded blanket. The textured stitches make it easier to find by touch, and the cotton fabric feels pleasant on a cool evening when the windows are cracked open.
For a simple gift, make one in a color that matches a friend’s favorite mug or winter scarf. Slip in a handwritten note and pair it with a small notebook for a birthday, a holiday stocking, or a thoughtful thank-you. If you make one for a child, avoid buttons, beads, and other small parts, and remember that small parts and long loose stitches are unsafe for children under three.
Check the fit before gifting. Phone sizes vary, and some protective cases add a surprising amount of width. A cover for a phone with a thick case may need two or four extra stitches at the foundation chain, keeping the stitch multiple of 2.
Caring for Handmade Crochet Phone Cover
Care depends on the fiber you choose. For cotton, hand wash or use a gentle machine cycle with cold or warm water and a mild detergent. Place the cover in a mesh bag if you machine wash it, then reshape it and dry it flat.
Do not hang the cover while it is wet. The water weight can stretch the side seams and make the opening lose its shape. Lay it on a clean towel, smooth the edges, and let it dry fully before using it again.
For acrylic, use cold or warm water on a gentle cycle and dry flat or tumble dry on low if the yarn label allows it. Keep acrylic away from a hot iron because heat can melt or flatten the fibers. Cool steam from a distance may help with shaping, but a damp towel and careful hand shaping are safer.
If you choose untreated wool, hand wash it in cool water and avoid rubbing, twisting, or sudden temperature changes because untreated wool can felt. Superwash wool tolerates machine washing better, but follow the yarn label and still dry the cover flat to keep its shape.
Store the cover folded rather than hung, somewhere breathable and away from strong sunlight. If you use wool, cedar or lavender sachets can help discourage moths, but keep them beside the project rather than touching it directly. Save leftover yarn with its label so you have the dye lot if you need to repair or remake the cover later.
Small Ways to Make Handmade Crochet Phone Cover Your Own
Try a thicker worsted weight yarn if you want a sturdier cover with a little more padding. The finished size may grow, so measure the rectangle against your phone before sewing the side seams. A thinner yarn will create a lighter cover with more drape, but it may not protect the phone from bumps as well.
Color changes can stay simple. Work the first six rows in one shade and the next seven in another for a quiet color-blocked design. To avoid a bulky seam, change colors at the final yarn over of the last stitch in the old color, then weave in the tails carefully on the inside.
If you prefer a denser fabric, replace the double crochet rows with single crochet rows. The cover will take longer to grow and feel firmer, with smaller spaces between stitches. Make a gauge swatch first because the finished width and height will change.
Resize the cover by changing the foundation chain while keeping the stitch multiple of 2 and adding 2 turning chains. Add or subtract rows to adjust the height. Measure frequently instead of relying only on the stitch count, especially when you use a different phone case.
A simple border can change the whole finish. Work two rounds of single crochet for a firmer opening, or use a contrasting color for the final round. You could also make a matching pair in two colors and give one to a friend, keeping the second in your own project basket.
Frequently Asked Questions About Handmade Crochet Phone Cover
Can I use a different hook size for the Handmade Crochet Phone Cover?
Yes, you can use a different hook size if your gauge or yarn calls for it. The pattern lists H-8 (5.0 mm), but a half size up or down may suit your tension. A smaller hook creates denser fabric, while a larger hook creates a softer, more open cover. Always measure the phone and swatch before sewing.
What yarn can I substitute for the Handmade Crochet Phone Cover?
Choose another worsted weight yarn, which is weight 4, medium, and aim for about 170 yards per 100 g skein. Cotton gives a firm, washable fabric, while acrylic feels lighter and often costs less. Wool can work, but follow its washing needs carefully. Make the gauge swatch before beginning so the cover fits your phone.
What should I do if I find a mistake several rows later?
First, decide whether the mistake affects the fit or only one small stitch. If the edge slopes or the count changes, pull back calmly to the row where the problem began. Insert the hook into the live loop, unravel one stitch at a time, and recount 24 double crochet stitches before moving on.
Is this Handmade Crochet Phone Cover suitable for a beginner?
Yes, this project suits a beginner who knows how to make a chain and basic double crochet. The rows repeat, and the finished piece stays small enough to correct without a large time loss. The fiddliest parts are identifying the final stitch and sewing the side seams evenly, but both become easier with slow counting.
How long does this crochet phone cover take to make?
Allow about three to four hours of relaxed crochet time, usually spread over two to three evenings. Your time may vary with tension, interruptions, and how quickly you sew the seams. The crochet rows work up fairly quickly, while checking the fit, adding the border, and weaving in the ends take a little extra care.
Does this pattern use US or UK crochet terms?
This pattern uses US crochet terms. That means the double crochet is the taller US stitch, and single crochet is the short basic stitch. UK patterns use the same names differently, so compare the abbreviations and stitch explanations if you normally crochet from UK instructions.
Take the Time You Need
Let the cover grow at the pace your hands choose. Some evenings will bring several rows, and some will bring only a careful correction or a few stitches before you set the work down. The point is not to hurry toward a finished object, but to notice the yarn sliding through your fingers and feel the fabric becoming useful, one quiet loop at a time.
—META—
SEO Title: Handmade Crochet Phone Cover Pattern
Meta Description: Make a calm Handmade Crochet Phone Cover with simple US double crochet, clear sizing, gentle steps, and easy care for everyday use.
Slug: handmade-crochet-phone-cover
Category: Crochet
Tags: crochet pattern, phone cover, beginner crochet, slow making, handmade gift
Image Alt Text: Crochet phone cover project beside yarn and hook on a quiet table
Close view of double crochet rows forming a phone cover
Finished handmade crochet phone cover resting beside a phone
Pinterest Title: Handmade Crochet Phone Cover Pattern
Pinterest Description: Make a simple Handmade Crochet Phone Cover with a gentle rhythm and useful everyday finish. This small project suits quiet evenings and thoughtful gifts.

Handmade Crochet Phone Cover
- Total Time: 240 minutes
Description
Create a comforting and practical phone cover using simple crochet techniques. The finished cover protects your phone while adding a handmade touch to your everyday essentials.
Materials
- Worsted weight yarn (weight 4, medium), cotton or acrylic, about 110 yards total, or about 65 g
- H-8 (5.0 mm) crochet hook
- Yarn needle
- Small scissors
- Tape measure
- One stitch marker (optional)
Instructions
- Chain 26 to create a starting foundation chain of 24 working chains plus 2 turning chains.
- For Row 1, work one double crochet (dc) in the third chain from the hook and continue with one double crochet in each remaining chain across, totaling 24 double crochet stitches.
- Turn your work and chain 2 for the turning chain, then work one double crochet in each stitch across for Row 2, placing the final double crochet into the top of the previous row’s turning chain.
- Repeat Row 2 until you have 13 rows total, measuring close to 4 inches wide by 6.5 inches tall.
- Fasten off by cutting the yarn with a tail about 18 inches long, pull the cut end through the final loop, and tighten it gently.
- Fold the rectangle so the shorter edges meet with the right side facing inward and thread the yarn needle with a long yarn tail.
- Sew the two side seams using a whip stitch or mattress stitch, keeping the bottom edges even and leaving the top open.
- Turn the cover right side out and check the fit with your phone nearby.
- For the top border, attach yarn at one side seam and make one single crochet (sc) in each stitch around the opening, then join with a slip stitch.
- Fasten off, cut a 6-inch tail, and pull it through the loop.
- Weave in all the ends using the yarn needle.
- If using cotton, lightly block the cover by dampening it, shaping it flat to the finished measurements, and allowing it to dry completely.
Notes
Ensure the cover fits your phone before finishing the seams. Consider personalizing with color changes or different yarn types for different textures.
- Preparation Time: 20 minutes
- Active Time: 180 minutes