

This post contains Amazon affiliate links. As an Amazon Associate I earn from qualifying purchases.
A self-striping crochet scarf is a satisfying project for practicing consistent half double crochet stitches while letting the yarn create the color changes. The simple construction makes it suitable for beginners, and the finished scarf is long enough to wrap comfortably around the neck. It is also a relaxing, portable project for travel, quiet evenings, or handmade gift making.
Why you’ll love this pattern
This scarf uses a straightforward stitch pattern with no complicated shaping. Once the foundation chain and first row are complete, every following row repeats the same basic movement. That makes it easy to settle into a steady rhythm.
The self-striping yarn adds visual interest without requiring you to change colors manually or weave in multiple contrasting yarns. The generous length and fringed ends give the finished piece a classic handmade look, while the half double crochet fabric provides warmth without making the scarf overly bulky.
“The repeating rows were easy to memorize, and the self-striping yarn made the scarf look much more complicated than it was. Adding the fringe was a simple finishing touch.”
How this crochet scarf comes together
You will crochet a long, narrow scarf from one end to the other. The foundation chain establishes the scarf’s width, and the body is worked in half double crochet rows. Row 2 becomes the repeat row, so the project is mainly about maintaining even tension and keeping the edges straight.
The pattern is beginner-friendly. You should know how to chain, make a half double crochet, turn your work, fasten off, and weave in yarn ends. After the scarf reaches 72 inches from the beginning edge, you will add fringe to both ends.
Because the pattern gives the finished length rather than a fixed row count, completion time will depend on your crochet speed and tension.
Materials you’ll need
- 2 skeins RED HEART® Super Saver® yarn in Calm Stripe
- 5.5 mm crochet hook
- Yarn needle
- Waste yarn
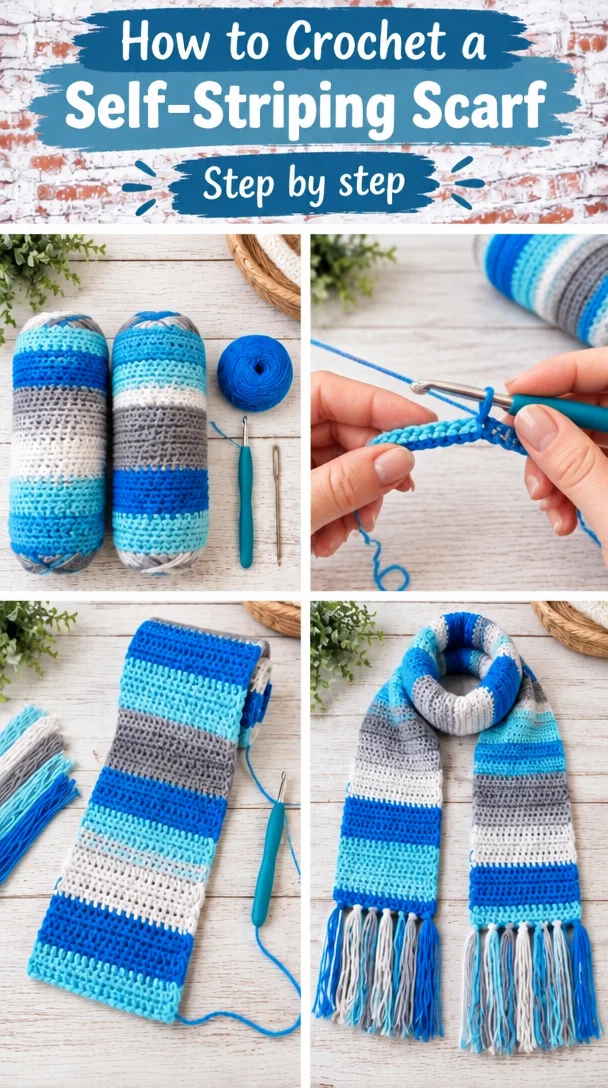
RED HEART® Super Saver® is a durable acrylic yarn suitable for a washable everyday scarf. The self-striping colorway creates changing bands of color as you work. A different yarn may be used, but changing the yarn weight or hook size can affect the scarf’s width, drape, texture, and total yarn requirement.
The waste yarn is used temporarily to mark the fringe positions. Choose a contrasting color so the markers are easy to see and remove.
Step-by-step instructions
-
Make the foundation chain. Chain 24.
-
Work Row 1. Make a half double crochet (hdc) in the third chain from the hook and in each chain across. You will have 22 half double crochet stitches.
-
Work Row 2. Chain 2; this counts as the first half double crochet. Skip the first hdc, then make an hdc in the next hdc and in each hdc across. Turn your work.
-
Repeat the main row. Repeat Row 2 until the scarf measures 72 inches from the beginning edge. Measure without stretching the fabric.
-
Fasten off. Cut the yarn, leaving a useful tail, and pull the tail through the final loop to secure it.
-
Weave in the ends. Use the yarn needle to weave all loose ends securely into the wrong side of the scarf. Trim excess yarn after the ends are firmly tucked away.
-
Prepare the fringe. Cut 90 lengths of yarn, each 10 inches long. Divide them into 18 groups of 5 strands.
-
Mark the attachment positions. Use waste yarn to mark where the fringe groups will be attached. Space the markers evenly along each short end of the scarf. You will attach nine groups to each end.
-
Attach the first fringe group. Fold one five-strand group in half to create a loop. Insert the folded center through the edge of the scarf at a marked position.
-
Secure the fringe. Thread the loose fringe tails through the loop and pull gently to tighten the knot against the scarf edge.
-
Finish both ends. Repeat the process until nine fringe groups are attached to each end of the scarf.
-
Trim and block if desired. Trim the fringe ends evenly. Steam the scarf lightly to block it, taking care not to press the iron directly onto the acrylic yarn. Allow it to cool and set completely.
Styling inspiration for your finished scarf
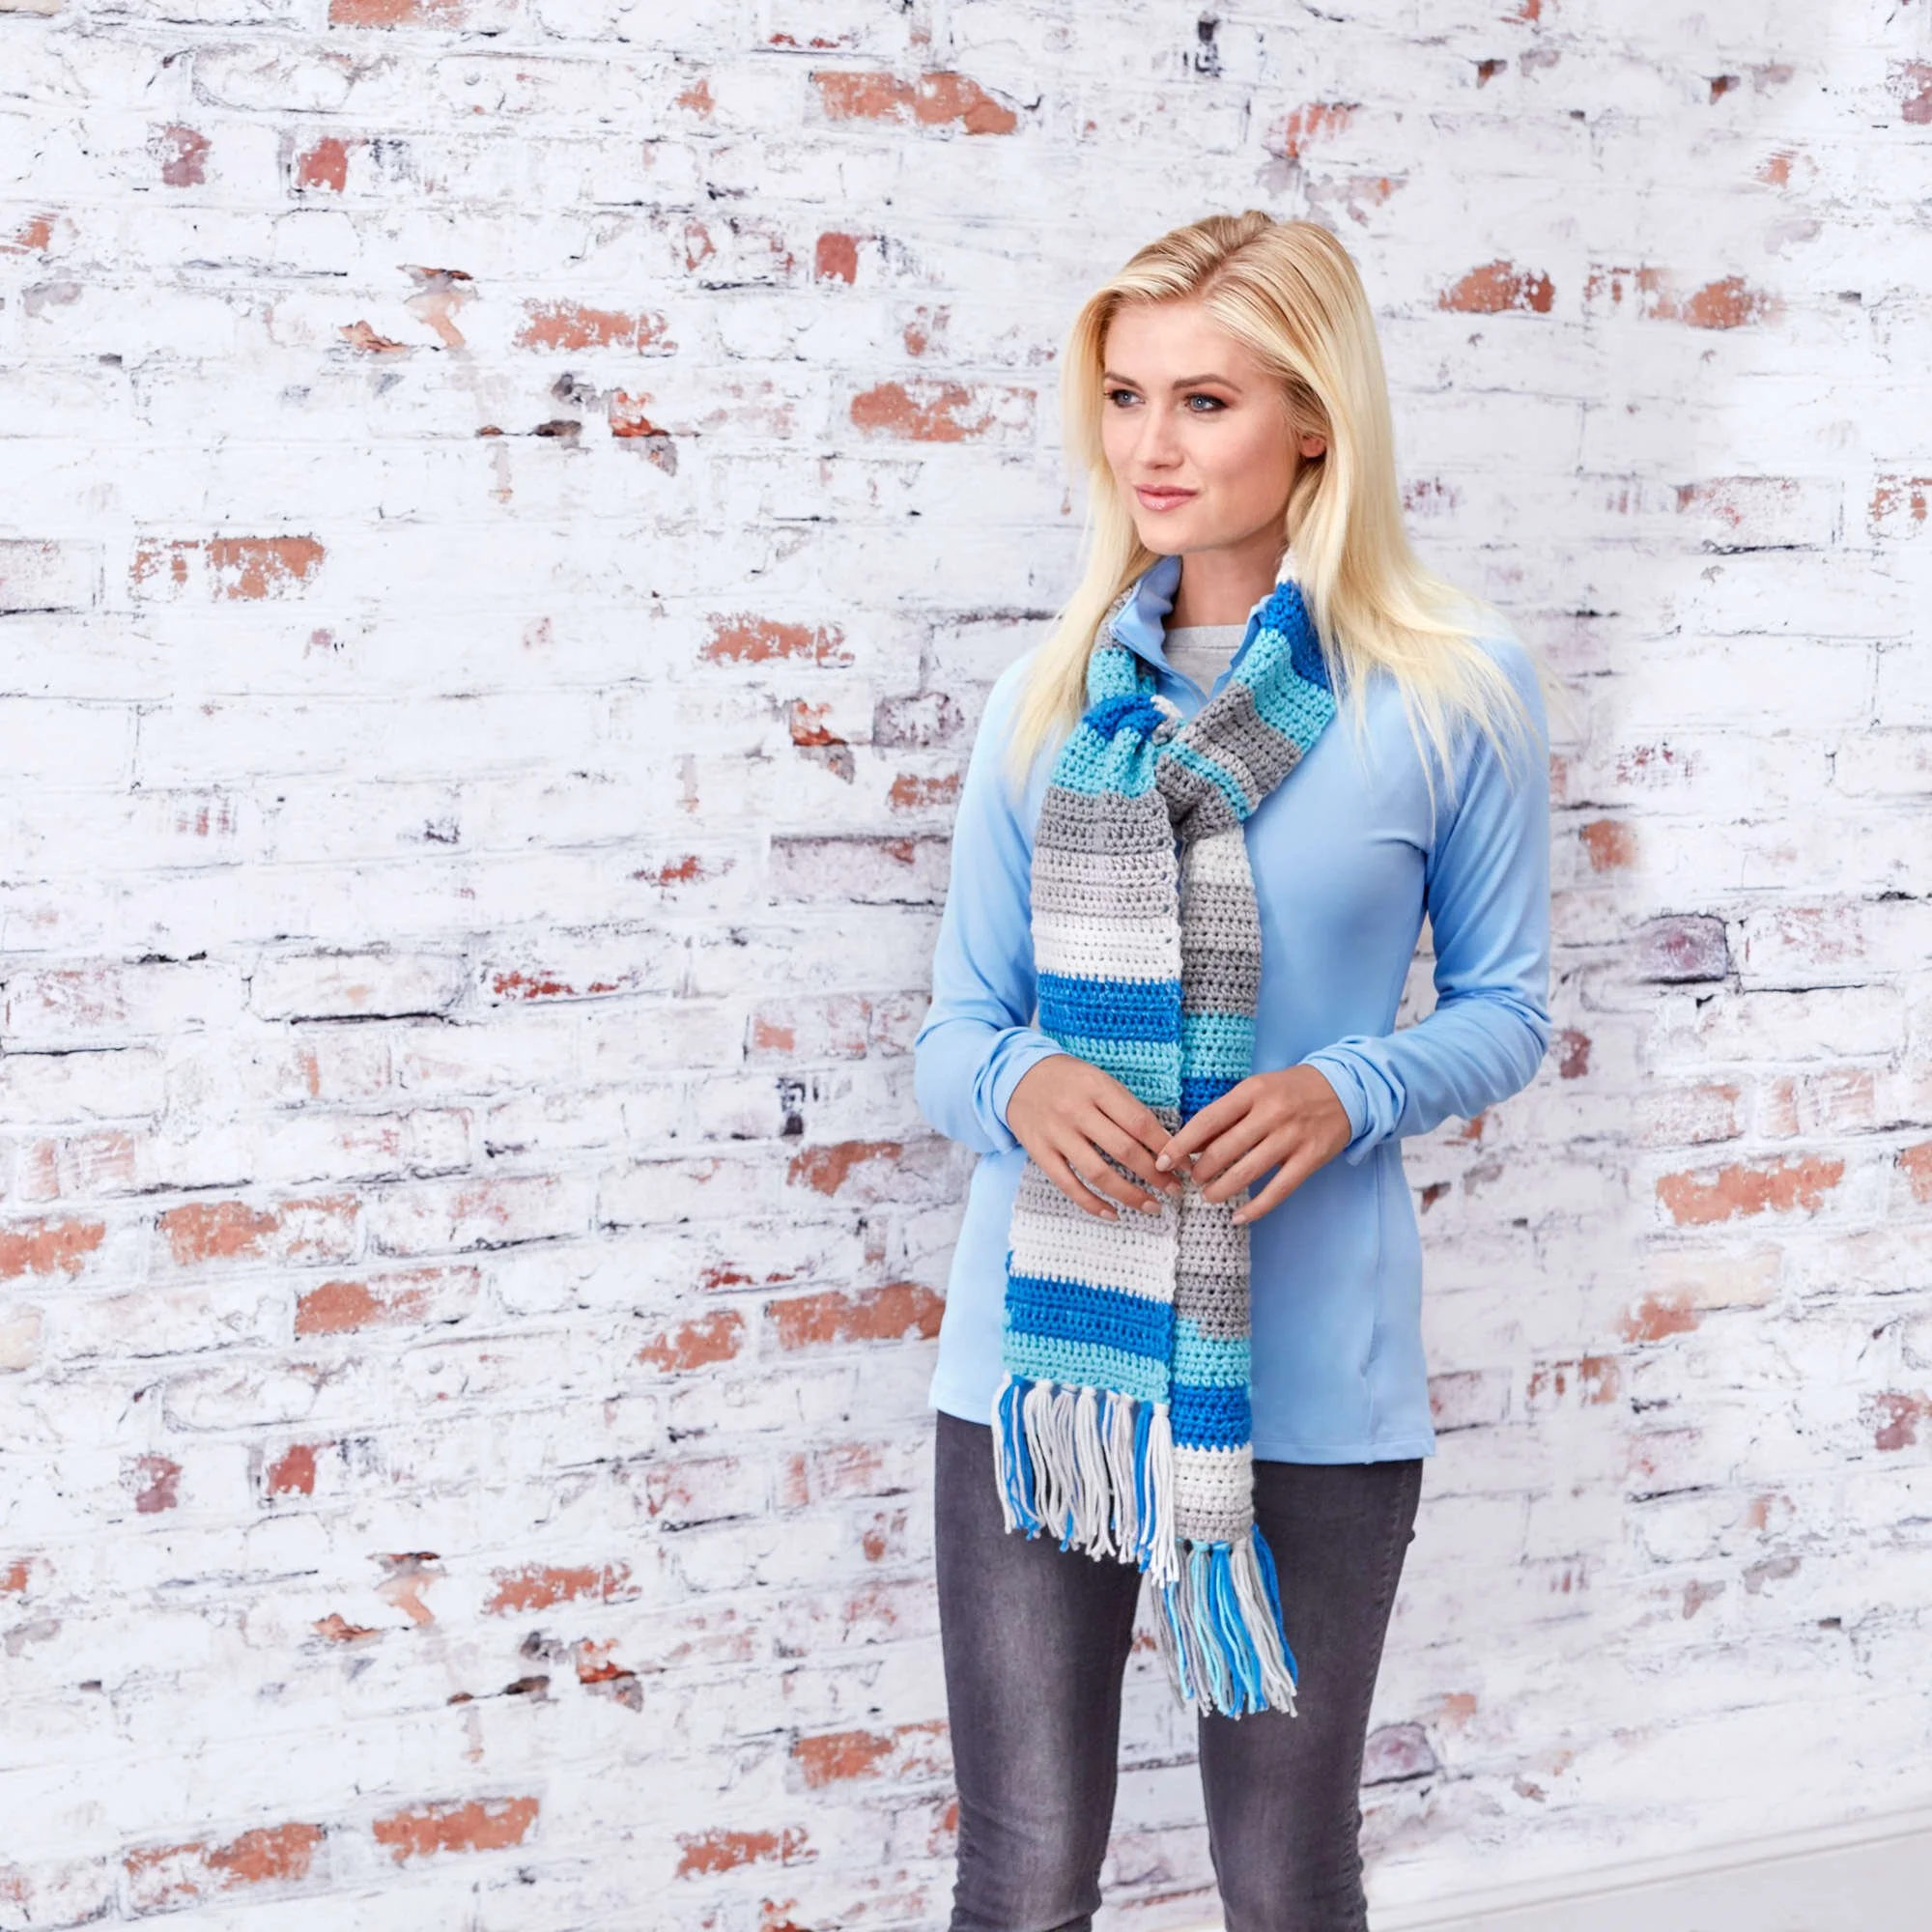
Wear the scarf loose around your neck for a relaxed everyday look, or wrap it once for extra warmth. The self-striping colors make it easy to coordinate with neutral coats, denim, and simple winter layers.
This scarf also makes a thoughtful handmade gift for birthdays, holidays, or winter celebrations. If you are preparing items for a craft fair or handmade shop, fold the scarf neatly and display the color changes and fringe clearly. Always check the original designer’s usage terms before selling finished items made from a pattern.
How to care for your crochet project
RED HEART® Super Saver® is commonly made from acrylic fiber, but always confirm the care information on your yarn label.
- Wash according to the label instructions, preferably using cool or lukewarm water.
- Use a gentle cycle or hand wash if the scarf has delicate fringe.
- Avoid harsh bleach and excessive heat.
- Reshape the scarf while damp if the fabric has become uneven.
- Lay it flat or hang it only after the scarf is sufficiently supported; hanging a wet scarf can stretch it.
- Keep the fringe untangled while drying.
- Store the scarf clean and completely dry in a cool, dry place.
- Avoid prolonged high heat, which can damage or flatten acrylic fibers.
Tips for success
- Check the foundation chain. Keep the chain loose enough to allow the hook to enter comfortably. A tight foundation can make the first edge narrower than the rest of the scarf.
- Count the first row. Confirm that Row 1 contains 22 hdc before beginning the repeat rows.
- Watch the turning chain. The chain-2 at the beginning of Row 2 counts as an hdc. Skipping the first hdc helps maintain the intended stitch count and straight edges.
- Use a row marker if needed. Place a removable marker in the first or last stitch of a row while learning the pattern.
- Measure regularly. Check the scarf length every few inches and stop when it reaches 72 inches from the beginning edge.
- Avoid stretching during measurement. Lay the scarf flat and measure gently so the finished length is accurate.
- Keep the edges even. Accidental increases or missed stitches can make the scarf flare or narrow. Count your stitches periodically.
- Secure the fringe carefully. Pull each fringe knot firmly enough to hold but not so tightly that the scarf edge puckers.
- Trim after attaching. Fringe often shifts slightly while being secured, so trim it only after all groups are in place.
- Steam cautiously. Acrylic yarn can melt or become permanently flattened under high heat. Use light steam from a safe distance and avoid direct contact with the iron.
Creative variations
- Change the colorway. Use another self-striping yarn for a different palette while keeping the same construction.
- Try a solid color. A solid yarn creates a clean, classic scarf and highlights the texture of the half double crochet stitches.
- Make a narrower scarf. Start with fewer than 24 chains, remembering that the foundation chain determines the width. This will also reduce the number of stitches in each row.
- Make a wider scarf. Start with more than 24 chains. A wider scarf will require more yarn and may have a heavier drape.
- Adjust the length. Repeat Row 2 until the scarf reaches your preferred length. A longer scarf requires additional yarn.
- Use contrasting fringe. Attach fringe in a coordinating solid color for a defined border effect. The amount of yarn needed may change.
- Add a simple border. A border can give the edges a more finished appearance, but it will increase the yarn requirement and may alter the final width.
- Coordinate accessories. Use the same colorway to make matching hats, ear warmers, or mittens if you have suitable patterns.
- Experiment with fringe length. Longer or shorter fringe changes the finished appearance and the amount of yarn required.
Frequently asked questions
Is this crochet scarf pattern beginner-friendly?
Yes. The scarf uses a foundation chain and repeated half double crochet rows. It is a good project for practicing even tension, straight edges, and finishing techniques.
What yarn works best for this scarf?
The specified yarn is RED HEART® Super Saver® in Calm Stripe. A similar medium-weight acrylic yarn can work, but differences in yarn thickness and fiber may change the scarf’s size, drape, and yardage needs.
Can I use a different hook size?
You can, but the hook size affects the fabric. A larger hook may create a looser, drapier scarf, while a smaller hook may produce a denser and stiffer fabric. It may also change the finished width and yarn usage.
How long is the finished scarf?
The instructions specify a length of 72 inches from the beginning edge. The width is established by chaining 24, and the exact finished width can vary slightly with individual tension.
How can I make the scarf wider or narrower?
Change the number of chains in the foundation chain. Fewer chains make a narrower scarf, and more chains make a wider scarf. Adjusting the width can change the amount of yarn required.
Why are my scarf edges uneven?
Uneven edges usually result from accidentally adding or skipping stitches. Remember that the chain-2 at the beginning of Row 2 counts as an hdc, skip the first hdc, and work across the remaining stitches as written.
Do I need to change colors manually?
No. The self-striping yarn creates the color changes as you crochet. If you use a solid or non-striping yarn, you would need to change colors manually to create a similar effect.
How much yarn does the pattern require?
The pattern calls for 2 skeins of RED HEART® Super Saver® yarn in Calm Stripe. Actual usage can vary with tension, fringe preparation, and any changes to the scarf’s width or length.
How should I attach the fringe evenly?
Use waste yarn to mark nine positions on each short end before attaching the fringe. Space the markers evenly, then use one group of five 10-inch strands at each marked position.
Can I sell a scarf made from this pattern?
The provided instructions do not state the designer’s selling or licensing terms. Check the original pattern source for its rules before selling finished items made from it.
Print
Self-Striping Crochet Scarf
Description
A satisfying project for practicing consistent half double crochet stitches while letting the yarn create the color changes. Suitable for beginners and perfect for handmade gifts.
Materials
- 2 skeins RED HEART® Super Saver® yarn in Calm Stripe
- 5.5 mm crochet hook
- Yarn needle
- Waste yarn
Instructions
- Make the foundation chain. Chain 24.
- Work Row 1. Make a half double crochet (hdc) in the third chain from the hook and in each chain across. You will have 22 half double crochet stitches.
- Work Row 2. Chain 2; this counts as the first half double crochet. Skip the first hdc, then make an hdc in the next hdc and in each hdc across. Turn your work.
- Repeat Row 2 until the scarf measures 72 inches from the beginning edge. Measure without stretching the fabric.
- Fasten off. Cut the yarn, leaving a useful tail, and pull the tail through the final loop to secure it.
- Weave in the ends. Use the yarn needle to weave all loose ends securely into the wrong side of the scarf. Trim excess yarn after the ends are firmly tucked away.
- Prepare the fringe. Cut 90 lengths of yarn, each 10 inches long. Divide them into 18 groups of 5 strands.
- Mark the attachment positions. Use waste yarn to mark where the fringe groups will be attached. Space the markers evenly along each short end of the scarf. You will attach nine groups to each end.
- Attach the first fringe group. Fold one five-strand group in half to create a loop. Insert the folded center through the edge of the scarf at a marked position.
- Secure the fringe. Thread the loose fringe tails through the loop and pull gently to tighten the knot against the scarf edge.
- Finish both ends. Repeat the process until nine fringe groups are attached to each end of the scarf.
- Trim and block if desired. Trim the fringe ends evenly. Steam the scarf lightly to block it, taking care not to press the iron directly onto the acrylic yarn. Allow it to cool and set completely.
Notes
A relaxed, portable project that is perfect for travel or handmade gifts. The self-striping colors make it easy to coordinate with different accessories.