

The little phone case grows quietly in your hands, one soft row at a time. By late afternoon, the yarn may be resting across your knees while the hook makes that small, familiar pull through each loop. This Crochet Phone Case Pattern Tutorial makes a useful little sleeve with a gentle texture, a simple flap, and enough structure to protect your phone from everyday bumps. I made mine over a couple of calm evenings, usually with coffee beside the yarn basket and the phone tucked away for a while.
Why This Project Is Such a Pleasure to Make
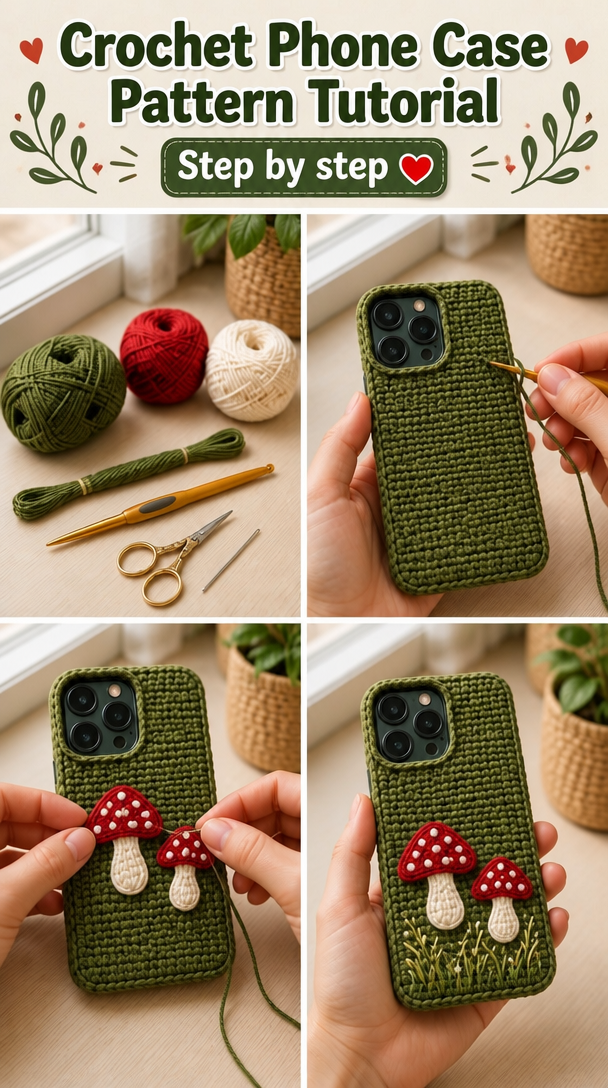
A phone case is small enough to feel approachable, but it still gives your hands a satisfying rhythm. You work a narrow rectangle, fold it into a pocket, and add a flap that closes with a button. The fabric grows quickly without demanding constant counting, which makes it a nice companion for a rainy evening on the couch or a quiet hour on the porch.
The main stitch is half double crochet, a stitch that sits between single crochet and double crochet in height. It creates a smooth fabric with a little cushion, and the rows have enough texture to make your progress easy to see. The first few rows may curl toward the hook, but the fabric settles once it gains some length and weight.
I like projects that have a clear use without feeling rushed. This one can sit in a basket beside your armchair, ready for a few rows whenever you have ten minutes. Many people find crocheting calming because the hands follow a repeated motion, and this case offers that rhythm without asking for a large time commitment.
The case also gives you a small place to practice paying attention. You notice how firmly you hold the foundation chain, how the yarn slides over your finger, and whether the edge stays straight. After the first ten minutes, my hands usually warm up and the stitches become less deliberate.
The Rhythm of Crocheting Crochet Phone Case Pattern Tutorial
This case begins with a foundation chain, which is the starting row of chain stitches. You work half double crochet back and forth to make one long piece, then fold the lower section upward to form the pocket. A short flap continues from the back, so there is no separate piece to sew on.
The pattern uses US crochet terms. That note matters because readers in the United Kingdom may use the same stitch words for different stitches. Here, half double crochet means the US half double crochet, written hdc, and every other abbreviation follows US terminology.
You will use a chain, or ch, to begin, a slip stitch, or sl st, to join the optional border, and half double crochet, or hdc, for the main fabric. A turning chain lifts the hook to the next row. You will also see back loop only, or BLO, in the border, meaning you work into the loop farthest from you to create a raised line.
The project is suitable for a confident beginner who knows how to make a chain and basic crochet stitches. The only fiddly part comes when you fold the case and line up the side edges. Give yourself about two to three evenings, or roughly three to four hours of relaxed crochet time, including sewing on the button and weaving in the ends.
Pattern at a Glance
Here is the whole project in one quiet view before you gather your supplies.
- Skill level: Easy, confident beginner
- Finished size: 4 inches wide by 7 inches tall (10 cm by 18 cm), including the flap
- Gauge: 14 hdc and 10 rows measure 4 inches (10 cm)
- Yarn: Worsted weight (weight 4, medium), cotton, about 120 yards total
- Hook: H-8 (5.0 mm)
- Other supplies: Yarn needle, scissors, tape measure, one stitch marker, and one 1-inch button
- Stitch multiple: Any multiple of 2 stitches, with 1 extra chain for turning
- Estimated time: Three to four hours over two to three evenings
What You Need for This Project
- Worsted weight (weight 4, medium) cotton yarn, about 120 yards total, or approximately 2.5 ounces (70 g). Choose yarn sold at about 170 yards per 100 g skein, and one skein will give you enough with a little left over.
- A cotton yarn example: Lily Sugar’n Cream in a worsted weight cotton. Choose a solid, heathered, or gently variegated shade depending on the look you want.
- H-8 (5.0 mm) crochet hook. A half size up or down is fine depending on your tension, but check the finished width if you change hooks.
- Yarn needle for weaving in ends and sewing on the button.
- Small scissors.
- Tape measure.
- One stitch marker, optional, for marking the fold or the first stitch of a row.
- One 1-inch button, or a wooden button that fits securely through the button loop.
Gauge tells you how large your stitches are, and this pattern uses 14 hdc and 10 rows to measure 4 inches (10 cm). A small swatch takes about twenty minutes, but it can save you from finishing a case that is too narrow for your phone. If your swatch is smaller, try the next larger hook; if it is larger, try the next smaller hook.
Cotton suits this project because it gives the case a firm fabric and tolerates regular washing better than many delicate fibers. You can substitute another worsted weight yarn, including acrylic, but expect a slightly different drape and feel. Acrylic is washable, though it can melt under a hot iron, so use gentle steam from a distance or block it cold instead.
Step by Step
- Difficulty and stitch multiple: This is an easy, confident beginner pattern. The stitch multiple is any multiple of 2, with 1 extra chain for the turning chain. For the sample size, chain 29.
- Make the foundation chain by working 29 chain stitches. The chain should lie flat without pulling tightly. If your chain feels tight, make it with a hook one size larger, then change back to H-8 (5.0 mm) for the first row.
- Row 1: Work 1 hdc in the second chain from the hook and in each chain across. To make a half double crochet, yarn over, insert the hook, yarn over and pull up a loop, then yarn over and pull through all three loops on the hook. You will have 28 hdc.
- Row 2: Chain 1, which counts as the turning chain but not as a stitch. Turn your work, then make 1 hdc in each stitch across. Count 28 hdc at the end of the row.
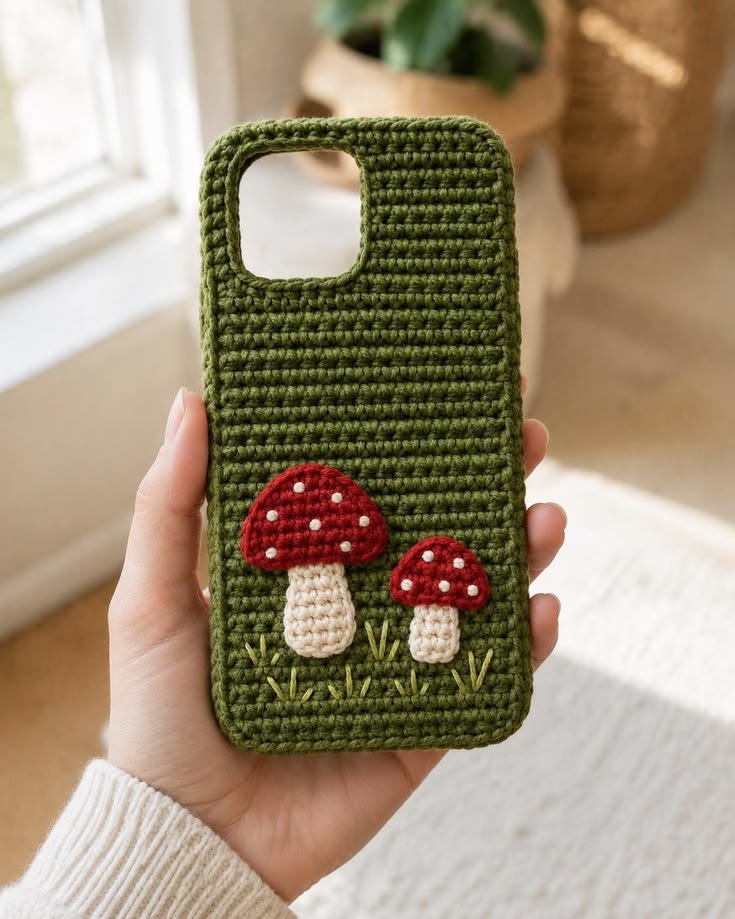
- Rows 3 through 24: Repeat Row 2 for 22 more rows. Keep the turning chain loose enough that the side edge does not pinch. When you finish Row 24, you should still have 28 hdc, and the piece should measure close to 4 inches wide by 9.5 inches long.
- Check the fabric before folding. The rows should look even, and the long rectangle should not flare sharply at either side. If the first rows curled, smooth the fabric with your hand rather than pulling hard on the edge stitches.
- Fold the lower edge upward 3.5 inches (9 cm), leaving the remaining 6 inches (15 cm) for the back and flap. Match the side edges carefully. Place a stitch marker through both layers on each side if that helps you hold the fold.
- Join the pocket sides: with the working loop at the upper edge of the back section, insert the hook through both layers at one side, yarn over, and make slip stitches down the side edge. A slip stitch, or sl st, pulls the yarn directly through the loop on the hook and the fabric, making a firm seam. Repeat on the other side.
- Work the flap: remove the hook from the working loop only if you need to reposition it, then continue across the top edge of the pocket with 1 hdc in each stitch. You will have 28 hdc across the flap base. Work Rows 25 through 29 in hdc, using the same chain 1 and turn at the beginning of each row. You will have 28 hdc at the end of every flap row.
- Shape the button loop on Row 30: chain 1 and turn, work 10 hdc, chain 8 for the loop, skip 8 stitches, and work 10 hdc across the remaining stitches. This keeps the loop centered. The row still uses all 28 positions, with the chain space replacing the center stitches.
- Make the final flap edge: chain 1 and turn. Work 1 hdc in each of the first 10 hdc, then work 8 hdc into the 8-chain loop, and finish with 1 hdc in each of the last 10 hdc. You will have 28 hdc. Fasten off, leaving a 6-inch tail for weaving in.
- Check for mistakes before finishing. At the end of a row, count the small V shapes along the top edge and look for a missed stitch at either corner. If you find an error several rows back, place a finger over the working loop, pull back one stitch at a time, and calmly undo only as far as needed. I once pulled back an entire round because a stitch went missing near the edge, and the corrected fabric sat much flatter afterward.
- Weave in all yarn ends with the yarn needle, passing the needle through several stitches in different directions. Sew the button to the front of the pocket so it lines up with the loop. Test the closure gently before trimming the tail.
- Finish with a light block if the edges look uneven. Dampen the cotton case, shape it flat to the finished measurements of 4 inches wide by 7 inches tall (10 cm by 18 cm), and let it dry completely. Do not use a hot iron on acrylic yarn, and do not stretch the button loop wider than necessary.
Where This Piece Finds Its Place
The finished case slips easily into a tote, a small crossbody bag, or the basket beside your armchair. The cotton fabric gives your phone a soft layer against keys and sunglasses, while the flap helps keep it from sliding out when you reach into a full bag.
At home, I like it on the small table near the couch, where the phone can rest out of sight during a book or a few rows of another project. In summer, it works well on the porch beside a glass of iced tea. In cooler fall weather, the texture feels especially pleasant against a sweater sleeve.
For a gift, make the case in the recipient’s favorite color and add a small note with the washing instructions. It would suit a holiday stocking, a birthday basket, or a simple care package for someone moving into a new apartment. You can also tuck a gift card inside before wrapping it.
Care and Storage for Crochet Phone Case Pattern Tutorial
Because this pattern uses cotton, wash the case by hand or place it in a mesh bag on a gentle cycle with cold or warm water. Use a small amount of mild detergent, and avoid bleach unless the yarn label specifically allows it. Cotton can hold water and feel heavy, so reshape the case while damp and dry it flat rather than hanging it wet.
If the fabric needs blocking, pin it lightly to the correct width and length while damp. Cotton accepts gentle warmth, but a hot iron can flatten the texture and leave shiny spots, so use a pressing cloth and low heat only if necessary. Let the case dry fully before returning your phone to it.
Store the case folded or lying flat in a breathable drawer. Do not hang it by the button loop, since the cotton may stretch around the closure. If you make a wool version, keep cedar or lavender nearby for moth protection, though the cotton sample does not need that extra step.
Keep any leftover yarn with its label so you have the fiber information and dye lot later. Even a small label can save you from guessing when you want to repair a worn edge or make a matching pouch.
Small Ways to Make It Your Own
Try these changes as invitations, not requirements. The original version has a steady shape, but small adjustments can make the case feel more personal.
- Use a thicker worsted weight yarn or a larger hook for a roomier sleeve with more drape. Measure your phone first, since the finished size will change with both yarn thickness and tension.
- Choose two colors and work Rows 1 through 12 in one shade and Rows 13 through 24 in another. A simple color block makes the folded pocket easy to see and uses small amounts of leftover cotton.
- Swap the half double crochet for single crochet, or sc. Single crochet creates a denser, firmer fabric and will take more rows to reach the same length. It may protect the phone well, but it will feel less soft and flexible.
- Resize the width by changing the foundation chain in multiples of 2, then add 1 chain for turning. For example, a chain of 31 gives you 30 stitches, while a chain of 27 gives you 26 stitches. Measure the pocket around your phone before sewing the sides.
- Add a simple border by working single crochet around the flap and pocket edges. Place 2 sc in each corner so the border does not pull, and use a contrasting color for a quiet outline.
- Make a small gift set with the phone case, a matching cord keeper, and a handwritten note. For a larger gift, pair it with a cotton market bag or a book chosen for a slow afternoon.
Frequently Asked Questions About Crochet Phone Case Pattern Tutorial
Can I use a different hook size for this crochet phone case?
Yes, you can use a different hook size, but check your gauge and finished width first. A smaller hook makes a denser fabric and a slightly smaller case, while a larger hook creates a looser fabric with more drape. H-8 (5.0 mm) gives the sample its 4-inch width, so change gradually rather than jumping several sizes.
What yarn can I substitute for the cotton?
You can substitute another worsted weight yarn, including acrylic or a cotton blend. Cotton gives this case firm structure and handles washing well, while acrylic feels lighter and may stretch differently. Choose yarn sold at about 170 yards per 100 g skein, and make a gauge swatch so the phone fits securely rather than loosely.
What should I do if I find a mistake several rows later?
If the mistake affects the edge or changes the case width, pull back to the missed stitch and correct it. Place your finger over the working loop, undo one stitch at a time, and count again at the row edge. If the error does not affect the fit, you can leave it, especially if the case will be used every day.
Is this phone case pattern suitable for a beginner?
Yes, this pattern suits a confident beginner who knows how to chain and make half double crochet. The main rectangle repeats one row, and the fold creates the pocket without complicated shaping. The side seams and button loop require a little attention, but you can work slowly and check each section before moving on.
How long does this crochet phone case take to make?
Plan on about three to four hours of relaxed work spread over two to three evenings. Your time may vary with tension, interruptions, and how carefully you sew the sides and button. The crocheting itself moves steadily, while weaving in the ends, lining up the flap, and checking the closure take a little extra patience.
Does this pattern use US or UK crochet terms?
This pattern uses US crochet terms. In particular, hdc means half double crochet in the US system, which does not mean the same stitch as half double crochet in UK terminology. The pattern also explains chain, slip stitch, single crochet, and the other abbreviations when they first appear so you can keep your place comfortably.
Taking It Slow with Crochet Phone Case Pattern Tutorial
Let the case take the time it takes. A slightly uneven row can still become a useful, lovely object, and a pulled-back section is simply part of listening to your hands. Set the hook down when you need to, return when the yarn feels inviting again, and let the finished piece carry the quiet evidence of your own unhurried making.
—META—
SEO Title: Crochet Phone Case Pattern Tutorial
Meta Description: Make a calm crochet phone case with cotton yarn, simple half double crochet rows, a button flap, and clear US terms for slow making.
Slug: crochet-phone-case-pattern-tutorial
Category: Crochet Patterns
Tags: crochet phone case, beginner crochet, cotton crochet, crochet gifts, slow making
Image Alt Text: Crochet phone case in cotton yarn beside a crochet hook
Crochet phone case folded into a pocket with button flap
Half double crochet phone case in progress on a work table
Pinterest Title: Calm Crochet Phone Case Pattern
Pinterest Description: Make a simple cotton crochet phone case with a button flap and gentle half double crochet texture. A useful slow-m making project for quiet evenings.

Crochet Phone Case Pattern Tutorial
- Total Time: 240 minutes
Description
Make a useful little sleeve with a gentle texture, a simple flap, and enough structure to protect your phone from everyday bumps.
Materials
- Worsted weight (weight 4, medium) cotton yarn, about 120 yards total
- H-8 (5.0 mm) crochet hook
- Yarn needle
- Small scissors
- Tape measure
- One stitch marker (optional)
- One 1-inch button
Instructions
- Make a foundation chain of 29 chain stitches.
- Row 1: Work 1 hdc in the second chain from the hook and in each chain across.
- Row 2: Chain 1, turn your work, and make 1 hdc in each stitch across.
- Repeat Row 2 for Rows 3 through 24, maintaining 28 hdc.
- Fold the lower edge upward 3.5 inches (9 cm) to form the pocket.
- Join the pocket sides with slip stitches down each side edge.
- Work the flap by making 1 hdc in each stitch across the top edge of the pocket.
- Continue working 28 hdc in Rows 25 through 29 for the flap.
- On Row 30, shape the button loop by chaining 8 for the loop and skipping 8 stitches.
- Make the final flap edge by working 1 hdc in the first 10 hdc, then 8 hdc into the 8-chain loop, and finish with 1 hdc in each of the last 10 hdc.
- Fasten off and weave in all yarn ends.
- Sew the button to the front of the pocket lining it up with the loop.
- Dampen the cotton case and block it to the finished measurements.
- Allow the case to dry completely before use.
Notes
Gauge: 14 hdc and 10 rows measure 4 inches (10 cm). Cotton suits this project as it gives the case a firm fabric; an acrylic substitute is possible but may result in a different drape.
- Preparation Time: 10 minutes
- Active Time: 180 minutes