

This post contains Amazon affiliate links. As an Amazon Associate I earn from qualifying purchases.
A simple scarf is a satisfying first wearable project: the shape is easy to manage, and most of the work comes from repeating the same stitch across each row. This super beginner crochet scarf uses single crochet to establish the first row, then double crochet for its main length. It’s a practical choice for someone learning the basics, a relaxing project for an experienced crocheter, or a handmade gift to keep close on chilly days.
Why you’ll love this pattern
This scarf keeps the construction straightforward. You begin with a short foundation chain, work one row of single crochet, and then repeat rows of double crochet until the scarf reaches its specified length. There are no complicated shaping steps, color changes, or pieces to assemble.
The pattern is beginner-friendly, but it still gives you useful practice with the essentials: making a chain, finding the correct stitch to work into, turning at the end of a row, and keeping row edges tidy. The double crochet rows also build length more quickly than rows of single crochet, making the project feel rewarding as it grows.
Because the scarf is a simple rectangle, it’s easy to pause and pick up again. That makes it a comfortable project for relaxing at home or taking along when you have a little crochet time. The finished piece can also make a thoughtful handmade gift, especially when you choose a color the recipient will enjoy wearing.
“This was a lovely project for practicing the basics. Once I got comfortable turning at the end of each row, the repeated double crochet rows felt relaxing, and I liked seeing the scarf get longer so quickly.”
How this crochet pattern comes together
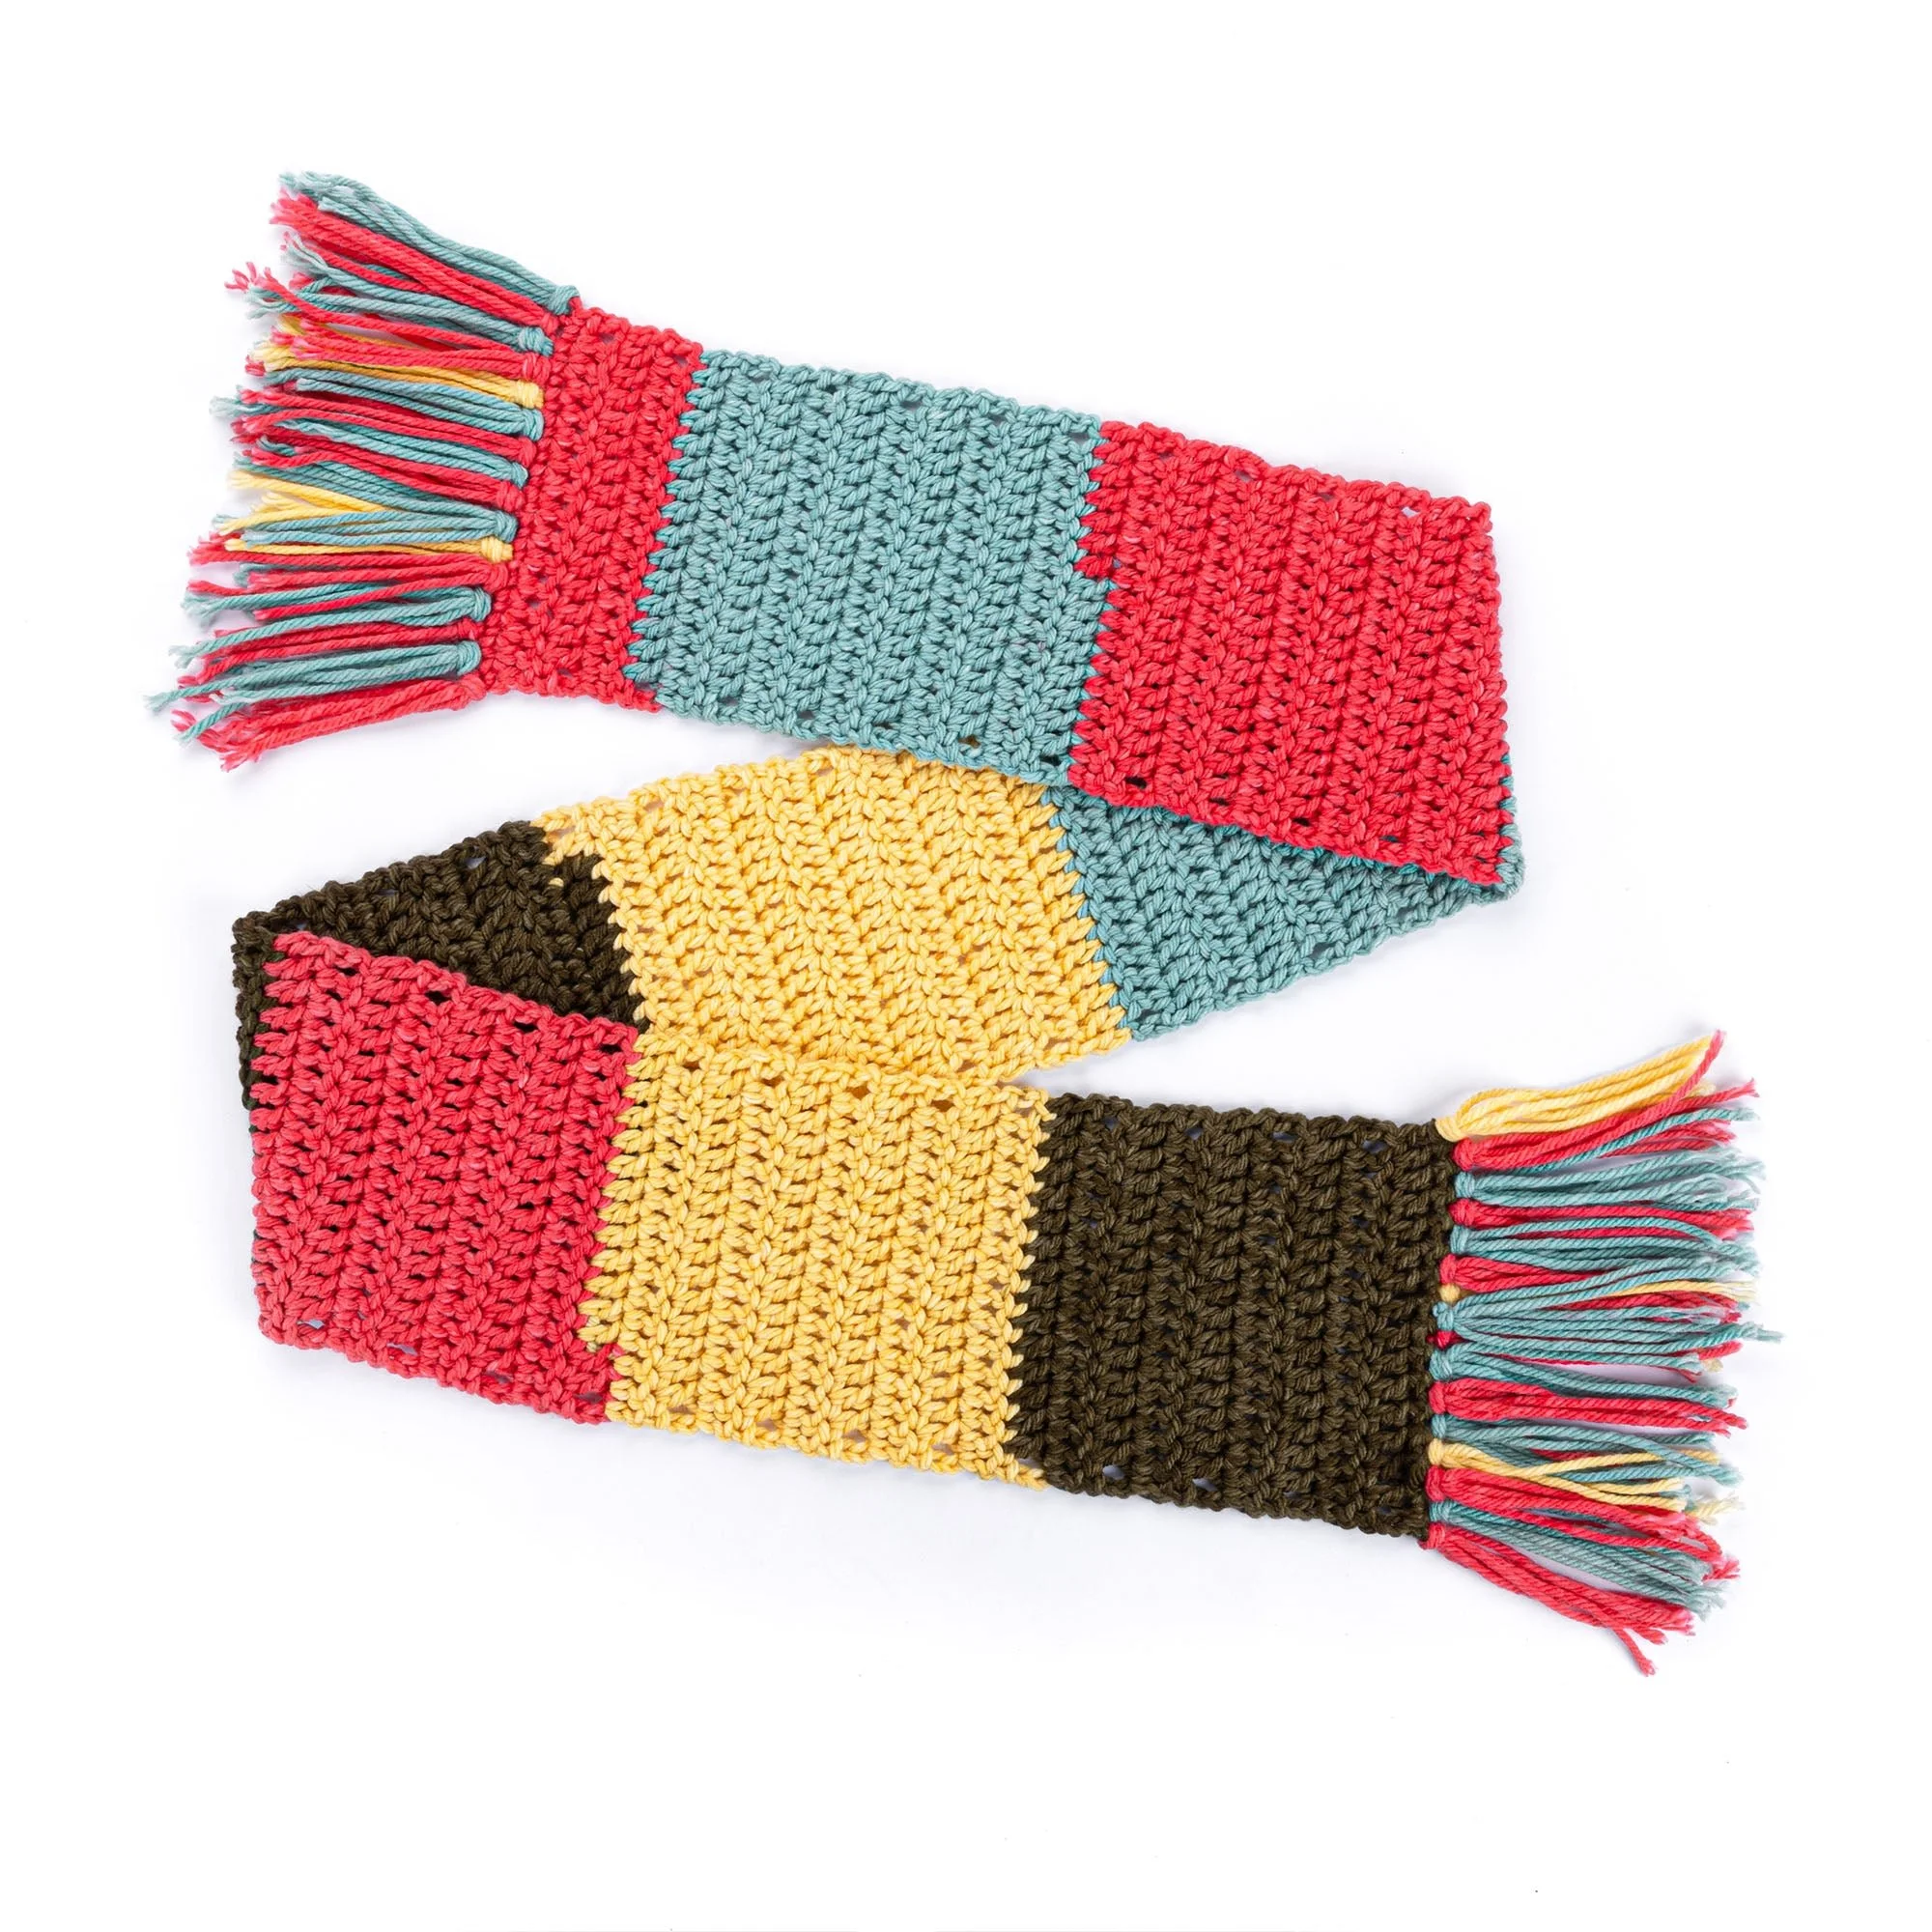
You’ll crochet one long, narrow rectangle, then add a final row of single crochet and finish it with fringe. The width is set by the starting chain: 17 chains become 16 single crochet stitches in the first row. After that, the pattern repeats a row of double crochet until the scarf measures 70 inches (178 cm).
The main technique is working flat in rows. At the end of each row, you turn your work and crochet back across it. The instructions call for chaining 3 at the start of each double crochet row. Treat that chain as the turning chain specified by the pattern, and work the first double crochet into the next stitch as instructed.
This is a suitable project for a beginner who knows, or is ready to learn, the basic single crochet and double crochet stitches. Your total working time depends on your pace and how often you crochet; the source pattern doesn’t give an estimated completion time. The repeat is simple, though, so you can make progress a few rows at a time.
Materials you’ll need
- Yarn: 2 balls of Red Heart® Super Easy™ yarn
- Crochet hook: U.S. size L/11 (8 mm)
- Yarn needle: For weaving in the ends
Check the yarn labels before you begin, since labels provide useful care information and help confirm that your two balls match in color and dye lot. If you choose a different yarn, select one that works comfortably with an 8 mm hook and has a similar thickness to the original. A different yarn can change the scarf’s width, drape, warmth, and total yarn requirement, so check your fabric as you work rather than expecting an exact match.
You can use a different color if you like, but keep the hook size and yarn weight in mind. A much thinner yarn will make a lighter, narrower scarf, while a thicker yarn can create a bulkier fabric and use more yarn. If you have a small pair of scissors available, they’ll be useful for cutting the fringe lengths.
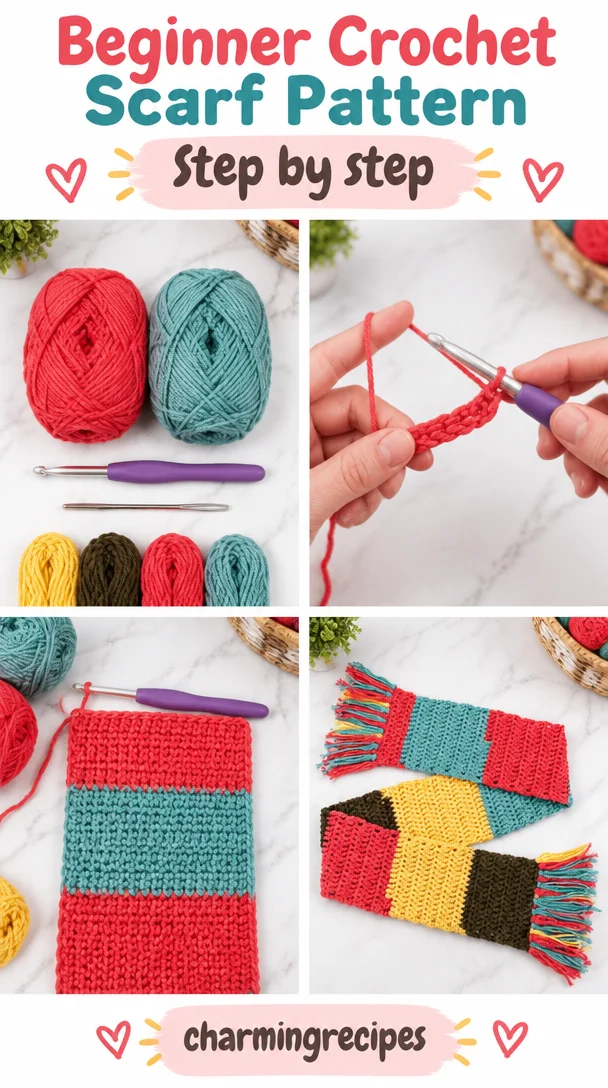
Step-by-step instructions
Abbreviations:
- ch = chain
- sc = single crochet
- dc = double crochet
- st(s) = stitch(es)
-
Make the foundation chain. Chain 17 (ch 17). Keep the chain relaxed rather than pulling it tight; a very firm foundation can make the first edge narrower and less flexible than the rest of the scarf.
-
Work the first row. Make 1 single crochet in the second chain from your hook. Then make 1 single crochet in each chain across to the end. You should have 16 single crochet stitches. Turn your work.
-
Start the second row. Chain 3. Make 1 double crochet in the next stitch, then make 1 double crochet in each stitch across to the end of the row. Turn your work.
-
Repeat the double crochet row. For each following row, chain 3, make 1 double crochet in the next stitch, and make 1 double crochet in each remaining stitch across. Turn at the end of the row. Repeat until the scarf measures 70 inches (178 cm).
-
Work the final row. Chain 1, then make 1 single crochet in each double crochet across to the end of the row. Fasten off and leave a tail long enough to weave in securely.
-
Weave in the yarn ends. Thread each end onto a yarn needle. Weave it through several stitches on the wrong side of the fabric, changing direction once if you can. A few secure passes help the end stay put through regular use.
-
Make and attach the fringe. Cut yarn into 14-inch (35.5 cm) lengths. Take 3 strands together for each fringe bundle. Fold a bundle in half, pull the folded loop through an edge stitch at one end of the scarf, then draw the loose ends through the loop and tighten gently to form a knot. Add fringe evenly across both ends and trim it to an even length.
The supplied instructions don’t specify an exact number of fringe bundles. Space them evenly by eye, using the same edge stitches and a similar gap between bundles on both ends. Avoid pulling the knots so tightly that the scarf edge puckers.
Ways to use your finished scarf
Wear the scarf loosely draped around your neck, wrapped once for extra coverage, or tucked into a coat on a cold day. The 70-inch (178 cm) length gives you room to style it in different ways, while the fringe adds a classic finishing touch.
This scarf also makes a practical handmade gift. Choose a shade that suits the recipient’s wardrobe, and consider making the fringe a little fuller if you want a more decorative finish. If you’re preparing it for a gift, check that all yarn ends are secure and trim the fringe evenly before wrapping.
For a coordinated handmade set, pair the scarf with a crocheted hat or headband made in a similar color and yarn. Keep in mind that matching yarn and colors alone won’t make the pieces identical in warmth or texture if they use different stitches or yarn weights.
How to care for your crochet project
Care depends on the exact fiber content of your yarn. Follow the care instructions on the Red Heart® Super Easy™ yarn label, or the label of any replacement yarn you use. When in doubt, gentle handling is a sensible choice for a handmade scarf.
If the label permits machine washing, use the recommended cycle and water temperature. A mesh laundry bag can help protect the fringe from snagging, and washing the scarf with similar colors can reduce the chance of color transfer. Avoid hot water unless the yarn label specifically says it’s suitable.
To dry the scarf, reshape it gently and lay it flat on a clean, dry surface if the label recommends flat drying. Don’t hang a wet scarf by one end: the weight of the water can stretch the rows and pull the fabric out of shape. Smooth the fringe into place while the scarf is damp, then let the piece dry fully before storing it.
Store the scarf clean and dry, folded loosely in a drawer or on a shelf. Keep it away from sharp hooks or items that might catch the fringe. If the scarf pills with wear, remove pills carefully with a fabric comb or suitable sweater tool, taking care not to cut the crochet stitches.
Tips for success
- Count the first row: It should contain 16 single crochet stitches. This count gives you a useful reference for the width of every row.
- Use stitch markers at the edges: Place a marker in the first and last stitch of a row if you find it difficult to see the edge stitches. Move the markers up as you work.
- Watch where each row begins: The instructions say to chain 3, then work into the next stitch. It’s easy to accidentally place a double crochet in the turning chain or skip the first stitch. Take a moment to identify the first stitch before continuing across.
- Check the row ends: Missing the final stitch can gradually narrow the scarf. Adding an extra stitch can make it wider. If your edges start to slant, count your stitches and look closely at the first and last stitches of a few rows.
- Keep your tension comfortable: Tight stitches can make the scarf stiff and difficult to drape. If your hook feels hard to insert or the starting chain pulls the edge inward, loosen your grip slightly.
- Measure the length on a flat surface: Check the scarf occasionally against the 70-inch (178 cm) target. Lay it flat without stretching; measuring a pulled fabric can give you a misleading result.
- Make the fringe consistent: Cut several lengths at once using the same measurement. Keep each bundle to three strands, attach the knots with similar tension, and trim the fringe after all bundles are in place.
- Secure the ends well: Weave in ends before adding fringe if that makes the edge easier to handle. Keep the tails on the wrong side and avoid pulling so firmly that the fabric puckers.
Customize your project
A color change is the simplest way to personalize this scarf. Try a solid shade for a classic accessory, a seasonal color for a winter gift, or a variegated yarn for shifting color without having to add stripes. If you use a new yarn, check its weight and label guidance. Different fibers and thicknesses can change the scarf’s drape, warmth, and size.
You can also make the scarf wider or narrower by changing the starting chain. The original chain of 17 produces 16 stitches in the first row. A different chain length will change the finished width, so keep track of the number of stitches you make and work consistently across every row. A wider scarf may use more yarn and take longer to finish; a narrower one will use less yarn but provide less coverage.
For a longer or shorter scarf, stop the repeated double crochet rows when you reach your preferred length instead of the 70-inch (178 cm) target. This adjustment mainly changes how much of the scarf you can wrap around your neck, and a longer version will require more yarn.
The fringe can be made fuller by placing bundles closer together, but that adds weight and uses more yarn. For a simpler look, use fewer bundles spaced evenly across the ends. You could also add a contrasting-color fringe, though you’ll need extra yarn and should make sure the contrast yarn is similar in thickness so the edge hangs evenly.
A decorative border is another possible variation, but the source pattern calls for a final single crochet row rather than an added edging. If you add a border, it may make the scarf wider or heavier and will require additional yarn. Crochet a short test section first to see whether you like the look and feel.
Frequently asked questions
Is this crochet scarf beginner-friendly?
Yes. The scarf is made in rows with a simple first row of single crochet followed by repeated double crochet rows. It’s a useful project for practicing chains, turning, stitch placement, and working evenly across a row. You’ll need to be comfortable with, or willing to learn, single crochet and double crochet.
How much yarn do I need?
The pattern calls for 2 balls of Red Heart® Super Easy™ yarn. If you substitute a different yarn, the amount needed may change, especially if its thickness or fiber differs. For a wider or longer scarf, plan on needing more yarn than the original version.
What size will the finished scarf be?
The instructions specify a length of 70 inches (178 cm). The starting chain determines the width, but no finished width is provided. Your width can vary with your yarn, hook, and personal tension, so use the first row as a consistent guide and check the fabric as you work.
Can I use a different crochet hook?
The pattern specifies a U.S. size L/11 (8 mm) hook. You can try a different size if you prefer, but it may change the fabric’s density, drape, and width. A smaller hook usually makes tighter stitches; a larger hook usually creates a looser fabric. If you change hooks, crochet a short section first to see whether you like the result.
How do I make the scarf longer or shorter?
Repeat the double crochet row until the scarf reaches the length you want. The pattern’s target is 70 inches (178 cm), but adjusting the length is straightforward. A longer scarf uses more yarn, while a shorter one uses less.
How can I change the scarf’s width?
Change the number of chains in the foundation, remembering that the first single crochet row has one fewer stitch than the starting chain because you skip the first chain from the hook. The pattern’s 17-chain foundation produces 16 single crochet stitches. Changing the width can also change yarn use and the finished look.
Why are my scarf edges uneven?
Uneven edges often come from accidentally skipping the first or last stitch, or working an extra stitch at the edge. The pattern calls for a chain 3 at the start of each double crochet row and a double crochet in the next stitch. Use stitch markers at the edges and count your stitches when you’re learning the repeat.
How do I stop the scarf from curling?
A small amount of curling can happen while a project is in progress, especially if your tension is firm. Check that your foundation chain isn’t tighter than the rows above it, and keep your double crochet stitches relaxed and even. The final single crochet row may help give the edge a neat finish. Follow the yarn label before wetting or blocking the scarf.
How should I wash the finished scarf?
Follow the care instructions on the yarn label, since care depends on the yarn’s fiber content. If machine washing is allowed, use the recommended cycle and water temperature; a laundry bag can help protect the fringe. Reshape the scarf and dry it as directed, avoiding hanging it while wet if that could stretch the fabric.
Can I sell scarves made from this pattern?
The pattern information provided here doesn’t state whether finished items may be sold. Check the original designer’s usage terms before selling finished scarves, and follow any applicable requirements for pattern attribution or commercial use.
Print
Beginner Crochet Scarf
Description
A simple scarf made with single and double crochet stitches, perfect for beginners and as a thoughtful handmade gift.
Materials
- Yarn: 2 balls of Red Heart® Super Easy™ yarn
- Crochet hook: U.S. size L/11 (8 mm)
- Yarn needle: For weaving in the ends
- Scissors: For cutting fringe lengths
Instructions
- Make the foundation chain. Chain 17 (ch 17). Keep the chain relaxed rather than pulling it tight.
- Work the first row. Make 1 single crochet in the second chain from your hook. Then make 1 single crochet in each chain across to the end. You should have 16 single crochet stitches. Turn your work.
- Start the second row. Chain 3. Make 1 double crochet in the next stitch, then make 1 double crochet in each stitch across to the end of the row. Turn your work.
- Repeat the double crochet row. For each following row, chain 3, make 1 double crochet in the next stitch, and make 1 double crochet in each remaining stitch across. Turn at the end of the row. Repeat until the scarf measures 70 inches (178 cm).
- Work the final row. Chain 1, then make 1 single crochet in each double crochet across to the end of the row. Fasten off and leave a tail long enough to weave in securely.
- Weave in the yarn ends. Thread each end onto a yarn needle. Weave it through several stitches on the wrong side of the fabric.
- Make and attach the fringe. Cut yarn into 14-inch (35.5 cm) lengths. Take 3 strands together for each fringe bundle. Fold a bundle in half, pull the folded loop through an edge stitch at one end of the scarf, then draw the loose ends through the loop and tighten gently to form a knot.
Notes
Check the yarn labels before you begin, since labels provide useful care information and help confirm that your two balls match in color and dye lot.