

The late afternoon light catches the yarn as it rests beside my coffee, and the hook makes that small, familiar pull through each loop. A little fabric gathers across my knees, firm enough to hold its shape but soft enough to fold into my palm. This Beginner Crochet Makeup Bag or Pencil Case is the kind of project that gives your hands a steady place to land on a quiet evening. It fits in a basket beside the armchair, travels well to the porch, and asks for only a few simple stitches before it starts looking like something useful.
Why Beginner Crochet Makeup Bag or Pencil Case Is So Soothing to Crochet
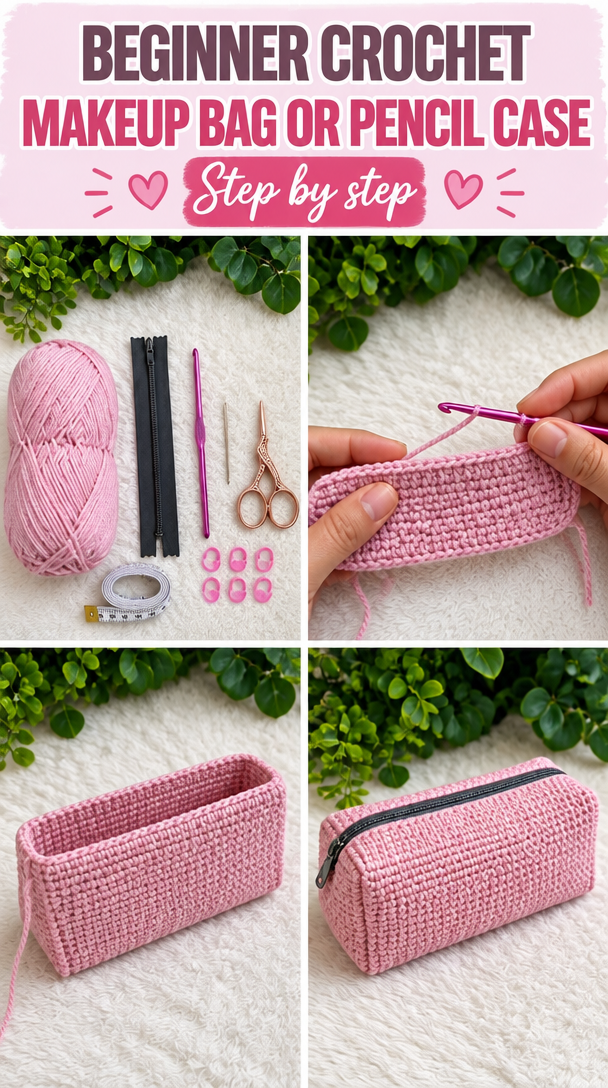
A small pouch has a comforting rhythm because the rows are short enough to see growing. You do not need to hold a large blanket across your lap or keep track of a complicated color chart. The fabric moves from your hook in a calm little strip, and each completed row gives you a natural place to pause.
I made mine over several evenings, usually with the yarn basket on the floor and a mug nearby. The first rows curled a little, as crochet often does, but the fabric settled once it had enough weight. After about ten minutes, my hands warmed up and the hook began making that quiet click against the stitches.
The finished pouch feels useful without looking hurried. You can keep lip balm, a compact, and hair ties inside, or use it for pencils, colored markers, crochet notions, or charging cords. In an American home, it fits just as easily in the living room basket as it does in a desk drawer.
This project also gives you a gentle way to practice recognizing stitches. You will work mainly in double crochet, a taller stitch that creates a flexible fabric with a little breathing room. A smaller hook keeps that fabric from becoming too loose, so the finished pouch feels sturdy rather than floppy.
There is no need to rush the turning points. The end of each row gives you a small check-in: count the stitches, notice the edge, and continue when your hands feel ready. Many people find crocheting calming because this kind of repeated movement leaves room for an ordinary thought to soften.
The Rhythm of This Crochet Project
This pouch begins with a foundation chain, which is the first line of chain stitches that supports the rest of the piece. You will work double crochet stitches across that chain, turn at the end of each row, and repeat the same simple movement until the rectangle reaches the length you want.
A double crochet, abbreviated dc, uses a yarn over before you insert the hook and creates a taller stitch than single crochet. It gives the pouch enough drape to fold neatly while still making steady progress across each row. The stitch repeat is a multiple of 2 stitches plus 2 for the turning chain.
This pattern uses US crochet terms. UK readers often find these posts too, and the same word can mean a different stitch there, so please use the US meaning of double crochet throughout this pattern.
The project suits a first crochet pouch, although the edges need a little attention. Plan on three to five evenings, or about four to six total hours, depending on your pace, your chosen closure, and how often you pause to count. Beginners can work it slowly, while experienced crocheters may finish the rectangle in a weekend.
Pattern at a Glance
Here are the details to keep beside your yarn while you work.
- Skill level: beginner
- Finished size: 7 inches wide by 4 inches tall (18 cm by 10 cm)
- Gauge: 14 double crochet and 8 rows measure 4 inches (10 cm)
- Yarn: worsted weight (weight 4, medium), about 170 yards per 100 g skein, 85 yards total
- Hook: H-8 (5.0 mm)
- Other supplies: yarn needle, scissors, tape measure, one stitch marker, and one button
- Stitch multiple: any multiple of 2 stitches plus 2 for the turning chain
- Estimated time: 4 to 6 hours, spread over 3 to 5 evenings
Materials for Beginner Crochet Makeup Bag or Pencil Case
- About 85 yards of worsted weight yarn (weight 4, medium), in a smooth cotton or cotton-blend fiber, from a 100 g skein with about 170 yards (easy to find; you will use about half a skein)
- H-8 (5.0 mm) crochet hook (a half size up or down is fine depending on your tension)
- Yarn needle for weaving in the ends (a blunt-tipped needle with a large eye works well)
- Small scissors
- Tape measure
- One stitch marker (optional, useful for marking the first stitch)
- One 1-inch button or another small closure you enjoy (can be swapped for a snap or a short crocheted tie)
I used a smooth worsted weight cotton yarn because cotton gives this pouch a firm hand and tolerates frequent washing. A cotton yarn from Lily Sugar’n Cream is one possible choice, although any yarn with a similar weight and yardage can work. Cotton does not spring back as much as acrylic, so keep your tension relaxed and avoid pulling the stitches tight.
Your swatch is worth the twenty minutes it takes. For this pattern, 14 double crochet and 8 rows should measure 4 inches (10 cm). If your swatch comes out smaller, try a larger hook; if it comes out larger, try a smaller hook. The gauge affects the finished size and the way the flap sits over the pouch.
You can substitute worsted weight acrylic or a cotton-acrylic blend. Choose a smooth yarn rather than a fuzzy one so you can see the loops clearly. Acrylic makes a washable pouch, but it can melt under a hot iron, so block it cold or use steam from a distance without touching the yarn.
Step by Step
- Difficulty and repeat: This is a beginner-level project using a multiple of 2 stitches plus 2 for the turning chain. The finished rectangle becomes the body and flap of the pouch, so you will fold it rather than sew separate front and back pieces.
- Make a foundation chain of 28 chain stitches, or ch. A chain is a loop pulled through the previous loop with the hook. Keep these stitches relaxed; if the chain pulls tight, go up one hook size just for the chain, then return to H-8 (5.0 mm) for the first row.
- Row 1: Yarn over, insert the hook into the fourth chain from the hook, yarn over again, and pull up a loop. Yarn over and pull through two loops twice to make one double crochet, or dc. Work 1 dc in each chain across. The first three chains count as the first dc, giving you 26 dc at the end of the row.
- Turn your work. The turning chain lifts the yarn to the height of the next row; here, chain 3, and treat that chain as the first dc. Work 1 dc in the next stitch and in every stitch across. You will have 26 dc at the end of Row 2.
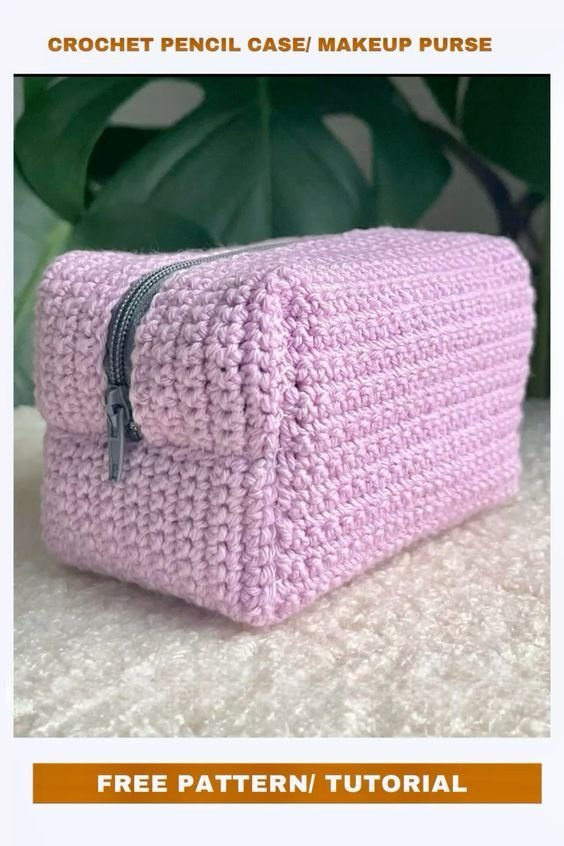
- Repeat Row 2 until you have 16 rows total. Each row has 26 dc, counting the chain-3 turning chain as the first dc. Let the fabric rest in your hand occasionally; it should feel flexible, not tightly drawn.
- At the end of Row 16, measure the rectangle. It should be about 7 inches wide by 8 inches long (18 cm by 20 cm). Small differences are normal, but if the piece is much wider or narrower, check your gauge before continuing.
- Fold the lower half of the rectangle upward so the bottom edge meets the point about 4 inches from the top. This creates a pouch body measuring about 7 inches wide by 4 inches tall (18 cm by 10 cm), with the remaining 4 inches forming the flap.
- Join one side seam with single crochet, abbreviated sc. Insert the hook through both layers at the side edge, yarn over, pull up a loop, yarn over, and pull through both loops. Work 16 sc evenly down the side. Repeat on the other side, making 16 sc. Do not crochet across the top opening.
- At the top flap, find the center stitch. Place a stitch marker through it if helpful. To make a button loop, chain 10, then slip stitch, or sl st, into the marked center stitch. A slip stitch joins the yarn without adding height. Fasten off and leave a 6-inch tail for weaving in.
- Sew the button to the front of the pouch, checking that it sits beneath the loop when the flap closes. Use the same yarn and make several small passes through the button holes. Keep the closure secure, especially if you plan to carry the pouch in a bag.
- If a mistake shows up, stop before pulling at the fabric. Count the stitches at the row end and look for a missing V-shaped stitch along the edge. If the error is only a row or two back, pull gently on the working yarn to undo the stitches, then rebuild the row; if it appears several rows later and does not affect the shape, you can leave it as a quiet mark of the making.
- Weave in the ends with a yarn needle by threading each tail through several stitches in different directions. Trim the excess after the tail feels secure. A cotton pouch usually needs only a light shaping, so lay it flat, smooth the sides, and let it dry completely if you dampen it while blocking.
Where This Piece Finds Its Place
Once the button closes, the pouch feels surprisingly complete. The dense little rectangle becomes a useful home for makeup, pencils, sewing clips, earbuds, or the small collection of hooks that tends to wander from room to room.
I like it beside the armchair with a pencil and a small notepad tucked inside. It also works in a summer tote, where the cotton fabric feels more comfortable than a stiff plastic case. In the fall, you can keep hand cream and lip balm inside for evenings on the porch or walks after the first cold snap.
For a gift, fill it with a few colored pencils, a small notebook, or travel-size toiletries. A simple button in a warm wood tone makes it feel personal without adding much extra work. You could also make two in related colors for a friend who likes keeping a desk organized.
If you sell finished items, my own policy is simple: I am comfortable selling pieces I personally make from my patterns, and I credit the pattern source when one is not mine.
Caring for Your Crochet
Because this version uses cotton, wash it in cold or warm water on a gentle cycle, preferably inside a mesh laundry bag. Hand washing also works well when the pouch only needs a small refresh. Use a mild detergent and avoid bleach, which can weaken fibers and change the color.
Press out water with a towel rather than twisting the pouch. Reshape it while damp and dry it flat, with the flap open, so the sides keep their shape. Never hang it wet, since the weight of the water can stretch the seams and distort the opening.
Cotton responds well to gentle blocking. You can smooth the pouch into its finished measurements and let it air-dry, but do not press a hot iron directly onto the fabric. Acrylic substitutions need extra care because acrylic can melt under a hot iron; block acrylic cold or use distant steam without touching the surface.
Store the pouch folded or lying flat in a breathable drawer or basket. Avoid sealing it damp in plastic. If you use wool for another version, add cedar or lavender nearby for moth protection, and remember that untreated wool can felt in warm agitation while superwash wool tolerates machine washing more easily.
Keep leftover yarn with its label, even if only a small amount remains. The label records the fiber, weight, care instructions, and dye lot, which helps if you later want to repair the pouch or make a matching piece.
Small Ways to Make It Your Own
You can keep the shape exactly as written or let the yarn guide a small variation. These changes are invitations, not requirements, and each one shifts the feel of the finished pouch.
- Try a thicker worsted weight yarn with a larger hook for a larger, softer case. A thinner yarn makes a smaller pouch with more drape, but you will need to check gauge and may want additional rows for height.
- Change colors at the end of any row to create simple stripes. Two rows of one color followed by two rows of another give the fabric a quiet, even rhythm without requiring a complicated plan.
- Swap the double crochet for single crochet if you want a denser fabric. Single crochet creates a firmer pouch with less stretch, but it takes more rows and more time to reach the same height.
- Resize the width by beginning with any multiple of 2 stitches plus 2 for the turning chain. Keep the stitch multiple intact so the turning chain and row edges continue to line up.
- Add a simple single crochet border around the flap and opening for a more finished edge. Work slowly at the corners, placing one or two stitches where needed so the border lies flat instead of pulling.
- Make a gift version in a favorite school color, a quiet neutral, or a bright summer shade. You can replace the button with a short crocheted tie when giving the pouch to someone who prefers a soft closure.
One thing I noticed while making the sample was how much the fabric changed after the side seams closed. Before folding, the rectangle looked plain and almost too simple. Once the flap came down, the shape felt purposeful, and the little bit of structure from the cotton became an advantage.
Frequently Asked Questions About Beginner Crochet Makeup Bag or Pencil Case
Can I use a different hook size for this crochet pouch?
Yes, you can use a different hook size if your tension needs it. H-8 (5.0 mm) is the stated hook, but a half size up or down can help you reach the gauge of 14 double crochet and 8 rows in 4 inches (10 cm). A smaller hook makes a firmer fabric, while a larger hook makes a looser pouch.
What yarn can I substitute for the cotton?
You can substitute a smooth worsted weight yarn with about 170 yards per 100 g skein. Cotton gives the pouch a firm, washable feel, while acrylic creates a lighter fabric with more spring. A cotton-acrylic blend also works. Check the care label and avoid fuzzy yarns, since fuzz can hide the stitch tops and make counting harder.
What should I do if I find a mistake several rows later?
If the mistake affects the edge, the stitch count, or the flap shape, pull back calmly to the problem row and redo it. If the stitch count remains correct and the error sits in the middle of the fabric, you can often leave it. Mark the row where you stop next time, and count the final two stitches before turning.
Is this pouch suitable for a complete beginner?
Yes, this pouch suits a complete beginner who knows how to make a chain and is ready to practice double crochet. The side seams and button loop add a little concentration, but they use basic stitches. Work near a good light and pause when the fabric starts to feel confusing rather than forcing your hands to continue.
How long does the Beginner Crochet Makeup Bag or Pencil Case take?
Plan on about four to six total hours, spread over three to five evenings. Your pace, yarn thickness, stitch tension, and finishing choices will change the timing. The rectangle works up steadily, while sewing the button and weaving in the ends take a quieter bit of attention at the end.
Does this pattern use US or UK crochet terms?
This pattern uses US crochet terms. The main stitch is US double crochet, abbreviated dc, which is called treble crochet in UK terminology. The chain, slip stitch, single crochet, and all other stitch names here follow US usage, so check your pattern references if you usually crochet with UK terms.
Take the Time You Need
Let the pouch grow at the pace your hands choose. A missed stitch does not undo the useful quiet of the evening, and a slightly uneven row can still become a case that carries something you reach for every day. Keep the yarn close, count when you need to, and let the simple rhythm be enough for now.
—META—
SEO Title: Beginner Crochet Makeup Bag or Pencil Case
Meta Description: Make a calm beginner crochet makeup bag or pencil case with simple stitches, clear counts, cotton yarn, and gentle step-by-step guidance.
Slug: beginner-crochet-makeup-bag-pencil-case
Category: Crochet Patterns
Tags: beginner crochet, crochet pouch, makeup bag, pencil case, slow making
Image Alt Text: A cotton crochet pouch growing beside a hook and yarn basket
A close view of double crochet rows and the foundation chain
A finished crochet makeup bag or pencil case with a button closure
Pinterest Title: Beginner Crochet Makeup Bag
Pinterest Description: Make a simple crochet makeup bag or pencil case with steady stitches and a useful everyday shape. A calm project for quiet evenings and thoughtful gifts.

Beginner Crochet Makeup Bag or Pencil Case
- Total Time: 360 minutes
Description
Create a simple and soothing crochet makeup bag or pencil case using basic double crochet stitches. This project is perfect for beginners and results in a useful pouch for various items.
Materials
- About 85 yards of worsted weight yarn (weight 4, medium), preferably smooth cotton or cotton-blend fiber, from a 100 g skein with about 170 yards
- H-8 (5.0 mm) crochet hook
- Yarn needle for weaving in ends
- Small scissors
- Tape measure
- One stitch marker (optional)
- One 1-inch button or another small closure (can be swapped for a snap or a short crocheted tie)
Instructions
- Make a foundation chain of 28 chain stitches (ch). Keep these stitches relaxed; if the chain pulls tight, go up one hook size just for the chain, then return to H-8 (5.0 mm) for the first row.
- Row 1: Yarn over, insert the hook into the fourth chain from the hook, yarn over again, and pull up a loop. Yarn over and pull through two loops twice to make one double crochet (dc). Work 1 dc in each chain across. You should have 26 dc at the end of the row.
- Turn your work. Chain 3 (this counts as the first dc), then work 1 dc in the next stitch and in every stitch across. You should have 26 dc at the end of Row 2.
- Repeat Row 2 until you have 16 rows total.
- At the end of Row 16, measure the rectangle. It should be about 7 inches wide by 8 inches long.
- Fold the lower half of the rectangle upward so the bottom edge meets the point about 4 inches from the top, creating a pouch body measuring about 7 inches wide by 4 inches tall.
- Join one side seam with single crochet (sc). Work 16 sc evenly down one side. Repeat on the other side, also making 16 sc.
- At the top flap, find the center stitch. To make a button loop, chain 10, then slip stitch (sl st) into the marked center stitch. Fasten off and leave a 6-inch tail for weaving in.
- Sew the button to the front of the pouch, ensuring it sits beneath the loop when the flap closes.
- Weave in the ends with a yarn needle, threading each tail through several stitches in different directions. Trim any excess.
Notes
Keep tension relaxed while crocheting to avoid a floppy pouch. You can substitute yarn types but aim to maintain the properties of smooth worsted weight for best results.
- Active Time: 240 minutes