

Creating delicate tissue paper pom-pom flowers can transport you to a peaceful place, where the soft rustle of colorful paper drifts in the air like a gentle breeze. As you fold and shape the layers, the tactile experience calms the mind, inviting a slow and intentional rhythm. Each petal unfolds like a whisper, revealing bursts of vibrant hues that dance in the light. These flowers offer a lovely way to bring warmth and cheer to any space, and the act of making them holds a meditative quality, reminding us to embrace the quiet joy of creativity.
The Heart Behind This DIY
Making tissue paper pom-pom flowers brings forth more than just a visual delight; it nourishes the soul. In today’s fast-paced world, taking the time to create something with your hands encourages a sense of stillness. The act of folding, fluffing, and securing each layer pulls us into the present moment. Each gentle crease and fluff carries with it a history of care and intention.
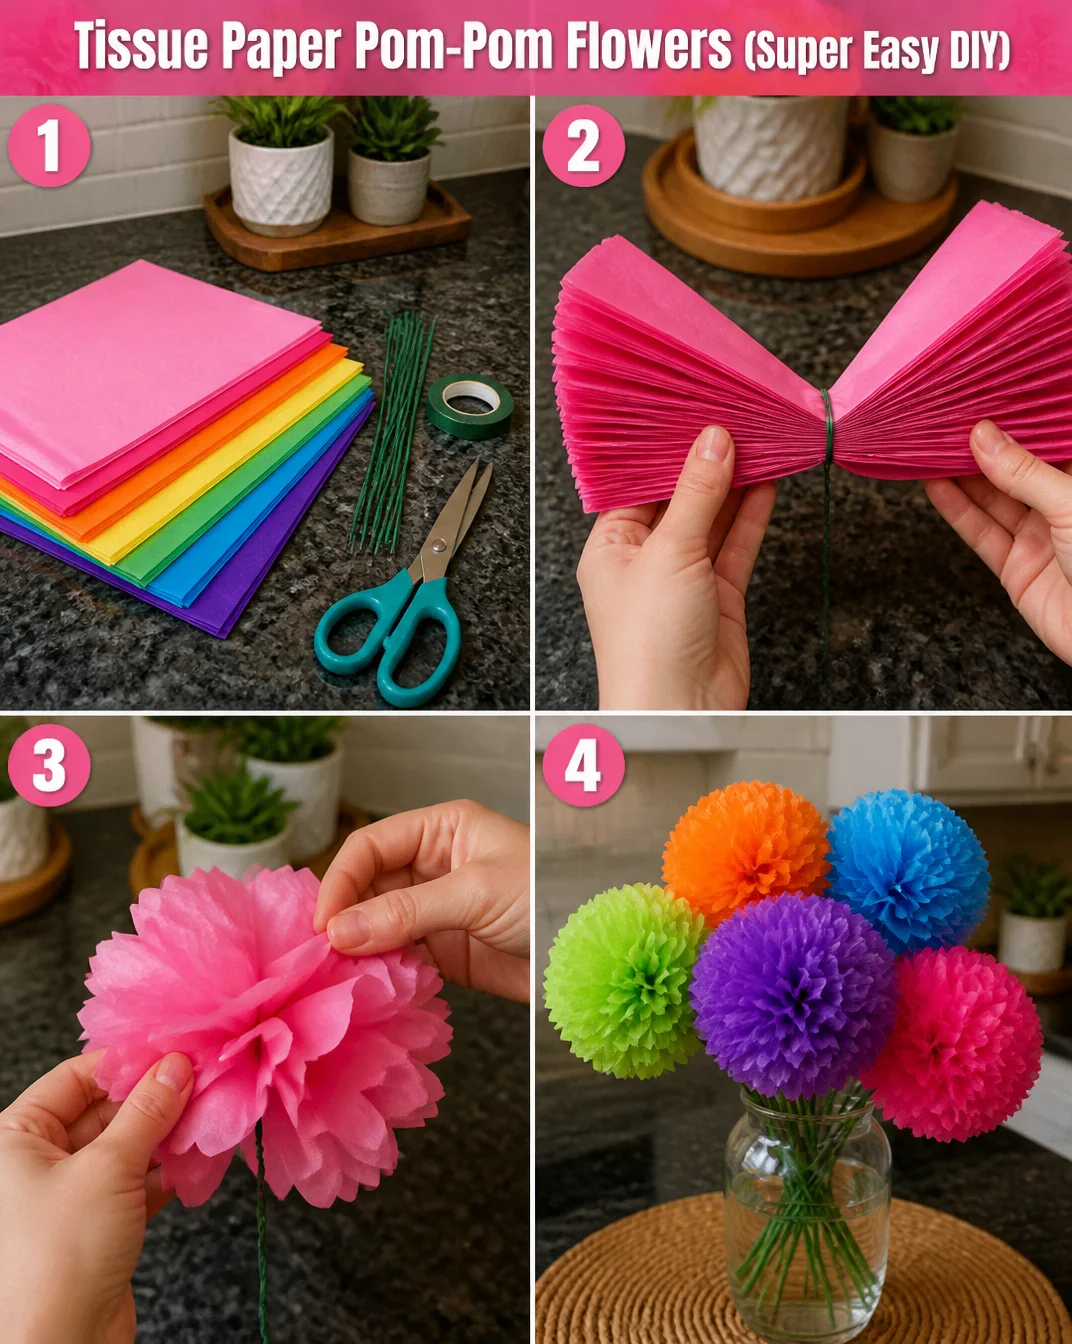
As you sit quietly with your materials, the myriad colors of tissue paper offer a feast for the eyes. You can feel the smooth texture slip between your fingers, guiding you to focus on the task at hand. There is no rush here—each step is an invitation to immerse yourself in a sensory experience. Whether you’re brightening up a party, decorating a room, or simply enjoying crafting time, these flowers embody a peaceful creativity that allows you to unwind.
A Gentle Look at the Process
The process of making pom-pom flowers unfolds like a gentle wave, flowing seamlessly from one step to the next. It begins with the soft touch of tissue paper, each sheet a promise of color and cheer. As you layer the paper, the sound of rustling offers a soft symphony. The act of folding creates a satisfying rhythm, grounding you deeply in the present.
This DIY project embraces simplicity, allowing you to experience each moment fully. A little snip here, a delicate twist there, and soon you find yourself enveloped in the joy of creation. With gentle movements, you shape your floral creation, watching it bloom with each intentional fold. The combination of seeing, touching, and creating creates a holistic experience for your senses, soothing your spirit along the way.
Materials You’ll Need
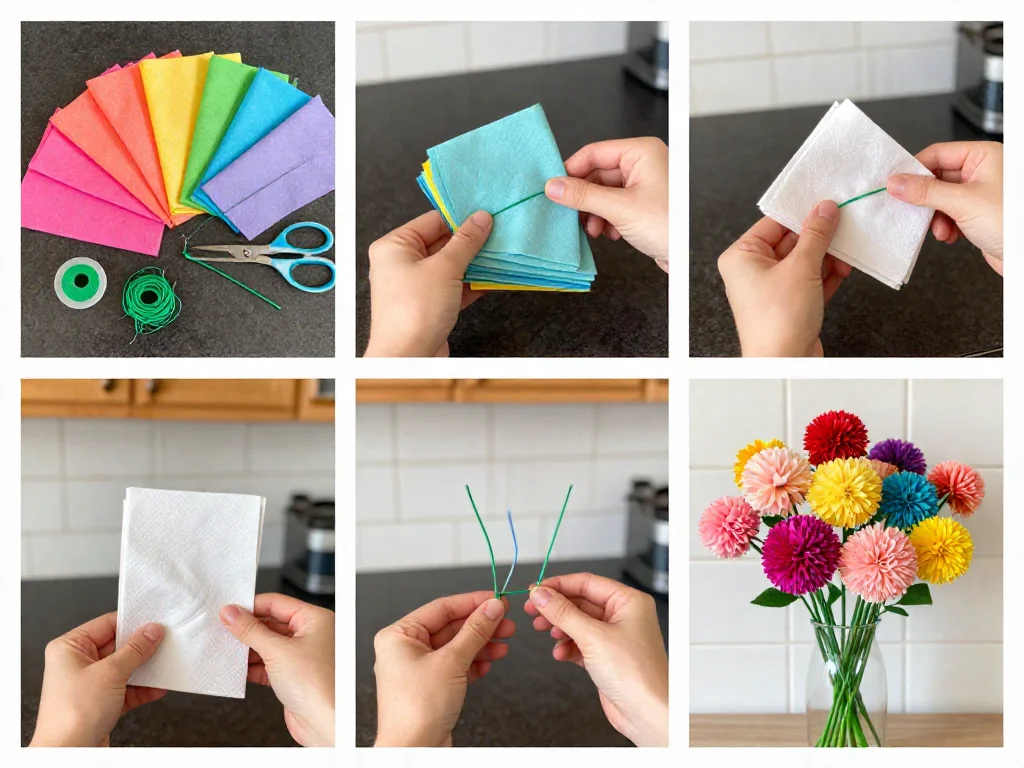
Gathering your materials serves as an exciting prelude to your crafting session. Having everything ready creates a cozy atmosphere. Here’s what you’ll need for your tissue paper pom-pom flowers:
- Tissue paper (assorted colors; easy to find at craft stores or online)
- Scissors (for cutting tissue paper)
- Wire or string (to hold the pom-poms together; floral wire works well)
- Optional: additional decorations (like ribbons or beads for added charm)
All the materials are easy to gather and can often be substituted with what you have at home, allowing for a more personal touch in your crafting.
Step-by-Step Directions
- Start by taking several sheets of tissue paper. Aim for about six to eight sheets to create a fluffy pom-pom.
- Lay the sheets flat on a sturdy surface. The colors can harmonize or offer playful contrast, depending on your intention.
- Fold the sheets lengthwise into an accordion shape, making 1 to 2-inch folds. The texture of the paper under your fingers feels soft and inviting.
- Once fully folded, trim the ends into a rounded or pointed shape for petals, depending on your desired look.
- Secure the center of the folded paper with a length of wire or string, wrapping it snugly to hold the layers in place.
- Gently pull apart each layer of tissue paper, starting with the topmost sheet. The sound of the paper loosening feels like a release.
- Fluff the layers carefully, shaping them into a full bloom. Take your time, noticing how the flower grows with each tender touch.
- Finally, display your pom-pom flower in your favorite spot, letting it bring a touch of color and joy to your space.
Enjoying the Finished Piece
Once your tissue paper pom-pom flowers come to life, they can find a place in your everyday moments. Hang them from the ceiling for a festive atmosphere or display them on a table for an extra pop of color. They can brighten up a cozy corner of your home or bring a spark of joy to a gathering.
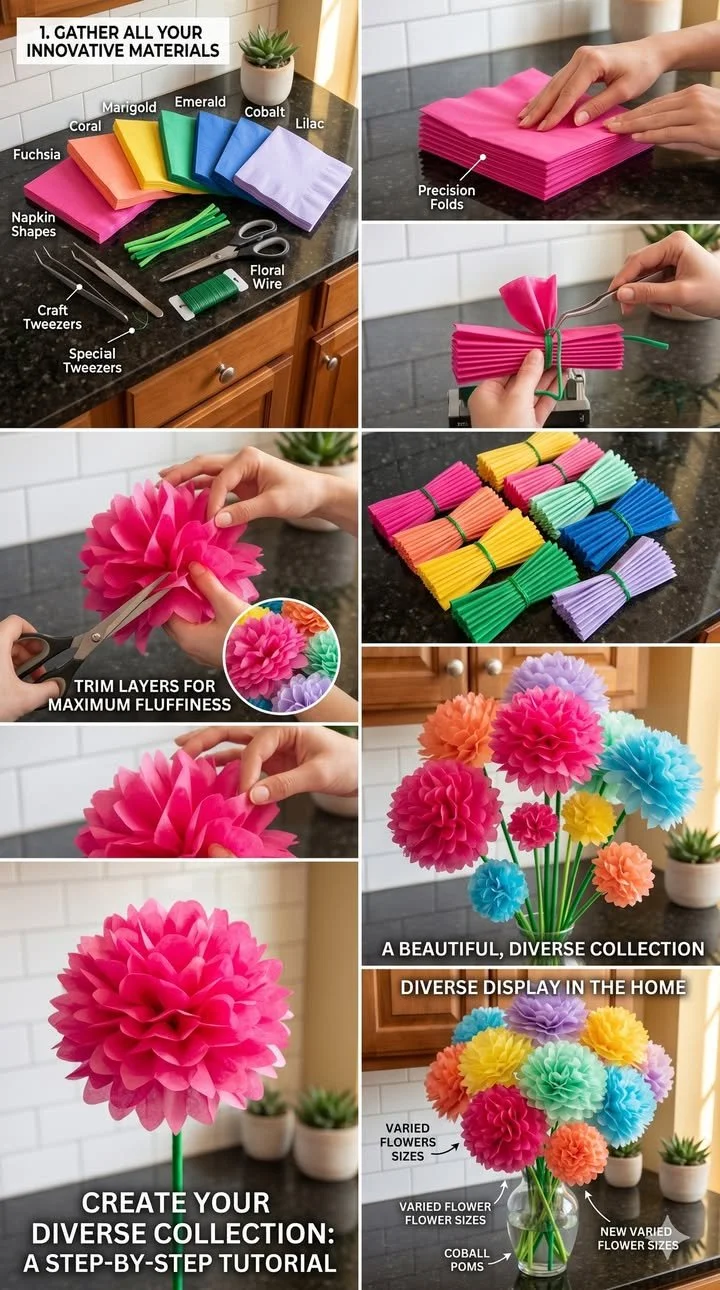
These flowers invite a sense of playfulness and beauty into your space. Encountering their vibrant hues encourages a smile, and their lightness transcends the ordinary. Each bloom can represent a memory, a feeling, or a moment spent in mindful creation. Allow yourself to pause and appreciate their charm, breathing in the warmth they provide.
Keeping It for Later
Tissue paper pom-pom flowers are not just a fleeting creation; they can be lovingly stored and reused. When the time comes to tuck them away, choose a soft yet protective space. Keep them in a box, ensuring they are flat and not crushed under heavier items.
If you want to refresh their look, consider gently re-fluffing and reshaping them before use. Also, if you enjoy seasonal decor, these flowers can adapt beautifully. Change their placement or add different ribbons to suit the occasion. Cherishing your creations while finding new ways to enjoy them extends their life and the joy they bring.
Gentle Tips & Variations
Creating tissue paper pom-pom flowers offers endless possibilities. Here are some gentle invitations to personalize your experience:
- Experiment with various tissue paper textures. Consider mixing in some metallic or patterned sheets for added interest.
- Try different sizes for your pom-poms. Larger blooms can be a stunning centerpiece, while smaller ones can add subtle charm to your decor.
- Explore using different securing methods like string or twine, allowing for various finishes that might better suit your style.
- Invite loved ones to join in the creation. Making these flowers together adds layers of connection, creating not just blooms but memories.
FAQs About Tissue Paper Pom-Pom Flowers (Super Easy DIY)
How long do tissue paper pom-pom flowers last?
These flowers can last quite a while if stored properly. Keeping them in a cool, dry place away from direct sunlight helps preserve their colors.
Can I use different types of paper?
Yes, you can! While tissue paper is ideal for its lightness and ease of use, you can experiment with other lightweight papers like crepe paper for a different effect.
What occasions are best for these flowers?
Tissue paper pom-pom flowers work well for a variety of occasions—from birthday celebrations to bridal showers. They can also brighten a simple day at home or a cozy gathering with friends.
Do I have to stick to a specific color scheme?
Not at all! Feel free to explore your favorite color palettes or seasonal themes. Crafting should be about expressing yourself, so let your creativity guide you.
Can children help with this project?
Absolutely! This project is a fun way for children to engage in creativity. Just be sure to supervise them with scissors and wire for safety.
A Gentle Note Before You Go
As you reflect on your experience crafting tissue paper pom-pom flowers, may you carry a sense of calm into your day. Each fold and fluff not only creates beauty but also nurtures a quieter space in your mind and heart. Allow yourself to indulge in the little moments of joy that crafting can bring, reminding yourself that the journey of making is as fulfilling as the creation itself. Embrace the quiet, the colors, and the simplicity of your handiwork, and let it inspire you to explore further in your cozy crafting journey.
Print
Tissue Paper Pom-Pom Flowers
- Total Time: 10 minutes
- Yield: Multiple flowers depending on sheets used
- Diet: N/A
Description
Create beautiful and colorful tissue paper pom-pom flowers that add a cheerful touch to any space while inviting a sense of calm and creativity.
Ingredients
- Tissue paper (assorted colors)
- Scissors
- Wire or string
- Optional: additional decorations (like ribbons or beads)
Instructions
- Start by taking several sheets of tissue paper. Aim for about six to eight sheets to create a fluffy pom-pom.
- Lay the sheets flat on a sturdy surface.
- Fold the sheets lengthwise into an accordion shape, making 1 to 2-inch folds.
- Once fully folded, trim the ends into a rounded or pointed shape for petals.
- Secure the center of the folded paper with a length of wire or string.
- Gently pull apart each layer of tissue paper, starting with the topmost sheet.
- Fluff the layers carefully, shaping them into a full bloom.
- Finally, display your pom-pom flower in your favorite spot.
Notes
Experiment with various tissue paper textures and sizes for personalized blooms. This project is great for all ages, just be cautious with scissors.
- Prep Time: 10 minutes
- Cook Time: 0 minutes
- Category: Crafts
- Method: Crafting
- Cuisine: N/A