

As you gently sift your fingers through the warm grains of sand, you become aware of the delicate breeze tickling your skin. Each granule glides through your hands like a whispered secret, the fine texture dancing with the light. This quiet moment connects you with the simple joy of creating. The Easy 2-Ingredient Sensory Sand invites you to take a breath, slow down, and immerse yourself in the tactile experience of crafting something soothing and delightful. It feels like a warm embrace, a silken reminder of peaceful simplicity.
The Heart Behind This DIY
Creating Easy 2-Ingredient Sensory Sand serves as a gentle reminder to pause and engage with our senses. In a world filled with noise and haste, this simple activity encourages you to connect with the comforting textures of the materials. The act of feeling the sand slip through your fingers offers a grounding experience, pulling your thoughts away from the distractions of daily life.
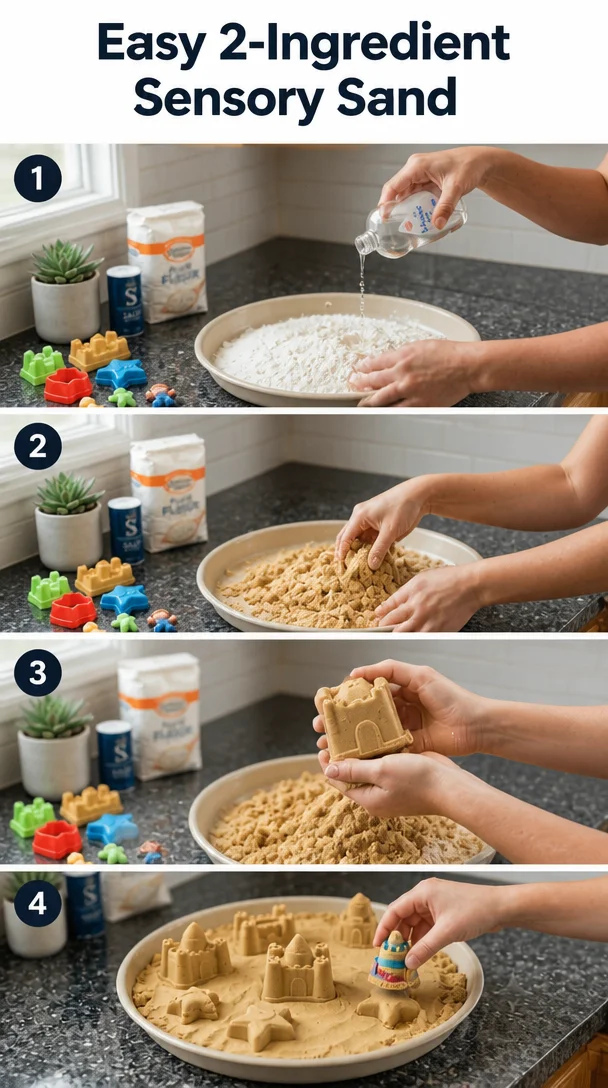
The colors, textures, and even sounds of this project create a warm atmosphere. As you play with the sand, your mind can ease into a quieter space, promoting mindfulness and relaxation. It transforms into a small, cozy ritual, a moment where you can feel fully present. This little treasure can bring a cozy corner of calm into your home.
A Gentle Look at the Process
When embarking on the journey of making Easy 2-Ingredient Sensory Sand, you’ll find that the movement is soothing. Picture yourself pouring the materials into a bowl, a gentle sound echoing like rainfall. The colors blend softly as you mix them together, the tactile feedback letting you know you’re engaging with your creation.
Visualize the transition from separate ingredients to a unified blend. This rhythmic flow invites you to connect with each step, allowing a sense of tranquility to permeate the atmosphere. As you gather your materials, notice the colors and scents that surround you. Let each element contribute to the gentle experience of making.
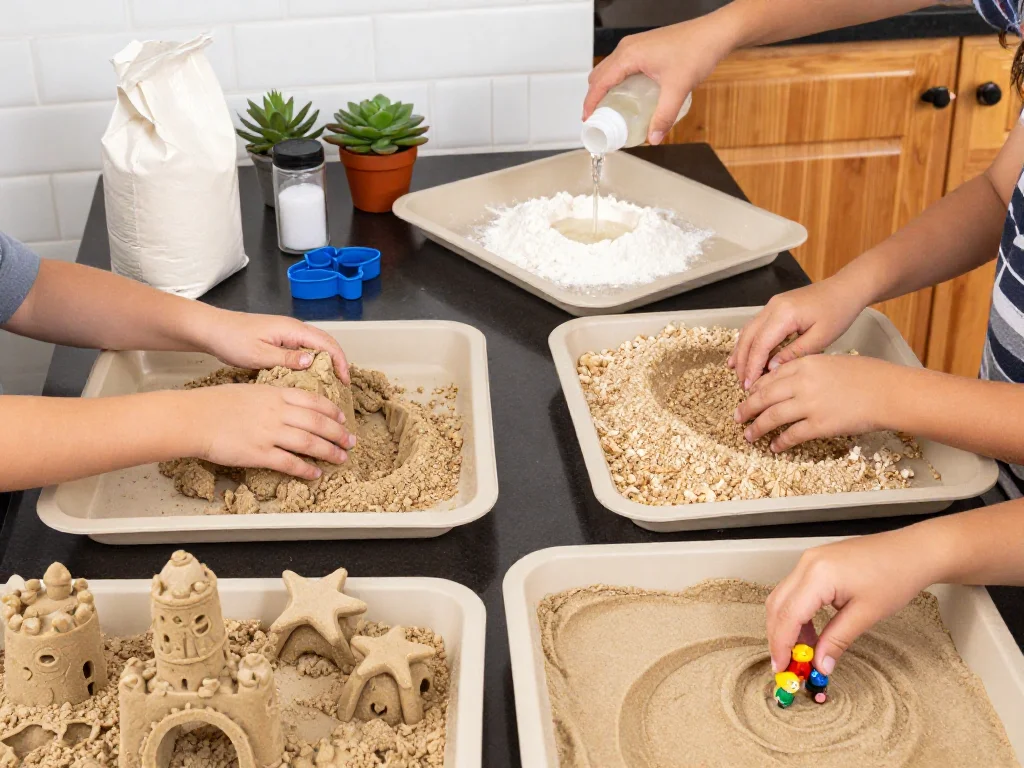
Materials You’ll Need
- All-purpose flour (easy to find and commonly stocked)
- Vegetable oil (light scents can add to the experience)
Both ingredients are simple and familiar. These can usually be found in every kitchen, emphasizing that this project doesn’t require specialty items, just your willingness to create.
Step-by-Step Directions
- Prepare your space: Begin by clearing a cozy spot on your table. Lay down a clean cloth or a large bowl to catch any stray grains.
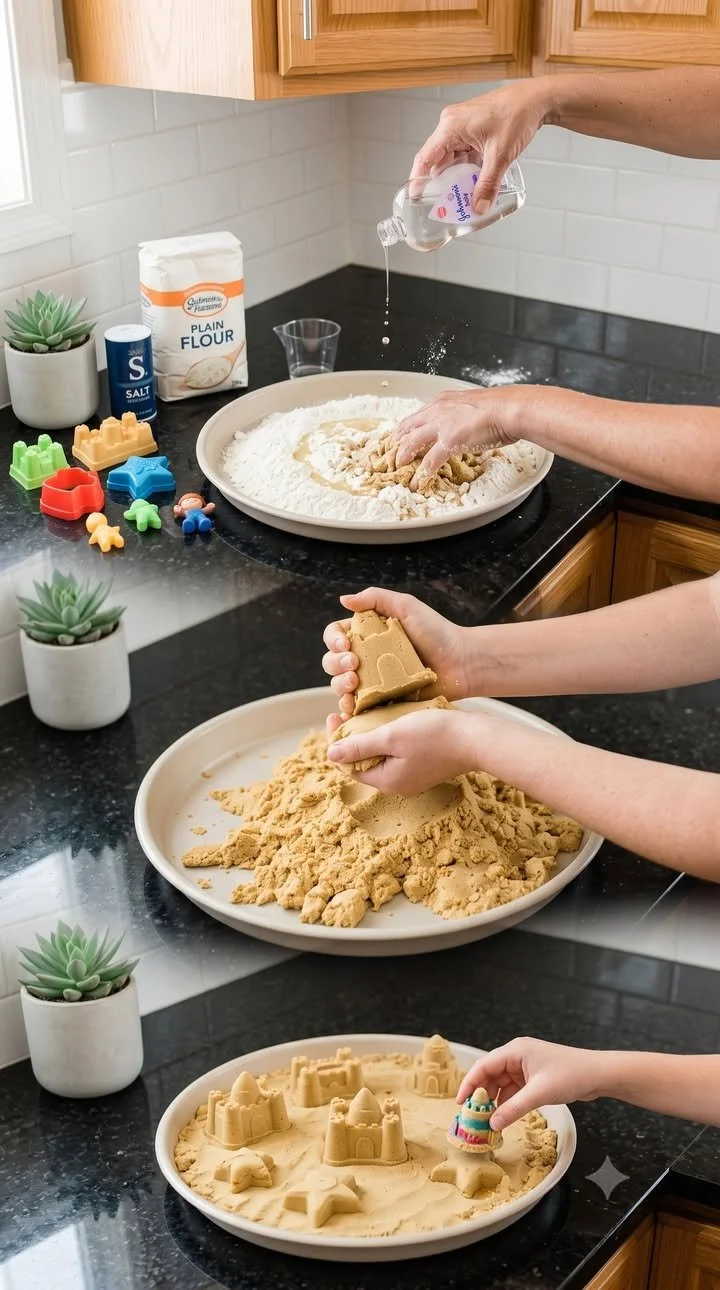
- Measure the flour: Pour about 2 cups of all-purpose flour into your bowl. Feel the soft, powdery texture as it spills from the measuring cup and settles softly.
- Add the oil: Gently measure 1/4 cup of vegetable oil and drizzle it over the flour. Notice the rich, smooth feel of the oil pooling amidst the dry grains.
- Mix together: With clean hands, start to blend the flour and oil together. Feel the transformation as the powder becomes drier and more textured, almost like warm cake batter.
- Knead gently: Continue mixing until it holds together entirely, kneading it slowly until you achieve a uniform sand-like texture. Focus on each gracious motion as your hands work through the blend.
- Embrace the color: If you’d like to customize your sand, consider adding a drop of food coloring now, kneading it in until the hues blend seamlessly.
- Store your sensory sand: Once you are satisfied with the consistency and color, set it aside in a small container or jar. Store it in a cool, dry place until you are ready to enjoy it.
Using Easy 2-Ingredient Sensory Sand in Everyday Life
Now that you have your Easy 2-Ingredient Sensory Sand, imagine ways to incorporate it into your space. A lovely display in a glass jar can bring warmth to your coffee table or desk. You might find joy in running your fingers through the sand while enjoying a quiet moment with your favorite book, feeling the texture as you read.
You can also use this sensory sand in a calming sensory tray, perfect for a child or for yourself when in need of a break. As you create shapes or simply allow it to flow between your fingers, it serves as a self-soothing remedy. It bridges the gap between playful childhood reminiscence and adult calmness, making every moment spent with it meaningful.
Making This DIY Last
To preserve the cozy experience of your Easy 2-Ingredient Sensory Sand, consider storing it in an airtight container. This helps to keep it fresh and prevents it from becoming too dry or clumping together. A simple glass jar or a resealable plastic bag works beautifully.
When you want to reuse it, give it a gentle shake to break any clumps, bringing back its delightful texture. Remember, if the sand feels a bit dry over time, adding a few drops of vegetable oil can help restore its original softness.
Calm Customization Ideas
As you grow comfortable with your Easy 2-Ingredient Sensory Sand, consider these gentle suggestions to infuse a personal touch:
- Add essential oils: A few drops of lavender or chamomile can enhance the sensory experience, creating a calming aroma.
- Different colors: You can create multiple jars of sand in different colors, each evoking different moods or seasons.
- Add natural elements: Tiny shells, dried flowers, or pebbles can create a more intricate sensory experience, inviting exploration and play.
- Incorporate textures: Mixing in small beads or glitter can add a different tactile quality while keeping the overall experience soothing.
Each small change opens up the opportunity to make this project truly yours, connecting more personally with the feelings of calm and creativity.
FAQs About Easy 2-Ingredient Sensory Sand
Can I use different oils?
Yes, you can explore other cooking oils, like coconut or olive oil. Each will bring a distinct texture and subtle scent.
Is there a way to make this sand coarse?
You can try adding a small amount of sugar or salt to create a different texture. Start small, as this can change the feel significantly.
How do I clean up if I spill it?
If some sand escapes during your making, gently sweep it up with a soft brush or use a damp cloth to gather what you can. It cleans up easily and won’t leave much mess behind.
Can children help with this DIY?
Absolutely! This is a family-friendly project, and it offers a great opportunity for kids to engage in the creative process. Supervision is gentle but can enhance the experience.
How long will it last?
When stored properly in an airtight container, your sensory sand can last for months. If it begins to dry out, just add a touch of oil to revive it.
A Gentle Note Before You Go
As you reflect on the process of creating your Easy 2-Ingredient Sensory Sand, take a moment to appreciate the tranquility that comes with crafting. Allow each grain to remind you of the calmness you can cultivate in your life. While the aesthetic or playful qualities are delightful, it’s the mindfulness of making that truly nurtures your spirit. As you integrate this sensory experience into your day, remember that the joy lies in both the creation and the quiet moments that follow. Embrace your cozy creativity and carry this grounding practice with you.
Print
Easy 2-Ingredient Sensory Sand
- Total Time: 10 minutes
- Yield: 1 batch
- Diet: N/A
Description
Craft your own soothing sensory sand using just two simple ingredients for a calming tactile experience.
Ingredients
- 2 cups all-purpose flour
- 1/4 cup vegetable oil
Instructions
- Prepare your space: Begin by clearing a cozy spot on your table.
- Measure the flour: Pour about 2 cups of all-purpose flour into your bowl.
- Add the oil: Gently measure 1/4 cup of vegetable oil and drizzle it over the flour.
- Mix together: Use clean hands to blend the flour and oil together.
- Knead gently: Continue mixing until it holds together entirely.
- Embrace the color: If desired, add food coloring now.
- Store your sensory sand: Set it aside in a small container or jar.
Notes
To revive dry sand, add a few drops of vegetable oil. Can be stored in an airtight container for months.
- Prep Time: 10 minutes
- Cook Time: 0 minutes
- Category: Craft
- Method: Mixing
- Cuisine: N/A