This post contains Amazon affiliate links. As an Amazon Associate I earn from qualifying purchases.
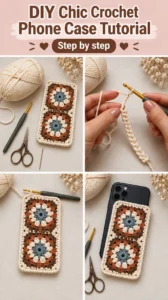
The hook makes a small, soft click against the table while the afternoon light settles over the yarn. This Crochet Granny Phone Cover grows quickly in your hands, one familiar stitch after another, until it rests with a little weight in your palm. I made mine beside the living room window, with my coffee cooling near the yarn basket, and liked how the simple fabric gave my attention one gentle place to land.
Why Crochet Granny Phone Cover Is So Soothing to Crochet
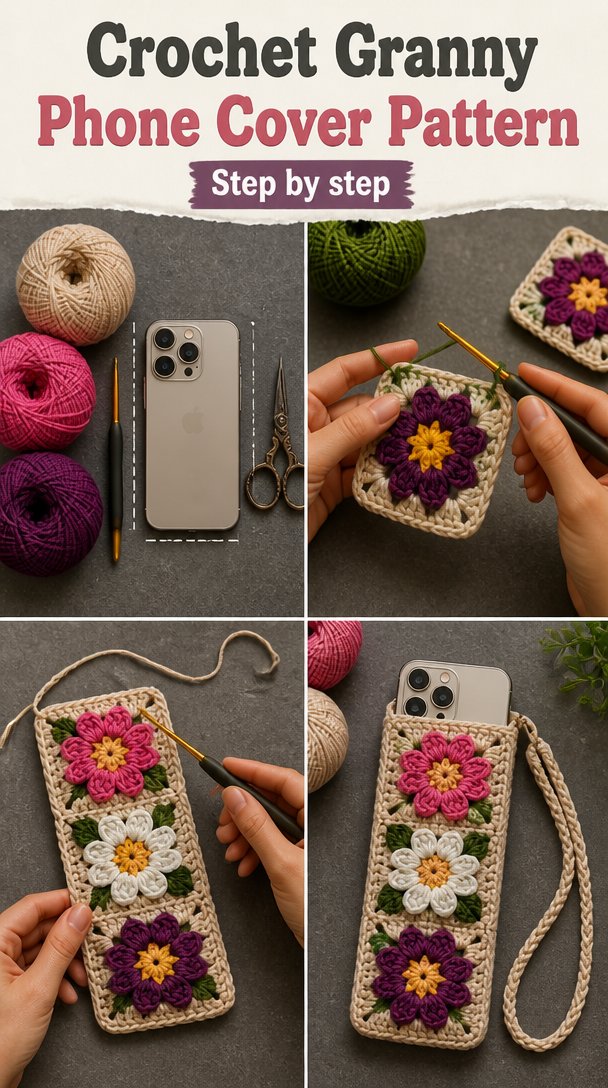
A small project has its own kind of comfort. You can carry it from the couch to the porch, set it beside your plate during a quiet lunch, or tuck it into a project bag before leaving the house. It does not ask you to remember a long chart or manage a large blanket across your knees.
This phone cover uses steady rows of double crochet, with a little granny-style color change to give the fabric a familiar handmade character. The stitch has enough height to make progress visible, but it remains simple enough for your hands to find their rhythm after a few rows.
My first rows curled slightly at the edges. That is normal for this small fabric, and the piece settled once it gained a little length. After about ten minutes, my hands warmed up and the yarn began sliding through my fingers more evenly.
The project also leaves room for ordinary life. You can pause after any row, mark your place, and return later without losing the thread of the work. Many people find crocheting calming because repeated hand movements give the mind a quiet, manageable focus. This cover offers that rhythm without asking for several weeks of commitment.
How Crochet Granny Phone Cover Comes Together
The cover begins with a foundation chain, which is a row of chain stitches that forms the base. You will work double crochet into the chain, turn at the end of each row, and keep the same stitch count throughout the main fabric. The granny-style detail comes from changing colors every few rows rather than from a complicated granny square construction.
Double crochet, abbreviated dc, creates a flexible fabric with a little drape. It suits a phone cover because the fabric grows quickly and remains soft enough to slide around the phone without feeling stiff. A simple single crochet border, abbreviated sc, gives the open edges a firmer finish.
This pattern uses US crochet terms. UK readers often find these posts too, and the same word means a different stitch there, so please use US stitch meanings as written. The pattern is easy for a beginner who feels comfortable making chain stitches and working into rows, while an experienced crocheter can finish it during a slow evening.
Plan on about two to three hours of crochet time, spread across one or two evenings. The color change and final border take a little attention, but the main rows move steadily.
Pattern at a Glance
Keep this small summary nearby while you work.
- Skill level: Easy, beginner-friendly
- Finished size: 4 inches wide by 7 inches tall (10 cm by 18 cm)
- Gauge: 14 double crochet and 8 rows measure 4 inches (10 cm)
- Yarn: Worsted weight (weight 4, medium), about 110 total yards (100 m), or about 65 g
- Hook size: H-8 (5.0 mm)
- Other supplies: Yarn needle, scissors, tape measure, and one stitch marker
- Stitch multiple: 1 stitch, with no repeating multiple for the basic rectangle
- Estimated time: About two to three hours
Materials for Crochet Granny Phone Cover
- Worsted weight yarn (weight 4, medium), cotton or acrylic, about 110 yards (100 m) total, or about 65 g. Use one main color with a small amount of a second color for the granny-style stripes. One 100 g skein that contains about 170 yards is more than enough.
- A crochet hook in size H-8 (5.0 mm). A half size up or down is fine depending on your tension. Choose I-9 (5.5 mm) if your stitches feel tight, or G-6 (4.0 mm) if your fabric looks loose.
- Yarn needle for weaving in the ends (a blunt-tipped needle with a large eye works well)
- Scissors
- One stitch marker, optional, for marking the first stitch of the border
- Tape measure for checking gauge and the finished size
- A phone to check the fit as you work, with the case removed if you normally use a separate case
I used a smooth worsted weight cotton yarn for the sample because cotton gives the cover a pleasant, sturdy hand and tolerates frequent washing. A smooth acrylic yarn also works well and keeps the project light and affordable. Easy-to-find examples include Lily Sugar’n Cream for cotton or Caron yarn for acrylic, but you do not need those exact brands.
Make a small gauge swatch before you begin. The twenty minutes can save you from finishing a cover that feels too narrow or too loose. Work 14 double crochet and 8 rows, then measure the center area rather than the curling edge. If you have more stitches than 14 in 4 inches, go up to I-9 (5.5 mm). If you have fewer, try G-6 (4.0 mm).
For a safe substitution, choose another smooth worsted weight yarn with a similar yardage and fiber feel. Cotton makes a firmer cover, while acrylic gives a slightly softer and more flexible fabric. Avoid a very fuzzy yarn because the fibers can catch around the phone opening, and keep the finished fabric snug enough that the phone cannot slip out.
Step by Step
- Difficulty and stitch multiple: This is an easy project. The basic rectangle uses a one-stitch repeat, so you begin with 15 chains and work 14 stitches across each row. The finished piece measures about 4 inches wide by 7 inches tall (10 cm by 18 cm).
- With your main color, make 15 chain stitches. A chain, abbreviated ch, forms the foundation chain, which supports the first row. Keep the chain relaxed rather than pulling it tight. If your chain feels stiff, remake it with a larger hook or use I-9 (5.5 mm) just for the chain.
- To make Row 1, yarn over, insert the hook into the fourth chain from the hook, yarn over and pull up a loop, yarn over and draw through two loops, then yarn over and draw through the last two loops. This makes one double crochet, abbreviated dc. Work 1 dc into each remaining chain across. The skipped chains count as the first dc, giving you 13 dc plus the turning chain space. Row 1 has 14 stitches in total.
- Chain 3 to turn. This is your turning chain, which brings the yarn up to the height of the next row. Turn the work so the new row faces you. Work 1 dc into the next stitch and each stitch across, making the last dc into the top of the turning chain from the previous row. Row 2 has 14 stitches.
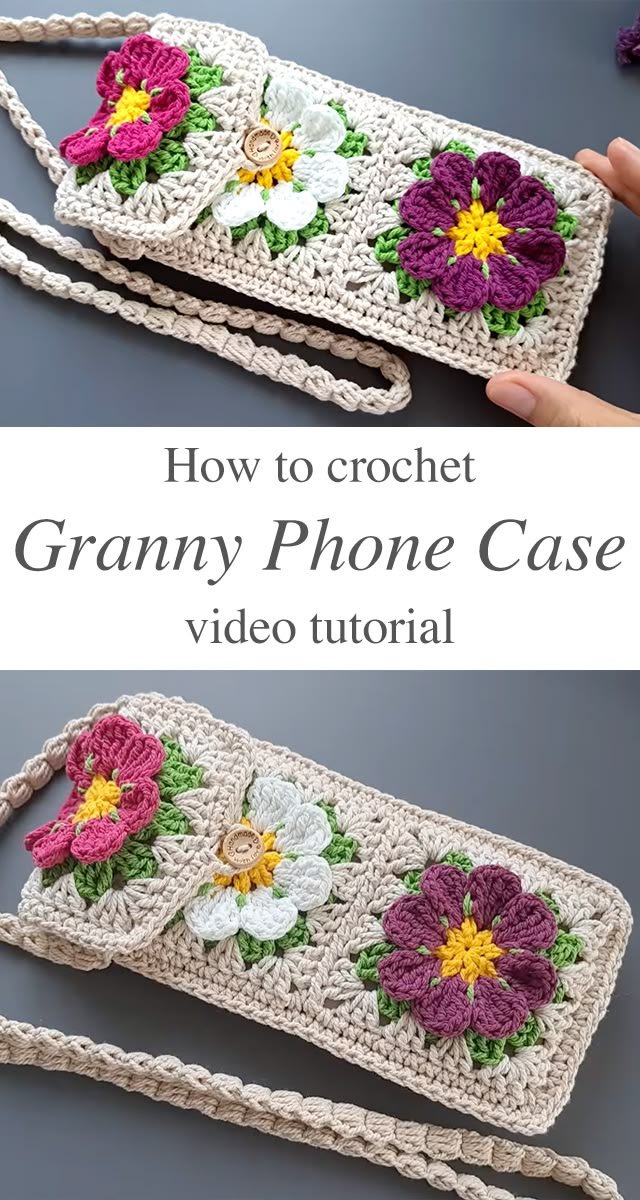
- Repeat Row 2 for Rows 3 through 6. Each row begins with chain 3, followed by 1 dc in each stitch across. Count 14 stitches before turning. The fabric may curl a little at this stage, but the rows will settle as the cover grows.
- Change to your contrast color at the end of Row 6. On the final yarn over of the last dc, use the new color to pull through the final two loops. Cut the first color, leaving a 5-inch tail, and continue with the contrast color. This keeps the color change tidy without adding a bulky knot.
- Work Rows 7 through 10 in the contrast color, using the same chain 3 and 14 dc across. Row 7 has 14 stitches, Row 8 has 14 stitches, Row 9 has 14 stitches, and Row 10 has 14 stitches. Let the new stripe rest naturally; you do not need to pull it tight.
- Change back to the main color at the end of Row 10, using the same final-yarn-over method. Work Rows 11 through 14 in the main color. Keep checking that the first and last stitches remain visible, because missing the last stitch can make the top edge narrow.
- For Rows 15 through 18, change to the contrast color again and work 14 dc across each row. At the end of Row 18, change back to the main color. Work Rows 19 through 22 in the main color, again keeping 14 stitches in every row.
- Check the size before adding the border. The rectangle should measure about 4 inches wide by 7 inches tall (10 cm by 18 cm). If your phone is taller than this, add more rows in pairs, keeping 14 stitches in every row. If the phone is shorter, stop after a row that leaves enough fabric to fold around it.
- If a mistake shows up, pause before pulling the whole piece apart. Look across the row and count from the beginning; a missing stitch usually appears as a small dip along the edge. If the mistake sits only one or two rows back, gently pull the yarn out stitch by stitch to that spot, place the hook back into the active loop, and remake the row. Pulling back calmly is part of the process, and a few minutes of repair is easier than carrying a hidden error forward.
- After the final row, chain 1 and turn the work so you can make the border. Work 1 single crochet, abbreviated sc, into each stitch across the top edge, then place 1 sc into the side edge of each row, 1 sc into each stitch along the bottom foundation chain, and 1 sc into the other side edge of each row. A single crochet is shorter than a double crochet and helps the opening keep its shape.
- Join the border with a slip stitch, abbreviated sl st, into the first sc. A slip stitch moves the yarn without adding height. Fasten off, leaving a tail long enough to weave in. Fold the rectangle with the wrong side facing out, matching the side edges, and sew the sides together with the yarn needle. Leave the top edge open.
- Weave in the ends by passing each tail back and forth through several stitches on the wrong side, then trim the extra yarn. Turn the cover right side out and slide your phone inside to check the fit. Cotton can be lightly blocked by shaping it flat while damp; acrylic should be shaped cold or with gentle steam from a distance because a hot iron can melt or flatten the fibers.
Where Crochet Granny Phone Cover Finds Its Place
The finished cover works well beside the armchair, in the basket near the couch, or inside a tote where the phone might otherwise gather scratches. The texture gives you a little extra grip when you carry the phone from the kitchen to the porch, while the open top keeps it easy to reach.
You can also use it as a small holiday gift. Tuck in a handwritten note, a favorite tea bag, or a gift card, then choose colors that remind you of the recipient’s home. A warm cream with a rust stripe feels gentle for fall, while blue and white can suit a bright summer porch.
For children, keep the design plain and secure. Small buttons, beads, safety eyes, and long loose threads can become hazards for children under three. If you make one for a crib or car seat, it must stay snug and secure, with no loose parts or dangling straps.
Caring for Your Crochet
Care depends on the fiber you choose. For the cotton sample, hand wash or use a gentle machine cycle with cool or warm water, then reshape it while damp. Cotton can shrink or lose its shape with very hot water, so keep the temperature moderate.
Lay the cover flat on a clean towel to dry. Do not hang it wet, since the weight of the water can stretch the sides. If the border looks uneven, pin or smooth the cover into its finished 4 by 7 inch shape while damp and let it dry flat.
If you choose acrylic instead, use a gentle or delicate cycle with cold water and dry flat. Do not press acrylic with a hot iron because it can melt under heat. You can use steam from a distance, or block it cold by shaping the damp fabric with your hands.
Store the cover folded in a breathable drawer or basket rather than hanging it from a strap. If you choose wool for a future version, cedar or lavender nearby can help discourage moths. Keep leftover yarn with its label so you have the fiber information and dye lot if you need to repair or match the cover later.
Small Ways to Make Crochet Granny Phone Cover Your Own
Try a thicker yarn if you want a more padded cover. A bulky yarn will make the piece larger and warmer, but it can also take up more room in a pocket. A thinner yarn will create a lighter cover with a closer fabric, though you may need to add stitches or rows for your phone.
Change the stripe rhythm to suit your mood. Two rows of contrast color create narrow bands, while six rows make broad blocks that show off a quiet color pairing. You can also use one color throughout and let the granny-style shape come from the raised rows and simple border.
For a firmer fabric, replace the double crochet rows with single crochet. Single crochet makes a denser cover with less drape, so it offers more structure but grows more slowly. Keep the same foundation chain and check the width often, since single crochet gauge differs from double crochet gauge.
Resize the cover by adjusting the foundation chain and keeping the stitch count even from edge to edge. Add or remove rows for height. With this simple rectangle, you do not need a complicated stitch multiple, but you do need to keep the side edges straight and leave enough room for the phone to slide in and out.
Add a narrow second round of single crochet if you want a stronger rim. You could also make a matching small pouch for earbuds, a library card, or a pair of reading glasses. If you sell finished items, my own policy is to sell only pieces I have made and checked carefully myself.
Frequently Asked Questions About Crochet Granny Phone Cover
Can I use a different hook size for this phone cover?
Yes, you can use a different hook size, but it will change the finished measurements and fabric. Use H-8 (5.0 mm) for the listed gauge, I-9 (5.5 mm) if your stitches are tight, or G-6 (4.0 mm) if your stitches are loose. Check the cover against your phone before sewing the sides closed.
What yarn can I substitute for the worsted weight yarn?
You can substitute another smooth worsted weight yarn, meaning weight 4, medium yarn, with about 170 yards per 100 g skein. Cotton gives a firm, washable cover, while acrylic feels softer and usually dries quickly. Choose a similar thickness rather than matching a brand, and make the gauge swatch before committing to the full piece.
What should I do if I find a mistake several rows later?
Pull back only to the row that contains the mistake when possible. Remove the stitches slowly until the hook reaches the active loop, then remake that row and continue. If the error does not affect the fit and you can live with it, leave it as part of the handmade fabric. A tiny uneven spot will rarely matter inside the finished cover.
Is this crochet phone cover suitable for a beginner?
Yes, this project suits a beginner who knows how to chain and make a double crochet. The main rectangle repeats the same 14-stitch row, and the border uses single crochet and slip stitch. The fiddliest parts are changing colors neatly and sewing the side seams, but both become easier when you work slowly and count before turning.
How long does it take to crochet the phone cover?
Plan on about two to three hours of crochet time. A beginner may need closer to three hours because counting and color changes take extra attention. An experienced crocheter may finish sooner, especially if the gauge matches the pattern. You can divide the work into short sessions and stop after any completed row.
Does this pattern use US or UK crochet terms?
This pattern uses US crochet terms. In US terms, double crochet means the taller stitch described in the steps, while UK terminology uses that name for a shorter stitch. The pattern also uses US abbreviations for chain, slip stitch, single crochet, and double crochet, so check your reference if you normally read UK patterns.
Take the Time You Need
Let the cover grow at the pace your hands choose. Count when you need to, pull back when something feels wrong, and leave the yarn on the arm of the couch when the evening is done. The finished piece will carry those quiet minutes with it, and you can trust that steady work is enough.
—META—
SEO Title: Crochet Granny Phone Cover Pattern
Meta Description: Make a calm Crochet Granny Phone Cover with simple US stitches, worsted yarn, gentle stripes, and a practical handmade finish.
Slug: crochet-granny-phone-cover
Category: Crochet Patterns
Tags: crochet phone cover, granny crochet, easy crochet, crochet gift, slow making
Image Alt Text: Crochet phone cover rectangle with granny-style color stripes on a crochet hook
Close-up of double crochet rows and a contrasting stripe in progress
Finished crocheted phone cover folded beside yarn and a tape measure
Pinterest Title: Crochet Granny Phone Cover
Pinterest Description: Make a simple Crochet Granny Phone Cover with steady double crochet rows and soft color changes. A small, useful project for quiet evenings and handmade gifts.

Crochet Granny Phone Cover
- Total Time: 140 minutes
Description
A small project that brings comfort and style to your phone with a cozy crochet cover.
Materials
- Worsted weight yarn (weight 4, medium), about 110 yards (100 m) total, or about 65 g
- Crochet hook size H-8 (5.0 mm)
- Yarn needle for weaving in ends
- Scissors
- One stitch marker (optional)
- Tape measure
Instructions
- With your main color, make 15 chain stitches (ch).
- For Row 1, yarn over, insert the hook into the 4th chain from the hook, yarn over and pull up a loop, yarn over and draw through 2 loops, yarn over and draw through the last 2 loops. Work 1 dc into each remaining chain across. Row 1 has 14 stitches in total.
- Chain 3 to turn, work 1 dc into each stitch across Row 2, making 14 stitches.
- Repeat Row 2 for Rows 3 through 6, keeping 14 stitches in each row.
- Change to your contrast color at the end of Row 6; on the final yarn over, pull through the new color. Cut the first color, leaving a 5-inch tail.
- Work Rows 7 through 10 in the contrast color, keeping 14 stitches in each row.
- Change back to the main color at the end of Row 10; work Rows 11 through 14 in the main color, keeping 14 stitches.
- For Rows 15 through 18, change to the contrast color again and work 14 dc across each row.
- At the end of Row 18, change back to the main color; work Rows 19 through 22 in the main color, again keeping 14 stitches.
- Check the size before adding the border; the rectangle should measure about 4 inches wide by 7 inches tall.
- After the final row, chain 1 and turn the work. Work 1 single crochet (sc) into each stitch across the top edge, then place 1 sc into the side edge of each row, 1 sc into each stitch along the bottom foundation chain, and 1 sc into the other side edge of each row.
- Join the border with a slip stitch (sl st) into the first sc. Fasten off, leaving a tail long enough to weave in.
- Fold the rectangle with the wrong side facing out, matching the side edges, and sew the sides together with the yarn needle (leaving the top edge open).
- Weave in the ends and turn the cover right side out. Check the fit with your phone.
Notes
Keep the design plain and secure for children's versions, avoiding small loose parts or dangling straps.
- Preparation Time: 20 minutes
- Active Time: 120 minutes