

This post contains Amazon affiliate links. As an Amazon Associate I earn from qualifying purchases.
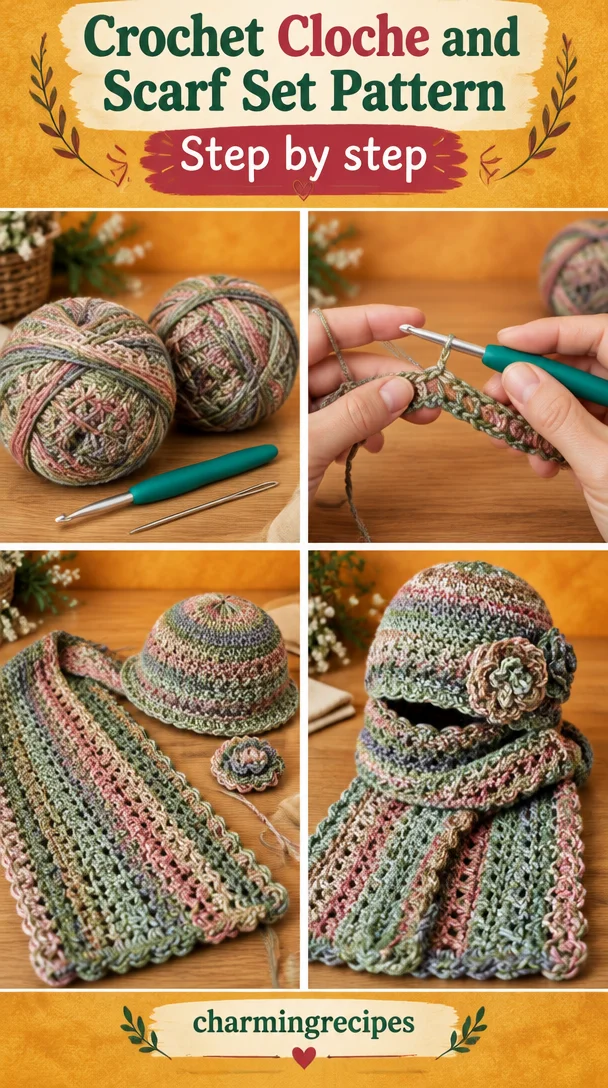
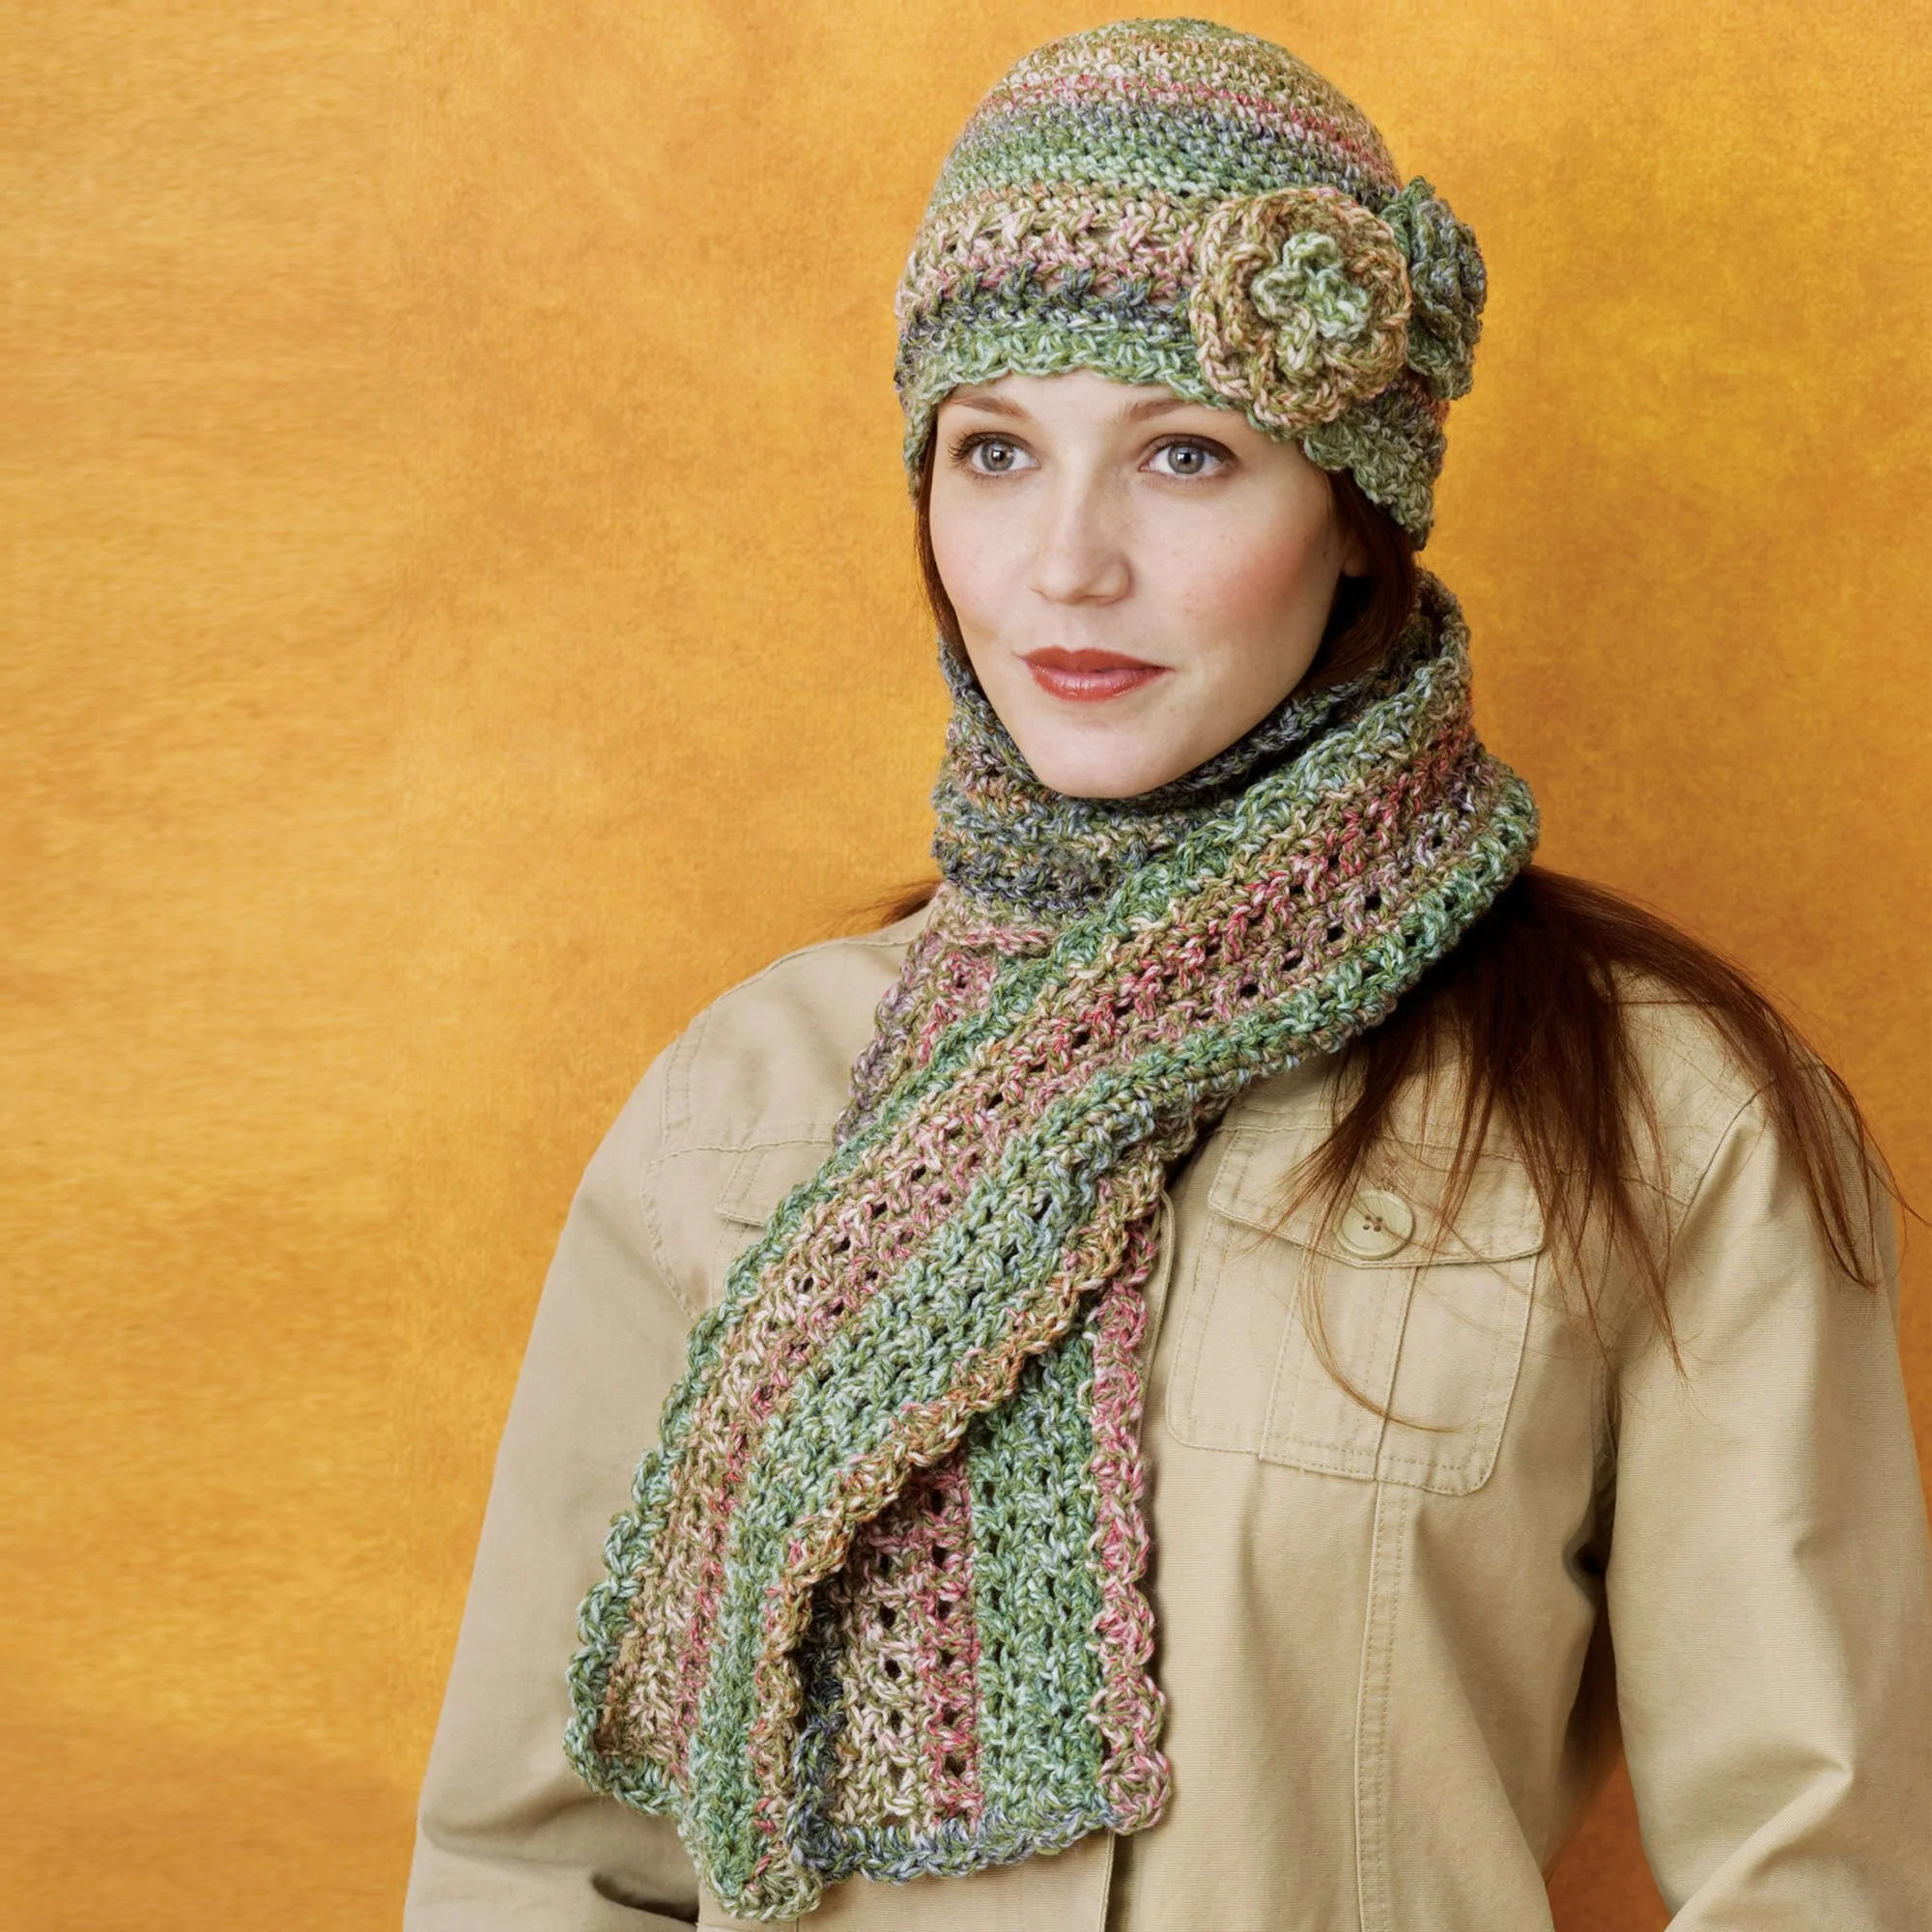
The Crocheted Cloche & Scarf Set pairs a gently textured scarf with a matching cloche hat, making a coordinated accessory set for cool-weather outings. The back-cross double crochet gives both pieces a distinctive woven look, while the scarf’s openwork finish and the hat’s optional flower add decorative details. The set is a satisfying project for crocheters who are comfortable with basic stitches and ready to practice working cross stitches, shaping, and joined and unjoined rounds.
Why You’ll Love This Pattern
This pattern creates two useful pieces that look thoughtfully coordinated without relying on complicated colorwork. The scarf is worked in rows, and the cloche begins at the crown and grows in rounds. Both pieces use single crochet and double crochet, with back-cross double crochet providing the repeating texture.
The pattern is also a good way to build confidence with stitch placement. You’ll practice working around the posts or over stitches to make the cross effect, keeping a foundation chain loose enough for a flexible scarf edge, and using a marker to track unjoined rounds on the hat. The optional flower gives you a small decorative project to finish the set or save for another accessory.
Because the scarf and hat are separate pieces, you can work on whichever suits your time and mood. The scarf’s long rows are easy to settle into, while the cloche offers a change of pace as you increase, work even, and shape the brim.
“The texture made the set look special, but the stitches were easy to follow once I marked the hat rounds. I loved being able to add the flower at the end for a little extra personality.”
How This Crochet Pattern Comes Together
You’ll make a scarf with a textured center section and decorative edging, then crochet a matching cloche from the crown down. The scarf starts with a long foundation chain. Its first set of rows builds the cross-stitch texture, and a second section is worked from the opposite side of the starting chain. A border is then added around the edges.
The cloche begins with a small ring and increases in single crochet to form the crown. After the crown shaping, you work several unjoined rounds to build the sides. The brim section alternates back-cross double crochet rounds with single crochet, then finishes with an openwork round and a decorative final round.
The main pattern feature is the back-cross double crochet. In this pattern, the cross effect is made by working a double crochet back over an earlier stitch before continuing across the next pair. Follow the stitch order carefully, especially at the beginning of the scarf and in the hat’s textured rounds. The pattern uses familiar stitches, but the cross-stitch placement and changing between joined and unjoined rounds make it a better fit for an adventurous beginner or intermediate crocheter than for a first-ever project.
The instructions do not specify finished measurements or a gauge, so check the fabric as you work. The scarf should lie comfortably without a tight, puckered foundation edge, and the cloche should be checked against the intended wearer as the sides grow. Completion time varies with your pace and experience; the scarf’s 185-chain foundation and the hat’s multiple rounds make this a multi-session set rather than a quick one-evening project for most crocheters.
Materials You’ll Need
- Yarn: RED HEART® “Collage™” — 2 balls, or 1 ball plus 2½ yards for the scarf; 2½ oz for the cloche
- Crochet hook: 5.5 mm (US I-9)
- Yarn needle: For weaving in ends and sewing the optional flower onto the cloche
The listed yarn is the one specified for the pattern. The instructions do not state its fiber content or weight, so check the yarn label for care information and yarn details. If you substitute another yarn, choose one with a similar thickness and drape, and make a small test piece first. A different yarn can change the texture, finished dimensions, and amount of yarn needed. Keep the 5.5 mm hook for the stated pattern unless your yarn label or a test swatch suggests a practical adjustment.
Step-by-Step Instructions
Abbreviations and stitch notes
- ch = chain
- sc = single crochet
- dc = double crochet
- sl st = slip stitch
- rnd = round
- st(s) = stitch(es)
A back-cross dc is worked across two stitches to create a crossed texture. Follow the pattern’s specified order and placement rather than treating it as an ordinary pair of dc stitches. Keep the working yarn relaxed so the cross stitches do not pull the fabric tight.
Scarf
-
Make the foundation chain. Chain 185 loosely.
-
Work Row 1. Single crochet in the second chain from the hook and in each chain across. Turn. You should have 184 sc.
-
Work Row 2. Chain 3 and skip the first sc. Work a back-cross dc over the next 2 sc. Repeat the back-cross dc across to the last sc, then work a dc in the last sc. Turn.
-
Work Row 3. Chain 1. Work 1 sc in each dc across and in the top of the ch-3. Turn.
-
Work Rows 4–5. Repeat Rows 2 and 3.
-
Work Row 6. Chain 1 and sc in the first sc. Then repeat: ch 2, skip the next 2 sc, sc in the next sc. Continue across and fasten off.
-
Work from the opposite side of the foundation chain. With the wrong side facing, attach the yarn on the opposite side of the beginning chain.
-
Work the first row on this side. Chain 3 and skip the first chain. Work a back-cross dc over the next 2 chains. Repeat across to the last chain, then dc in the last chain. Turn.
-
Work Rows 2–5 on this side. Repeat Rows 3–6 from the first scarf section. At the end of the last row, do not fasten off; the working yarn is used for the border.
-
Add the scarf border. For Rnd 1, ch 3. Working along the long edge, place 4 dc in the first sc and sc in the next ch-2 space. Then repeat 3 dc in the next sc, sc in the next ch-2 space, continuing to the last sc. Work 5 dc in the last sc.
-
Work around the short end and remaining edges. Along the short end, repeat the following 4 times: sc in the end of the next sc row, then 3 dc over the post of the dc at the end of the next row. Work sc in the end of the next sc row, then 5 dc in the next corner sc. Work sc in the next ch-2 space, then repeat the long-edge edging sequence once more around the remaining side. Join with a sl st in the top of the ch-3.
-
Finish. Fasten off and weave in all ends with the yarn needle.
The border alternates groups of dc with sc placement points to form a softly scalloped edge. If your border starts to ruffle, check that you are following the specified placement rather than adding stitches into every edge space.
Cloche
-
Form the ring. Chain 4 and join with a sl st in the first ch to make a ring.
-
Work Rnd 1. Ch 1, work 8 sc in the ring, and join with a sl st in the first sc.
-
Work Rnd 2. Ch 1 and work 2 sc in each sc around. Join. You should have 16 sc.
-
Work Rnd 3. Ch 1. Repeat sc in the next sc, 2 sc in the next sc 8 times. Join. You should have 24 sc.
-
Work Rnd 4. Ch 1. Repeat sc in the next 2 sc, 2 sc in the next sc 8 times. Join. You should have 32 sc.
-
Work Rnds 5–6. Ch 1, sc in each sc around, and join at the end of each round.
-
Work Rnd 7. Ch 1. Repeat sc in the next sc, 2 sc in the next sc 16 times. Join. You should have 48 sc.
-
Work Rnd 8. Repeat Rnd 5: ch 1, sc in each sc around, and join.
-
Work Rnd 9. Ch 1. Repeat sc in the next 3 sc, 2 sc in the next sc 12 times. Do not join. You should have 60 sc.
-
Mark the start of the unjoined rounds. Place a stitch marker in the first sc of the next round. Move the marker up as you work so you can see where each round begins.
-
Work Rnds 10–20. Sc in each sc around without joining.
-
Work Rnd 21. Repeat sc in the next 14 sc, 2 sc in the next sc 4 times. Join to the first sc. You should have 64 sc.
-
Work Rnd 22. Ch 3. Working behind the ch-3, dc in the last sc of the previous round. Then repeat a back-cross dc over the next 2 sc around. Join with a sl st in the top of the ch-3.
-
Work Rnd 23. Ch 1, sc in each stitch around, and join.
-
Work Rnd 24. Repeat Rnd 22.
-
Work Rnd 25. Ch 1 and sc in each stitch around, decreasing 1 stitch at the end of the round. Join and turn. You should have 63 sc.
-
Work Rnd 26 on the wrong side. Ch 1. Repeat sc in the next sc, ch 2, skip the next 2 sc around. Join and turn.
-
Work Rnd 27 on the right side. Ch 1. Repeat sc in the next ch-2 space, 3 dc in the next sc around. Join.
-
Finish the cloche. Fasten off and weave in the ends.
Optional flower
- With the pink section of yarn, ch 4 and join with a sl st to form a ring.
- For Rnd 1, ch 1, work 8 sc in the ring, and join with a sl st in the first sc.
- For Rnd 2, repeat ch 3, sl st in the next sc 7 times. Then ch 3 and sl st in the joining sl st of Rnd 1.
- For Rnd 3, ch 1. Working behind the ch-3 spaces in the sc of Rnd 1 and to the left of the Rnd 2 slip stitches, sc in the first sc. Repeat ch 4, sc in the next sc 7 times, then ch 4 and join in the first sc.
- For Rnd 4, ch 1. Working behind the ch-4 spaces in the same sc of Rnd 1 and to the left of the sc stitches from Rnd 3, sc in the first sc. Repeat ch 5, sc in the next sc 7 times, then ch 5 and join in the first sc.
- Fasten off and weave in the ends. Add a button or bead to the flower’s center, then sew the flower onto the side of the cloche.
Ways to Wear and Use Your Finished Set
Wear the cloche and scarf together for a coordinated look on cool days, or use each piece separately with other clothing. The scarf’s textured rows and decorative border can add interest to a simple coat, while the cloche offers a handmade alternative to a plain winter hat.
The set also makes a thoughtful handmade gift for someone who enjoys practical accessories. If gifting, consider checking the recipient’s preferred scarf length and hat fit before choosing yarn or adjusting the pattern. Since the pattern does not provide finished measurements, try the cloche on during construction rather than relying on an assumed size.
For a craft fair or handmade shop, the matched pieces can be displayed and priced as a set, with the flower offered as an optional embellishment. Be sure to check the original designer’s usage terms before selling finished items or using the pattern in a commercial listing.
How to Care for Your Crochet Project
The specified yarn’s fiber content and care instructions are not given here, so follow the care label on the yarn you use. If you no longer have the label, use gentle handling until you can confirm the fiber’s needs.
- Wash the pieces according to the yarn label. If the care directions are unclear, hand wash gently in cool or lukewarm water with a mild detergent.
- Avoid twisting or wringing the scarf and cloche. Press water out carefully with a towel.
- Reshape the pieces while damp, paying attention to the scarf’s edges and the cloche’s brim.
- Dry flat unless the yarn label gives different instructions. Hanging a wet scarf can stretch it, and hanging the hat may distort its shape.
- Avoid high heat, which can damage some fibers or change the fabric’s texture.
- Store the set clean and dry. Keep the flower’s button or bead from snagging on other garments by storing the hat in a way that protects its embellishment.
- If you used multiple colors, especially for the flower, test for colorfastness before washing the finished set with other items.
Blocking is optional. If the scarf edge needs a little help lying flat, gently reshape it during drying rather than stretching it forcefully. Do not pin the cloche into a larger shape than intended.
Helpful Tips for Success
- Keep the scarf foundation chain loose. The pattern specifically calls for a loose chain. A tight foundation can pull the scarf edge inward, even if your later rows are relaxed. If your chains are usually tight, consider using a slightly larger hook just for the foundation, then return to the 5.5 mm hook for the stitches.
- Count the first scarf row. Row 1 should have 184 sc. Counting it before moving on helps catch a missed or extra stitch before the textured rows begin.
- Use a marker for unjoined cloche rounds. Rnds 9–20 are worked continuously without joining. Move the marker at the beginning of each round so you do not lose your place or accidentally add a round.
- Notice when the pattern changes from joined to unjoined work. The first cloche rounds are joined, Rnds 9–20 are not, and the pattern returns to joined rounds at Rnd 21. Follow each join instruction as written.
- Check the increases as you go. The crown counts are supplied at key rounds: 16, 24, 32, 48, 60, and 64 stitches. These counts are useful checkpoints. If a count is off, correct it before working more rounds.
- Keep back-cross stitches relaxed. Pulling the yarn tightly as you cross over the stitches can make the fabric dense and narrow. Aim for even tension and clear stitch tops.
- Track right and wrong sides for the brim. Rnd 26 is explicitly worked on the wrong side and Rnd 27 on the right side. Turn at the end of Rnds 25 and 26 as instructed.
- Weave in ends securely. Use the yarn needle to take each end through several stitches on the wrong side, changing direction once to help secure it. Avoid pulling so tightly that the fabric puckers.
Creative Ways to Customize the Set
The simplest way to personalize the set is to choose a color you love. A solid shade emphasizes the back-cross texture, while a yarn with color changes can create a more varied look without adding extra colorwork steps. The pattern specifies RED HEART® “Collage™”; if you choose a different yarn, match the thickness and drape as closely as possible. A substantial change in yarn weight can affect both hat fit and scarf dimensions, as well as yarn use.
You can also make the scarf edging stand out by choosing a contrasting color for the border, provided you can join the new color neatly and have enough yarn. A contrast border may change the amount of yarn needed and adds extra ends to weave in. For a coordinated look, use the same contrast color for the flower or its center.
The flower is optional. Leave it off for a cleaner cloche, or use the suggested pink section and add a button or bead. Make sure any small embellishment is securely attached, especially if the hat is for a young child.
To adjust the fit or scarf length, treat changes as a modification rather than a guaranteed sizing instruction. A different yarn or hook can alter the fabric’s dimensions, and changing the number of stitches may require reworking the stitch pattern and edging. Make a test swatch or sample section, check the cloche against the wearer as you work, and plan for a different yarn amount if you enlarge either piece.
Frequently Asked Questions
Is this cloche and scarf pattern suitable for beginners?
It can suit an adventurous beginner who already knows how to chain, single crochet, double crochet, slip stitch, and work in rows and rounds. The back-cross double crochet, increases, unjoined rounds, and turning instructions add some complexity. New crocheters may find it helpful to practice the cross stitch on a small swatch first.
How much yarn does the pattern call for?
The materials list specifies 2 balls, or 1 ball plus 2½ yards for the scarf, and 2½ oz for the cloche. The pattern names RED HEART® “Collage™.” If you substitute a different yarn or change the dimensions, the amount needed may differ.
Can I use another yarn or hook size?
Yes, but a substitution can change the finished size, texture, drape, and yarn requirement. The pattern calls for a 5.5 mm (US I-9) hook. Before making the full set with a different yarn or hook, try a small sample and check that the fabric is comfortable and not too stiff or loose.
How do I keep the scarf edges even?
Begin with a loosely worked foundation chain and count the first row to confirm that you have 184 sc. Follow the turning chain and last-stitch instructions closely in the textured rows. If the edge still looks uneven, check that you are not accidentally skipping the final stitch or placing an extra stitch into the turning chain.
Why are the cloche rounds spiraling?
The hat is intentionally worked without joining from Rnd 9 through Rnd 20. This creates continuous rounds, and a slight spiral line can be normal. Place a marker at the first stitch of the next round and move it upward as you work. The pattern instructs you to join again at Rnd 21.
How can I adjust the cloche size?
The pattern does not provide a finished size or a detailed grading method. For the best fit, check the hat against the intended wearer as the crown and sides take shape. Changing yarn, hook size, or stitch counts can alter the fit; if you modify the increase sequence, take care to preserve a smooth crown and enough circumference.
How should I wash the finished scarf and hat?
Check the yarn label first because the fiber and care details are not specified here. When uncertain, hand wash gently in cool or lukewarm water, avoid wringing, reshape, and dry flat. Follow the label if it gives different care instructions.
Can I sell items made from this pattern?
The provided instructions do not state whether finished items may be sold. Check the original designer’s usage terms before selling the cloche, scarf, or set.
Print
Crocheted Cloche & Scarf Set
Description
This DIY project involves creating a matching cloche hat and scarf using basic crochet stitches with a decorative back-cross double crochet technique. Ideal for cool-weather outings, the set features a textured scarf with an openwork finish and an optional flower detail for the hat.
Materials
- Yarn: RED HEART® 'Collage™' — 2 balls, or 1 ball plus 2½ yards for the scarf; 2½ oz for the cloche
- Crochet hook: 5.5 mm (US I-9)
- Yarn needle: For weaving in ends and sewing the optional flower onto the cloche
Instructions
- Make the foundation chain. Chain 185 loosely.
- Work Row 1. Single crochet in the second chain from the hook and in each chain across. Turn. You should have 184 sc.
- Work Row 2. Chain 3 and skip the first sc. Work a back-cross dc over the next 2 sc. Repeat the back-cross dc across to the last sc, then work a dc in the last sc. Turn.
- Work Row 3. Chain 1. Work 1 sc in each dc across and in the top of the ch-3. Turn.
- Work Rows 4–5. Repeat Rows 2 and 3.
- Work Row 6. Chain 1 and sc in the first sc. Then repeat: ch 2, skip the next 2 sc, sc in the next sc. Continue across and fasten off.
- Work from the opposite side of the foundation chain. With the wrong side facing, attach the yarn on the opposite side of the beginning chain.
- Work the first row on this side. Chain 3 and skip the first chain. Work a back-cross dc over the next 2 chains. Repeat across to the last chain, then dc in the last chain. Turn.
- Work Rows 2–5 on this side. Repeat Rows 3–6 from the first scarf section. At the end of the last row, do not fasten off; the working yarn is used for the border.
- Add the scarf border. For Rnd 1, ch 3. Working along the long edge, place 4 dc in the first sc and sc in the next ch-2 space. Then repeat 3 dc in the next sc, sc in the next ch-2 space, continuing to the last sc. Work 5 dc in the last sc.
- Work around the short end and remaining edges. Along the short end, repeat the following 4 times: sc in the end of the next sc row, then 3 dc over the post of the dc at the end of the next row. Work sc in the end of the next sc row, then 5 dc in the next corner sc. Work sc in the next ch-2 space, then repeat the long-edge edging sequence once more around the remaining side. Join with a sl st in the top of the ch-3.
- Finish. Fasten off and weave in all ends with the yarn needle.
- Form the ring for the cloche. Chain 4 and join with a sl st in the first ch to make a ring.
- Work Rnd 1. Ch 1, work 8 sc in the ring, and join with a sl st in the first sc.
- Work Rnd 2. Ch 1 and work 2 sc in each sc around. Join. You should have 16 sc.
- Work Rnd 3. Ch 1. Repeat sc in the next sc, 2 sc in the next sc 8 times. Join. You should have 24 sc.
- Work Rnd 4. Ch 1. Repeat sc in the next 2 sc, 2 sc in the next sc 8 times. Join. You should have 32 sc.
- Work Rnds 5–6. Ch 1, sc in each sc around, and join at the end of each round.
- Work Rnd 7. Ch 1. Repeat sc in the next sc, 2 sc in the next sc 16 times. Join to the first sc. You should have 48 sc.
- Work Rnd 8. Repeat Rnd 5: ch 1, sc in each sc around, and join.
- Work Rnd 9. Ch 1. Repeat sc in the next 3 sc, 2 sc in the next sc 12 times. Do not join. You should have 60 sc.
- Mark the start of the unjoined rounds. Place a stitch marker in the first sc of the next round. Move the marker up as you work so you can see where each round begins.
- Work Rnds 10–20. Sc in each sc around without joining.
- Work Rnd 21. Repeat sc in the next 14 sc, 2 sc in the next sc 4 times. Join to the first sc. You should have 64 sc.
- Work Rnd 22. Ch 3. Working behind the ch-3, dc in the last sc of the previous round. Then repeat a back-cross dc over the next 2 sc around. Join with a sl st in the top of the ch-3.
- Work Rnd 23. Ch 1, sc in each stitch around, and join.
- Work Rnd 24. Repeat Rnd 22.
- Work Rnd 25. Ch 1 and sc in each stitch around, decreasing 1 stitch at the end of the round. Join and turn. You should have 63 sc.
- Work Rnd 26 on the wrong side. Ch 1. Repeat sc in the next sc, ch 2, skip the next 2 sc around. Join and turn.
- Work Rnd 27 on the right side. Ch 1. Repeat sc in the next ch-2 space, 3 dc in the next sc around. Join.
- Finish the cloche. Fasten off and weave in the ends.
- Optional flower: With the pink section of yarn, ch 4 and join with a sl st to form a ring. For Rnd 1, ch 1, work 8 sc in the ring, and join with a sl st in the first sc. For Rnd 2, repeat ch 3, sl st in the next sc 7 times. Then ch 3 and sl st in the joining sl st of Rnd 1. For Rnd 3, ch 1. Working behind the ch-3 spaces in the sc of Rnd 1 and to the left of the Rnd 2 slip stitches, sc in the first sc. Repeat ch 4, sc in the next sc 7 times, then ch 4 and join in the first sc. For Rnd 4, ch 1. Working behind the ch-4 spaces in the same sc of Rnd 1 and to the left of the sc stitches from Rnd 3, sc in the first sc. Repeat ch 5, sc in the next sc 7 times, then ch 5 and join in the first sc. Fasten off and weave in the ends. Add a button or bead to the flower’s center, then sew the flower onto the side of the cloche.
Notes
The pattern does not provide finished measurements or a gauge, so check the fabric as you work. Completion time varies with your pace and experience; it is recommended to treat this as a multi-session project.