

The yarn rests across your knees, warm from your hands, while the hook makes that small, steady pull through each loop. Late afternoon light catches the soft stitches, and the flower begins to take shape one petal at a time. This Crochet Flower Pattern is a gentle little project for a quiet morning, a rainy evening on the couch, or the few minutes before dinner when you want your hands occupied without asking too much of your mind.
Why This Crochet Project Is Such a Pleasure to Make
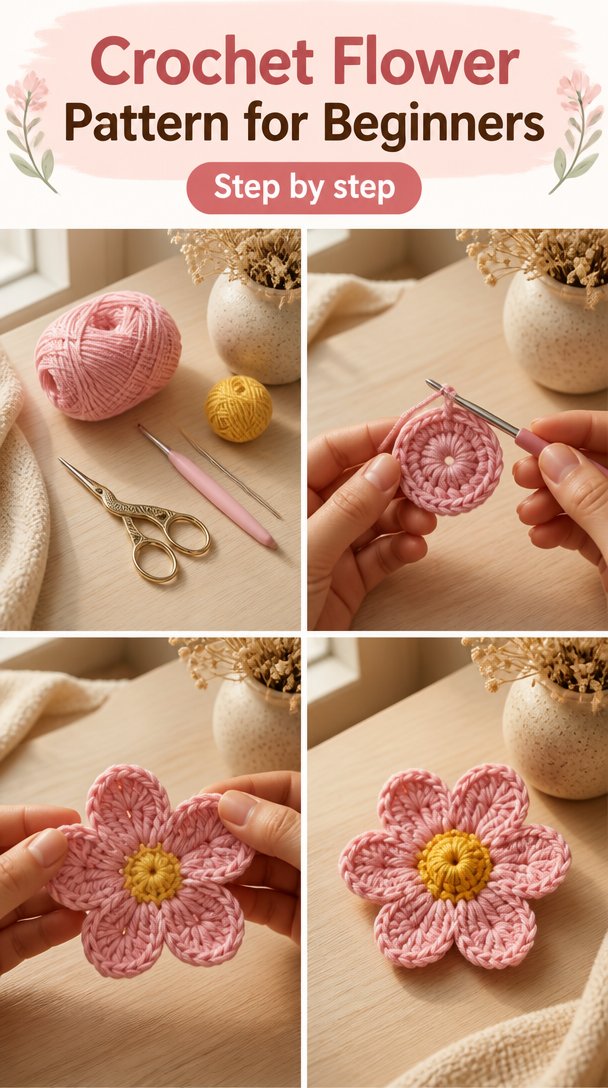
This flower has a pleasing rhythm. You work a small center, build outward in rounds, and watch the petals gather their shape without needing a complicated chart. The project stays small enough to carry in a basket beside your armchair, yet it gives you enough repetition to settle into the motion of the hook.
I made my first flower at the kitchen table with a mug of coffee cooling beside the yarn bowl. The first few rounds felt slightly fussy, as small rounds often do, but once the petals opened, my hands found the pattern. After ten minutes, my fingers felt warmer and the yarn moved more easily.
You can make one flower during a quiet porch afternoon, or keep several in progress for long fall evenings. They work well as little decorations, gift toppers, hair clips, garland pieces, or soft accents on a wrapped present. The finished fabric has enough structure to hold its shape while remaining pleasant to touch.
Small crochet projects also leave room for ordinary life. You can pause when the phone rings, set the flower beside your scissors, and return without losing a whole afternoon of work. If your attention wanders, the compact size makes it simple to count back and find your place.
A Gentle Look at the Process
This Crochet Flower Pattern begins with a magic ring, also called a magic circle, and a center made with double crochet stitches. A double crochet, written dc, gives the flower height without making the center too stiff. The petals grow from spaces around that center, so the work opens in a soft, rounded way.
The pattern uses US crochet terms. UK readers often find these posts too, and the same word can mean a different stitch there, so this note matters: a US double crochet is a UK treble crochet. I will use US terms throughout, including chain (ch), slip stitch (sl st), single crochet (sc), half double crochet (hdc), and double crochet (dc).
You will also see a turning chain, which lifts your work to the height of the next row, and a foundation chain, which is the starting chain that supports a flat piece. This flower does not need a long foundation chain because it begins in a magic ring, but knowing the difference helps when you move to other patterns.
The center and petals come together in four rounds. The last round uses a simple mix of single crochet and double crochet to give each petal a clear edge. Set aside about 30 to 45 minutes for one flower, including weaving in the ends. The work is easy, although the small center and first petal round can feel fiddly until your fingers learn the rhythm.
Pattern at a Glance
Keep this small guide nearby while you work.
- Skill level: Easy, with a fiddly first round
- Finished size: 4 inches (10 cm) across
- Gauge: 16 double crochet stitches and 8 rounds measure 4 inches (10 cm)
- Yarn: Worsted weight (weight 4, medium), about 45 yards total
- Hook size: H-8 (5.0 mm)
- Other supplies: Yarn needle, scissors, stitch marker, and tape measure
- Stitch multiple: Petal round uses a multiple of 6 stitches around the center
- Estimated time: 30 to 45 minutes
What You Need for This Project
- Worsted weight yarn, weight 4 medium, cotton or acrylic, about 45 yards total. A 100 g skein usually provides about 170 yards, so one skein gives you plenty for several flowers. A cotton example is Lily Sugar’n Cream; a worsted acrylic example is Red Heart. These are examples rather than requirements.
- H-8 (5.0 mm) crochet hook. Half a size up or down is fine depending on your tension. Choose H-8 if you usually crochet with an even, medium firmness.
- Yarn needle for weaving in the ends.
- Sharp scissors for trimming yarn tails.
- One stitch marker, optional, for marking the first stitch of each round.
- Tape measure for checking the finished size and gauge.
- A small bowl or shallow basket, optional, to keep the center from rolling away while you work.
Gauge matters less for a single decorative flower than it would for a sweater, but a quick swatch still tells you how your fabric behaves. For this pattern, 16 double crochet stitches and 8 rounds should measure 4 inches (10 cm). The twenty minutes spent checking can save you from making a flower that feels floppy, tightly cupped, or much larger than you planned.
You can safely substitute another worsted weight yarn with a similar thickness. Cotton gives the petals a crisp shape and handles frequent washing well, while acrylic feels soft, costs less for larger batches, and washes easily. If you use wool, the flower may relax and open more after blocking, but untreated wool can felt if you wash it with heat and agitation. Match your hook to the fabric in your hands rather than relying on the label alone.
Step by Step
- Difficulty and repeat: This is an easy project with a small, fiddly center. The petal round works in a multiple of 6 stitches around the center, and the finished flower measures about 4 inches (10 cm) across.
- Make a magic ring, also called a magic circle, by looping the yarn around two fingers and pulling a working loop through the center. Chain 2 for the turning chain, then work 12 double crochet stitches into the ring. Pull the yarn tail gently to close the center, but leave enough room for the stitches to lie flat.
- Join with a slip stitch, or sl st, to the top of the first double crochet. A slip stitch moves you to the next place without adding height. You should have 12 double crochet stitches in Round 1.
- Round 2: Chain 2, then work 2 double crochet stitches in each stitch around. Put both loops of each stitch over your hook unless the pattern says otherwise. Join with a slip stitch to the top of the first double crochet. You should have 24 double crochet stitches.
- Round 3: Chain 1, then work 1 single crochet, or sc, in the first stitch. A single crochet is a shorter stitch that adds firmness. Chain 3, skip the next stitch, and single crochet in the following stitch. Repeat this sequence around, joining with a slip stitch to the first single crochet. You will make 12 chain-3 spaces.
- Round 4 begins the petals. Slip stitch into the first chain-3 space if your hook is not already there. In that space, work 1 single crochet, 1 half double crochet, or hdc, 3 double crochet stitches, 1 half double crochet, and 1 single crochet. The half double crochet sits between the short edge and the taller center of the petal.
- Move to the next chain-3 space with a slip stitch. Work the same petal sequence in every space: 1 single crochet, 1 half double crochet, 3 double crochet stitches, 1 half double crochet, and 1 single crochet. Continue around until you have 12 petals.
- Join the final petal to the beginning with a slip stitch. Check that the petals lie in one direction and that the center stays flat. If one petal twists, gently turn it with your fingers before you fasten off. The round should contain 12 completed petals.
- Fasten off by cutting the yarn, leaving a tail about 6 inches (15 cm) long, and pulling the tail through the last loop. Use a yarn needle to weave in the ends on the back of the flower. Thread each tail through several stitches, change direction, and trim close to the fabric.
- Look over the edge before you finish. If a stitch went missing, you may notice one chain-3 space that looks wider or one petal that pulls inward. Pull back calmly to the last clear round by removing the needle, easing out the yarn stitch by stitch, and remaking the section. Small projects forgive a careful restart.
- Shape the flower with your fingers while it is still warm from your hands. Cotton can be lightly blocked by dampening it, arranging the petals on a towel, and letting it dry flat. Acrylic can be shaped with your fingers or blocked with steam held at a distance, but never press a hot iron directly against acrylic because it can melt.
Where This Piece Finds Its Place
This flower suits small, useful moments around the home. Tuck one into a basket beside the couch, sew it to a fabric pouch, or place several in a shallow dish near the front door. A few flowers in different shades can make a gentle spring arrangement without taking up much space.
For a gift, attach one flower to a wrapped book, a jar of homemade cookies, or a hand-knit scarf. You can also sew a flower to a hair clip or a plain tote bag, using matching thread and firm stitches on the back. If you make several for a baby shower, keep them as decorations rather than loose toys unless you secure every part carefully.
Small parts and long loose stitches can be unsafe for children under three. Anything placed in a crib or attached to a car seat needs to be snug and secure, so a loose crochet flower should never hang where it could come free.
These flowers also make a thoughtful holiday gift when grouped in a few colors. Slip three into a small paper envelope with a note suggesting their uses, or add one to the outside of a present as a reusable decoration.
Making It Last
Care depends on the yarn you choose. For cotton or acrylic worsted weight yarn, wash the flower by hand or use a gentle cycle with cold or warm water. Place it in a small mesh bag if you wash it with other items, and reshape the petals while damp.
Dry the flower flat on a clean towel. Never hang it wet, because the weight of the water can stretch the petals and pull the center out of shape. Cotton may need a little smoothing after washing, while acrylic usually returns to shape easily when you arrange it with your fingers.
If you block cotton, pin the petals lightly on a towel or blocking mat and let the flower dry completely. For acrylic, use cold shaping or very distant steam only. Acrylic melts under a hot iron, so keep direct heat away from the stitches.
Store finished flowers folded loosely or flat in a breathable basket rather than pressed under heavy books. If you make a wool version, add cedar or lavender nearby for moth protection, but avoid placing strongly scented material directly against pale yarn. Keep leftover yarn with its label so you have the dye lot if you make another flower later.
Small Ways to Make It Your Own
Try the pattern in a few colors and notice how the mood changes. A cream center with muted green petals feels quiet and natural, while two strong colors make the flower cheerful enough for a summer tote. Color blocking also helps you see the round structure as you practice.
You can use a slightly thicker yarn for a larger flower with more presence. The petals will grow wider and the fabric may feel softer, so test one flower before planning a whole garland. A thinner yarn creates a smaller, more delicate flower and may need a smaller hook to keep the center from becoming loose.
If you replace the double crochet stitches with single crochet, the petals will become shorter, denser, and less ruffled. That version works well as a flat appliqué. If you use half double crochet instead, you will get a middle ground with a little height and a firm shape.
To resize the flower, keep the center count even and preserve the petal rhythm of 6 stitches per repeat. Adding 6 more center stitches gives you another petal space, while removing 6 makes a smaller version. Make the adjustment before the petal round so the spaces remain balanced.
A simple border can change the finish. Slip stitch around the outer tips for a neat edge, or add a contrasting single crochet along the back loops only, called BLO, for a subtle ridge. Front loop only, or FLO, means working through the loop closest to you, but this flower does not require BLO or FLO unless you choose to add a decorative edging.
Frequently Asked Questions About This Crochet Flower Pattern
Can I use a different hook size for this Crochet Flower Pattern?
Yes, you can use a different hook size if your yarn or tension calls for it. H-8 (5.0 mm) creates a balanced fabric for worsted weight yarn, while a smaller hook makes a denser flower and a larger hook makes a softer, more open flower. Check that the center lies flat and the petals do not look stretched.
What yarn can I substitute for the recommended yarn?
Use another worsted weight yarn, weight 4 medium, with a similar thickness. Cotton gives crisp petals and suits pieces that may need frequent washing, while acrylic keeps the project soft and easy to care for. Wool also works, but untreated wool can felt with hot water and agitation, so wash it gently and cool.
What should I do if I notice a mistake several rows later?
First, identify the last round where the stitch count and shape look correct. Remove the needle, pull the yarn back slowly one stitch at a time, and place the live loop on your hook. For this flower, look for 12 center stitches, then 24 stitches, then 12 chain-3 spaces before continuing.
Is this Crochet Flower Pattern suitable for a beginner?
Yes, this pattern suits a beginner who knows how to make a chain, single crochet, half double crochet, double crochet, and slip stitch. The magic ring and first small round may feel fiddly, but you can use a chain-4 ring instead if needed. The center will be slightly less adjustable, and you can still make a lovely flower.
How long does one crochet flower take?
One flower takes about 30 to 45 minutes when you include weaving in the ends and shaping the petals. Your first flower may take longer while you read the instructions and count the spaces. After your hands remember the petal sequence, several flowers can move along comfortably during an evening at the couch.
Does this pattern use US or UK crochet terms?
This pattern uses US crochet terms. In particular, the double crochet here is the US double crochet, which is called a treble crochet in UK terminology. The abbreviations are also given at first mention, so you can check the stitch before beginning each round.
Taking It Slow
Let the flower take the time it needs. You do not have to make a dozen, correct every wobble at once, or turn a small project into a test of speed. Hold the work close, listen for the quiet click of the hook, and trust that each careful stitch gives the next one somewhere to rest.
—META—
SEO Title: Crochet Flower Pattern for Slow, Simple Making
Meta Description: Make a calm Crochet Flower Pattern with simple rounds, gentle shaping, and clear US terms for a small handmade accent.
Slug: crochet-flower-pattern
Category: Crochet Patterns
Tags: crochet flower, easy crochet, slow making, crochet home decor, yarn crafts
Image Alt Text: Flower center and petals worked in worsted weight yarn
Crochet flower beside hook, scissors, and yarn
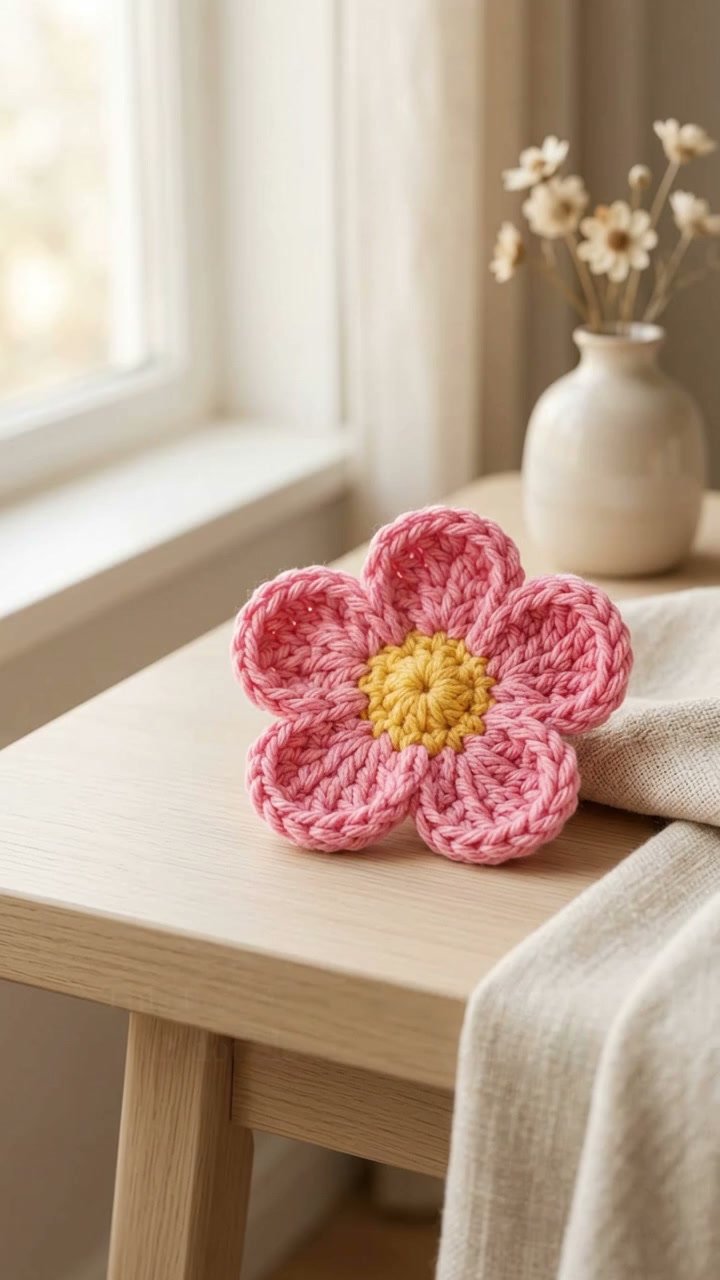
Finished crochet flower resting on a quiet home surface
Pinterest Title: Calm Crochet Flower Pattern
Pinterest Description: Make a small crochet flower with simple rounds and gentle shaping. This calm project suits quiet afternoons, thoughtful gifts, and slow making.

Crochet Flower Pattern
- Total Time: 45 minutes
Description
This Crochet Flower Pattern is a gentle little project for creating beautiful flowers that can be used as decorations, gift toppers, or soft accents.
Materials
- Worsted weight yarn, medium, about 45 yards total
- H-8 (5.0 mm) crochet hook
- Yarn needle
- Sharp scissors
- One stitch marker (optional)
- Tape measure
- Small bowl or shallow basket (optional)
Instructions
- Make a magic ring by looping the yarn around two fingers and pulling a working loop through the center. Chain 2 for the turning chain, then work 12 double crochet stitches into the ring. Pull the yarn tail gently to close the center.
- Join with a slip stitch to the top of the first double crochet. You should have 12 double crochet stitches in Round 1.
- Round 2: Chain 2, then work 2 double crochet stitches in each stitch around. Join with a slip stitch to the top of the first double crochet. You should have 24 double crochet stitches.
- Round 3: Chain 1, then work 1 single crochet in the first stitch. Chain 3, skip the next stitch, and single crochet in the following stitch. Repeat this sequence around, joining with a slip stitch to the first single crochet. You will make 12 chain-3 spaces.
- Round 4: Slip stitch into the first chain-3 space. In that space, work 1 single crochet, 1 half double crochet, 3 double crochet stitches, 1 half double crochet, and 1 single crochet. Move to the next chain-3 space with a slip stitch. Repeat the petal sequence in every space until you have 12 petals.
- Join the final petal to the beginning with a slip stitch. Check that the petals lie in one direction and the center stays flat.
- Fasten off by cutting the yarn, leaving a tail about 6 inches long, and pulling the tail through the last loop. Use a yarn needle to weave in the ends on the back of the flower.
- Shape the flower with your fingers while it is still warm from your hands.
Notes
This flower can be used for various decorative purposes around the home or as a thoughtful gift. Be mindful of small parts if used around children.