

Late afternoon light rests across the yarn basket while the hook makes its small, steady pull through each loop. The pouch grows quietly in your hands, light enough to lift with one finger, useful enough to carry from the kitchen counter to the couch. This Crochet Phone Pouch Handmade for Everyday Use takes only a few evenings, and the simple fabric gives your hands a gentle rhythm without asking you to hurry.
Why Crochet Phone Pouch Handmade for Everyday Use Is So Soothing to Crochet
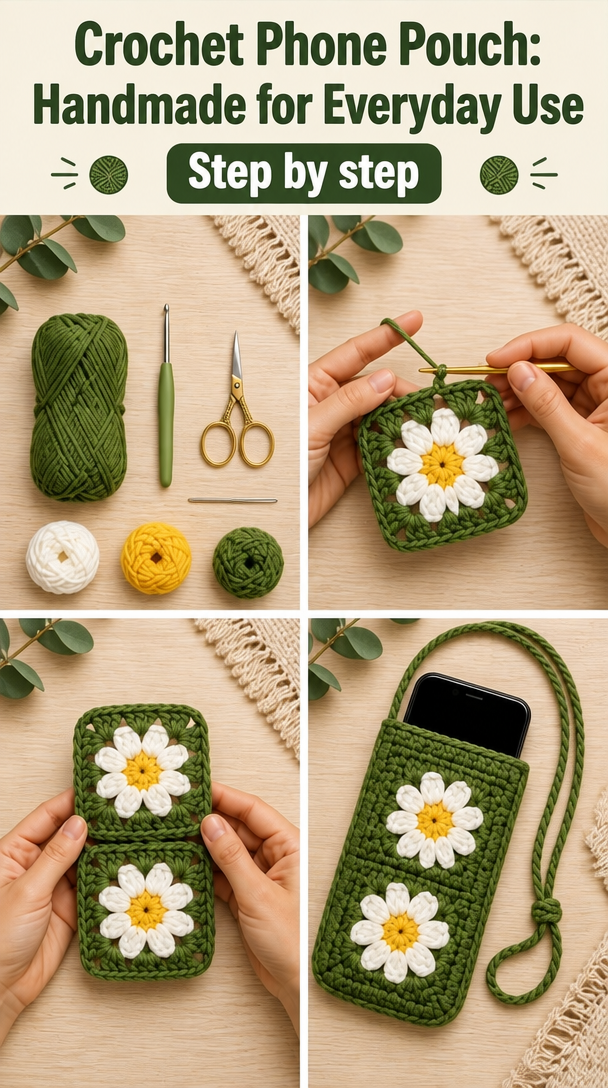
A phone pouch is a small project with a clear destination. You can see the base take shape, watch the sides rise, and finish before the work begins to feel like a long-term promise. That sense of proportion makes it a lovely choice for a rainy evening on the couch or a quiet hour on the porch when summer air moves through the screen door.
The main fabric uses double crochet, a stitch made by wrapping the yarn over the hook, inserting the hook, and working through loops in stages. It has enough height to grow quickly, but it still gives you visible stitches to count. After the first ten minutes, my hands usually warm up and find the motion. The quiet click of the hook becomes part of the room.
This project also leaves space for ordinary interruptions. You can set it beside your coffee, answer a message, and return without losing a complicated color chart. The first few rows may curl until the fabric gains enough height to settle. That is normal, and the pouch becomes more cooperative as the sides grow.
A small handmade holder can also give a daily object a softer place to land. Instead of letting your phone disappear beneath a book or slip between couch cushions, you have a loop, pouch, or basket where you can find it again. The usefulness stays modest, which suits slow making well.
The Rhythm of This Crochet Project
You will begin with a foundation chain, the first line of connected chain stitches, and work double crochet stitches into it. The base has a simple rectangle shape. Once you fold that rectangle and sew the sides, the fabric becomes a soft phone pouch with a practical flap and button closure.
This pattern uses US crochet terms. UK readers often find these posts too, and the same word can mean a different stitch there, so check your labels and stitch references before you begin. The main stitch is double crochet, abbreviated dc, because it gives a flexible fabric without making the project feel slow.
The pattern is suitable for a confident beginner. You will use chain, abbreviated ch, slip stitch, abbreviated sl st, and double crochet. A turning chain lifts the work at the start of a new row, while a stitch marker can help you identify the flap edge if you prefer a visual reminder.
Plan on about two to three evenings, or roughly three to four hours of relaxed work. The button loop is the fiddliest part because you need to place it neatly, but you can pause, look at the pouch from the front, and adjust it before sewing anything down.
Pattern at a Glance
Keep this small guide nearby while you work, especially when you pause between rows.
- Skill level: Confident beginner
- Finished size: 4 inches wide by 7 inches tall (10 cm by 18 cm)
- Gauge: 14 double crochet and 8 rows measure 4 inches (10 cm)
- Yarn: Worsted weight (weight 4, medium), about 170 yards per 100 g skein, using 100 yards total from one skein
- Hook: H-8 (5.0 mm)
- Other supplies: Yarn needle, scissors, tape measure, one ¾-inch button, and one optional stitch marker
- Stitch multiple: Any multiple of 2 stitches, with the sample beginning at 20 stitches
- Estimated time: Three to four relaxed hours over two to three evenings
Materials for Crochet Phone Pouch Handmade for Everyday Use
- Worsted weight yarn, weight 4 medium, in a smooth acrylic or acrylic blend, about 170 yards per 100 g skein; you need 100 yards total, or about 59 g from one skein (easy to find)
- H-8 (5.0 mm) crochet hook; a half size up or down is fine depending on your tension
- Yarn needle with an eye large enough for your yarn (for weaving in ends and sewing the sides)
- Small scissors
- One stitch marker (optional, can be swapped for a scrap of contrasting yarn)
- Tape measure
- One ¾-inch button, wooden or washable plastic (can be swapped for a snap or a crocheted button)
Gauge means the number of stitches and rows that fit into a measured space. For this pouch, 14 double crochet and 8 rows should measure 4 inches (10 cm). A twenty-minute swatch is worth making because a tighter gauge can make the pouch too narrow for your phone, while a looser gauge can leave it floppy and oversized.
Choose a yarn with a similar worsted weight and a smooth surface if you substitute. Acrylic keeps this small everyday project affordable and easy to wash, but cotton will make a firmer pouch and can suit a phone holder that gets frequent handling. Avoid a very fuzzy yarn because the stitches become harder to see and the flap may not close cleanly.
Step by Step
- Check the difficulty and multiple. This is a confident beginner project worked in US terms. The stitch multiple is any multiple of 2 stitches, and this sample begins with 20 stitches for a finished pouch about 4 inches wide.
- Make the foundation chain. Chain 21. The first 20 chains form the working width, and the extra chain gives you the turning chain for Row 1. If your foundation chain pulls tight, go up one hook size just for the chain, then return to H-8 (5.0 mm).
- Work Row 1. Make 1 double crochet in the fourth chain from the hook. The skipped chains count as the first double crochet, then make 1 double crochet in each remaining chain across. You will have 18 double crochet plus the turning chain at the edge, for 20 stitches in the row.
- Build the rectangle. Chain 3, which counts as the first double crochet, and turn. Make 1 double crochet in each stitch across, working into the top loops of the stitches from the row below. Repeat this row until you have 14 rows total, counting Row 1. Each row has 20 stitches, and the fabric should measure about 4 inches wide by 7 inches long.
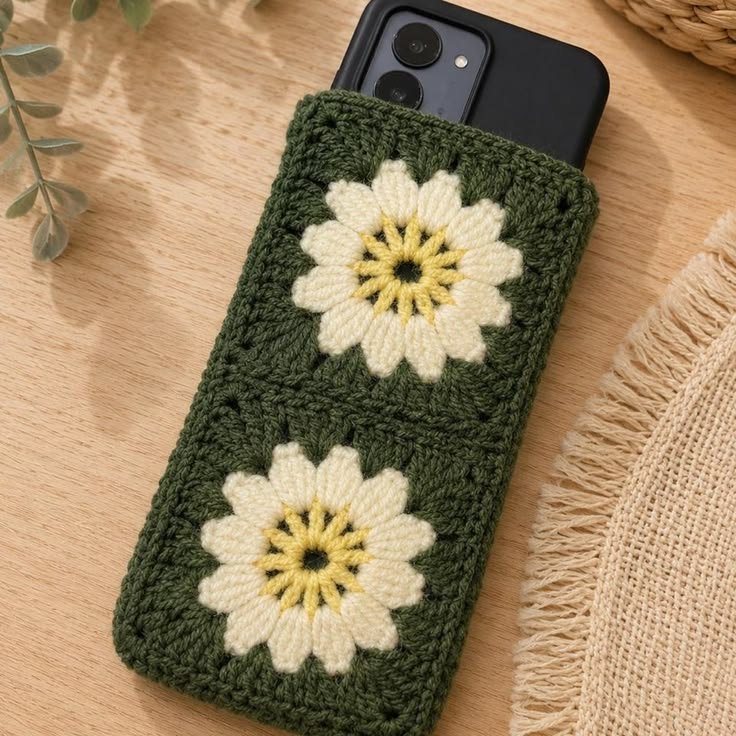
- Look for the row edge. At the end of every row, count 20 stitches before turning. The turning chain counts as a stitch, so work your last double crochet into the top of the chain-3 from the previous row. The yarn slides more easily when you keep the edge relaxed instead of tugging it tight.
- Add the flap. Continue with the same stitch pattern for 5 more rows: chain 3, turn, and make 1 double crochet in each stitch across. You still have 20 stitches at the end of each row. The finished rectangle now has 19 rows total, with the lower 14 rows forming the pouch body and the upper 5 rows forming the flap.
- Shape the button loop. On the next row, chain 3 and turn, then make 7 double crochet. Chain 4 to create the button opening, skip the next 4 stitches, and make 8 double crochet across the remaining stitches. This row still uses the original 20-stitch width, with the chain-4 space replacing 4 skipped stitches.
- Finish the flap edge. Chain 1 and turn. Make 1 single crochet, or sc, in each stitch and chain space across, placing 1 single crochet in each of the 20 spaces or stitches along the row. Single crochet makes a lower, firmer edge so the button loop holds its shape. Fasten off, leaving a 10-inch tail for sewing if you want to use that tail to secure the flap edge.
- Fold the pouch. Place the fabric with the right side, or RS, facing you. The right side is the side you want to show on the outside. Fold the lower 14-row section upward, leaving the 5-row flap free at the top, and align the side edges carefully.
- Sew the sides. Thread the yarn needle with a separate 24-inch length of yarn. Sew the two side seams from the lower fold to the base of the flap using a whipstitch or mattress stitch. Keep your stitches snug but not tight, because pulling too firmly can draw the pouch inward.
- Check for mistakes calmly. If a missing stitch shows up several rows later, compare the two side edges first. You can pull back one row at a time by gently removing the hook and drawing out the loops, then rework the row. I once found a missing edge stitch after three rows and discovered it by counting the last stitches before sewing, which saved a crooked side seam.
- Attach the button. Fold the flap closed and mark the spot where the chain-4 loop meets the pouch front. Sew the ¾-inch button firmly to the front, taking care that no long loose loops remain inside. Test the closure before trimming the thread.
- Weave in the ends and finish. Use the yarn needle to weave each tail back and forth through several stitches on the wrong side, or WS, which is the inside-facing side of the work. Trim only after the tail feels secure. Acrylic can be shaped with a light cool block, but avoid a hot iron because acrylic can melt; for this pouch, smoothing it flat by hand is usually enough.
Where This Piece Finds Its Place
The finished pouch can live beside the armchair, in a basket near the front door, or on the small table where you charge your phone at night. The flap keeps the phone from slipping out while the pouch gives you a softer grip than a bare device. It also makes a useful little holder for earbuds, a charging cord, or a few cards.
For summer, tuck it into a tote before you head to the porch or farmers market. In fall, it can sit beside a blanket basket while you watch the first cool evenings arrive. The pouch is small enough to bring along when you visit family, and it makes a thoughtful holiday gift when paired with a handwritten note and a charging cord.
For a gift, choose a calm neutral for someone who likes simple home pieces, or use two colors for someone who enjoys a little contrast. If you make one for a child, skip loose decorative parts and check the closure carefully. Small parts and long loose stitches are unsafe for children under three.
Care and Storage
This version uses worsted weight acrylic yarn, so wash it in cold water on a gentle cycle with mild detergent. Place it in a mesh bag if you want extra protection, then reshape it and dry it flat. Never hang it wet, because the weight of the water can stretch the pouch and pull the button loop out of alignment.
For light shaping, smooth the damp pouch on a towel and let it air-dry flat. Acrylic responds poorly to direct high heat, so do not press it with a hot iron. If you use steam, keep the source several inches away and let the warmth soften the fabric without touching it directly.
Store the pouch folded or resting flat somewhere breathable rather than hanging it by the loop. Acrylic does not need wool-specific moth care, but a clean drawer or basket keeps dust away. If you have leftover yarn, keep it with its label so you retain the fiber information and dye lot for future repairs or matching projects.
If you make this pouch in untreated wool, wash it by hand in cool water because agitation can felt it. Superwash wool tolerates a gentle washing machine cycle better, but always check the yarn label. Cotton can usually handle frequent washing, though it may soften and relax more than acrylic over time.
Small Ways to Make It Your Own
- Try a different yarn thickness. A bulky yarn will make a larger, thicker pouch with less drape, while sport weight yarn will create a smaller, lighter holder. Make a new gauge swatch before changing weight, since the original stitch counts will not guarantee the same finished size.
- Use two colors. Work the 14-row body in one shade and the 5-row flap in another. Changing colors at a row edge gives you a clean division, and weaving in the extra tails becomes part of the finishing pause.
- Swap double crochet for single crochet. Single crochet creates a denser fabric with less stretch and more coverage. It will take longer and may need extra rows for height, but it suits a pouch that you want to feel firm.
- Resize by the stitch multiple. Add or remove stitches in groups of 2 so the opening and side edges stay balanced. Measure your phone first, then add about ½ inch to the width and height for comfortable movement.
- Add a simple border. Work one round of single crochet around the flap and pouch opening after sewing the sides. Keep the border loose at the corners so it does not pull the fabric into a cup shape.
Frequently Asked Questions About Crochet Phone Pouch Handmade for Everyday Use
Can I use a different hook size for this phone pouch?
Yes, you can use a different hook size if you adjust for gauge. A smaller hook creates a denser fabric and helps keep the phone from peeking through, while a larger hook makes a looser, more flexible pouch. Start with H-8 (5.0 mm), then change by half a size if your swatch does not reach 14 double crochet and 8 rows in 4 inches.
What yarn can I substitute for the worsted weight acrylic?
You can substitute another worsted weight yarn with about 170 yards per 100 g skein. Cotton gives the pouch a firmer feel and handles frequent washing well, while a soft acrylic blend keeps it light and easy to care for. Check your gauge before beginning, and avoid novelty yarns that hide the stitch tops or make the button loop bulky.
What should I do if I find a mistake several rows later?
Pull back calmly to the row where the mistake began. Remove the hook, draw out the loops one row at a time, and place the hook back through the live loop when you reach the correct point. Count the edge stitches before moving forward. If the mistake does not affect the fit and you can secure the area safely, you may choose to leave it as part of the handmade fabric.
Is this crochet phone pouch suitable for a beginner?
Yes, this project suits a confident beginner who knows chain, slip stitch, and double crochet. The rectangle uses one repeated row, and the side seams only require careful alignment. The button loop takes a little concentration, but you can place a stitch marker near the opening and check the pouch from the front before sewing the button in place.
How long does it take to crochet this phone pouch?
Most people will need about three to four relaxed hours, spread over two to three evenings. Your pace will depend on your tension, experience, and how often you pause to count. The actual crocheting moves steadily, while sewing the sides, attaching the button, and weaving in the ends add a quiet finishing hour.
Does this pattern use US or UK crochet terms?
This pattern uses US crochet terms. In US terminology, double crochet means the tall stitch used throughout the pouch, while UK terminology uses that same phrase for a different stitch. The pattern also identifies chain as ch, slip stitch as sl st, single crochet as sc, and double crochet as dc to keep the instructions clear.
Take the Time You Need
Let the pouch grow at the speed your hands choose. A missed stitch is a place to pause, not a reason to rush, and a slightly uneven edge can often settle once the seams come together. Keep the yarn near your favorite chair, listen for the small pull of the hook through the loop, and allow this useful little piece to become finished in its own time.
—META—
SEO Title: Crochet Phone Pouch Handmade for Everyday Use
Meta Description: Make a calm crochet phone pouch with simple US stitches, gentle guidance, and caring details for a useful handmade everyday holder.
Slug: crochet-phone-pouch-handmade-everyday-use
Category: Crochet Accessories
Tags: crochet phone pouch, crochet accessories, beginner crochet, handmade gifts, slow crochet
Image Alt Text: Crochet rectangle worked in double crochet beside a yarn basket
Finished crochet phone pouch with flap and button on a wooden table
Crochet hook and yarn beside the completed phone pouch
Pinterest Title: Crochet Phone Pouch for Everyday Use
Pinterest Description: Make a simple crochet phone pouch with a button flap and steady double crochet rows. A useful handmade project for quiet evenings and thoughtful gifts.

Crochet Phone Pouch Handmade for Everyday Use
- Total Time: 240 minutes
Description
Create a calming and practical phone pouch that can be used every day. This crochet project is suitable for confident beginners and features double crochet stitches for a flexible and functional design.
Materials
- Worsted weight yarn (weight 4 medium), about 170 yards per 100 g skein; 100 yards total from one skein
- H-8 (5.0 mm) crochet hook; a half size up or down is fine depending on your tension
- Yarn needle with an eye large enough for your yarn
- Small scissors
- One stitch marker (optional)
- Tape measure
- One ¾-inch button, wooden or washable plastic
Instructions
- Check the difficulty and multiple. This is a confident beginner project worked in US terms. The stitch multiple is any multiple of 2 stitches, and this sample begins with 20 stitches for a finished pouch about 4 inches wide.
- Make the foundation chain. Chain 21. The first 20 chains form the working width, and the extra chain gives you the turning chain for Row 1.
- Work Row 1. Make 1 double crochet in the fourth chain from the hook. The skipped chains count as the first double crochet, then make 1 double crochet in each remaining chain across. You will have 18 double crochet plus the turning chain at the edge, for 20 stitches in the row.
- Build the rectangle. Chain 3, which counts as the first double crochet, and turn. Make 1 double crochet in each stitch across, working into the top loops of the stitches from the row below. Repeat this row until you have 14 rows total.
- Add the flap. Continue with the same stitch pattern for 5 more rows: chain 3, turn, and make 1 double crochet in each stitch across.
- Shape the button loop. On the next row, chain 3 and turn, then make 7 double crochet. Chain 4 to create the button opening, skip the next 4 stitches, and make 8 double crochet across the remaining stitches.
- Finish the flap edge. Chain 1 and turn. Make 1 single crochet in each stitch and chain space across, placing 1 single crochet in each of the 20 spaces or stitches along the row.
- Fold the pouch. Place the fabric with the right side facing you. Fold the lower 14-row section upward, leaving the 5-row flap free at the top.
- Sew the sides. Thread the yarn needle with a separate 24-inch length of yarn. Sew the two side seams from the lower fold to the base of the flap using a whipstitch or mattress stitch.
- Attach the button. Fold the flap closed and mark the spot where the chain-4 loop meets the pouch front. Sew the ¾-inch button firmly to the front.
- Weave in the ends and finish. Use the yarn needle to weave each tail back and forth through several stitches on the wrong side.
Notes
This project is ideal for a calm evening and makes a thoughtful gift when paired with a handwritten note and a charging cord.
- Active Time: 180 minutes