

This post contains Amazon affiliate links. As an Amazon Associate I earn from qualifying purchases.
The hook makes a small, satisfying pull through each loop as late afternoon light settles across the yarn. This Free Dracula Cat Amigurumi Pattern grows one rounded piece at a time, with a sweet little cape and a face that seems to appear almost quietly. I made mine over several evenings at the kitchen table, beside a mug of coffee that went cold while I counted. The project stays small enough to carry in a basket, yet it gives your hands enough repetition to settle into a gentle rhythm. By the time the first rows curled, the cat felt like a real little thing waiting to take shape.
Why Free Dracula Cat Amigurumi Pattern Is So Soothing to Crochet
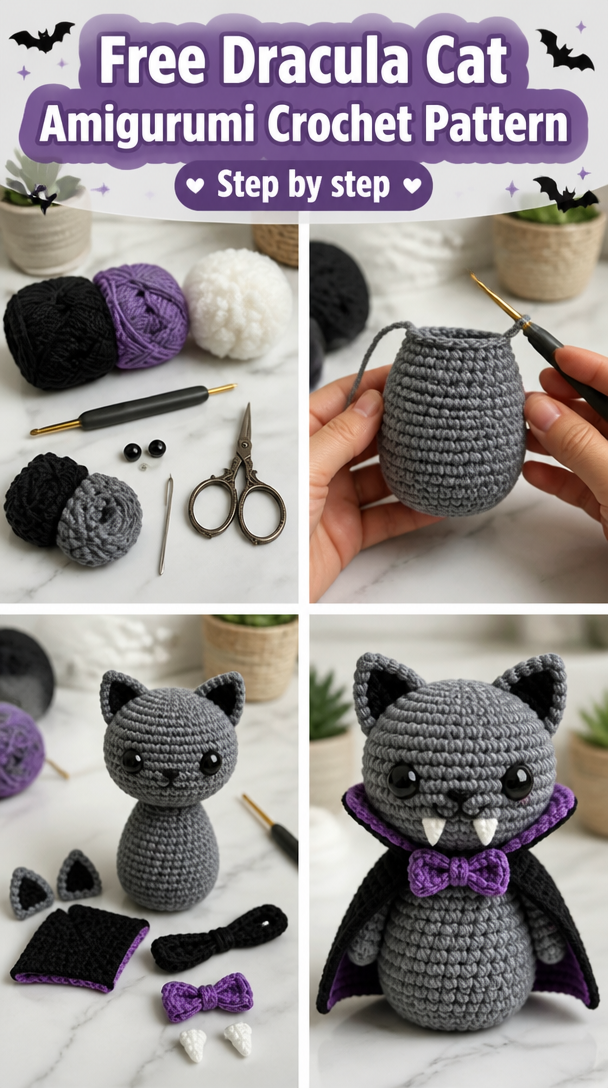
Small crochet projects have their own kind of comfort. You can see progress without clearing an entire afternoon, and each round gives you a short place to pause, breathe, and check your work. This little cat uses compact stitches and simple shaping, so your attention stays close to the fabric instead of jumping between complicated instructions.
I especially liked making this project on the couch during a rainy evening. The black yarn looked almost blue in the lamp light, and the quiet click of the hook became part of the room. Many people find crocheting calming because the repeated motion gives the mind something steady to follow, not because every round has to be perfect.
The finished cat also brings a little seasonal charm without taking over a room. He fits on a bookshelf, a mantel, or the basket beside an armchair. During the first cold snap of fall, I tucked mine near a small vase of dried branches, where his pointed ears and red cape looked playful rather than fussy.
How Free Dracula Cat Amigurumi Pattern Comes Together
This pattern begins with a magic ring, also called a magic circle, so the bottom of the body closes neatly. You work the body in single crochet, or sc, which creates a firm fabric that holds polyester fiberfill without large openings. A few increases make the shape wider, and decreases bring the top back in.
The ears, tail, and cape use simple rows. A chain, abbreviated ch, forms the foundation chain for the cape, while a slip stitch, or sl st, joins small pieces neatly. You will also use a turning chain when a row needs height before you work back across it.
This pattern uses US crochet terms. UK readers often find these posts too, and the same word can mean a different stitch there, so check your labels and stitch names before you begin. The main body uses single crochet rather than double crochet, or dc, because the denser fabric keeps the stuffing from showing.
The pattern suits a confident beginner and also gives an experienced crocheter a quiet little evening project. Allow about 3 to 4 hours, spread over two or three evenings, including sewing on the features and making the cape. The face takes the most patience, especially if you want both eyes to sit at the same height.
Pattern at a Glance
Keep this small overview nearby while you work.
- Skill level: confident beginner
- Finished size: about 6 inches tall (15 cm), including the ears
- Gauge: 18 single crochet and 18 rounds measure 4 inches (10 cm)
- Yarn: worsted weight (weight 4, medium), about 120 yards total
- Hook size: H-8 (5.0 mm)
- Other supplies: polyester fiberfill, yarn needle, scissors, stitch markers, tape measure, 9 mm safety eyes, small amount of white and red yarn
- Stitch multiple: cape rows use any multiple of 3 stitches plus 1
- Estimated time: 3 to 4 hours
Materials for Free Dracula Cat Amigurumi Pattern
- About 120 yards of black worsted weight yarn (weight 4, medium), from a 170-yard per 100 g skein, plus small amounts of white, red, and pink worsted weight yarn
- H-8 (5.0 mm) crochet hook, with half a size up or down fine depending on your tension
- Polyester fiberfill, about 2 ounces (57 g), or enough to make the body firm but not stiff
- Two 9 mm safety eyes (easy to find, or swap for embroidered eyes)
- Yarn needle for sewing pieces together and weaving in the ends
- Sharp scissors
- Two stitch markers, optional but useful for marking the first stitch of each round
- Tape measure for checking the finished height and gauge
- Small piece of felt or black yarn for the nose, optional if you prefer to embroider it
I recommend making a small gauge swatch before you begin. Work 18 single crochet across for 18 rounds, then measure the center 4 inches (10 cm), rather than measuring the edges. The twenty minutes feels like a pause at first, but it tells you whether your fabric will hold the stuffing and whether your cat will stay close to the finished size.
For another worsted weight yarn, match the weight and fiber before worrying about the brand. A smooth acrylic yarn such as Red Heart is easy to handle and washable, while a cotton blend such as one from Lion Brand gives a slightly crisper fabric. You can substitute freely, but different fibers change the drape and size, so use the gauge and finished measurements as your guide.
Acrylic works well here because it keeps the toy affordable and easy to clean. It can melt under a hot iron, so never press it directly; if you block the cape, use cold shaping or very gentle steam from a distance. Keep the safety eyes secure, and remember that small parts and long loose stitches are unsafe for children under three.
Step by Step
- Difficulty: confident beginner. The body uses a single crochet fabric, and the cape repeats in any multiple of 3 stitches plus 1. Make a magic ring, also called a magic circle, with black yarn, and work 6 sc into the ring. Pull the tail to close the center. 6 sc.
- Work 2 sc in each stitch around. This is an increase, which means you work two stitches into one stitch to widen the shape. Place a stitch marker in the first stitch if you like. 12 sc.
- Repeat 1 sc in the next stitch, then 2 sc in the following stitch around. The fabric may cup slightly now, and that is exactly what you want for the base of the body. 18 sc.
- Repeat 1 sc in each of the next 2 stitches, then 2 sc in the next stitch around. Keep your stitches relaxed so the hook slides through without a tug. 24 sc.
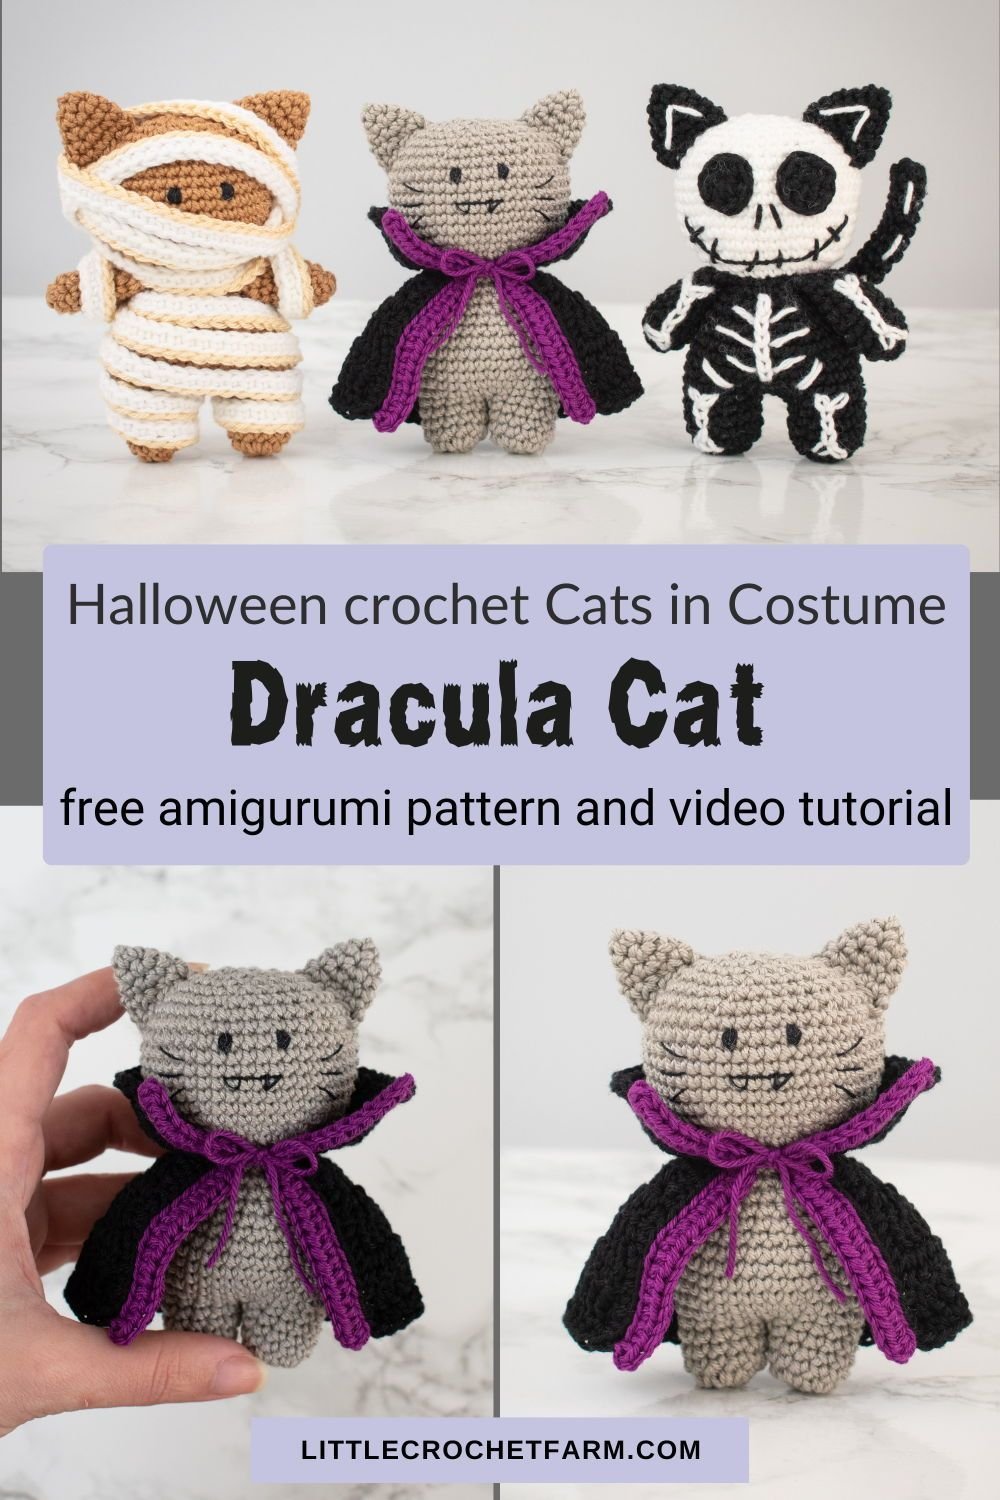
- Repeat 1 sc in each of the next 3 stitches, then 2 sc in the next stitch around. The base should look like a small, even circle. If the edge waves, your tension may be loose; if it cups sharply, loosen your hands slightly. 30 sc.
- Work 1 sc in each stitch around for 8 rounds. Move the stitch marker at the end of every round if you use one. The first rows curled for me until the piece grew heavy enough to settle, so do not flatten it by force. 30 sc each round.
- Begin the first decrease round. A decrease combines two stitches into one: insert the hook into the next stitch, pull up a loop, insert the hook into the following stitch, pull up a loop, then yarn over and pull through all three loops. Repeat 1 sc in the next 3 stitches, then 1 decrease around. 24 sc.
- Work 1 sc in each stitch around for 2 rounds. Add the safety eyes between rounds 11 and 12, with about 7 stitches between them, before stuffing the body. Push the backs on firmly and check that both eyes sit at the same height. 24 sc each round.
- Repeat 1 sc in the next 2 stitches, then 1 decrease around. Begin adding polyester fiberfill now, a little at a time. The body should feel full when pressed but still have some softness. 18 sc.
- Work 1 sc in each stitch around for 1 round, then repeat 1 sc in the next stitch and 1 decrease around. Add a little more stuffing before the opening becomes too small. 12 sc.
- Repeat 1 decrease around. Cut the yarn, leaving a 10-inch tail, and use the yarn needle to weave through the front loops only, or FLO, of the remaining stitches. Pull the opening closed, stitch across it once or twice, and weave in the end inside the body. 6 sc before closing.
- Make each ear with black yarn. Chain 7 for the foundation chain, then work 1 sc in the second chain from the hook and across. Chain 1 as the turning chain, turn, skip the first stitch, and work 1 sc across. Repeat this narrowing row once more, then fasten off. Make a second ear the same way. Sew the ears to the top of the head, angling them slightly outward.
- Make the tail by chaining 18. Work 1 sc in the second chain from the hook and across, then chain 1 and turn. Work 1 sc across for 2 rows. Fasten off, roll the strip gently, and sew the base to the back of the body. Leave the end curved upward, or let it rest beside the cat.
- Make the cape. With red yarn, chain 22 for the foundation chain. Work 1 dc, or double crochet, in the fourth chain from the hook and across. A double crochet begins with a yarn over, so it gives the fabric more height than a single crochet. You will have 19 dc. 19 dc.
- Chain 2 as the turning chain, turn, and work 1 dc in each stitch across. Repeat this row for 5 rows total. Fasten off and weave in the ends. If the top edge pulls tight, your turning chain tension is the likely cause; make the chain more loosely next time or go up one hook size just for the foundation chain.
- Fold the top corners of the cape slightly toward the center and sew a short red yarn tie to each corner. Embroider a small pink nose and a white mouth, or use black and white embroidery for a softer face. Check every sewn end twice, especially if you plan to give the cat to a child.
- Lay the cape flat and shape it with your fingers. Acrylic does not need hot blocking, and direct heat can damage it, so block cold or use steam from a distance with care. Weave in any remaining ends, then trim them close without cutting the stitches.
If a mistake shows up several stitches back, stop before you keep building on it. Remove the hook, pull back one stitch at a time, and count from a nearby marker. At the end of a row or round, look for the small V at the top of every stitch; a missing V usually tells you where the stitch disappeared.
Free Dracula Cat Amigurumi Pattern in a Quiet Home
This little cat feels at home wherever a small seasonal object can make you smile. Set him on a living room shelf, beside a stack of books, or in the basket next to your favorite chair. His red cape adds a gentle Halloween note without requiring a whole room of decorations.
You can also tuck him into a holiday gift basket with cocoa, a soft pair of socks, and a handwritten note. For a child over three, he makes a sweet handmade surprise, though I would embroider the eyes instead of using safety eyes for extra security. A finished item can also sit on a porch table under cover, away from rain and direct sun.
For gifting, make a second cape in the recipient’s favorite color. Deep green, plum, or soft gray changes the mood while keeping the same small cat shape.
Making Free Dracula Cat Amigurumi Pattern Last
This pattern uses acrylic worsted weight yarn, so wash the cat in cold water on a gentle cycle, preferably inside a mesh laundry bag. Use a small amount of mild detergent, and reshape the body with your hands when the wash ends. Never hang it wet, because the weight can pull the stitches and distort the ears.
Dry the cat flat on a clean towel. If the cape needs tidying, shape it while damp and let it air-dry flat. Do not use a hot iron on acrylic, since heat can melt or flatten the fibers; cold blocking or distant steam works more safely.
Store the cat standing or lying in a breathable basket, folded with the cape resting loosely rather than packed under heavy objects. Acrylic does not attract moths in the same way wool can, but cedar or lavender sachets still keep stored handmade items smelling fresh without placing anything directly against the face.
Keep leftover yarn with its label in a sealed bag or labeled basket. The label records the fiber and dye lot, which helps if you later want to repair the cape or make a matching accessory.
Small Ways to Make Free Dracula Cat Amigurumi Pattern Your Own
Try a thicker yarn if you want a larger cat. A bulky yarn with a larger hook will increase the finished size and make the fabric softer, but you may need more stuffing and larger safety eyes. A thinner yarn creates a smaller, firmer figure and makes the facial details more fiddly.
Change the color story. Black with red gives the familiar Dracula feeling, while charcoal with rust suits a quieter fall display. You could also work the body in stripes, changing color after every two rounds and carrying the unused yarn inside where it will stay hidden.
For a firmer, more textured cat, replace some body rounds with single crochet. The body already uses single crochet, but a thinner hook makes the fabric even denser. If you tried double crochet in the body, the holes would grow larger and the stuffing could peek through, so I would reserve double crochet for the cape.
Resize the cape by keeping the stitch multiple in mind. The cape uses any multiple of 3 stitches plus 1, so add or remove 3 foundation chains at a time. A simple scalloped border can soften the bottom edge, while a narrow black border gives the red cape a clearer outline.
For a gift, embroider the eyes and add a tiny felt bow tie or a contrasting collar. If you sell finished items made from this pattern, my policy is simple: I credit the pattern source and do not present the design as my own.
Frequently Asked Questions About the Free Dracula Cat Amigurumi Pattern
What hook size should I use for this crochet cat?
Use an H-8 (5.0 mm) crochet hook for the stated gauge and finished size. If your stitches look loose and the stuffing shows, try a G-6 (4.0 mm) or H-8 (5.0 mm) with firmer tension. If your fabric feels stiff and your hook struggles to enter the stitches, try an I-9 (5.5 mm), knowing the cat may become slightly larger.
Can I substitute another yarn for the pattern?
Yes, substitute another smooth worsted weight yarn, which is weight 4, medium, and check your gauge before making the body. Acrylic keeps this project washable, while cotton makes a crisper figure and may feel a little heavier. A wool yarn can work, but untreated wool may felt in warm water, so wash it gently and avoid agitation.
What should I do if I find a mistake several rows later?
Pull back calmly to the last place where your stitch count was correct. Remove the hook, loosen one stitch at a time, and count the top V shapes as you go. If the error does not change the shape and will hide under the cape or an ear, you can sometimes leave it, but do not ignore a missing stitch that changes the body count.
Is this Dracula cat suitable for a beginner?
This project suits a confident beginner who knows how to make a chain, single crochet, increases, and decreases. The body is repetitive, while the ears and cape use short rows. The face and sewing take patience, so give yourself permission to adjust the eyes before fastening them permanently.
How long does the Free Dracula Cat Amigurumi Pattern take?
Plan on about 3 to 4 hours, spread over two or three evenings. The body may take around two hours, and the remaining time goes to stuffing, sewing, embroidering, and making the cape. Your pace will depend on how often you stop to count and how carefully you position the features.
Does this pattern use US or UK crochet terms?
This pattern uses US crochet terms throughout. In US terminology, single crochet means a short, dense stitch, while UK terminology uses that same phrase differently. The pattern also identifies abbreviations such as sc, dc, ch, sl st, FLO, and increases, so check your preferred terminology before beginning.
Take the Time You Need
Let this cat take the time it takes. Set the yarn in your lap, listen for the quiet click of the hook, and allow a missed stitch to be part of the evening rather than a reason to hurry. The finished figure matters, but the small pauses between rounds matter too, and your hands already know more than they think they do.
Print
Free Dracula Cat Amigurumi Pattern
- Total Time: 240 minutes
Description
This soothing crochet project invites you to create a charming little cat with a red cape, perfect for seasonal decorations or gifts.
Materials
- 120 yards of black worsted weight yarn (weight 4, medium)
- Small amounts of white, red, and pink worsted weight yarn
- H-8 (5.0 mm) crochet hook
- About 2 ounces (57 g) polyester fiberfill
- Two 9 mm safety eyes
- Yarn needle for sewing pieces together
- Sharp scissors
- Two stitch markers (optional)
- Tape measure
- Small piece of felt or black yarn for the nose (optional)
Instructions
- Make a magic ring with black yarn, and work 6 sc into the ring. Pull the tail to close the center. (6 sc)
- Work 2 sc in each stitch around. (12 sc)
- Repeat 1 sc in the next stitch, then 2 sc in the following stitch around. (18 sc)
- Repeat 1 sc in each of the next 2 stitches, then 2 sc in the next stitch around. (24 sc)
- Repeat 1 sc in each of the next 3 stitches, then 2 sc in the next stitch around. (30 sc)
- Work 1 sc in each stitch around for 8 rounds. (30 sc each round)
- Begin the first decrease round. Repeat 1 sc in the next 3 stitches, then 1 decrease around. (24 sc)
- Work 1 sc in each stitch around for 2 rounds. Add the safety eyes between rounds 11 and 12, with about 7 stitches between them, before stuffing the body. (24 sc each round)
- Repeat 1 sc in the next 2 stitches, then 1 decrease around. Begin adding polyester fiberfill now. (18 sc)
- Work 1 sc in each stitch around for 1 round, then repeat 1 sc in the next stitch and 1 decrease around. (12 sc)
- Repeat 1 decrease around. Cut the yarn, leaving a 10-inch tail, and use the yarn needle to weave through the front loops only of the remaining stitches. Pull the opening closed and weave in the end inside the body. (6 sc before closing)
- Make each ear with black yarn. Chain 7 for the foundation chain, then work 1 sc in the second chain from the hook and across. Chain 1 as the turning chain, turn, skip the first stitch, and work 1 sc across. Repeat this narrowing row once more, then fasten off. Make a second ear the same way. Sew the ears to the top of the head.
- Make the tail by chaining 18. Work 1 sc in the second chain from the hook and across, then chain 1 and turn. Work 1 sc across for 2 rows. Fasten off, roll the strip gently, and sew the base to the back of the body.
- Make the cape. With red yarn, chain 22 for the foundation chain. Work 1 dc in the fourth chain from the hook and across. (19 dc)
- Chain 2 as the turning chain, turn, and work 1 dc in each stitch across. Repeat this row for 5 rows total. Fasten off and weave in the ends.
- Fold the top corners of the cape slightly toward the center and sew a short red yarn tie to each corner. Embroider a small pink nose and a white mouth, or use black and white embroidery.
- Lay the cape flat and shape it with your fingers.
Notes
Ensure to check the placement of safety eyes for proper symmetry. Follow wash care instructions for acrylic yarn to maintain the integrity of your amigurumi.
- Preparation Time: 20 minutes
- Active Time: 180 minutes