

The little tree grows quietly in your hands, one soft loop at a time. A small green shape rests beside your coffee, and the hook makes that gentle click against the yarn as late afternoon light moves across the table. This Mini Christmas Tree Ornament Crochet project has the satisfying rhythm of a few repeated stitches, a little shaping, and a finish that fits into your palm. I made mine over a couple of calm evenings, with the first rows curling slightly until the fabric gained enough height to settle. It is a small seasonal project, but it gives your hands a peaceful place to go.
Why Mini Christmas Tree Ornament Crochet Is So Soothing to Crochet
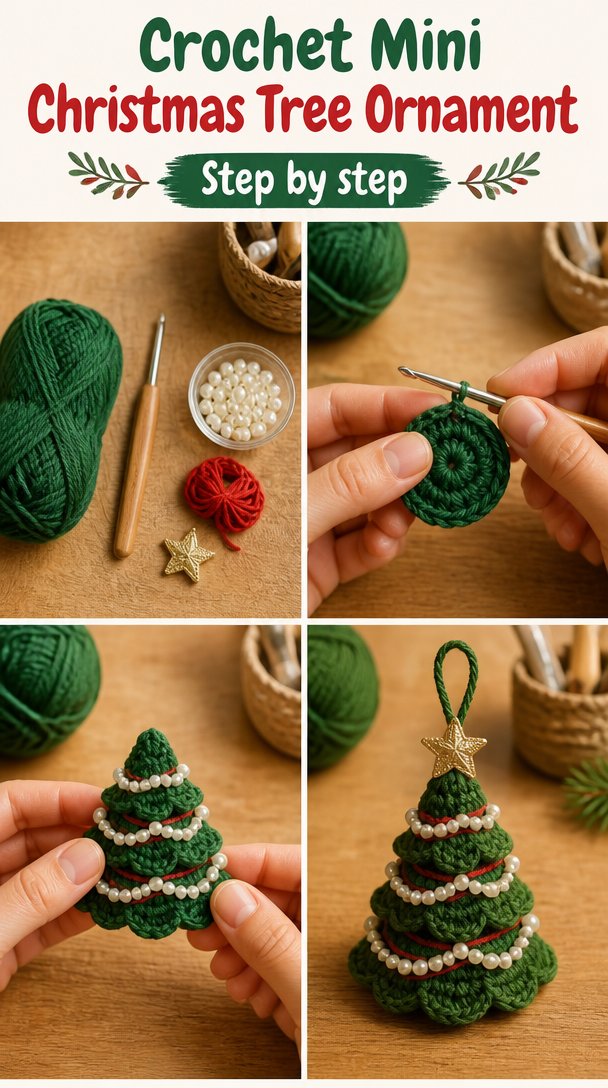
This ornament is small enough to feel manageable, even when you only have twenty minutes between supper and bedtime. You work from the bottom upward, so the shape becomes visible early. That helps the project feel encouraging rather than endless.
The main stitch is double crochet, which gives the tree a soft, open texture without making the work too loose. Each row has a clear rhythm: chain, turn, work across, and pause to notice the little triangle taking form. After the first ten minutes, my hands warmed up and the yarn began sliding more easily through my fingers.
A small project also leaves room for ordinary life. You can keep it in the basket beside your armchair, work on it during a rainy evening on the couch, or carry it onto the porch when the air turns cool. It does not ask you to rearrange your day. It simply offers a few quiet rows within it.
The finished tree makes a sweet addition to a holiday branch, a mantel, or a gift package. You might make several in different greens while a mug of coffee cools beside your yarn basket. You might also make one in cream, rust, or cranberry for a softer fall display that can stay out beyond December.
The Rhythm of This Crochet Project
You will begin with a foundation chain, which is the first line of chains that supports the rest of the work. From there, you will use double crochet, a taller stitch made by wrapping the yarn before pulling through the loops. Each row increases by two stitches, creating the sloping sides of the tree.
The pattern uses US crochet terms. UK readers often find these posts too, and the same word can mean a different stitch there, so this note matters: a US double crochet is a UK treble crochet. I will use US terms throughout.
You will make a flat triangular tree, fold it lightly along the center, and add a small hanging loop. There is no complicated colorwork or difficult shaping. The fiddly part comes near the top, where the rows become short, so count slowly and let the hook do one motion at a time.
This project suits a confident beginner and gives an intermediate crocheter a pleasant, portable make. Allow about two to three hours for one ornament, including weaving in the ends and a little blocking time. If you make several at once, the later trees usually move faster because your hands remember the pattern.
Pattern at a Glance
Keep these details nearby while you work.
- Skill level: Confident beginner
- Finished size: About 4 inches tall by 3.5 inches wide (10 cm by 9 cm)
- Gauge: 14 double crochet and 8 rows measure 4 inches (10 cm)
- Yarn: Worsted weight (weight 4, medium), about 70 yards total, or less than one 170-yard, 100 g skein
- Hook: H-8 (5.0 mm)
- Other supplies: Yarn needle, scissors, tape measure, stitch marker, and 6 inches of ribbon or cord
- Stitch multiple: Any multiple of 2 stitches for the starting chain, with the first row worked into the third chain from the hook
- Estimated time: About two to three hours
Materials for Mini Christmas Tree Ornament Crochet
- About 70 yards of worsted weight yarn, also called weight 4 or medium yarn, in a smooth acrylic or wool-acrylic blend. A typical skein has about 170 yards per 100 g skein, so one skein is more than enough.
- One H-8 (5.0 mm) crochet hook. A half size up or down is fine depending on your tension.
- Yarn needle for weaving in the ends.
- Sharp scissors.
- Tape measure for checking the finished size and gauge.
- One stitch marker, optional, for marking the turning chain or final loop.
- About 6 inches of ribbon, cotton cord, or yarn for the hanging loop.
- Optional small wooden bead or button for the top, only if the ornament will stay away from children under three.
I used a smooth worsted weight acrylic yarn because it is easy to find, holds the triangle shape, and handles ordinary holiday storage well. A basic worsted weight yarn from Lion Brand, Red Heart, or I Love This Yarn can work nicely here. Those are examples, not requirements.
Gauge is worth the twenty minutes it takes to make a small swatch. For this ornament, 14 double crochet and 8 rows should measure 4 inches (10 cm). Exact gauge matters less than it would for a sweater, but a very loose fabric can make the tree floppy and a very tight fabric can make the top difficult to shape.
You can substitute another worsted weight yarn with a similar thickness. Cotton will make a firmer ornament, while wool can add warmth and a little halo. If you use bulky yarn, the tree will become larger and heavier. If you use a lighter yarn, it will become smaller and more delicate, so adjust the hook to keep the fabric smooth.
Step by Step
- Difficulty and repeat: This is a confident beginner project. The starting chain may contain any multiple of 2 stitches, and the first row is worked into the third chain from the hook. For the sample size, chain 20.
- Make a slip knot and place it on your H-8 (5.0 mm) hook. Work 20 chain stitches, called ch, by pulling a loop through the loop on your hook each time. Keep the foundation chain relaxed rather than tight.
- Row 1: Work 1 double crochet, called dc, into the third chain from the hook. Continue with 1 dc in each chain across. You will have 18 dc because the first two chains count as the turning chain. Chain 2 and turn.
- Row 2: Work 1 dc in the first stitch, then work 2 dc in the next stitch. Repeat across, ending with 1 dc in the last stitch. You will have 20 dc. Chain 2 and turn.
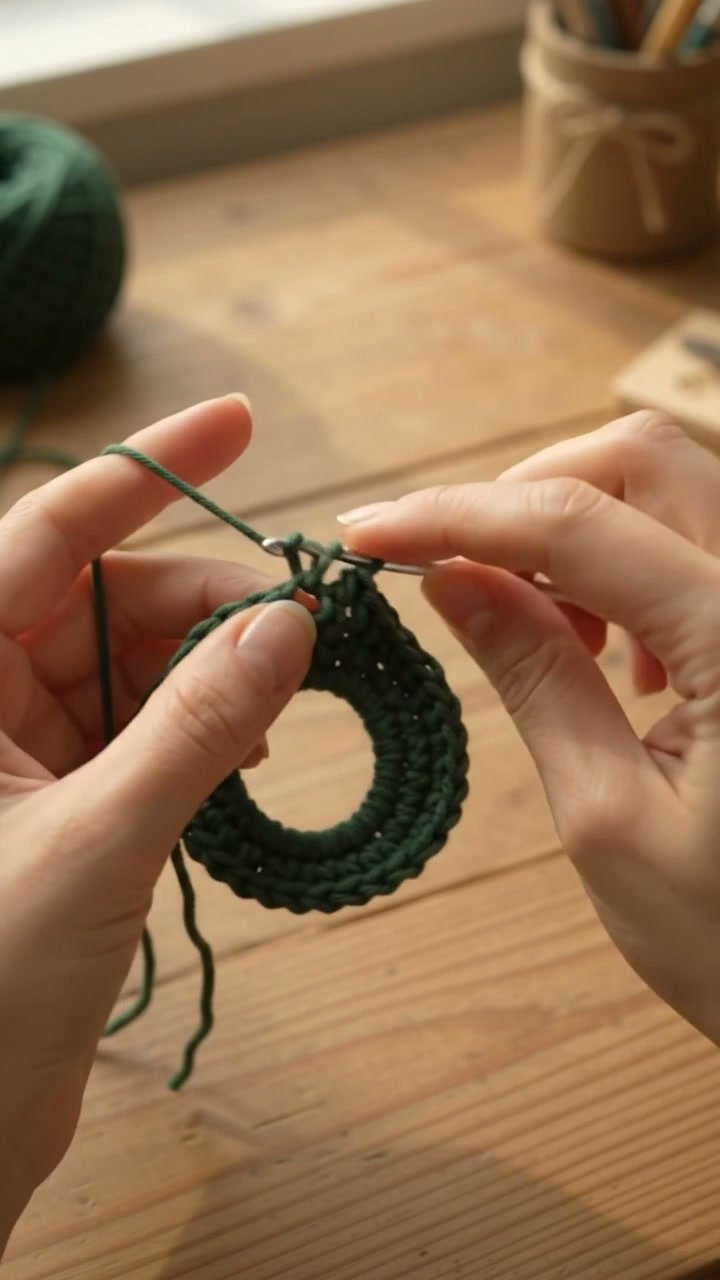
- Row 3: Work 1 dc in the first stitch, 1 dc in the next stitch, then 2 dc in the following stitch. Repeat this sequence across, ending with 1 dc in each of the last two stitches. You will have 22 dc. Chain 2 and turn.
- Row 4: Work 1 dc in each of the first 2 stitches, then 2 dc in the next stitch. Repeat across, ending with 1 dc in each of the last 3 stitches. You will have 24 dc. Chain 2 and turn.
- Continue the same shaping through Row 8. On each row, work 1 dc in the first stitches, place 2 dc in the center increase point, and finish with the same number of regular dc on the other side. Your stitch counts are 26, 28, 30, 32, and 34 dc for Rows 5 through 8.
- For a clear way to find the increase point, count from both ends. The center stitch changes as the row grows, so do not worry if it does not sit directly beneath the previous increase. The triangle will still form as long as each row adds 2 stitches.
- After Row 8, chain 1 and turn the work so the top edge faces you. Work 1 single crochet, called sc, evenly across the sloping edge, across the top, and down the other sloping edge. A single crochet is a short stitch made by inserting the hook, yarn over, pulling up a loop, then yarning over and pulling through both loops.
- When you reach the bottom point, work 3 sc into that point so it does not curl inward. Continue around the remaining edge, join with a slip stitch, called sl st, to the first sc, and fasten off. The border is not meant to look perfectly measured. It simply smooths the edges and gives the tree a little more body.
- Make the hanging loop by threading the 6-inch ribbon or cord onto the yarn needle. Pass it through the top center of the tree, tie the ends together, and trim them neatly. If you prefer a yarn loop, chain 12, slip stitch to the first chain, and sew the loop firmly to the top.
- If a mistake shows several rows later, stop before pulling out a large section. Look for the last row where the count was correct, then gently pull back one stitch at a time to that place. A missed stitch often shows as a sloping edge that suddenly narrows or as a row count that is 1 stitch short. The yarn tail you forgot to weave in can wait; the lost stitch deserves your attention first.
- Weave in both yarn ends with the yarn needle, passing the needle through several stitches on the wrong side. Trim only after the tail feels secure. Lightly block the tree by pinning it flat and misting it with water, then allow it to dry completely before hanging it.
The finished piece should measure about 4 inches tall by 3.5 inches wide (10 cm by 9 cm). If your first rows curl, keep going for a little while. The fabric often settles once it has enough weight, and a gentle block at the end can smooth the remaining lift.
Where Mini Christmas Tree Ornament Crochet Finds Its Place
This little tree works best where you can see its texture up close. Hang it from a holiday branch in a vase, tuck it into a garland, or place it on the knob of a cabinet. A few trees in different shades can fill a small bowl on the coffee table without making the room feel crowded.
It also makes a thoughtful handmade gift when you attach it to a wrapped book, a jar of cookies, or a bundle of tea. You could make one in the recipient’s favorite color and add the year on a small paper tag. The ornament stays light enough to mail in a regular greeting card envelope, though you may want to protect the ribbon loop from bending.
For a quieter seasonal display, try cream, tan, or soft gray instead of green. A rust-colored tree can sit on the mantel through November, while a deep red one brings a little warmth to the living room during long fall evenings. The project does not need a large tree or a full holiday display to have a place.
Caring for Your Crochet
Because this pattern uses worsted weight acrylic yarn, wash the ornament only when needed. Hand wash it in cool water with a small amount of mild detergent, or place it in a mesh bag on a gentle cold-water cycle. Avoid hot water, which can encourage some acrylic yarns to lose their shape.
Press the water out between clean towels and lay the tree flat to dry. Do not hang it while wet because the loop can stretch and the triangle may pull out of shape. If the edges look uneven, pin it flat while damp and let it dry naturally.
Acrylic can melt under a hot iron, so do not press it directly. Use steam from a distance only if your yarn label allows it, or choose a cold block with pins instead. For this small ornament, a light mist and flat drying usually do enough.
Store the tree folded or laid flat in a breathable box rather than hanging it all year. Keep it away from damp storage spaces and strong heat. Save the leftover yarn with its label so you have the fiber information and dye lot if you make a matching ornament later.
Small parts such as beads, buttons, and loose cords are unsafe for children under three. If you make this ornament for a home with young children, leave off the bead and secure the hanging loop firmly. This is a decoration, not a toy, and it should never go in a crib or car seat.
Small Ways to Make Mini Christmas Tree Ornament Crochet Your Own
- Try a different yarn weight if you want a new scale. Bulky yarn will make a larger, softer tree, while sport or light worsted yarn will make a smaller ornament. Keep the hook comfortable and expect the finished size to change.
- Play with color in a simple way. Use one shade for the first four rows and another for the last four, or change colors every two rows for gentle stripes. Carrying yarn up the side can leave a visible edge, so weave in the tails neatly or cover that side with the border.
- Swap double crochet for single crochet if you want a denser fabric. Single crochet will make the tree firmer and less open, but it will also take more stitches and rows to reach the same size. You may need to add rows gradually.
- Resize the tree by changing the starting chain in multiples of 2. A shorter chain makes a small tree, and a longer chain makes a wider one. Keep the same increase rhythm, adding 2 stitches on every row.
- Add a simple decorative edge with a contrasting color. A round of single crochet in white can suggest snow, while a few embroidered French knots can stand in for lights. Sew every embellishment securely and keep small pieces away from young children.
One practical note from making several: cotton gives a crisp, structured result, while acrylic keeps the project light and easy to wash. Wool can look especially lovely after blocking because the fibers relax and open, but untreated wool may felt with agitation. Superwash wool tolerates machine washing better, while untreated wool needs gentler care.
Frequently Asked Questions About Mini Christmas Tree Ornament Crochet
Can I use a different hook size for this Mini Christmas Tree Ornament Crochet pattern?
Yes, you can use a different hook size if your tension needs it. An H-8 (5.0 mm) hook gives the sample size and a balanced fabric, but an I-9 (5.5 mm) hook can help if your stitches feel tight. A G-6 (4.0 mm) hook will make a denser, slightly smaller tree. Check that the fabric does not feel stiff or stretched.
What yarn can I substitute for the worsted weight acrylic?
You can substitute any smooth worsted weight yarn, including cotton, wool, or a wool-acrylic blend. Choose yarn described as weight 4, medium, and expect about 70 yards for one ornament. Cotton gives more structure, while wool gives a softer surface. Read the care label before washing, since untreated wool can felt and acrylic should not meet a hot iron.
What should I do if I notice a mistake several rows later?
Pull back calmly to the last row where your stitch count was correct. Undo one stitch at a time and place the hook back through the live loop before continuing. If the mistake only changes the edge slightly and the ornament still lies flat, you may leave it. For a missing stitch, correcting the count usually gives a cleaner triangle than trying to hide it.
Is this Christmas tree ornament crochet pattern suitable for a beginner?
Yes, this pattern suits a confident beginner who knows how to chain, double crochet, single crochet, and slip stitch. The shaping repeats in a simple way, and each row adds 2 stitches. You may find the small top section fiddly, but the work becomes easier when you count at the end of every row instead of waiting until the whole tree is finished.
How long does one Mini Christmas Tree Ornament Crochet take?
One ornament takes about two to three hours, including the border, hanging loop, weaving in the ends, and light blocking. Your first one may take longer because you are checking the increase point. Once the movement feels familiar, a small group of ornaments can move along during several quiet evenings.
Does this pattern use US or UK crochet terms?
This pattern uses US crochet terms. In this version, dc means double crochet, while UK readers may know that same stitch as treble crochet. The abbreviations are written out the first time they appear, so you can keep the terminology clear while you work. Check other patterns carefully because stitch names do not always match between the two systems.
Take the Time You Need
Let this be a small place to slow down. The triangle does not need to become perfect in a hurry, and a slightly uneven edge can usually settle with a careful border and gentle block. Keep your hook, yarn, and scissors close, listen for the quiet rhythm of the stitches, and let the ornament grow at the pace your hands can comfortably hold.
—META—
SEO Title: Mini Christmas Tree Ornament Crochet Pattern
Meta Description: Make a calm Mini Christmas Tree Ornament Crochet with simple US stitches, worsted yarn, and gentle steps for a handmade holiday decoration.
Slug: mini-christmas-tree-ornament-crochet
Category: Crochet
Tags: crochet ornaments, christmas crochet, beginner crochet, handmade decor, slow making
Image Alt Text: Small green crochet Christmas tree ornament beside a crochet hook
Close-up of double crochet rows forming a miniature tree shape
Finished crochet tree ornament with a simple hanging loop
Pinterest Title: Mini Christmas Tree Crochet Ornament
Pinterest Description: Make a small crochet tree ornament with a gentle rhythm and simple shaping. This calm project suits quiet evenings and handmade holiday giving.

Mini Christmas Tree Ornament Crochet
- Total Time: 180 minutes
Description
This Mini Christmas Tree Ornament Crochet project has the satisfying rhythm of a few repeated stitches, a little shaping, and a finish that fits into your palm. It’s a small seasonal project that gives your hands a peaceful place to go.
Materials
- About 70 yards of worsted weight yarn (weight 4, medium)
- One H-8 (5.0 mm) crochet hook
- Yarn needle for weaving in the ends
- Sharp scissors
- Tape measure for checking the finished size and gauge
- One stitch marker (optional)
- About 6 inches of ribbon, cotton cord, or yarn for the hanging loop
Instructions
- Make a slip knot and place it on your H-8 (5.0 mm) hook. Work 20 chain stitches (ch) by pulling a loop through the loop on your hook each time.
- Row 1: Work 1 double crochet (dc) into the third chain from the hook. Continue with 1 dc in each chain across. You will have 18 dc. Chain 2 and turn.
- Row 2: Work 1 dc in the first stitch, then work 2 dc in the next stitch. Repeat across, ending with 1 dc in the last stitch. You will have 20 dc. Chain 2 and turn.
- Row 3: Work 1 dc in the first stitch, 1 dc in the next stitch, then 2 dc in the following stitch. Repeat across, ending with 1 dc in each of the last two stitches. You will have 22 dc. Chain 2 and turn.
- Row 4: Work 1 dc in each of the first 2 stitches, then 2 dc in the next stitch. Repeat across, ending with 1 dc in each of the last 3 stitches. You will have 24 dc. Chain 2 and turn.
- Continue the same shaping through Row 8, adding 2 dc on each row, reaching 26, 28, 30, 32, and 34 dc for Rows 5 through 8.
- After Row 8, chain 1 and turn the work so the top edge faces you. Work 1 single crochet (sc) evenly across the sloping edge and down the other sloping edge.
- When you reach the bottom point, work 3 sc into that point and continue around the remaining edge, join with a slip stitch to the first sc, and fasten off.
- Make the hanging loop by threading the 6-inch ribbon or cord onto the yarn needle. Pass it through the top center of the tree, tie the ends together, and trim them neatly.
- Weave in both yarn ends with the yarn needle, passing the needle through several stitches on the wrong side. Trim only after the tail feels secure.
- Lightly block the tree by pinning it flat and misting it with water, then allow it to dry completely before hanging it.
Notes
This decoration is not a toy and should never be placed in a crib or car seat. Small parts like beads may pose a choking hazard for children under three.
- Active Time: 120 minutes