This post contains Amazon affiliate links. As an Amazon Associate I earn from qualifying purchases.
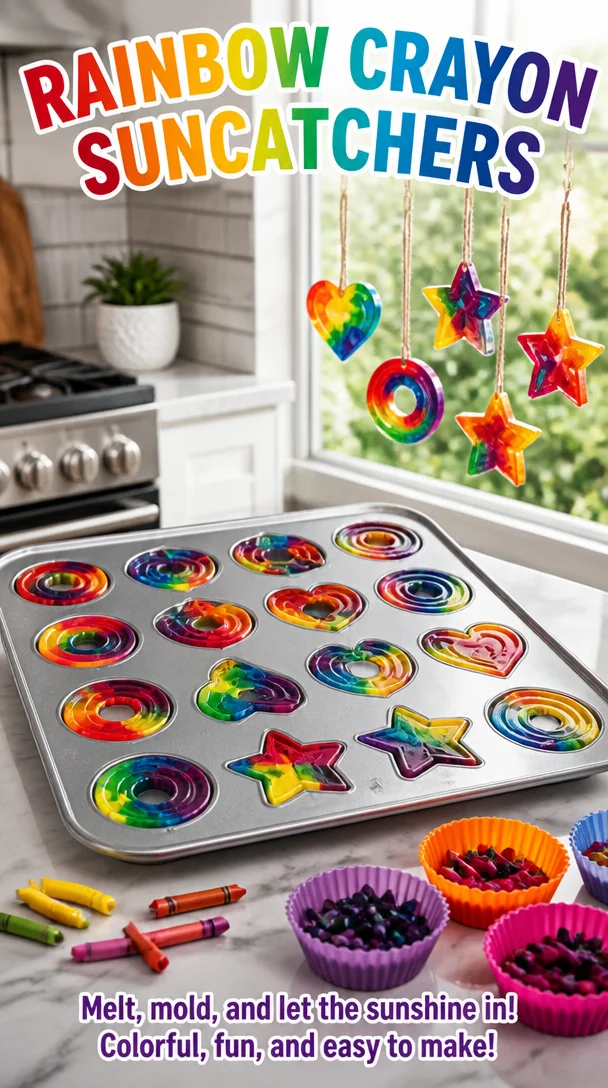
Rainbow Crayon Suncatchers offer a gentle invitation into a world of color and light, transforming ordinary moments into vibrant displays. As sunlight filters through the colors, it creates a warm embrace of hues that dance playfully across the room. The act of melting crayons fills the air with a soft warmth, reminiscent of childhood wonder. Each suncatcher links the past to the present, breathing life into space with a simple, yet profound, charm.
The Heart Behind This DIY
Creating Rainbow Crayon Suncatchers allows us to slow down and connect with both our materials and ourselves. Each crayon’s texture feels familiar and comforting, a reminder of soothing afternoons spent coloring. In this mindful process, we focus on the gentle heat of the melting wax and the inviting aroma of warm crayons, guiding our thoughts to a serene place.
As we engage our hands in this simple craft, our minds can wander without worry. The rhythmic movement of peeling crayons, breaking them into pieces, and watching them melt becomes a dance of intention. This satisfying flow quiets the mind and nourishes the spirit, creating not just a craft but a treasured memory.
A Gentle Look at the Process
Making Rainbow Crayon Suncatchers is filled with tactile pleasures. The sound of crayons being unwrapped crackles softly, and the sharpness of the broken pieces contrasts pleasantly with the warm, smooth wax. As the crayons melt together, colors swirl, creating mesmerizing patterns, transforming mere wax into a canvas of joy.
This DIY process encourages us to stay present, to truly experience each step as it unfolds. The act of pouring melted wax into molds introduces a sense of calm anticipation, the beauty of creation growing with each transition.
Gathering Your Materials
- Crayons (preferably made from non-toxic wax, easy to find)
- Oven-safe silicone molds (shapes of your choice)
- Baking sheet (to protect your oven)
- Parchment paper (optional, for a stable work surface)
- Wax paper or plastic wrap (to protect your workspace)
- Scissors (for breaking the crayons)
- An oven (for melting the crayons)
These materials blend easily into a cozy crafting session. If you do not have silicone molds, you can use muffin tins or other oven-safe containers. Just remember to ensure they are well-suited for heat.
Step-by-Step Directions
-
Preheat your oven to 200 degrees Fahrenheit. The gentle warmth will slowly melt the crayons without burning them.
-
Gather your crayons and remove the wrappers. Feel the roughness of the paper as you peel it away. There’s something satisfying about this activity, almost like unwrapping a gift every time.
-
Break the crayons into small pieces, around one inch long. The snapping sound reminds us of playful moments, and you can mix colors as you go.

-
Arrange the crayon pieces in your silicone molds. Consider creating patterns or simply placing them randomly. Allow your creativity to flow with each color choice.
-
Place the filled molds on a baking sheet for stability. This step adds comfort, making it easier to handle your creations.
-
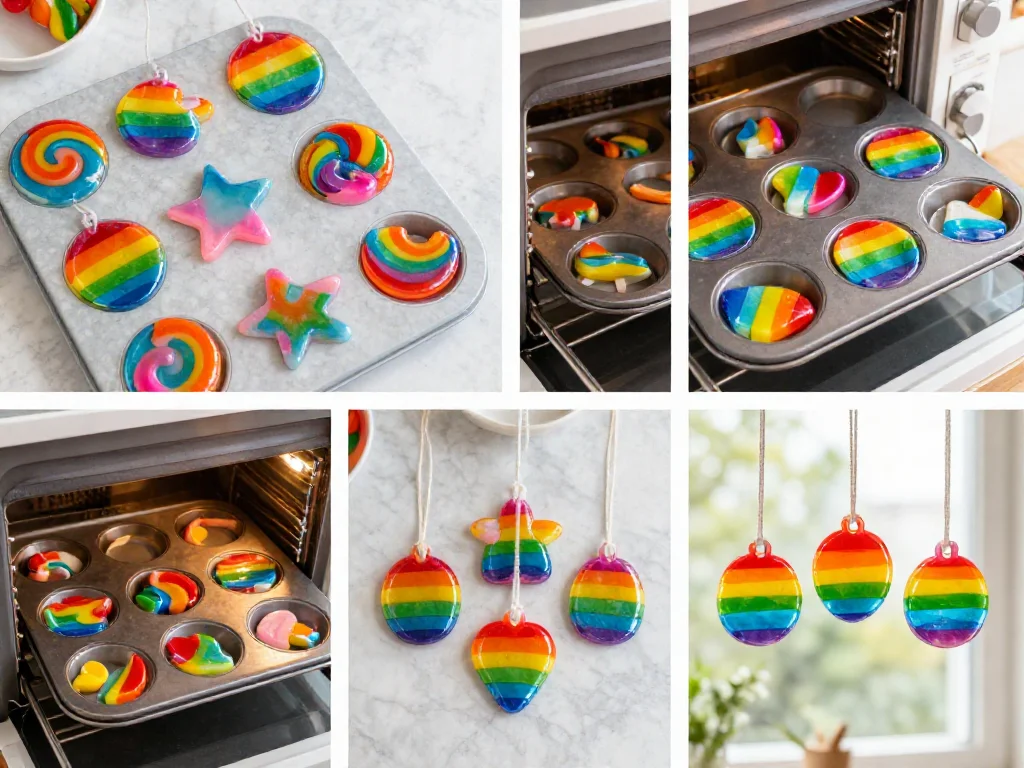
Carefully place the baking sheet into the preheated oven. Enjoy the slow anticipation as the crayons gently begin to melt, transforming into a beautiful amalgamation of colors.
-
Watch closely through the oven door as the colors blend together. The melting wax creates a mesmerizing scene, like a miniature work of art in progress.
-
Once completely melted (about 10-15 minutes), remove the molds from the oven. Let them sit undisturbed for a few minutes as the wax begins to set.
-
After about 10 minutes, place the molds in the freezer for 20-30 minutes. This will help the suncatchers become firm and easier to remove.
-
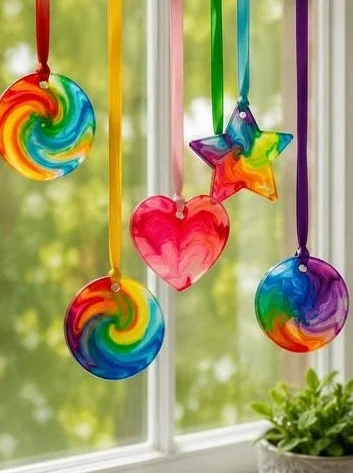
Gently pop your creations out of the molds. Observe the smooth, shiny surface and the beautiful way the colors swirl together. Each piece feels like a little treasure.
Enjoying the Finished Piece
Your Rainbow Crayon Suncatchers can bring life and color to various spaces. Hang them in windows where sunlight can stream through, creating splashes of color across walls and floors. Watching the colors shift and change throughout the day can evoke a sense of peace and joy.
You may also choose to display them in a child’s room, adding warmth and character to their space. Consider making a set to gift to friends or family members, sharing in the gentle wonder of creativity together.
Making This DIY Last
To help your suncatchers live on throughout the seasons, consider how you can store or display them. You can hang them with fishing line for an elegant touch or place them on an easel for an indoor garden display.
If storing them, keep them in a cool, dry place away from direct sunlight to maintain the integrity of the colors. They can be treasured keepsakes or seasonal decorations, bringing joy with every glance.
Gentle Tips & Variations
-
Experiment with different shapes and sizes of molds for unique effects. Explore the joy of subtle variations, making this project your own.
-
Use different types of crayons. Try biodegradable options or even crayons that blend easily for a smooth finish.
-
Add glitter or small natural elements like dried flowers to your molds for a textured touch. These touches can add extra visual interest.
-
Try layering the crayons by pouring a layer of one color, letting it cool slightly, and adding another layer. This creates a more intricate design.
-
Consider admiring your creations with friends. Gather around a table with your materials and make an afternoon of creativity and connection.
FAQs About Rainbow Crayon Suncatchers
How long do the suncatchers last?
With proper care, your suncatchers can last for many seasons. Just keep them in a cool, dry area away from direct sunlight to prevent any melting or fading.
Can I use broken crayons that are too short to hold?
Absolutely! This project is a wonderful way to use those small pieces that are often discarded. They add to the unique charm of each suncatcher.
Is it safe to melt crayons in the oven?
Yes, as long as you use non-toxic crayons. Always monitor them closely while melting, and predetermine temperature to avoid burning.
Will this project create any mess?
Like most crafts, there could be some drips or spills. Using parchment paper will help catch any stray wax. Just take a moment to clean your workspace afterward.
Can I use other materials besides crayons?
If you wish to explore, consider using colored wax from other sources like old candles. However, test their melting points to ensure safety.
A Gentle Note Before You Go
As you finish this project, take a moment to breathe deeply, savoring the warmth and colors of your Rainbow Crayon Suncatchers. Each piece holds the gentle hum of creativity, becoming a vibrant companion in your space. Allow yourself to enjoy the beauty you’ve created, reflecting on how this simple act of making has unfolded into joy and mindfulness. Your journey into cozy crafting continues, filled with the promise of more moments like these to come.
Print
Rainbow Crayon Suncatchers
- Total Time: 30 minutes
- Yield: 4 suncatchers
- Diet: N/A
Description
Create vibrant suncatchers using melted crayons that fill your space with color and warmth.
Ingredients
- Crayons (preferably non-toxic)
- Oven-safe silicone molds
- Baking sheet
- Parchment paper (optional)
- Wax paper or plastic wrap
- Scissors
- An oven
Instructions
- Preheat your oven to 200 degrees Fahrenheit.
- Gather your crayons and remove the wrappers.
- Break the crayons into small pieces, around one inch long.
- Arrange the crayon pieces in your silicone molds.
- Place the filled molds on a baking sheet for stability.
- Carefully place the baking sheet into the preheated oven.
- Watch closely as the colors blend together.
- Once completely melted (about 10-15 minutes), remove the molds from the oven.
- Let them sit undisturbed for a few minutes.
- After about 10 minutes, place the molds in the freezer for 20-30 minutes.
- Gently pop your creations out of the molds.
Notes
Experiment with different shapes, sizes, and types of crayons. Adding glitter or natural elements can create unique designs.
- Prep Time: 15 minutes
- Cook Time: 15 minutes
- Category: Craft
- Method: Melting
- Cuisine: N/A