This post contains Amazon affiliate links. As an Amazon Associate I earn from qualifying purchases.
Creating Giant Puffy Sidewalk Art can feel like a warm embrace on a sunlit day. As you mix the colors and feel the thick, fluffy texture underneath your fingertips, there’s a deep satisfaction that grows within. Something special happens when these vibrant hues meet the cool, concrete canvas. They create a space filled with imagination and joy—an invitation for anyone passing by to pause, smile, and let their own creativity bloom. The act of making this art invites you to slow down, breathe deeply, and savor each moment, truly making it a delightful experience.
The Heart Behind This DIY
Giant Puffy Sidewalk Art stands out as a simple yet powerful way to engage with your surroundings and connect with your inner child. It encourages us to take a step back from our fast-paced routines and immerse ourselves in the tactile experience of creativity. With each movement, you draw out textures, colors, and patterns, allowing your mind to wander.
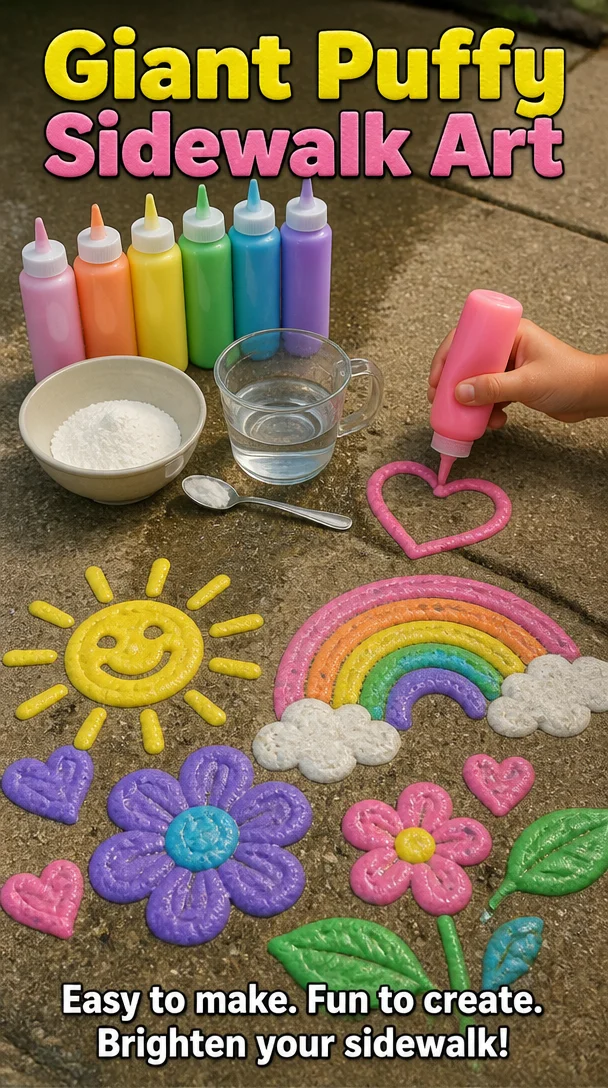
This calming project fosters mindfulness, inviting you to focus on the here and now. The way the colors swirl together, the gentle sound of laughter mingling with playful creativity, and the warm sun reflecting on your work all contribute to a deeper sense of being present. Each stroke becomes a meditation, a chance to explore how colors blend and how shapes take form. In a world filled with distraction, this simple art project softens the edges of everyday life and brightens the spirit. It reminds us that nurturing our creativity can be a source of great comfort.
A Gentle Look at the Process
As you prepare for this cozy art experience, allow your senses to lead you. Picture yourself gathering your materials, feeling the weight of the fluffy mixture in your hands. Listen closely to the sound of mixing, feel the smoothness of the pavement waiting for your art.
The process itself becomes an enjoyable rhythm, flowing gently from one step to the next. The colors come alive in a dance of hues and imagination, swirling and blending into one another as you apply them to the concrete. Each touch, each movement carries a sense of intention. There’s no rush here—just the sweet joy of creation.
Gathering Your Materials
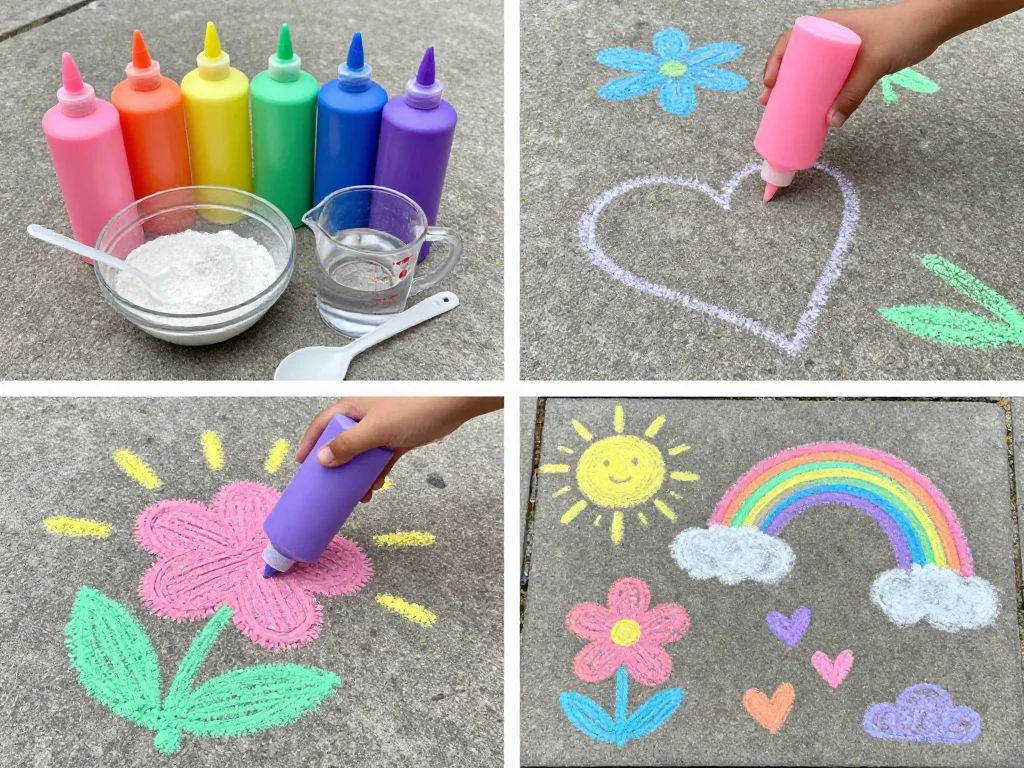
- Shaving cream (easy to find and adds texture)
- School glue (also easy to source; for a smooth mixture)
- Food coloring (your favorite colors)
- Large mixing bowl (big enough for whisking)
- Whisk or spoon (for stirring the mixture)
- Plastic or paper plates (to hold your art)
- Sidewalk or concrete surface (a blank canvas)
- Bucket of water (for cleanup)
- Sponge or cloth (for wiping excess)
These materials create a gentle palette that invites your imagination. You can use substitutes or variations, like different adhesives or additional textures, depending on what you have available.
Step-by-Step Directions
-
Start by finding a comfortable spot outside. Gather your materials and take a moment to breathe deeply, enjoying the fresh air.
-
In the mixing bowl, combine equal parts of shaving cream and school glue. The lightness of the shaving cream feels soft and fluffy, while the glue adds stability.

-
Gently whisk the mixture until it becomes creamy and well-blended. Take in the cloud-like texture that forms—it invites you to dive into your creativity.
-
Once mixed, separate the fluffy concoction into smaller bowls. This allows you to mix in your food coloring, creating vibrant shades to work with.
-
Add a few drops of food coloring to each small bowl. Gently stir until the colors dance and swirl, bringing your imagination to life. Feel the smoothness beneath your fingers as you blend.
-
Step outside to your chosen sidewalk or concrete area. With a plastic or paper plate in hand, scoop up some of the colorful mixture and apply it to the ground.
-
Allow your creativity to flow as you create shapes, patterns, or scenes. The mixture puffs up slightly as it dries, adding dimension and charm to your work.
-
Continue adding colors and designs until you feel satisfied with your masterpiece. Enjoy the playful exploration of colors and shapes as you create.
-
When finished, step back and admire your work. Take a deep breath to feel the joy of this moment.
Enjoying the Finished Piece
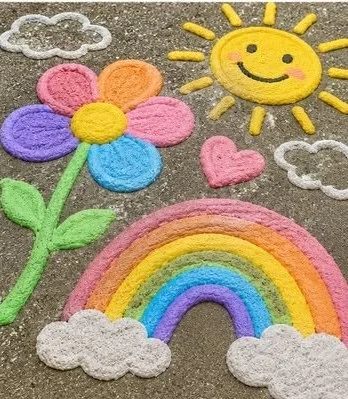
Once you step back and see your giant puffy masterpiece, there’s a wave of contentment that washes over you. The vibrant colors bounce joyfully off the concrete, brightening your surroundings. Friends, family, or passersby may stop to admire this cheerful creation, bringing about spontaneous smiles and connections.
You could choose to add little fun elements, like drawing hopscotch squares or friendly doodles around your artwork. The finished piece can add a splash of color to your garden or driveway, or serve as a cheerful prompt for neighborhood play. Each time you glance at it, it brings forth a reminder of the joy you felt while creating.
How to Store or Reuse Giant Puffy Sidewalk Art
One of the charming aspects of Giant Puffy Sidewalk Art is that it’s mainly temporary. It brings beauty, laughter, and texture to your outdoor space but will gradually fade with time and weather. If any remnants remain, consider taking photographs of your work, capturing the colors and shapes for lasting memories. Sharing these moments can feel just as fulfilling.
If you choose to create again, simply wash the area with water. The sponge or cloth you prepared makes cleanup simple. You can mix new colors or redo old designs, embracing the process of creation anew.
Gentle Tips & Variations
- Explore texture by adding a sprinkle of glitter to your mixture, inviting a sparkle to the sunlight.
- Try using a variety of tools, like brushes or sponges, to apply your art, which creates different effects and textures.
- If you want to change things up, use natural ingredients, like flower petals or leaves, to decorate your sidewalk art for a more whimsical, earthy touch.
- Invite friends or family to join, transforming it into a community experience filled with laughter and collaboration.
FAQs About Giant Puffy Sidewalk Art
Can I use this mixture for other surfaces besides sidewalks?
Yes, while it works best on concrete, you can experiment with various outdoor surfaces. However, ensure they are porous enough to allow easy removal later on.
Will the colors fade over time?
Yes, the beautiful colors may lessen under sunlight and rain. That’s part of the charm—embracing the fleeting nature of your creation.
How can I clean up after making this?
A simple bucket of water and a sponge will do the trick. Just wash away any remnants, leaving a clean slate for future creativity.
How long will the art stay vibrant outside?
Typically, it lasts several days to a week, depending on the weather conditions. Enjoy its beauty while it lasts, gathering friends for an impromptu art viewing.
Can I store the mixture for later use?
It’s best to use the mixture fresh. The texture and properties change after a while, so preparing each time ensures a lovely outcome.
Final Reflections on Making Giant Puffy Sidewalk Art
As you draw your final stroke and step back to admire your vibrant creation, take a quiet moment to breathe and reflect. The world feels quieter, more serene, filled with the warmth of creativity. Each color, each puff embodies not just art but an experience—a reminder that joy lies in the doing, not just the finishing.
Creating art outside invites you to engage with nature and the community around you. It encourages you to slow down, savor the moment, and simply enjoy the process of making. Whether your work inspires laughter or reflection, it adds a cozy touch to the world, nurturing your spirit along the way. Relish this quiet moment, and carry it with you, embracing the comfort of creativity in everyday life.
Print
Giant Puffy Sidewalk Art
- Total Time: 10 minutes
- Yield: 1 masterpiece
- Diet: N/A
Description
A fun and vibrant DIY project creating giant fluffy sidewalk art using simple ingredients, perfect for engaging creativity outdoors.
Ingredients
- Shaving cream
- School glue
- Food coloring
- Large mixing bowl
- Whisk or spoon
- Plastic or paper plates
- Sidewalk or concrete surface
- Bucket of water
- Sponge or cloth
Instructions
- Start by finding a comfortable spot outside. Gather your materials and take a moment to breathe deeply, enjoying the fresh air.
- In the mixing bowl, combine equal parts of shaving cream and school glue. The lightness of the shaving cream feels soft and fluffy, while the glue adds stability.
- Gently whisk the mixture until it becomes creamy and well-blended. Take in the cloud-like texture that forms; it invites you to dive into your creativity.
- Once mixed, separate the fluffy concoction into smaller bowls. This allows you to mix in your food coloring, creating vibrant shades to work with.
- Add a few drops of food coloring to each small bowl. Gently stir until the colors dance and swirl, bringing your imagination to life. Feel the smoothness beneath your fingers as you blend.
- Step outside to your chosen sidewalk or concrete area. With a plastic or paper plate in hand, scoop up some of the colorful mixture and apply it to the ground.
- Allow your creativity to flow as you create shapes, patterns, or scenes. The mixture puffs up slightly as it dries, adding dimension and charm to your work.
- Continue adding colors and designs until you feel satisfied with your masterpiece. Enjoy the playful exploration of colors and shapes as you create.
- When finished, step back and admire your work. Take a deep breath to feel the joy of this moment.
Notes
Explore variations like adding glitter or using natural ingredients for a whimsical touch. Invite others to join in for a richer experience.
- Prep Time: 10 minutes
- Cook Time: 0 minutes
- Category: Art Projects
- Method: Crafting
- Cuisine: N/A