

This post contains Amazon affiliate links. As an Amazon Associate I earn from qualifying purchases.
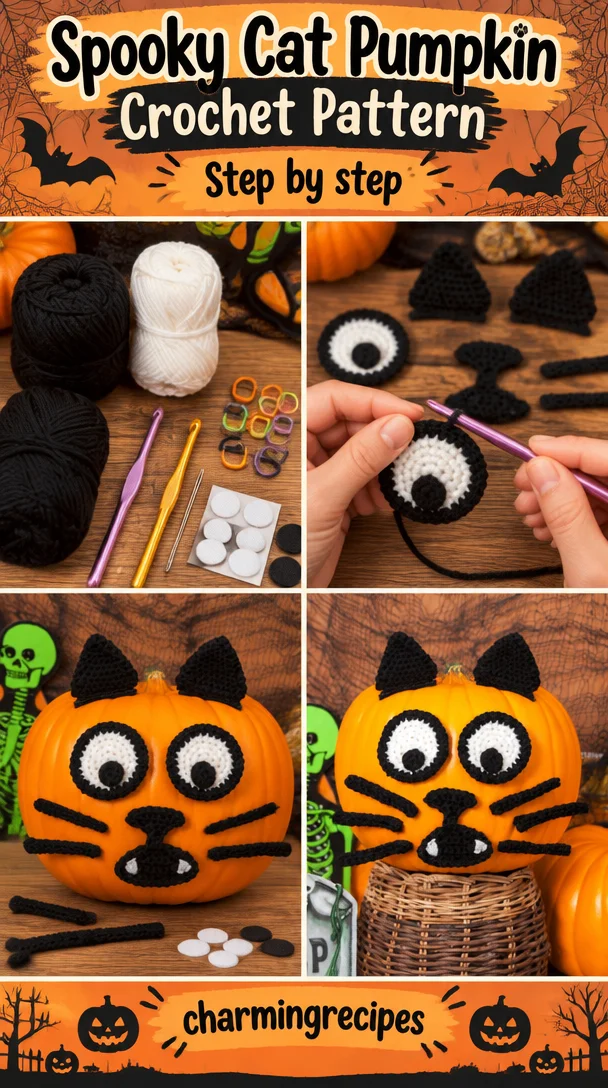
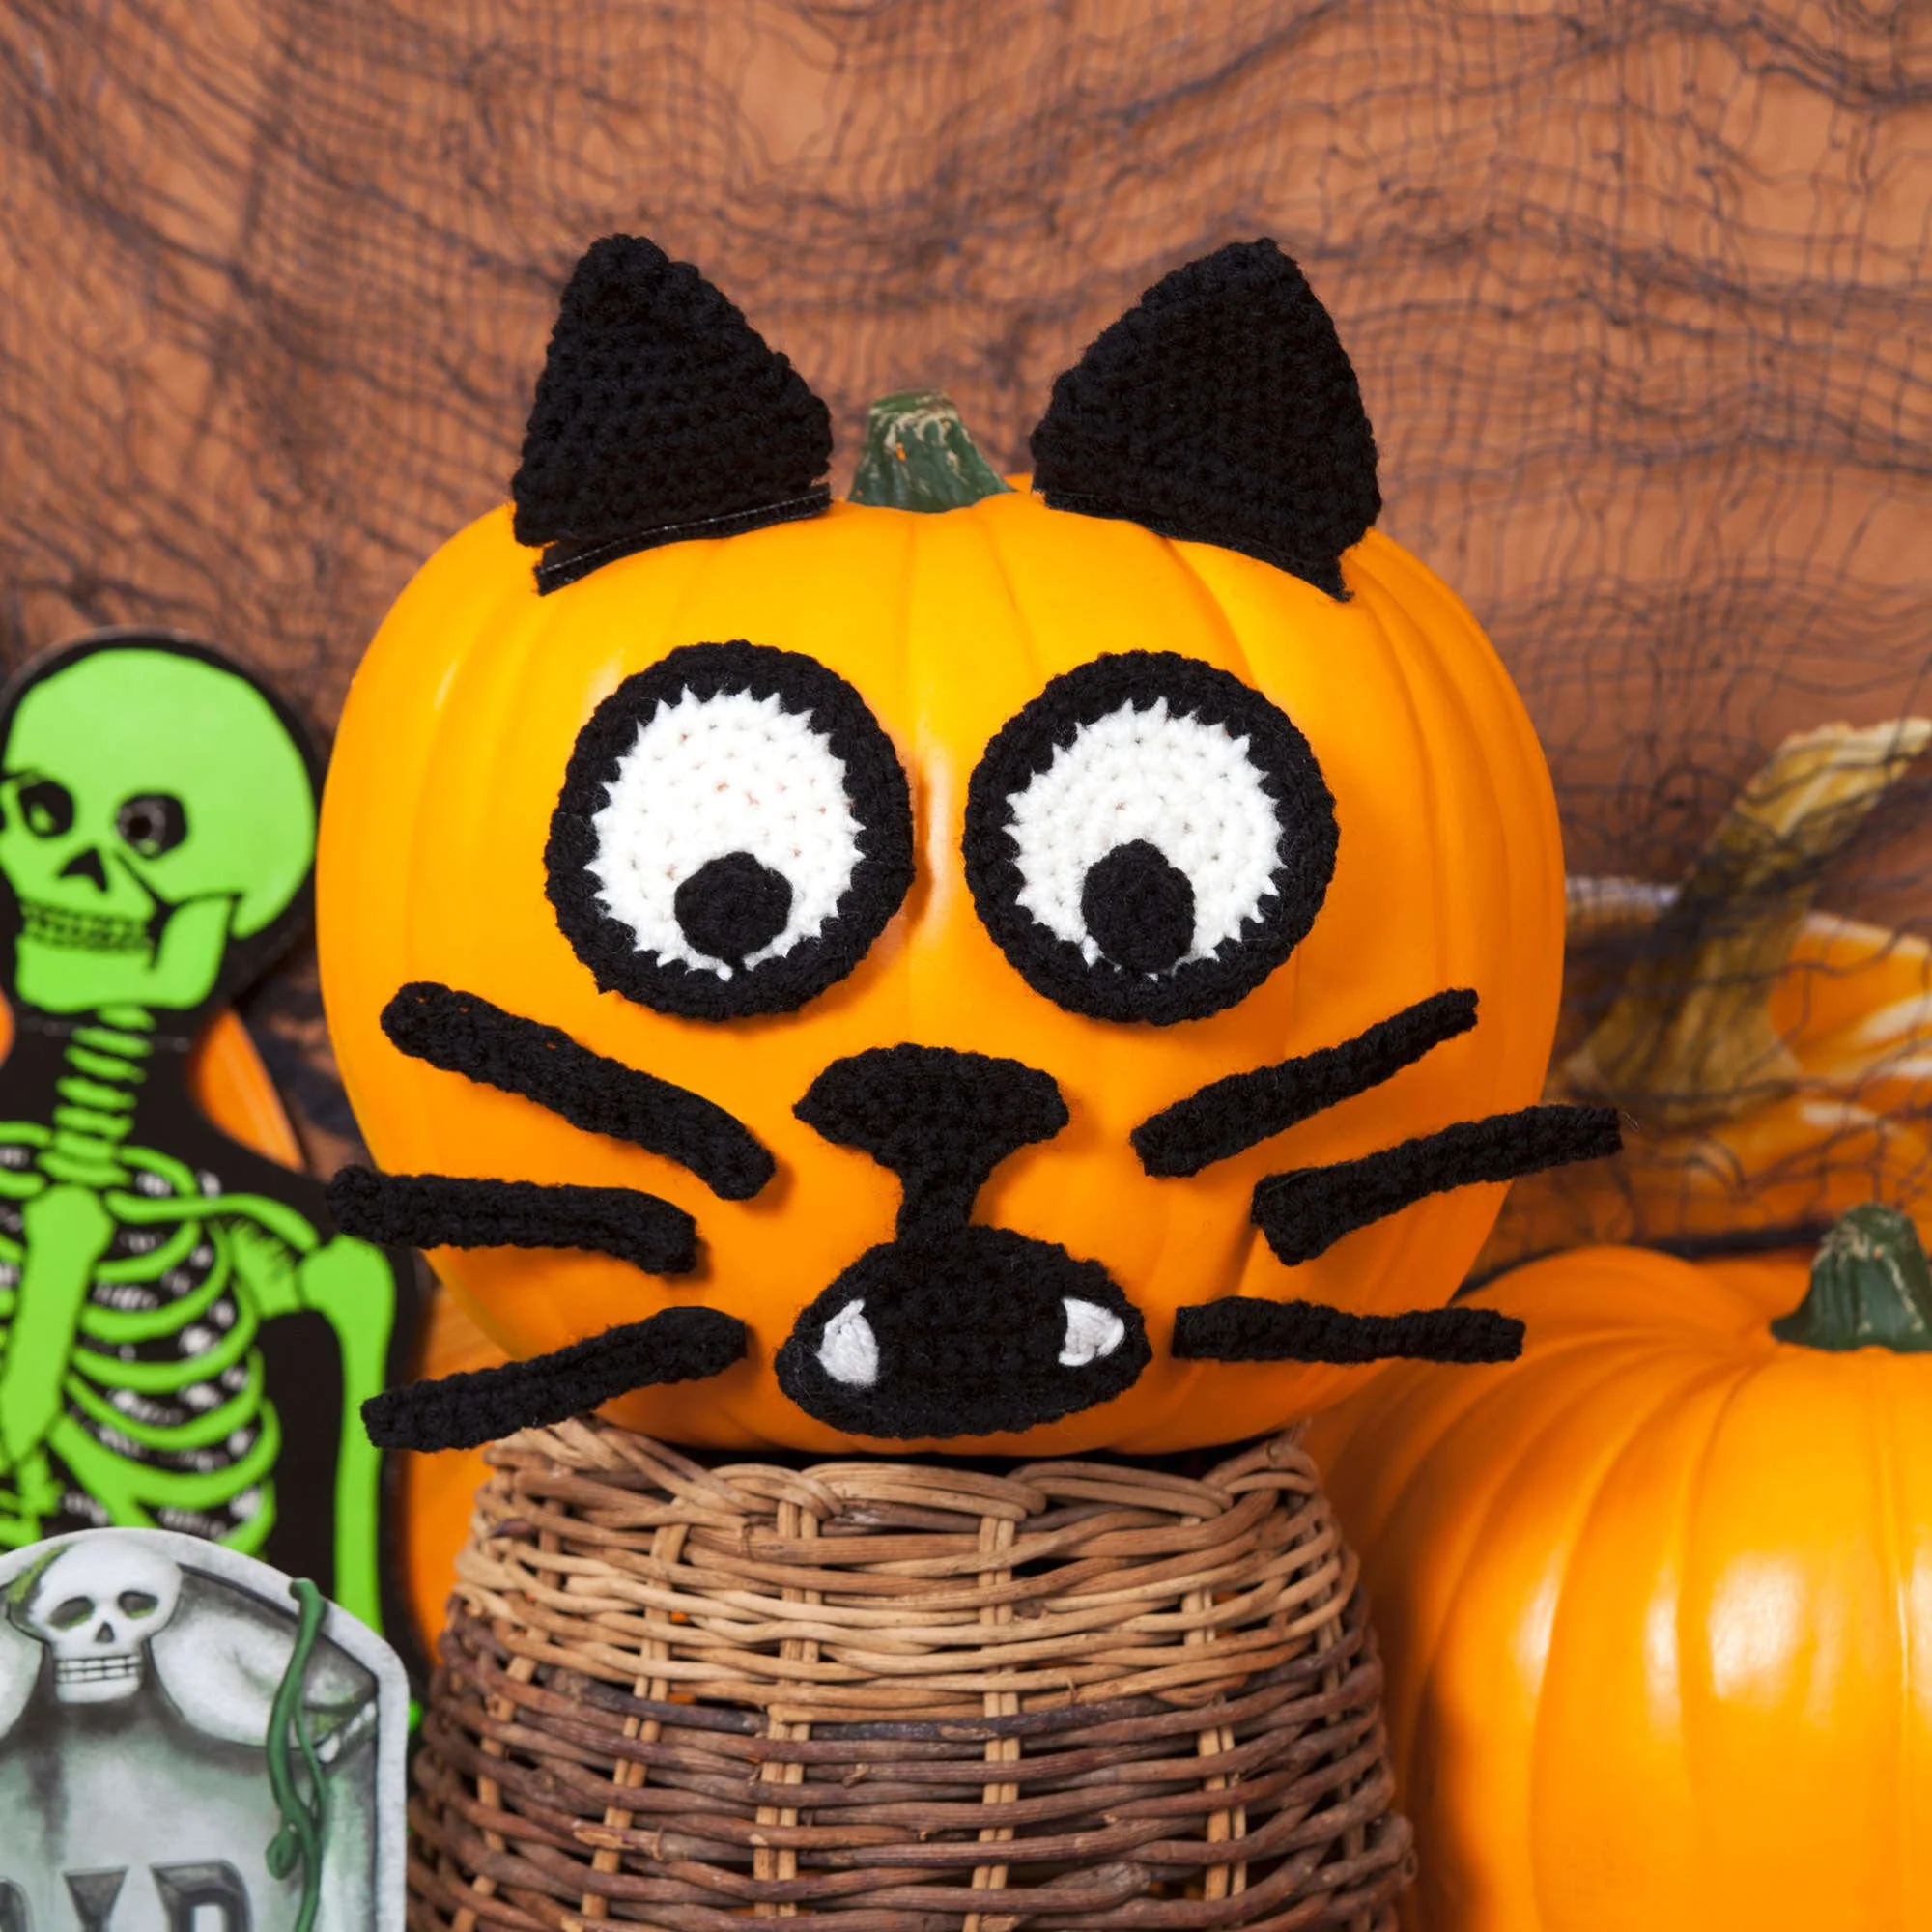
This crochet spooky cat pumpkin is a playful way to give a plain pumpkin a Halloween personality. You’ll make separate crocheted facial features—eyes, pupils, a nose, a mouth with pointed teeth, ears, and whiskers—then arrange them on the pumpkin using self-stick fasteners, double-sided tape, or glue dots. The small pieces make this a satisfying seasonal project for crocheters who enjoy appliqués, and the removable features are especially useful for decorating a pumpkin without permanently altering it.
Why you’ll love this pattern
The charm of this project comes from its mix of simple shapes and expressive details. You can crochet the pieces one at a time, then adjust their placement before attaching them. That makes it easy to experiment with the cat’s expression: move the eyes closer together, tilt an ear, or position the whiskers at a jaunty angle.
The pattern also offers a good chance to practice working in rounds, joining with slip stitches, crocheting flat rows, and finishing small appliqué pieces. Those techniques are useful well beyond Halloween décor. The black-and-white color scheme keeps the look classic, while the separate pieces give you room to customize the face.
Because this is made from individual components rather than one large crocheted object, it’s convenient to work on in short sessions. The pieces are portable, too, so you can make an ear or a whisker between other tasks. It can be a fun handmade decoration for a front porch, a fall table, or a seasonal display indoors.
“I loved being able to move the features around before sticking them on. A little change in the eyes or mouth gave my pumpkin a completely different personality.”
How this crochet pattern comes together
You’ll crochet the cat’s face as a collection of separate pieces, then arrange those pieces on a pumpkin. The main components are two white eyes, two small pupils, a nose, a shaped mouth, pointed teeth, two black ears, and whiskers.
The eyes and ears are worked in rounds, with slip stitches used to join where specified. The mouth and whiskers are made with chains and rows of stitches. The small pupils are crocheted as circles and whipstitched onto the eyes. Once the pieces are finished and their yarn ends are woven in, you’ll attach a suitable self-stick fastener, double-sided tape, or glue dot to the back of each piece.
This is best approached as an appliqué project. You’re making small flat shapes rather than a stuffed toy, so focus on neat edges and even tension. The source instructions refer to specific rounds, rows, and stitch counts, but those details are not included here. Follow the complete stitch directions from the pattern you’re using rather than guessing counts or adding unlisted shaping.
The project should be manageable for a crocheter who knows basic stitches and can follow round and row instructions. Newer crocheters can work through it with extra attention to stitch placement and counting. The time required depends on your pace and how much you adjust the layout; the separate components make it easy to pause and return later.
Supplies you’ll need
- Yarn: RED HEART® “Super Saver®” in Black (Color A) and Soft White (Color B)
- 3.75 mm crochet hook: Use the larger hook for the eyes, as specified.
- 3.5 mm crochet hook: Use this for the remaining parts as directed by your complete pattern.
- Stitch markers: Helpful for marking the start of a round or a specific stitch.
- Yarn needle: For whipstitching the pupils and weaving in ends.
- Attachment option: Self-stick hook-and-loop fasteners, double-sided tape, or glue dots.
RED HEART® “Super Saver®” is an acrylic yarn. Use the yarn label as your guide for washing and drying the finished pieces. The exact amount of yarn is not specified, so check the complete pattern for its yardage information before purchasing. If you have leftovers in a similar weight, you can use them for a color variation, but a different yarn thickness may change the size and firmness of the pieces.
The two hook sizes are part of the supplied material list. Keep them distinct, and follow the full pattern’s directions for which hook to use on each component. If you substitute another hook, the pieces may turn out larger or smaller, which can affect how the features fit together on your pumpkin.
Step-by-step instructions
The steps below explain the construction and finishing sequence. The available instructions do not include exact stitch counts, round details, or row counts, so refer to the complete pattern for those specifics. Don’t add increases, decreases, or extra rows unless the full directions call for them.
-
Make the eyes. Using Soft White (Color B) and the larger 3.75 mm hook, crochet two eyes by following the specified rounds. Join with slip stitches where directed. Keep the joining method consistent so both eyes have a similar outline. Place a stitch marker at the beginning of a round if you find it difficult to see where each round starts.
-
Crochet the pupils. Make two small circles following the pattern’s instructions. Position one pupil on each eye and check that they face the same way. Use a yarn needle to whipstitch each pupil in place. Take small, even stitches around the edge so the pupils sit neatly without pulling the eye fabric out of shape.
-
Make the nose and connecting line. Crochet the nose, then work the line that connects the nose to the mouth as instructed. This line helps define the cat’s expression, so handle it gently when arranging the face. If the pattern makes the nose and line as one continuous section, keep that construction together rather than cutting the yarn between parts.
-
Crochet the mouth. Begin with the chain specified in the full pattern, then work the rows as written. Pay attention to turning instructions and the number of stitches at the end of each row. Add the edging as directed. An even edge makes the mouth easier to position and gives the appliqué a tidy outline.
-
Shape the pointed teeth. Follow the pattern’s needle-detail step to form the pointed teeth. Use the needle to define the points carefully, without pulling so tightly that the mouth puckers. Check the finished mouth from the front to make sure the teeth remain visible and the fabric lies flat.
-
Make two ears. With Black (Color A), crochet two ears in rounds, following the specified shaping instructions. Match the tension and round placement on both ears so they look like a pair. If the rounds are joined with slip stitches, make each join in the same way to keep the edges consistent.
-
Create the whiskers. Make the whisker pieces by chaining and single crocheting across the rows given in the pattern. Keep the chains relaxed and avoid pulling the first row too tightly; tight chains can make a piece curl or bow. Use the pattern’s row directions rather than adding extra rows.
-
Weave in all ends. Before attaching the pieces, use a yarn needle to secure and weave in the yarn tails on every component. Weave each end through the back of the stitches in more than one direction when practical, then trim the excess. Keep the needle path away from the front so no yarn tails show through the face.
-
Arrange the face. Lay the features on the pumpkin before attaching them. Start with the eyes and mouth, then position the nose, ears, and whiskers around them. Step back to check that the expression looks balanced. Make small adjustments before applying any fastener, tape, or glue dot.
-
Attach the pieces. Apply self-stick hook-and-loop fasteners to the back of each feature, or use double-sided tape or glue dots. Choose an attachment method that is appropriate for the pumpkin’s surface and the display setting. Press each piece into place gently. Avoid stretching the crocheted fabric as you secure it, and make sure small parts are firmly attached if the display will be within reach of children or pets.
Ways to use your finished project
The finished cat face is designed as seasonal pumpkin décor. Use it to turn a pumpkin into a Halloween centerpiece, add personality to an entryway display, or create a playful accent for a classroom or craft-room shelf. It also works well as part of a fall arrangement with leaves, gourds, and other seasonal decorations.
The separate features make the project useful when you want a decoration that can be rearranged. With removable hook-and-loop fasteners, you can try more than one expression or take the crocheted pieces off when you’re ready to store the pumpkin. If you use tape or glue dots, check that they release cleanly from the pumpkin’s surface before relying on them for repeated use.
A finished set can make a thoughtful handmade gift for a cat lover or someone who enjoys Halloween decorating. You could also make several faces in different arrangements for a themed display. If you’re preparing pieces for a craft fair or handmade shop, keep the attachment method and the pumpkin surface in mind, and confirm that your chosen materials are appropriate for the intended use.
How to care for your crochet project
The crocheted pieces are made with acrylic yarn, but the pumpkin and attachment materials may require different care. Remove the appliqués before cleaning or storing the pumpkin whenever possible. The safe care method for the yarn pieces depends on the yarn label, so follow RED HEART® “Super Saver®” care instructions and test your chosen method on a small piece if you’re unsure.
If the pieces need freshening, handle them gently. Use cool or lukewarm water and a mild detergent only if the yarn label allows washing. Avoid twisting or wringing; instead, press excess water out with a clean towel. Reshape the eyes, mouth, ears, and whiskers while damp, then leave them flat to dry completely. Keeping the pieces flat helps prevent stretching and preserves their outlines.
For long-term storage, make sure everything is dry before packing it away. Store the appliqués in a clean, dry container, ideally laid flat so the edges don’t become bent. Keep adhesive fasteners away from lint and dust, which can reduce their grip. If the attachments lose their stickiness, replace them rather than pressing the crocheted pieces firmly enough to distort the stitches.
Tips for success
- Use a marker in joined or continuous rounds. A marker makes it easier to identify where each round begins, especially when working black yarn, where individual stitches can be harder to see.
- Count as you go. The exact counts come from the full pattern. Check them at the end of each round or row to catch a missed stitch before it affects the next section.
- Match the two sides of a pair. Make both eyes and both ears with similar tension. Compare them before fastening off or weaving in the final ends, while small adjustments are still manageable.
- Keep joined rounds consistent. Slip stitches that are too tight can pull the edge inward. Work joins with a steady hand and use the same approach for matching pieces.
- Watch the starting chain on the whiskers. A tight foundation chain can cause curling. Keep it relaxed, and use the row count in the full instructions rather than trying to flatten the work by pulling on it.
- Check the mouth edges. Count stitches across each row and follow the turning instructions carefully. If one edge starts to slant, pause and check whether a stitch has been missed or added.
- Arrange before attaching. Dry-position the features on the pumpkin before peeling backing from a fastener or applying tape or glue. It’s much easier to adjust the expression before anything sticks.
- Test the attachment method. Pumpkin surfaces vary. Try your chosen fastener on a discreet area first, especially if you need the pieces to be removable or want to avoid leaving residue.
- Secure ends without puckering. Weave in each tail firmly enough to hold, but don’t pull the yarn so hard that the small shapes narrow or wrinkle.
Creative variations
You can personalize the cat while keeping the original construction intact. Try a different color for the ears or whiskers, or use a contrasting shade around the mouth if the complete pattern allows an edging color change. A small color adjustment can change the mood without altering the shape.
For a more dramatic face, rearrange the eyes, tilt the ears, or place the whiskers at different angles. These are layout changes, so they don’t require changing the crochet instructions. Take a photo of a few arrangements before attaching the pieces; comparing them makes it easier to choose a balanced expression.
You can also embroider a tiny detail onto the face, such as a short accent line or a small decorative mark, as long as it does not interfere with the pupils, mouth, or attachment points. Keep added details lightweight so they don’t pull on the appliqués.
Changing yarn weight or hook size can make the pieces larger or smaller, but it will also affect how they fit together and how well they suit the pumpkin. A thicker yarn may produce bulkier features and use more yarn; a thinner yarn may make smaller, more delicate pieces. If you make a major size change, check the proportions of all components together before attaching them.
Frequently asked questions
Is this crochet pattern beginner-friendly?
It can suit a beginner who already knows how to crochet basic stitches and follow a pattern in rounds and rows. The small components are manageable, but joining rounds, keeping row edges even, and positioning appliqués may take practice. Work slowly and use a stitch marker to track round starts.
What yarn works best for the cat features?
The materials list specifies RED HEART® “Super Saver®” in Black and Soft White. A comparable yarn may work, but changing the yarn weight or fiber can alter the size, texture, and firmness of the pieces. Check the yarn label before washing, and use the complete pattern’s gauge or size information if available.
Can I use a different hook size?
You can, but the pieces may come out larger or smaller. That can change the proportions of the face and how the features fit on your pumpkin. The materials list includes both a 3.75 mm and a 3.5 mm hook; follow the complete pattern to determine which hook is intended for each section.
How long does it take to make?
The exact time depends on your crochet pace, experience, and how much time you spend arranging the face. Since the design is made from separate pieces, you can work on it in short sessions. The available instructions do not specify a completion time.
How do I make the features larger or smaller?
Changing hook size or yarn weight is the simplest approach, but it changes the scale of the pieces and may affect their fit on the pumpkin. For best results, make a test piece first and compare all components together. Avoid changing individual features in isolation, or the eyes, mouth, ears, and whiskers may no longer look proportionate.
Why are my crochet pieces curling?
Curling can happen when the foundation chain is too tight, tension is uneven, or the shape is being pulled by the stitches. Check that you are following the pattern’s stitch counts and turning instructions. Relax the starting chain on the whiskers, and reshape flat pieces gently after finishing. Don’t use forceful blocking that could distort the appliqué.
How should I wash the finished pieces?
Follow the care instructions on the yarn label. If washing is allowed, use gentle handling, avoid wringing, and reshape the pieces while damp. Let them dry flat and completely before storing or reattaching them. Remove the appliqués from the pumpkin first if possible.
Can I sell items made from this pattern?
The instructions provided here do not state the designer’s selling or licensing terms. Check the original designer’s usage policy before selling finished items, and follow any restrictions or attribution requirements that apply.
Print
Crochet Spooky Cat Pumpkin
Description
A playful way to give a plain pumpkin a Halloween personality by crocheting separate facial features and attaching them to the pumpkin.
Materials
- Yarn: RED HEART® “Super Saver®” in Black (Color A) and Soft White (Color B)
- Crochet hook: 3.75 mm (for eyes), 3.5 mm (for remaining parts)
- Stitch markers: Helpful for marking the start of a round or a specific stitch
- Yarn needle: For whipstitching the pupils and weaving in ends
- Attachment option: Self-stick hook-and-loop fasteners, double-sided tape, or glue dots
Instructions
- Make the eyes: Using Soft White (Color B) and the larger 3.75 mm hook, crochet two eyes by following the specified rounds. Join with slip stitches where directed.
- Crochet the pupils: Make two small circles following the pattern’s instructions. Whipstitch each pupil in place on the eyes.
- Make the nose and connecting line: Crochet the nose and work the line that connects the nose to the mouth as instructed.
- Crochet the mouth: Begin with the chain specified in the full pattern, then work the rows as written.
- Shape the pointed teeth: Follow the pattern’s needle-detail step to form the pointed teeth.
- Make two ears: With Black (Color A), crochet two ears in rounds, following the specified shaping instructions.
- Create the whiskers: Make whisker pieces by chaining and single crocheting as per the pattern.
- Weave in all ends: Secure and weave in the yarn tails on every component with a yarn needle.
- Arrange the face: Lay the features on the pumpkin before attaching them and make adjustments.
- Attach the pieces: Apply self-stick hook-and-loop fasteners or use double-sided tape/glue dots to attach the pieces to the pumpkin.
Notes
Adjust the layout and expression of the face before attaching to the pumpkin for best outcomes.