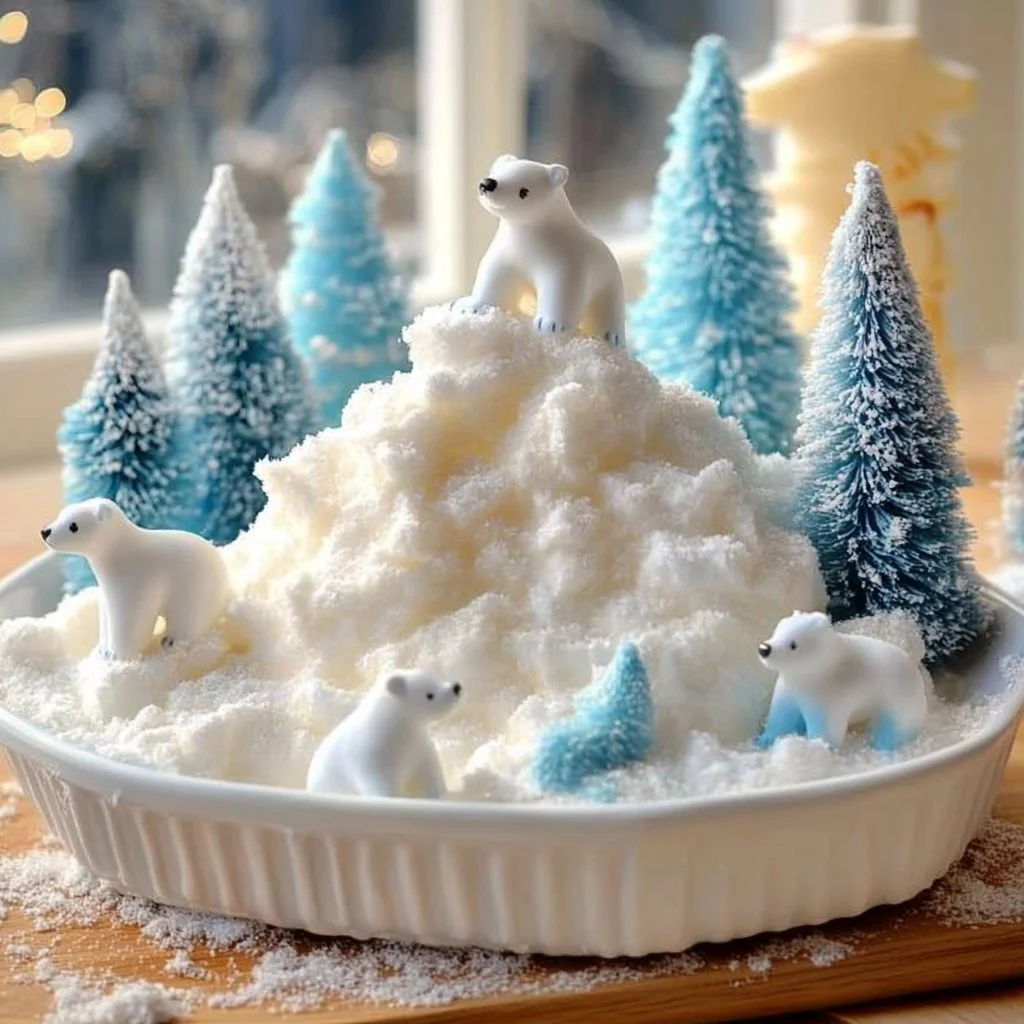
Snow Foam Sensory Play
I vividly remember those blissful winter afternoons of my childhood, when the world outside transformed into a mesmerizing winter wonderland. My grandmother would craft delightful, fluffy creations that seemed to capture the essence of snow right in our living room—she called it "Snow Foam." This sensory play activity became a cherished family tradition, especially during the chilly months where the snow blanketed the earth, making outdoor play a bit trickier.
This recipe isn’t just about making foam; it’s about the joy of sensory exploration that brings families together, igniting creativity and laughter. Imagine the thrill of squishing, molding, and even decorating your own snow-like masterpiece. Whether you’re a parent looking for a fun indoor activity or someone who wants to dive into unique sensory experiences, this Snow Foam Sensory Play is absolutely perfect for the season. So, roll up your sleeves, and let’s create some magical winter memories!
Why You’ll Love This Snow Foam Sensory Play
- Kid-approved: Children will love the tactile experience!
- Customizable: Play with colors and scents to make it your own.
- Simple ingredients: Made from common pantry staples!
- Engaging experience: Promotes sensory exploration and creativity.
- Perfect for winter: Adds a touch of snowy fun indoors.
- Easy clean-up: Mess-free, as it’s entirely made with non-toxic ingredients.
Ingredients
- 2 cups of shaving cream
- 1 cup of cornstarch
- 1 tablespoon of white glue (optional for extra hold)
- Food coloring (optional, for creativity)
- Essential oils (optional, for scent)
Step-by-Step Instructions
Step 1: Combine the Ingredients
- In a large mixing bowl, add 2 cups of shaving cream.
- Sprinkle in 1 cup of cornstarch.
- If you desire a stronger texture, mix in 1 tablespoon of white glue.
Step 2: Mix it Up!
- Using your hands or a spatula, mix the ingredients until they are fully combined. The mixture should feel fluffy and light.
Step 3: Add Color and Scent
- If you’d like to add food coloring, simply drop in a few drops and mix until you achieve your desired color.
- For an aromatic twist, include a couple of drops of essential oils and blend well.
Step 4: Playtime!
- Once the Snow Foam is ready, let your kids dig in! Encourage them to mold, squish, and create their snowy landscapes.
Tips & Variations
- Texture control: If the foam is too loose, add more cornstarch. If it’s too dry, a bit more shaving cream will do the trick.
- Color options: Mix different colors to create vibrant patterns.
- Scents galore: Use various essential oils like lavender for calming or peppermint for refreshing fun.
- Outdoor-inspired: For an outdoor activity, you can expand on this by adding tiny plastic animals or decorations to build a winter scene.
Storage Instructions
- Store any leftover Snow Foam in an airtight container for up to a week in the refrigerator. Just give it a good mix before using again.
Nutritional Information
- Prep Time: 10 minutes
- Total Time: 10 minutes
- Calories per serving: Non-caloric as this is not consumed
- Servings: Makes enough for multiple play sessions
Frequently Asked Questions
1. Is this foam safe for children?
Yes, all ingredients are non-toxic, but always supervise young children to avoid any ingestion.
2. Can I use different types of shaving cream?
Absolutely! Just ensure that the shaving cream is non-toxic and suitable for children’s use.
3. How long will the foam last?
Store it in an airtight container in the fridge for up to a week.
4. Can I make this foam without glue?
Yes, the glue is optional. It helps with texture but is not necessary for the foam to form.
Serving Suggestions or Pairings
Pair this sensory play with warm hot cocoa or winter-themed snacks to enhance the cozy experience. Perfect for a snowy afternoon of family fun!
Final Thoughts
Snow Foam Sensory Play is more than just a fun activity; it’s a chance to connect with loved ones and create magical memories. I’d love to hear how your foam turned out or any special variations you tried—feel free to share your experiences in the comments below! Happy crafting!

