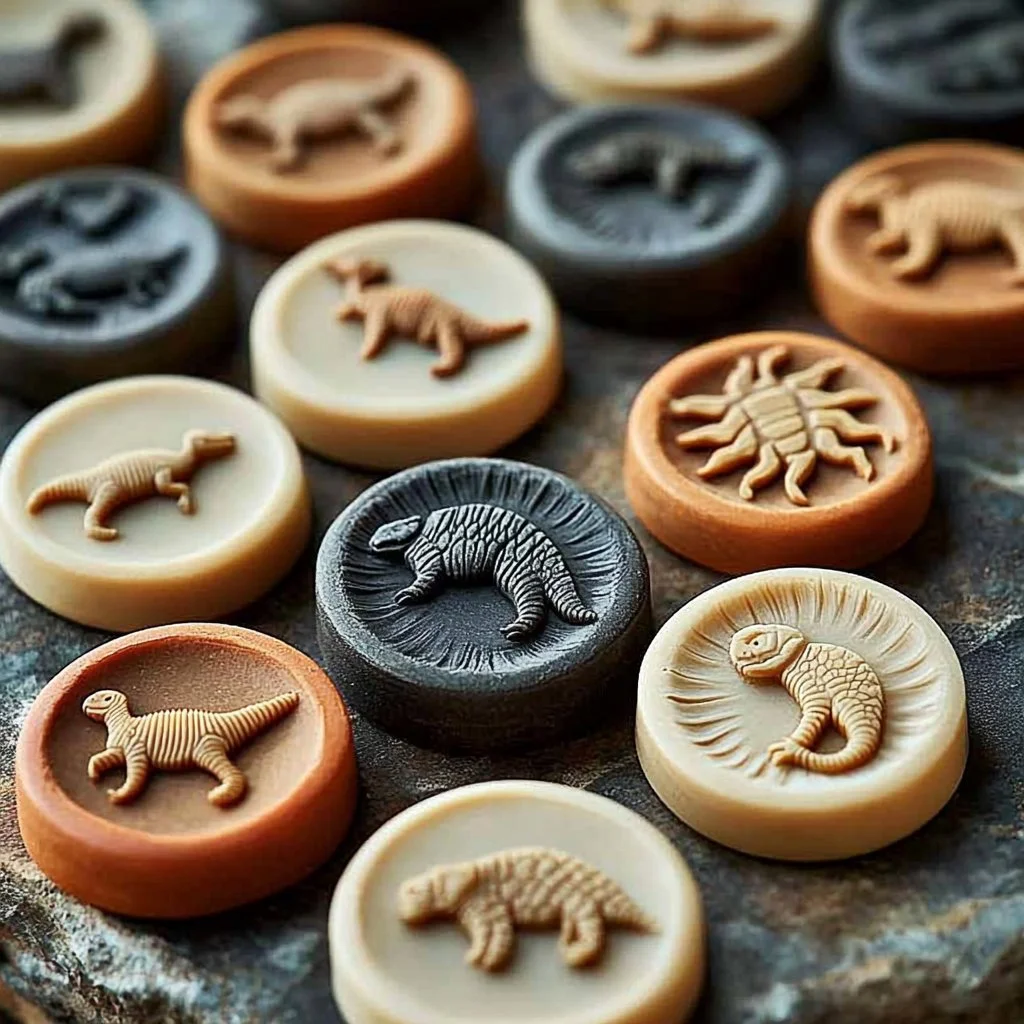
Fossil-making is an enchanting craft that takes you on a creative journey through time. Combining science and art, this DIY adventure allows you to explore the natural world while having fun. The joy of crafting your own fossils is not only about the end result but also the process of shaping and molding materials to create something unique. Whether you’re an adult wanting to revive your childhood curiosity or a parent looking for an engaging activity for your kids, this fossil-making adventure will spark imagination and creativity. Plus, it’s a perfect way to learn about the fascinating world of paleontology right at home! Get ready to dig into a fun-filled, hands-on experience that leaves you with beautiful, timeless treasures.
Why You’ll Love This Fossil-Making Adventure:
- Ignite creativity by crafting unique fossils.
- Engage in a fun, hands-on science project.
- A perfect activity for kids and adults alike.
- Great for themed parties or educational purposes.
- Affordable materials that are easy to find.
- Shareable keepsakes to remember your crafting fun.
Materials:
- Air-dry clay or self-hardening modeling clay
- Small toys (dinosaurs, leaves, or seashells) for imprinting
- Rolling pin
- Plastic knife or sculpting tool
- Paint (optional, for decorating)
- Paintbrush (optional)
- Clear sealant (optional)
Full Step-by-Step:
Step 1: Prepare Your Workspace
- Find a clean, flat surface to work on.
- Gather your materials within reach.
Step 2: Shape the Clay
- Take a portion of the air-dry clay (about the size of a tennis ball).
- Roll it into a smooth ball, ensuring there are no cracks.
Step 3: Flatten the Clay
- Use a rolling pin to flatten the clay into a disk approximately 1 to 2 inches thick.
- Feel the texture of the clay as you roll; it should be smooth and pliable.
Step 4: Create Imprints
- Press your chosen toy or nature item firmly into the clay to create an impression.
- Remove the item gently to reveal the fossil shape.
Step 5: Dry the Fossils
- Allow your fossils to air dry for the recommended time (typically 24 to 48 hours).
- Note the change in the texture and color as it dries.
Step 6: Optional Decoration
- Once dry, consider painting your fossils for a vibrant touch.
- Use a paintbrush to apply paint, allowing imagination to guide your design.
Step 7: Seal (Optional)
- For added durability, apply a clear sealant once the paint is completely dry.
Tips & Variations:
- Customize Your Imprints: Use different toys, leaves, or even your own handprints for unique designs.
- Swap Materials: If you don’t have modeling clay, try salt dough or even a mixture of flour and water.
- Color Your Fossils: Experiment with natural dyes or food coloring for more colorful creations.
- Create a Display: Use a small box or frame to showcase your fossils as art pieces.
Frequently Asked Questions:
Q1: What type of clay is best for making fossils?
A1: Air-dry clay works well, but self-hardening modeling clay can also produce good results.
Q2: How long does it take for the fossils to dry?
A2: It usually takes between 24 to 48 hours, depending on the thickness and humidity.
Q3: Can I make fossils without toys?
A3: Absolutely! You can use natural items like leaves, shells, or even your hands for interesting impressions.
Q4: How can I store my fossils once they’re made?
A4: Store them in a cool, dry place, preferably in a display box to keep them safe from damage.
Suggestions:
- Consider making a fossil-themed party where everyone creates their own.
- Use your handmade fossils to create a scrapbook or memory wall.
- Organize a fossil hunt outdoors and collect natural items to replicate.
Final Thoughts
This fossil-making adventure is not just a craft; it’s an opportunity to learn, create, and have fun together. We would love to see your unique fossil creations! Feel free to share your versions or leave a comment with your experiences and suggestions. Happy crafting!
Print
Fossil-Making Adventure
- Total Time: 1440 minutes
- Yield: Multiple fossils
- Diet: N/A
Description
An engaging DIY project to create your own fossils using air-dry clay and small toys, perfect for both kids and adults.
Ingredients
- Air-dry clay or self-hardening modeling clay
- Small toys (dinosaurs, leaves, or seashells) for imprinting
- Rolling pin
- Plastic knife or sculpting tool
- Paint (optional, for decorating)
- Paintbrush (optional)
- Clear sealant (optional)
Instructions
- Prepare Your Workspace: Find a clean, flat surface to work on and gather your materials within reach.
- Shape the Clay: Take a portion of the air-dry clay (about the size of a tennis ball) and roll it into a smooth ball.
- Flatten the Clay: Use a rolling pin to flatten the clay into a disk approximately 1 to 2 inches thick.
- Create Imprints: Press your chosen toy or nature item firmly into the clay to create an impression.
- Dry the Fossils: Allow your fossils to air dry for 24 to 48 hours.
- Optional Decoration: Once dry, paint your fossils for a vibrant touch.
- Seal (Optional): Apply a clear sealant once the paint is completely dry.
Notes
Customize your imprints, swap materials, and experiment with colors for unique fossil creations.
- Prep Time: 15 minutes
- Cook Time: 0 minutes
- Category: Craft
- Method: Crafting
- Cuisine: N/A
Nutrition
- Serving Size: 1 fossil
- Calories: 0
- Sugar: 0g
- Sodium: 0mg
- Fat: 0g
- Saturated Fat: 0g
- Unsaturated Fat: 0g
- Trans Fat: 0g
- Carbohydrates: 0g
- Fiber: 0g
- Protein: 0g
- Cholesterol: 0mg

