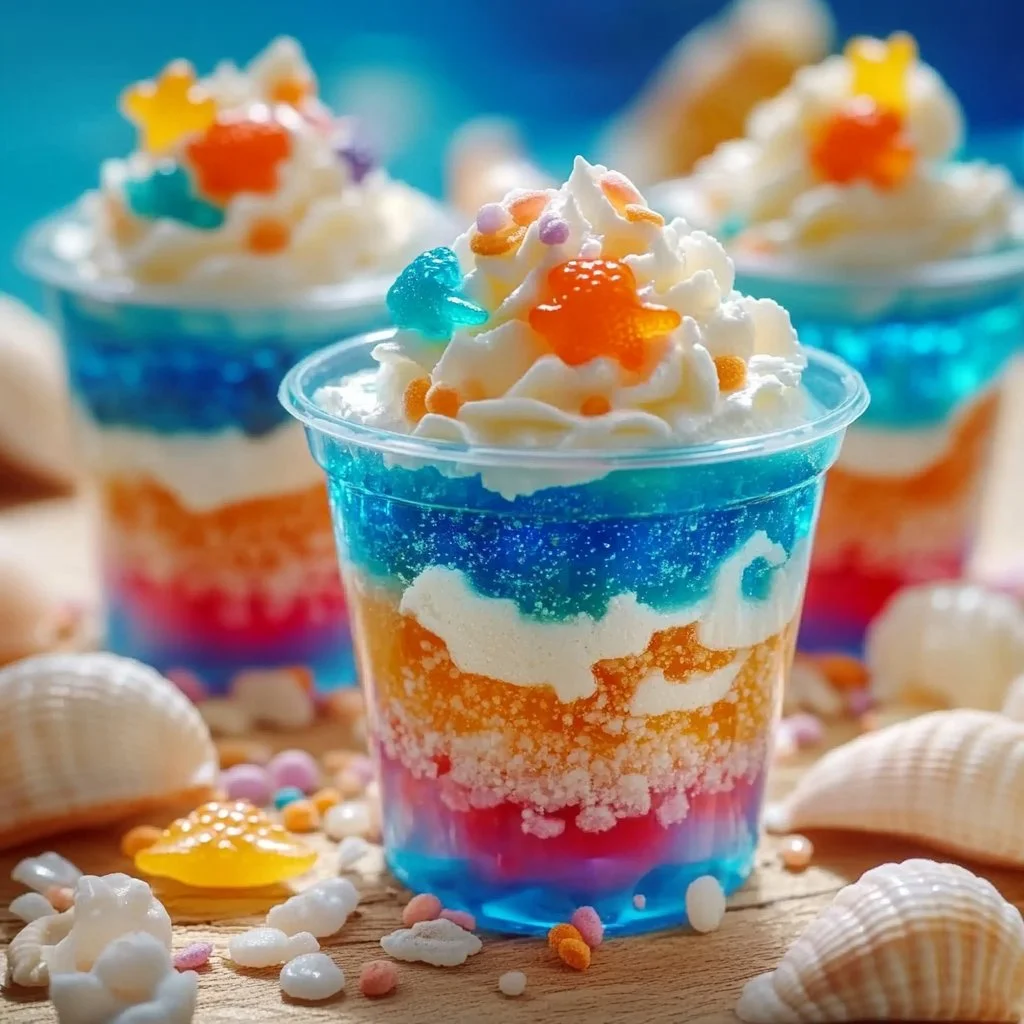
Growing up, summer meant days spent at my grandmother’s house, where her kitchen was always filled with the sweet aroma of baked goods and the laughter of family gathered around the table. One of my fondest memories was making her enchanting edible candy aquariums, a vivid and whimsical treat that brought together our love for crafting and candy. This colorful dessert was not just a feast for the eyes but also a creative outlet where my siblings and I could turn our imaginations into mouthwatering memories.
Perfect for summertime celebrations, birthday parties, or simply as a sweet activity for kids, this edible candy aquarium bursts with fun flavors and textures that will charm both the young and the young-at-heart. With its vibrant colors and playful designs, it’s an irresistible treat that invites everyone to dive in and enjoy. Let’s dive into this delightful recipe that I proudly carry on in honor of my grandmother’s legacy!
Why You’ll Love This Edible Candy Aquarium
- Perfect for Kids: Fun to make and delicious to eat, kids will love it!
- Customizable: Create your own unique aquarium with different candies.
- Visually Stunning: A feast for the eyes as well as the taste buds!
- No Baking Required: Easy to assemble, making it a one-bowl dessert.
- Gluten-Free: A treat that can be enjoyed by everyone!
Ingredients
- 1 package of blue Jell-O (flavor of your choice)
- 1 ½ cups boiling water
- 1 package of gummy fish
- 1 cup crushed graham crackers (to mimic sand)
- ½ cup whipped cream (for sea foam, optional)
- 1 clear plastic cup or small glass
Step-by-Step Instructions
Prepare the Jell-O
- In a bowl, mix the blue Jell-O with boiling water, stirring until completely dissolved.
- Allow the mixture to cool for about 30 minutes, then pour it into your clear plastic cups to create the base of your aquarium.
Create the "Sand"
- While the Jell-O sets in the refrigerator (about 2-4 hours), take your graham crackers and crush them into fine crumbs.
- Once the Jell-O is set, you can start adding your layers.
Assemble the Aquarium
- Carefully take the cups out of the fridge.
- Layer the crushed graham crackers on top of the solidified Jell-O to create a sandy ocean floor.
- Place the gummy fish on top of the sand or let them float in the Jell-O.
Add the Finishing Touch
- For a whimsical touch, dollop whipped cream on top to resemble sea foam.
Tips & Variations
- Candy Variations: Substitute gummy fish with other ocean-themed candies like gummy sharks or sour worms.
- Sweetener Option: Use sugar-free Jell-O for a lighter version.
- Personalize It: Add edible pearls or chocolate rocks for additional flair.
- Dietary Needs: For a vegan option, look for plant-based gelatin alternatives.
Storage Instructions
- Store the assembled candy aquariums, covered, in the refrigerator for up to 3 days.
- Avoid freezing, as the texture may change.
Nutritional Information
- Prep Time: 15 minutes
- Chill Time: 2-4 hours
- Total Time: 2-4 hours 15 minutes
- Calories: Approximately 150 calories per serving
- Servings: 4
Frequently Asked Questions
Q: Can I use any flavor of Jell-O?
A: Absolutely! Feel free to experiment with different flavors to match your theme or preference.
Q: How long does the Jell-O need to set?
A: It typically takes about 2-4 hours for the Jell-O to fully set.
Q: Can I make this ahead of time?
A: Yes! You can prepare the Jell-O a day before and assemble it the day you plan to serve.
Q: Are there any alternatives to gum-filled fish?
A: Yes! You can use chocolate, licorice, or any candies of your choice that fit your aquarium theme.
Serving Suggestions or Pairings
Pair these delightful edible aquariums with a refreshing lemonade or an ocean-blue mocktail for a fun summer gathering! They also make great centerpieces at birthday parties, alongside some colorful cupcakes.
Final Thoughts
This edible candy aquarium not only captivates with its vibrant colors and flavors, but it also brings families together, evoking cherished moments from my childhood. I can’t wait for you to try it out and share your creations! Please leave a comment below with your thoughts or any fun variations you’ve tried. Happy cooking!

