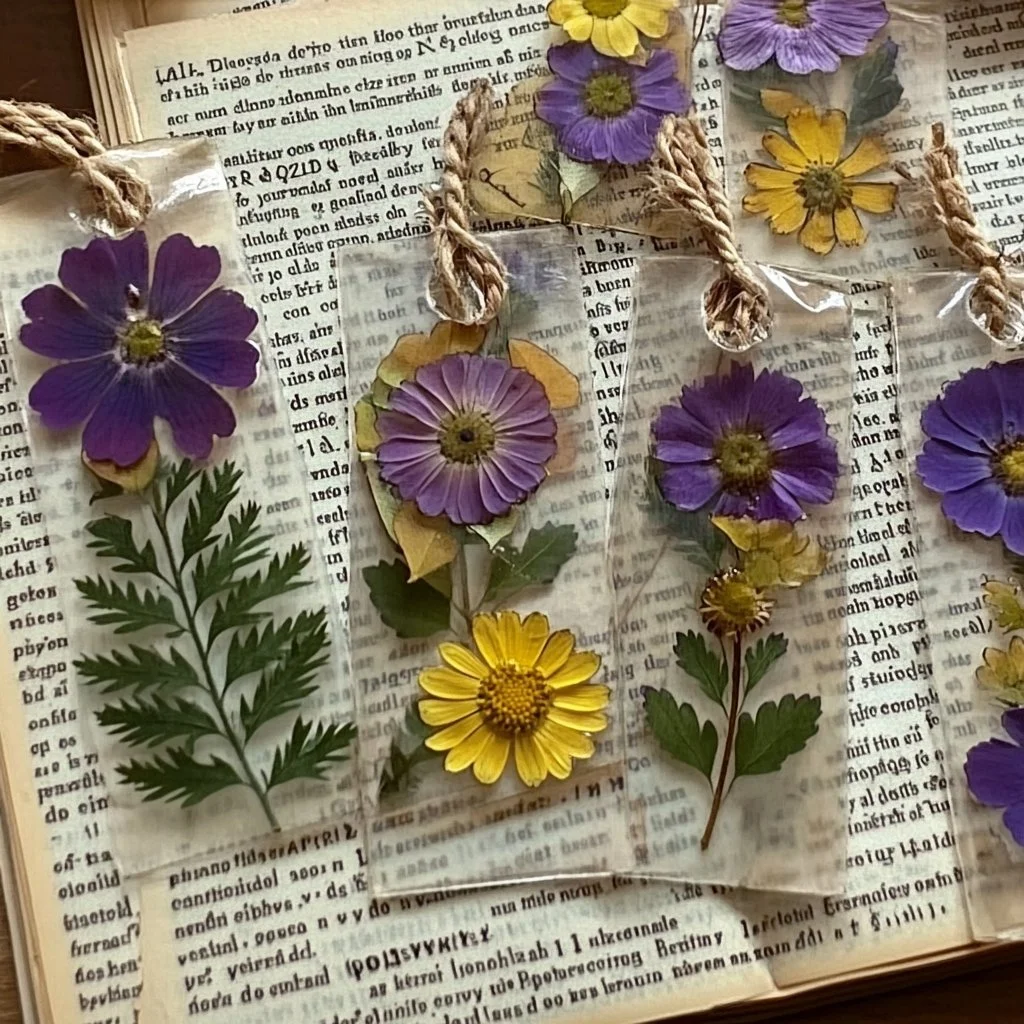
Pressed flower bookmarks are a beautiful way to preserve the fleeting beauty of nature and add a personal touch to your reading experience. This DIY project is simple and enjoyable, making it perfect for both beginners and seasoned crafters alike. By using flowers from your garden or special plants from memorable locations, you can create unique and meaningful bookmarks that you’ll cherish for years to come. Not only do these bookmarks make lovely gifts, but they can also serve as a delightful reminder of the beauty found in nature. With just a few materials and steps, you can turn vibrant petals and leaves into functional art that brightens up any book. Whether you’re enhancing your own literary adventures or creating heartfelt presents for friends, making pressed flower bookmarks is a rewarding and creative endeavor.
Why You’ll Love This DIY Pressed Flower Bookmarks
- Personalized Touch: Each bookmark is uniquely your own, allowing you to express your style.
- Thoughtful Gifts: Handmade bookmarks make thoughtful gifts for book lovers and friends.
- Connection to Nature: Use flowers you’ve grown or collected to keep memories alive.
- Simple Process: Easy to follow, even for those new to crafting.
- Variety: Experiment with different flowers and designs for endless possibilities.
Materials
- Fresh flowers and leaves (thin petals work best)
- Heavy books (for pressing the flowers)
- Parchment paper or wax paper
- Scissors
- Clear craft glue or Mod Podge
- Cardstock or thick paper for bookmarks
- Paintbrush (for applying glue)
- Ribbon or tassels (optional for decoration)
Step-by-Step Instructions
Select and Prepare Flowers
- Choose fresh flowers and leaves from your garden or local surroundings.
- Trim the stems and remove any excess foliage.
- Make sure the flowers are dry before pressing to avoid mold.
Press the Flowers
- Place flowers between two sheets of parchment or wax paper.
- Stack the sheets in a heavy book or use a flower press.
- Leave them pressed for at least one week for optimal results.
Create Your Bookmark
- Once flowers are pressed and dried, remove them carefully.
- Cut cardstock into your desired bookmark size.
- Arrange the dried flowers on the cardstock as you like.
Glue the Flowers
- Use a paintbrush to apply clear glue on the back of each flower.
- Press the flowers firmly onto the cardstock.
- Once the glue is dry, apply a coat of glue over the top of the flowers for protection.
Finishing Touches
- Cut the bookmark to shape if needed.
- Optionally, punch a hole at the top and add a ribbon or tassel for flair.
Tips & Variations
- Flower Options: Experiment with different types of flowers and leaves, such as daisies, pansies, or ferns.
- Color and Texture: Use contrasting colors or textures to create a more eye-catching design.
- Add Quotes: Write a favorite book quote on the bookmark if desired, using a fine-tip marker.
- Preservation: For an even more durable bookmark, consider laminating your finished product.
Frequently Asked Questions
Q1: Can I use any type of flower?
A: It’s best to use flat, thin flowers as they press well and retain their shape. Avoid bulky flowers or those with a lot of moisture.
Q2: How long do I need to press the flowers?
A: Aim for at least one week for thorough drying. If using thicker flowers, a longer pressing time may be necessary.
Q3: What if I don’t have access to a flower press?
A: Simply use heavy books to press your flowers. Make sure they are stacked firmly.
Q4: How can I store my bookmarks?
A: Keep your pressed flower bookmarks in a cool, dry location, preferably in a flat position to preserve their shape.
Serving Suggestions or Pairings
- Pair your bookmarks with a cozy cup of tea or coffee for a perfect reading session.
- Gift your bookmarks alongside a favorite book for a thoughtful present.
- Consider adding a small notecard with a handwritten note to personalize the gift even more.
Final Thoughts
Creating your own pressed flower bookmarks is a delightful way to bring nature into your everyday life. Not only do they serve as practical tools for holding your place in a book, but they also can be cherished pieces of art that evoke fond memories and a love for nature. We’d love to see your creations! Share your versions or leave a comment below with your thoughts, tips, or variations!
Print
Pressed Flower Bookmarks
- Total Time: 10 days for pressing flowers
- Yield: Multiple bookmarks
- Diet: Non-Dietary
Description
A simple and enjoyable DIY project to create unique pressed flower bookmarks that bring a personal touch to your reading experience.
Ingredients
- Fresh flowers and leaves (thin petals work best)
- Heavy books (for pressing the flowers)
- Parchment paper or wax paper
- Scissors
- Clear craft glue or Mod Podge
- Cardstock or thick paper for bookmarks
- Paintbrush (for applying glue)
- Ribbon or tassels (optional for decoration)
Instructions
- Select and Prepare Flowers: Choose fresh flowers and leaves, trim stems, and ensure they’re dry.
- Press the Flowers: Place between parchment or wax paper, stack in a heavy book, and leave for at least one week.
- Create Your Bookmark: Remove pressed flowers, cut cardstock to size, and arrange flowers on cardstock.
- Glue the Flowers: Apply clear glue on the back of flowers and press onto cardstock, then coat for protection.
- Finishing Touches: Cut to shape and optionally add a ribbon or tassel.
Notes
Experiment with different flower types and consider laminating for durability.
- Prep Time: 30 minutes
- Cook Time: 0 minutes
- Category: Craft
- Method: DIY
Nutrition
- Serving Size: 1 bookmark
- Calories: 0
- Sugar: 0g
- Sodium: 0mg
- Fat: 0g
- Saturated Fat: 0g
- Unsaturated Fat: 0g
- Trans Fat: 0g
- Carbohydrates: 0g
- Fiber: 0g
- Protein: 0g
- Cholesterol: 0mg

