

Bright bottle caps line up to form a cheerful rainbow caterpillar, creating a vibrant spectacle that invites creativity. As the afternoon sunlight dances over the colorful caps, the soft textures of the bottle plastics and the smooth surfaces beckon for gentle hands to engage. Each cap holds the promise of transformation; from a simple waste to a tactile delight, this crafting journey brings moments of quiet joy and focused expression. As we explore this DIY project, imagine the soft rhythm of placing each cap, the colors merging like a calming rainbow, making it a perfect choice for a cozy afternoon of crafting.
The Heart Behind This DIY
Making a bright bottle cap caterpillar feels comforting because it connects us to a moment of mindfulness. When we sit down with our materials, we bring our attention to the present. The sounds of gently stacking, the visual delight of sorting colors, and the satisfying feel of each cap create a simple yet rich sensory experience.
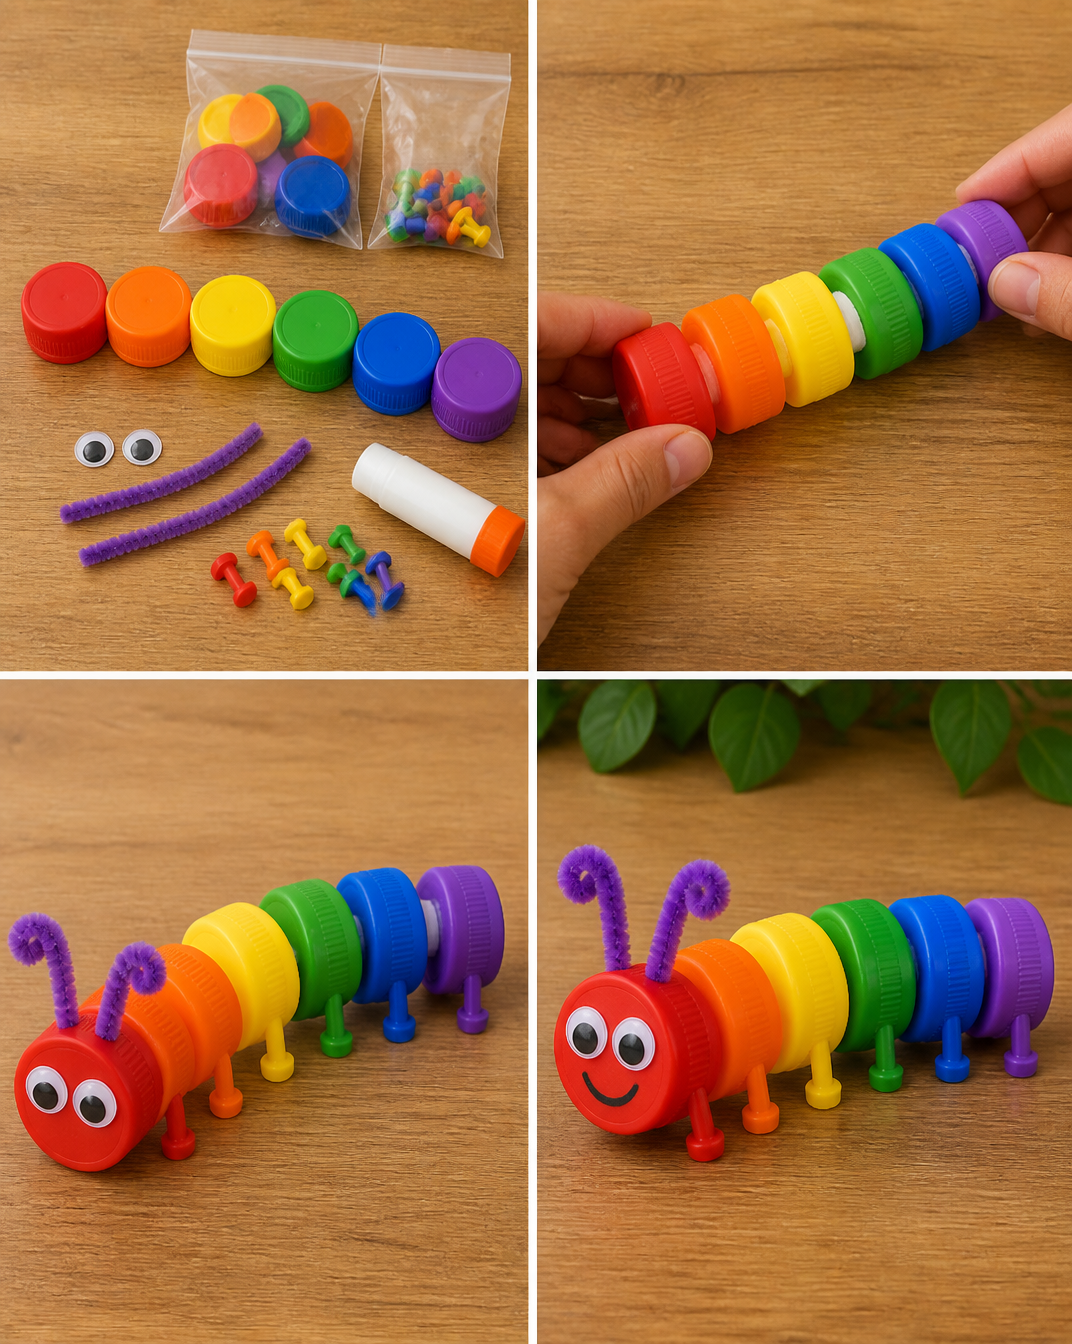
This process encourages us to slow down, breathe deeply, and focus our thoughts. It is a gentle reminder that creativity does not have to be flashy or complex. Instead, it can be found in the small details and the joyful act of bringing together pieces of discarded materials into something beautiful. Crafting transforms simple bottle caps into a cheerful caterpillar that sparks conversation and whimsy. This project not only brings delight to our homes but also creates a space for us to relax, engage, and express ourselves.
How This DIY Comes Together
As we prepare to make our adorable bottle cap caterpillar, let’s take a moment to consider the flow of the process. Imagine laying out the caps, hearing the gentle clink as they touch surface, and feeling the coolness of plastic against your fingers. This project invites you to engage with each element, noticing how the colors play together, how the shapes fit easily into your plans, and how your creativity unfolds with each step.
Not only does this crafting session provide a visual delight, but the act of creating fosters a sense of rhythm and movement. You might find yourself lost in a peaceful flow, where time feels irrelevant. No rush, just the soothing sound of creativity in progress.
Materials You’ll Need
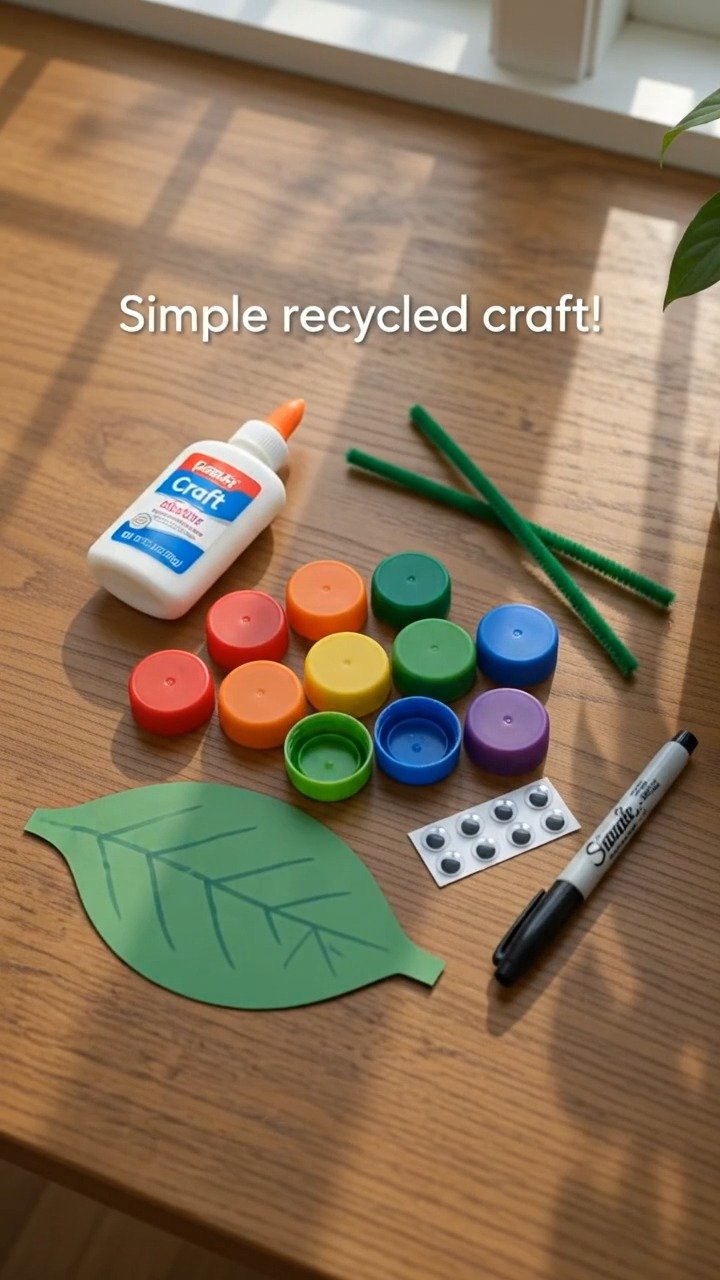
Gather the following materials to begin your journey of making the bright bottle cap caterpillar:
- Colorful bottle caps (any size)
- Craft glue (strong adhesive preferred)
- Googly eyes (optional for added character)
- Pipe cleaner or wire (for antennae, optional)
- Cardstock or sturdy paper (for a base, optional)
These materials are easy to find and can often be sourced from recycling bins or local craft stores. If you don’t have one item, don’t worry. Adaptation is part of the journey, so feel free to substitute where you see fit.
Step-by-Step Directions
-
Collect Caps: Start by gathering your colorful bottle caps. Feel the different textures and colors as you sort them.

-
Plan Your Caterpillar: Lay the caps in a line to envision the size and color pattern of your caterpillar. Enjoy this moment of arrangement.
-
Glue the Caps: Apply a small amount of glue to the edge of one cap and gently place the next cap beside it. Repeat this process until all your caps are in line. The glue creates a soft bond that reinforces the caterpillar’s body.
-
Add Eyes: If you like, add googly eyes to one cap, which will serve as the caterpillar’s head. The whimsical look will bring your creation to life.
-
Finish with Antennae: Twist a pipe cleaner or a piece of wire into a small antenna shape and secure it to the head cap with glue. Feel the playful swaying of the antennae as they stand tall.
-
Let It Set: Allow your caterpillar to dry completely. Take this time to appreciate the transformation you have created.
-
Display: Gently handle your finished caterpillar and find a special place to display it, bringing a splash of color and joy to your space.
Enjoying the Finished Piece
Once completed, the bottle cap caterpillar brings a sense of joy to the environment. You might choose to place it on a windowsill, where sunlight can enhance its bright colors or on a shelf that catches the eye of visitors.
This cheerful creation has a story to tell—of creativity, recycling, and the joy of making. It can act as a playful accent in a child’s room or serve as a conversation starter during gatherings. Each time you or someone else sees it, a smile is likely to emerge, allowing the warmth of this project to echo through your home. Take a moment to appreciate the warmth this object brings into your space.
Caring for Your Finished DIY
Keeping your bright bottle cap caterpillar looking fresh and vibrant can be quite simple. To store it, choose a cool, dry place away from direct sunlight, as prolonged exposure may fade the colors over time. If it collects dust, a gentle wipe with a soft, dry cloth will keep it looking clean and cheerful.
If you tire of the design after some time, consider reusing the materials for another creative project. The bottle caps can easily be repurposed into something new, allowing the spirit of creativity to flow without bounds. Remember each crafting experience is an opportunity to explore and express.
Gentle Tips & Variations
The beauty of crafting is the ability to customize and make something truly your own. Here are a few gentle suggestions:
- Paint the Caps: Before gluing them together, consider painting the bottle caps to add a unique touch or texture.
- Add a Background: If you’re feeling inspired, create a colorful background using cardstock or paint to enhance the caterpillar’s visual narrative.
- Introduce Other Shapes: Experiment with different bottle shapes or sizes to create a menagerie of creatures, such as butterflies or snails.
- Incorporate Nature: Add small twigs or leaves to your caterpillar for natural accents that connect the project with the outside world.
These variations invite you to explore and deepen your creative experience, nurturing your imagination along the way.
FAQs About Bright bottle caps line up to form a cheerful rainbow caterpillar
Q: Can I use other types of caps?
A: Yes, feel free to use any caps you have on hand, whether they’re from water bottles, soda bottles, or other containers. The key is to enjoy the colors and shapes.
Q: How long does the glue take to dry?
A: Most craft glues will take a few hours to dry thoroughly. Let your caterpillar sit undisturbed during this time to ensure a strong bond.
Q: Can kids participate in this project?
A: Absolutely! This project is fantastic for all ages. Just ensure younger children are supervised while using glue and small parts.
Q: What if I don’t have googly eyes?
A: You can easily draw eyes with a marker or leave it out entirely. Your caterpillar will still be delightful with or without them.
Q: How can I make this a group activity?
A: Gather friends or family together and provide each person with caps, glue, and other materials. Share ideas and enjoy creating your caterpillars together, fostering a sense of community.
A Gentle Note Before You Go
Creating a bright bottle cap caterpillar provides a moment of calm and joy amidst the everyday hustle. Each step is an invitation to slow down, to be fully present in the act of making, and to celebrate the small triumphs of creativity. Take time to appreciate your work, and let the process of crafting soothe your spirit.
As you complete this project, hold space for your thoughts and feelings, letting them flow into the colors and shapes. Remember, each creation reflects part of your journey, a reminder of the importance of taking time for yourself to create and explore, nurturing that cozy, creative spirit. Enjoy the journey ahead, and trust in your ability to make something beautiful.
Print
Bright Bottle Cap Caterpillar
- Total Time: 45 minutes
- Yield: 1 caterpillar
- Diet: N/A
Description
Transform simple bottle caps into a delightful rainbow caterpillar, encouraging mindfulness and creativity.
Ingredients
- Colorful bottle caps (any size)
- Craft glue (strong adhesive preferred)
- Googly eyes (optional for added character)
- Pipe cleaner or wire (for antennae, optional)
- Cardstock or sturdy paper (for a base, optional)
Instructions
- Collect your colorful bottle caps. Feel the different textures and colors as you sort them.
- Plan your caterpillar by laying the caps in a line to envision the size and color pattern.
- Glue the caps together by applying glue to the edge of one cap and attaching the next cap beside it.
- Add googly eyes to one cap to serve as the caterpillar’s head.
- Finish by twisting a pipe cleaner or wire into antennae and securing it on the head cap with glue.
- Let the caterpillar dry completely, appreciating your transformation.
- Display your finished caterpillar in a special place to brighten your space.
Notes
Adapt materials based on availability. This project is perfect for creativity and engagement, suitable for all ages.
- Prep Time: 15 minutes
- Cook Time: 30 minutes
- Category: Craft
- Method: Crafting
- Cuisine: N/A