

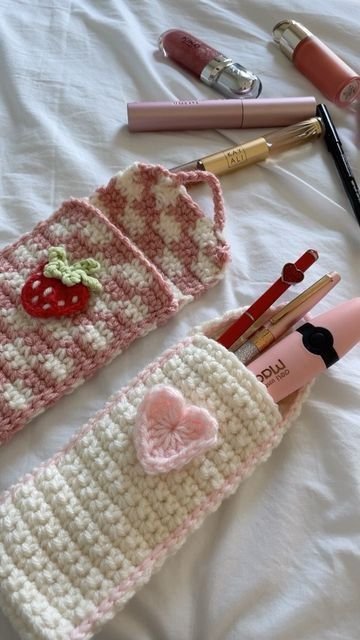
The finished pouch rests lightly across your knees, small enough to turn in one hand while the hook slips through each loop. I made this Crochet Pencil Case Pouch Pattern on a quiet afternoon with coffee cooling beside the yarn basket, and I liked how quickly the fabric gained enough weight to settle instead of curling. It is a useful little project for pencils, crochet hooks, makeup brushes, or the loose treasures that collect in a desk drawer. The rows ask for attention, but not strain, which makes this a gentle companion for a rainy evening or a slow Sunday morning.
Why This Project Is Such a Pleasure to Make
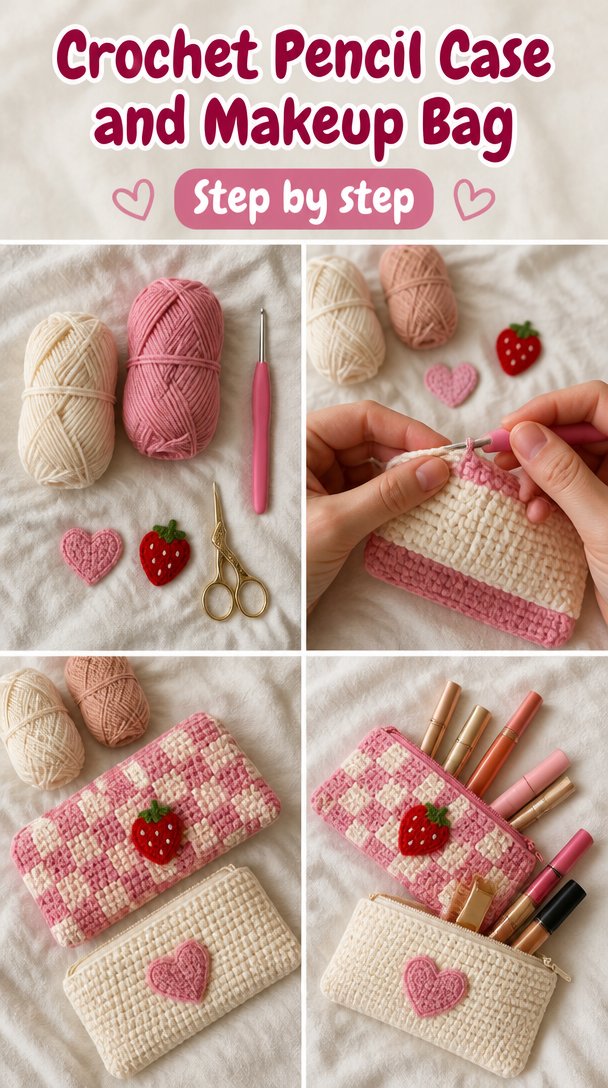
A small pouch gives you a satisfying sense of progress without asking for a whole weekend. You can see the shape forming after only a few rows, and the finished piece fits comfortably beside you on the couch, on a porch table in summer, or in the basket beside your favorite armchair.
The main fabric uses half double crochet, a stitch that sits between single crochet and double crochet in height. It grows steadily, feels softly textured, and keeps the pouch firm enough for pencils without becoming stiff. The rhythm is simple: yarn over, pull through, yarn over again, and pull through all three loops.
I noticed my hands warming up after the first ten minutes. Before that, my tension felt a little uneven, as it often does when I pick up a project after a busy day. The first rows curled at the edge, then the fabric grew heavy enough to settle flat across my palm.
This pouch also leaves room for small choices. You can make it in one calm color, use two shades for a simple striped effect, or choose a bright lining-like color that makes your desk feel more cheerful. None of those choices change the quiet nature of the work.
How Crochet Pencil Case Pouch Pattern Comes Together
You will crochet one flat rectangle, fold it in half, and seam the sides to form the pouch. The body works in half double crochet through the back loop only, or BLO, which means you work into the loop farthest from you rather than under both top loops. That small change creates soft horizontal ridges.
This pattern uses US crochet terms. UK readers often find these posts too, and the same word can mean a different stitch there, so check your pattern language before beginning. You will use a chain, abbreviated ch, for the starting foundation chain, then half double crochet, abbreviated hdc, for the body.
A slip stitch, or sl st, closes the seam neatly. You will not need a magic ring, bobble, front post double crochet, back post double crochet, treble crochet, increases, or decreases for this version. The construction stays flat and familiar, which makes it a kind project for a newer crocheter while still giving an experienced maker a pleasant evening rhythm.
Plan on about two to three evenings, or roughly three to four hours of relaxed crocheting, including seaming and finishing. The fiddliest part is sewing the sides evenly, not the crochet itself. If you pause there, mark the corners and return when your hands feel ready.
Pattern at a Glance
Here are the details in one place before you gather your supplies.
- Skill level: Easy beginner
- Finished size: 8 inches wide by 4 inches tall (20 cm by 10 cm)
- Gauge: 14 hdc and 10 rows measure 4 inches (10 cm)
- Yarn: Worsted weight (weight 4, medium), about 120 yards total
- Hook: H-8 (5.0 mm)
- Other supplies: Yarn needle, scissors, tape measure, and two optional stitch markers
- Stitch multiple: Any multiple of 2 stitches plus 1 for the foundation chain
- Estimated time: Three to four hours
What You Need for This Project
- About 120 yards of worsted weight yarn (weight 4, medium), preferably cotton or a cotton-acrylic blend, about 1 skein or 100 g
- H-8 (5.0 mm) crochet hook, with half a size up or down fine depending on your tension
- Yarn needle for weaving in ends
- Sharp scissors
- Tape measure
- Two stitch markers, optional, for marking the first and last stitch
For the sample, I used a worsted weight cotton-acrylic blend because it gives the pouch enough body while staying pleasant against your fingers. A plain worsted weight cotton yarn from Lily Sugar’n Cream can work well, though its firmer feel may make the pouch a little less soft. A worsted weight acrylic yarn from Lion Brand is another practical choice when you want easy washing and a broad range of colors.
Make a gauge swatch before you commit to the full rectangle. Work enough half double crochet rows to measure 4 inches (10 cm), then count 14 stitches across and 10 rows tall. The twenty minutes spent checking gauge can save you from finishing a pouch that is too narrow for your pencils.
For a substitution, stay with worsted weight yarn and choose a similar fiber or blend. Cotton suits an item that may visit a school bag or desk, while acrylic keeps the pouch light and washable. If you use wool, remember that untreated wool can felt with heat, agitation, and moisture. Superwash wool tolerates machine washing more easily, but it may drape differently.
Step by Step
- Difficulty and repeat: This is an easy beginner project. The stitch multiple is any multiple of 2 stitches plus 1 for the foundation chain. The finished pouch uses 29 chains and 27 stitches across each row.
- Make a foundation chain, which is the starting chain that supports the first row. Chain 29. Keep the chain relaxed; if it pulls tight, go up one hook size just for the chain, then return to H-8 (5.0 mm) for the next row.
- Row 1: Yarn over and insert your hook into the second chain from the hook. Pull up a loop, yarn over, and pull through all three loops on your hook to make one half double crochet, or hdc. Work 1 hdc in each chain across. You will have 27 hdc.
- Row 2: Chain 1 for the turning chain, which brings your hook to the right height for the next row. Turn your work so the opposite side faces you. Work 1 hdc in the back loop only, or BLO, of each stitch across. The turning chain does not count as a stitch. You will have 27 hdc.
- Rows 3 through 20: Repeat Row 2. At the end of every row, count 27 hdc. The ridges will begin to show after several rows, and the rectangle should measure about 8 inches wide by 8 inches tall (20 cm by 20 cm).
- Pause after Row 5 and check the edges. A missed stitch often shows as a slanted side or a shorter row. If your count is 26 or 28, do not panic. Pull back the last few stitches slowly, one loop at a time, until you reach the place where the row changed.
- Use the top loops to find each stitch. The two loops at the top look like small V shapes, while the back loop sits farther away. Insert your hook only under the far loop for the ridged texture, and keep the first and last stitches especially clear.
- After Row 20, fasten off by cutting the yarn and pulling the tail through the final loop. Leave a tail about 12 inches (30 cm) long if you plan to use it for seaming. Leave a shorter tail on the other side if you prefer to sew with fresh yarn.
- Fold the rectangle in half so the first and last rows meet. The ridged side can face outward or inward, depending on the look you prefer. Place a stitch marker through both layers at each side corner to hold the pouch steady while you sew.
- Thread a yarn needle with one long tail. Use a slip stitch seam by inserting the needle through matching edge stitches on both layers, drawing the yarn through gently, and repeating from bottom to top. Keep the seam firm but not tight so the edge does not pucker.
- Repeat the seam on the other side with the second yarn tail. Check that both corners line up and that the pouch opening stays even. If one side looks taller, loosen the last few stitches and adjust before finishing.
- Weave in the ends by running the yarn needle through several stitches in different directions on the inside of the pouch. Trim the extra yarn close to the fabric. This step keeps the tails from catching on pencils or slipping out during use.
- Shape the pouch with your hands and check the finished size. If you used cotton or a cotton blend, you can block it lightly by dampening it, shaping it flat to 8 by 4 inches (20 by 10 cm), and allowing it to dry. Acrylic can also be shaped, but never press a hot iron onto it because acrylic may melt.
Where This Piece Finds Its Place
The finished pouch slips easily into a tote, school bag, desk drawer, or basket beside the armchair. I like it for a short set of pencils and a small ruler, but it also holds crochet hooks, stitch markers, a measuring tape, and the yarn needle that tends to wander away from every project.
On the living room table, it gives small tools a home without adding visual clutter. In summer, it can sit on the porch with a notebook and a few colored pencils. During cool fall evenings, it fits beside your current project so you do not have to search for the right hook when the light begins to fade.
For gifting, fill it with two pencils, a small eraser, and a handwritten note. A teacher, student, journal keeper, or fellow crocheter can use it right away. You might also make a pair in related colors for a holiday gift, keeping one for yourself and giving one to a friend.
If you sell finished items made from this pattern, my own policy is simple: I am comfortable with small-scale sales when the maker writes the item listing in their own words and credits the pattern source.
Washing, Drying, Storing Crochet Pencil Case Pouch Pattern
Care depends on the fiber you choose. For the cotton-acrylic blend described here, wash the pouch on a gentle cycle with cold or warm water, using a mild detergent. Place it in a mesh bag if you want to reduce rubbing against zippers or rough laundry.
Remove the pouch promptly and reshape it while damp. Dry it flat on a clean towel to keep the rectangle from stretching, and never hang it wet because the weight can pull the side seams out of shape. Cotton may relax slightly after washing, so a quick adjustment while damp helps.
If you choose acrylic, block cold or use steam from a distance with care. Acrylic fibers can melt under a hot iron, and direct heat can flatten the texture permanently. Keep the iron away from the crochet and allow the pouch to cool fully before moving it.
Store the pouch folded or lying flat somewhere breathable rather than hanging it by the opening. If you make it with wool, add cedar or lavender nearby for moth protection, but keep strong oils from touching the fabric directly. Untreated wool can felt, while superwash wool handles washing more easily.
Keep leftover yarn with its label so you have the fiber content, color name, and dye lot if you decide to make a matching pouch later. A small paper band tucked into the project basket can save a surprising amount of guessing.
Small Ways to Make It Your Own
Try a thicker yarn if you want a sturdier, larger pouch. Bulky yarn will make the piece grow quickly but may create a wider finished item, while lighter yarn will produce a smaller pouch with more flexible drape. Adjust your hook to suit the yarn rather than forcing the original gauge.
Choose two colors and change yarn at the end of every fourth row for gentle color blocking. A deep blue with cream feels quiet and classic, while sunny yellow with soft gray brings a little brightness to a desk. Carry unused yarn only if the carried strand will not show through the sides.
Swap half double crochet for single crochet if you want denser fabric. Single crochet makes a firmer pouch and takes more rows to reach the same height, so expect a different texture and a little more time at the hook. Double crochet creates a taller, softer fabric, but the openings may be larger.
Resize the pouch by changing the foundation chain in multiples of 2 plus 1. For a narrower pouch, chain 25 instead of 29. For a wider pouch, chain 33 or 37, then work enough rows to reach the height you want.
Add a simple border if you enjoy a finished edge. Work one round of single crochet around the opening, placing one stitch in each row-end stitch along the sides and one stitch in each existing stitch across the top. A small loop and button can also close the pouch, but keep buttons and other small parts away from children under three.
Frequently Asked Questions About Crochet Pencil Case Pouch Pattern
Can I use a different hook size for this pouch?
Yes, you can use a different hook size, but it will change the fabric and finished size. H-8 (5.0 mm) gives this pouch a balanced fabric with enough body for pencils. Go up to I-9 (5.5 mm) for looser stitches and a softer drape, or down to G-6 (4.0 mm) for denser fabric. Check your gauge after changing hooks.
What yarn can I substitute for the recommended yarn?
Choose another worsted weight yarn, also called weight 4 or medium, with about 120 yards available. Cotton gives a firm, washable pouch, while acrylic feels lighter and often creates a softer fabric. A cotton-acrylic blend sits between the two. Avoid a very slippery yarn until you feel comfortable with tension, because it can make the BLO stitches harder to see.
What should I do if I find a mistake several rows later?
First, place the pouch flat and compare both edges. If the shape still looks even, you may decide to leave the mistake, especially if it sits inside the seam. If the edge narrows or widens, pull back calmly to the problem row, place your hook into the last secure loop, and rebuild the row with 27 hdc.
Is this pouch suitable for a beginner?
Yes, this pattern suits a beginner who knows how to make a chain and basic half double crochet. The project has one repeated body row, no shaping, and a simple seam. The fiddly part comes when you sew the sides, so use stitch markers to hold both layers together and take your time lining up the corners.
How long does the crochet pencil case pouch take to make?
Plan on about three to four hours, spread across two or three relaxed evenings. Your time may change with your tension, experience, and how carefully you sew the seams. The crochet grows steadily, but weaving in ends and checking the shape add a little finishing time. You do not need to rush this small project.
Does this pattern use US or UK crochet terms?
This pattern uses US crochet terms. The main stitch is half double crochet, abbreviated hdc, in US terminology. In UK terminology, the same words can refer to different stitch heights, so check your pattern references before beginning. The chain, slip stitch, single crochet, double crochet, and other abbreviations here follow American usage.
Take the Time You Need
Let the pouch grow at the speed your hands choose today. A missed stitch does not undo the quiet hour you spent making it, and a slightly uneven row can still become a useful, loved object. Keep your coffee nearby, listen for the small click of the hook, and let this simple fabric remind you that steady work has its own kind of beauty.
—META—
SEO Title: Crochet Pencil Case Pouch Pattern
Meta Description: Make a calm crochet pencil case pouch with easy US terms, worsted yarn, clear stitch counts, gentle care, and simple ways to customize it.
Slug: crochet-pencil-case-pouch-pattern
Category: Crochet Patterns
Tags: crochet pouch, pencil case, easy crochet, slow making, crochet accessories
Image Alt Text: Close view of ridged crochet pouch fabric made with half double crochet
Finished crochet pencil pouch folded open with pencils beside it
Pinterest Title: Easy Crochet Pencil Pouch
Pinterest Description: Make a softly ridged crochet pencil pouch with simple stitches and a relaxed, beginner-friendly rhythm. A useful handmade project for quiet evenings.