

The light glimmers softly through the window as it catches on delicate forms, transforming a mundane space into a cosmos of color. The air softly smells of clear glue, a familiar scent that evokes memories of past creations. As you watch the gentle dance of glittering stars, a serene sense envelops you, allowing your mind to quiet and your heart to feel at home. Clear glue, rainbow colors, and glitter create translucent star decorations that catch the light beautifully in any window. Which version would you make?
The Heart Behind This DIY
Creating with your hands reconnects you to a sense of calm often lost in the rush of daily life. This DIY opens a doorway to mindfulness, inviting you to slow down and immerse yourself in the present moment. The act of mixing colors and watching your hands transform simple materials into something beautiful fosters a deep sense of satisfaction.
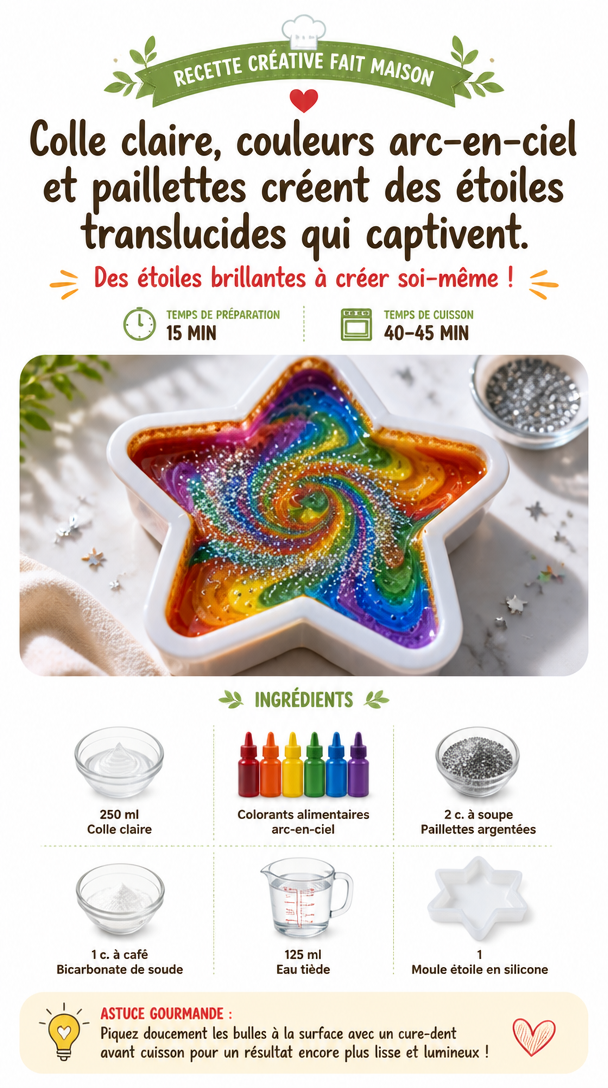
When you engage in this project, you invite a little magic into your space. Each star you create becomes a small talisman of joy, reflecting light and embodying the warmth of your intentions. You cherish the vibrant colors, each one chosen with care, bringing a unique personality to every piece. It becomes a soothing ritual, a reminder of the beauty present in slow, deliberate crafting.
A Gentle Look at the Process
Imagine the soft sounds of squishing glue, the gentle crinkle of parchment paper, and the smooth glide of your brush as you create. This DIY flows like a quiet stream, nurturing your creativity with each stroke. You will mix colors, sprinkle glitter, and mold the stars into shape, all while enjoying the simple pleasure of the textures and movements involved.
As you engage with the materials, let yourself become fully absorbed in the experience. Feel the warm sunlight filtering through your window, illuminating your workspace. Allow each moment to draw you deeper into your craft, creating a rhythm that feels almost meditative.
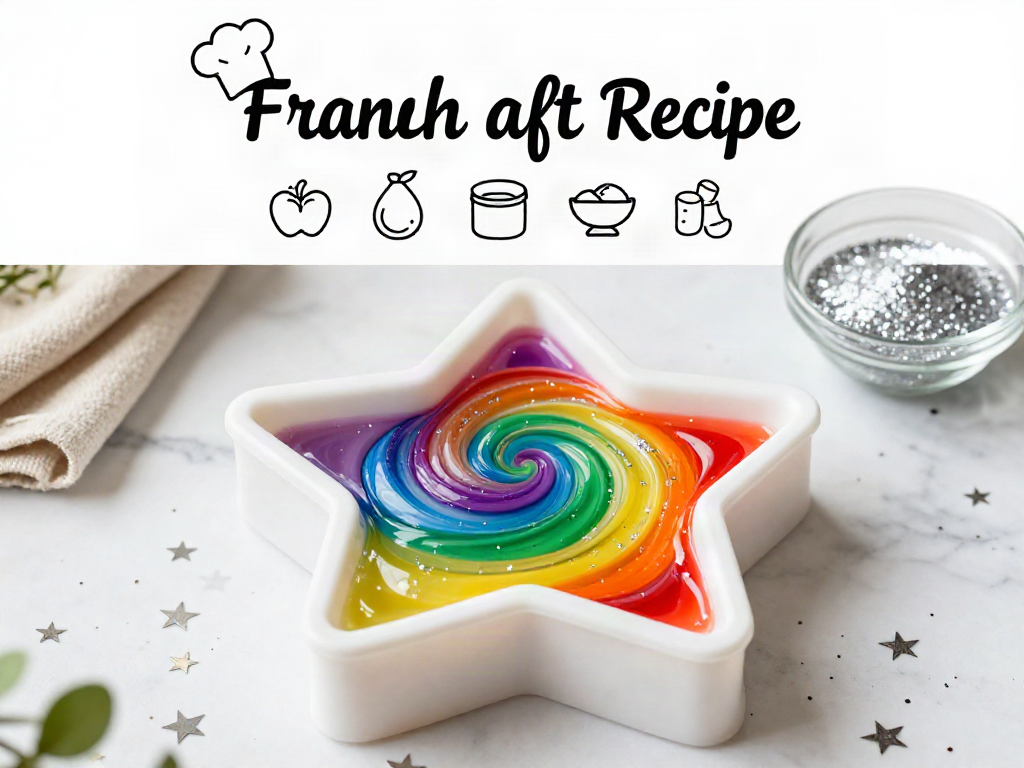
{image_1}
Materials You’ll Need
Gathering your supplies should feel like a gentle treasure hunt. Here’s what you’ll need for creating your lovely translucent stars:
- Clear glue (easy to find at craft stores)
- Water (for thinning the glue)
- Food coloring or liquid watercolors (choose your favorite shades)
- Glitter (gold, silver, or colorful options)
- Parchment paper (makes for easy cleanup and easy release)
- Star-shaped cookie cutters (optional, or you can freehand)
- Small paintbrush (for spreading the glue)
- Clear sealant spray (optional, for added durability)
Collect each item at your own pace, letting the tactile experience of each material be a part of your calm routine.
Step-by-Step Directions
-
Prepare Your Workspace: Lay down some parchment paper to protect your table and make the cleanup easier later. Take a moment to breathe in the space you’ve set up for creativity.

-
Mix the Glue: In a bowl, combine clear glue with a little water to achieve a more fluid consistency. It should feel smooth and easy to work with.
-
Add Color: Choose your colors and add them to the glue mixture. Swirl gently to create soft marbled effects or thoroughly mix for vibrant hues. Notice how each color transforms before your eyes.
-
Create Star Shapes: Using the cookie cutters or freehand, pour the colored glue onto the parchment paper, crafting star shapes. Feel the smoothness of the glue as it spreads under your hand.
-
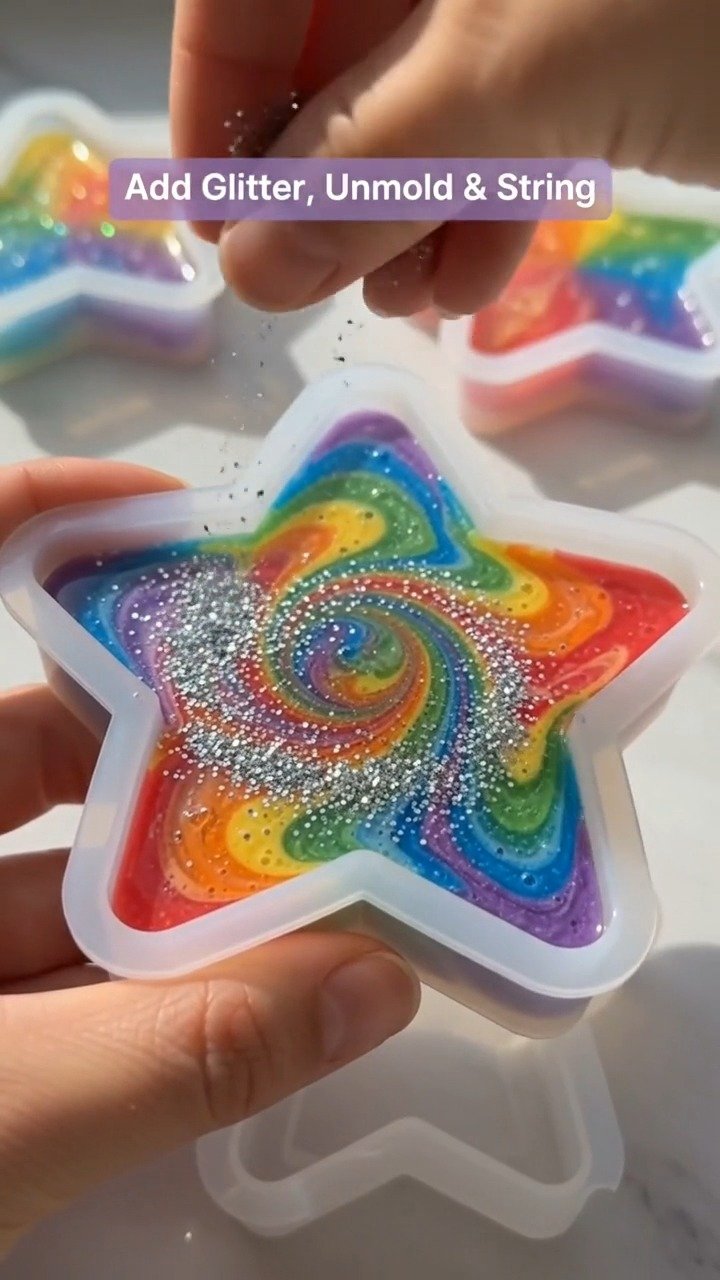
Sprinkle Glitter: While the glue is still wet, sprinkle glitter over the stars. Observe how the glitter catches the light, creating a mesmerizing effect. You may add multiple colors for a more whimsical look.
-
Drying Time: Allow your stars to dry completely. This may take several hours or overnight. Use this time to step away and enjoy a moment of peace, knowing your creations will be waiting for you.
-
Seal (Optional): Once dried, you can seal your stars with a clear spray for added durability if desired. Just be sure to follow the instructions on the spray for best results.
-
Cut Out the Stars: If you used cookie cutters, gently peel the dried stars from the parchment paper. They should come off easily, revealing their delicate beauty underneath.
Enjoying the Finished Piece
You have created a treasure that can now dance in the light. Hang your stars in any window, allowing them to catch the sunlight throughout the day. Watch as the colors play on your walls, turning your space into a cozy, brightly lit sanctuary.
Consider using these lovely stars to create a magical atmosphere during quiet evenings. They can grace a corner of your home, brightening darker months and celebrating the light during the spring and summer.
Beyond their beauty, these stars serve as reminders of your time spent crafting—a gentle nod to the importance of slowing down and appreciating the little things in life.
{image_2}
Keeping It for Later
After you’ve enjoyed your creations, consider how to preserve and store your stars. Store them in a safe, dry place where they won’t get crushed. Keeping them in a decorative box or a cloth pouch adds to the charm and helps you keep them organized.
When the seasons change, feel free to refresh your space by switching them out with new colors or patterns. Each time you bring them out or make new ones, you create a moment of joy and creativity.
Gentle Tips & Variations
As you create your dazzling stars, consider these gentle invitations to make this project uniquely yours:
- Layer Your Colors: Try layering different colors of glue for a richer effect. Overlaying can create beautiful gradients that mimic the skies or sunsets.
- Experiment with Different Shapes: While stars are lovely, consider using other cookie cutters or freehanding hearts, circles, or whimsical designs to widen your creative spectrum.
- Add Natural Elements: Incorporate pressed flowers or leaves into the glue before it dries. This can bring a touch of nature into your hanging decorations.
- Create a Mobile: Instead of merely hanging them in a window, consider assembling a mobile with your stars. This can add a soothing motion and create a playful experience.
- Make Personalized Gifts: Use this project as a heartfelt gift. Customize colors for loved ones, making it a thoughtful gesture to warm their spaces.
FAQs About Clear glue, rainbow colors, and glitter create translucent star decorations that catch the light beautifully in any window. Which version would you make?
Can I use regular school glue?
Yes, you can, but clear glue offers a more translucent finish, allowing your colors to shine through better.
How long do these stars last?
With proper care and storage, your stars can last for years. They are delicate, so take care not to crush them.
Do I need to use glitter?
Not at all! If you prefer a more gentle approach, feel free to skip the glitter for a more understated elegance.
Can I make these without a cookie cutter?
Absolutely. Freehanding shapes can be a fun and creative way to explore your designs.
What if my stars are sticky after drying?
If they feel sticky, it might be beneficial to add a thin layer of clear sealant. This can help create a smoother finish and protect them further.
A Gentle Note Before You Go
As you step away from your crafting space, take a moment to appreciate the small journey you’ve taken with these stars. Each one represents a bit of you, a moment of time spent creating something beautiful.
Let the act of making these translucent decorations serve as a reminder of the joys found in simple processes. In a world that can rush by, hold onto the calm, the vibrant colors, and the delight that comes from gentle hands-on projects. Embrace your creativity and let it shine wherever your stars may hang.
Print
Translucent Star Decorations
- Total Time: 60 minutes
- Yield: 10 stars
- Diet: N/A
Description
Create beautiful translucent stars using clear glue, watercolors, and glitter to catch the light in your windows.
Ingredients
- Clear glue
- Water
- Food coloring or liquid watercolors
- Glitter
- Parchment paper
- Star-shaped cookie cutters (optional)
- Small paintbrush
- Clear sealant spray (optional)
Instructions
- Prepare your workspace by laying down parchment paper.
- Mix the clear glue with a little water for a fluid consistency.
- Add your chosen colors to the glue mixture and swirl or mix.
- Create star shapes by pouring colored glue onto parchment paper.
- Sprinkle glitter over the stars while the glue is wet.
- Dry the stars completely for several hours or overnight.
- Seal with a clear spray for added durability, if desired.
- Cut out the stars from the parchment paper once dried.
Notes
Feel free to experiment with colors and shapes to make your stars unique.
- Prep Time: 15 minutes
- Cook Time: 0 minutes
- Category: Craft
- Method: Crafting
- Cuisine: N/A