

A soft breeze stirs the leaves outside, whispering secrets of nature into the cozy corners of our homes. The gentle warmth of the sun filters through the window, casting a golden hue into the space. Just as the late afternoon light begins to shift, you sit surrounded by delicate blossoms and fragrant herbs, ready to create something beautiful. With pressed flowers in hand, you prepare to transform them into a lantern, a gentle piece of art that captures the essence of nature, inviting calmness with each flicker of light.
The Quiet Joy of Making Pressed Flower Lantern
Creating a pressed flower lantern offers more than an opportunity to craft. It provides a moment to pause, breathe, and engage with the world around us. In our busy lives, this project reminds us to embrace slowness. It draws our focus into the delicate beauty of flowers, an art form that reflects the rhythms of nature. As we handle each bloom, we become mindful of texture, color, and the fleeting nature of life.
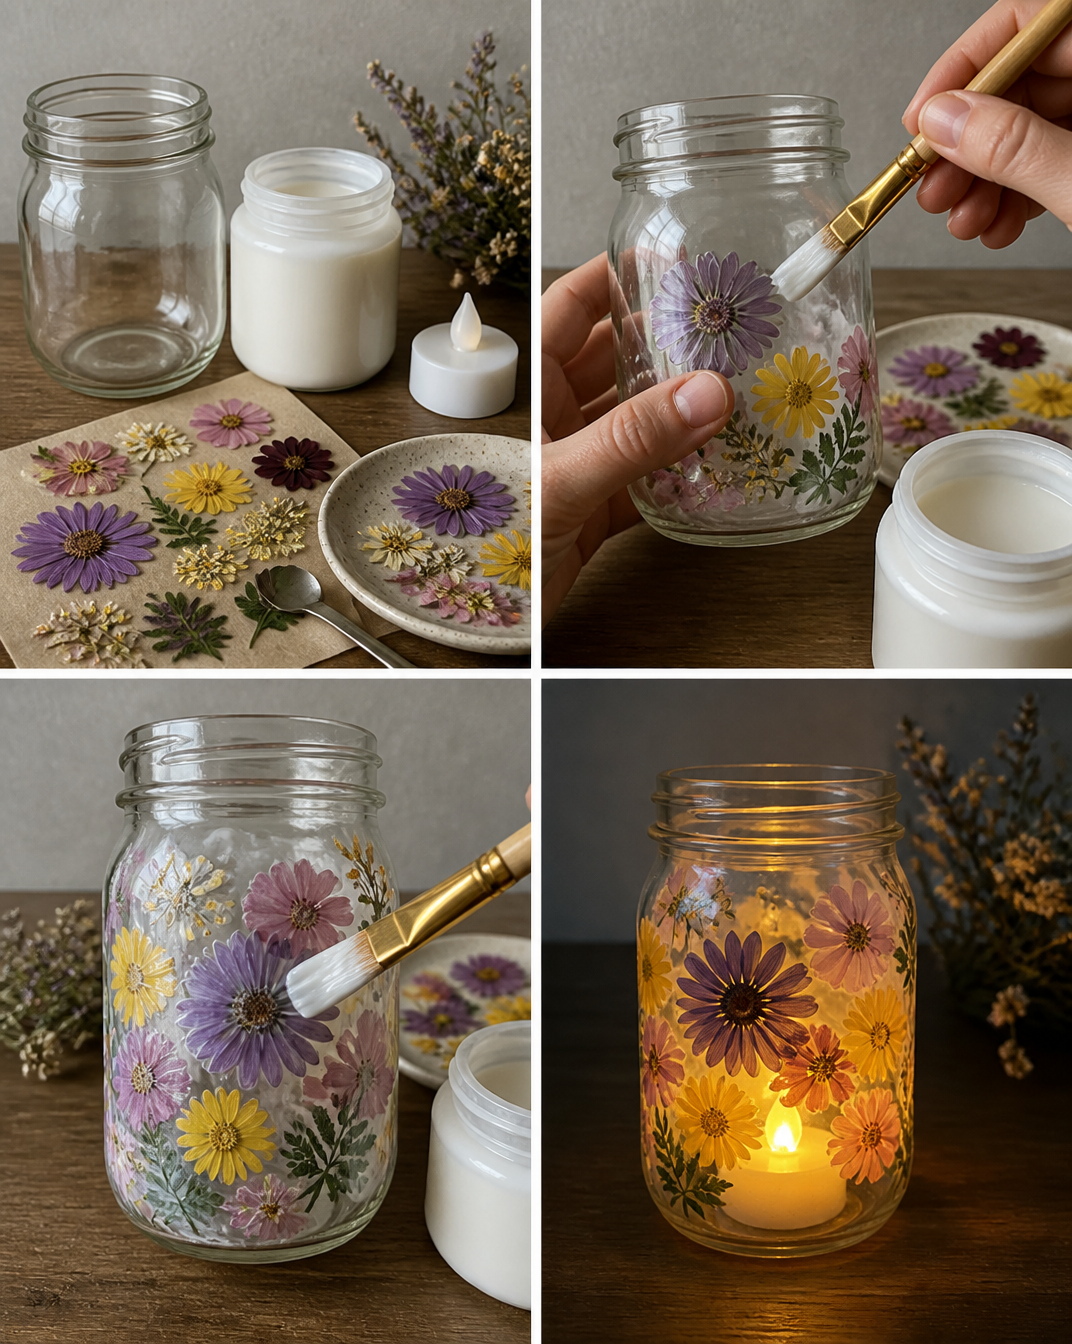
Gathering nature’s treasures invites a sensory experience. The smoothness of pressed petals, the earthy scent of dried herbs, and the warmth of a gentle light weave into a tapestry of comfort. Each step in this process offers moments to connect, to feel, and to reflect. The lantern serves as a glowing reminder of the beauty we can create from simple things, helping us slow down and savor the experience.
A Gentle Look at the Process
As you prepare to craft your pressed flower lantern, imagine the movement of the flowers as they drift through your fingers. You will select blooms, press them into delicate flatness, and then frame them within glass. Each action carries a rhythm—a gentle unfolding that feels both inviting and calming.
The process contains a soft flow from choosing your flowers to creating a glowing centerpiece for your home. When you work slowly and deliberately, the noise of the world outside begins to fade, and your space becomes a sanctuary of creativity, filled with the soothing sounds of soft rustling and muted clinks of glass.
Materials You’ll Need
To create your pressed flower lantern, gather the following materials:
- Fresh or dried flowers (choose a variety of colors and textures)
- Heavy books or a flower press (easy to find at craft stores)
- Cardstock or thin paper (to create the lantern)
- Clear glass container or jar (a candle holder works beautifully)
- Hot glue gun (optional, but it can secure flowers)
- Battery-operated tea light candles (safer than real flames)
- Scissors (for cutting)
- Chain or string (optional, for hanging)
These materials flow together with ease. You can often find them around your home or at your favorite local store. Feel free to substitute or adapt as needed; this project allows for personal expression and creativity.
Step-by-Step Directions
-
Prepare the Flowers: Choose your flowers. Remove any leaves and stems that may overlap. Consider their colors and shapes to create a harmonious arrangement.

-
Press the Flowers: Place your chosen flowers between sheets of cardstock or thin paper. Stack heavy books on top to press them down. Leave them for a few days until fully dried and flattened.
-
Design the Lantern: While the flowers dry, cut your cardstock or thin paper to the desired height and width of your lantern. A rectangle often works well.
-
Arrange the Flowers: Once pressed, lay out your dried flowers on the paper. Experiment with their arrangement until you find a design that resonates.
-
Secure the Flowers: If you prefer, use a glue gun to gently attach the flowers to the cardstock. This step adds an extra layer of durability if you plan to move your lantern.
-
Form the Lantern: Once the flowers are secure, carefully roll the paper to create a cylindrical shape. Overlap the edges slightly, then use glue or tape to hold it together.
-
Place in the Glass Container: Position your lantern within the glass jar or container. This will protect your creation and enhance the soft glow when lit.
-
Add the Light Source: Slide a battery-operated tea light candle into the jar. This light will create an inviting warmth without any worries about flames.
-
Finishing Touch: If you’d like, attach a chain or string to hang your lantern. Tying a simple knot can add a personal touch.
Enjoying the Finished Piece
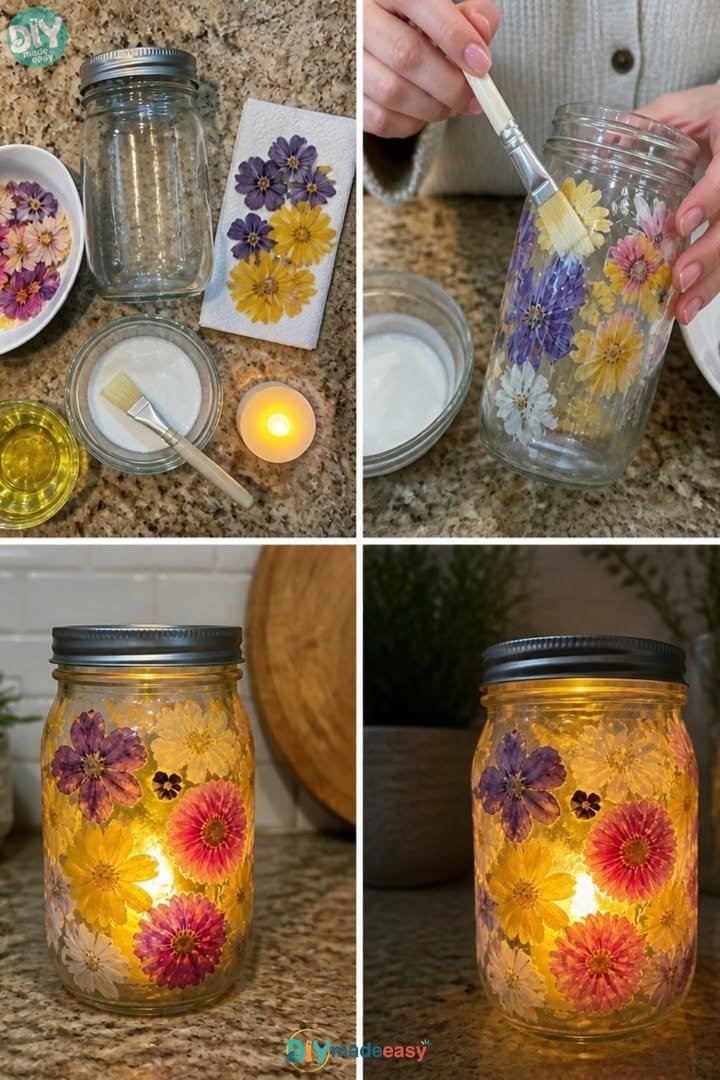
The pressed flower lantern becomes more than just a craft; it evolves into a cherished piece of decor. Imagine placing it in a corner of your living room or on a windowsill where soft light can shine through and dance with the petals. Every flicker reminds you of the nature that inspired it, encouraging mindfulness.
As evening settles in, the lantern glows gently in the dusk, casting delicate shadows of flowers across the walls. You can use it during quiet evenings, for meditative moments, or as a centerpiece for a gathering. Each time you light it, you are also igniting the spirit of creativity that brought it to life.
Caring for Your Finished DIY
To keep your pressed flower lantern looking fresh and vibrant, take gentle care. Avoid placing it in direct sunlight for extended periods; this will help the colors maintain their beauty.
If you notice the blooms beginning to fade, consider moving it to a more shaded area. If you decide to change the flowers, simply detach the old ones and repeat the pressing process with new blooms. This way, your lantern can evolve with the seasons.
When the time comes for storage, keep the lantern in a cool, dry place. Wrapping it in acid-free tissue paper can further protect it, ensuring that when you bring it out again, it still holds its charm.
Calm Customization Ideas
This DIY invites a world of creativity, and there are endless ways to infuse it with your personal touch. Here are a few gentle ideas to inspire you:
-
Vary the Flowers: Consider using different types of flowers for each season—bright sunflowers in summer, warm autumn leaves in fall, or even pine sprigs in winter.
-
Add Natural Elements: Incorporate twigs, feathers, or small pebbles around the base of the lantern to create an earthy feel.
-
Try Different Light Sources: Use colored LED lights or add fairy lights inside the jar for a magical ambiance.
-
Decorate the Exterior: Wrap twine or lace around the rim of the container for added texture.
-
Combine Lanterns: Make multiple lanterns with various designs. Display them together for a delightful cluster of colors and shapes.
FAQs About Pressed Flower Lantern
Can I use any flowers for this project?
You’re welcome to use any flowers that are flat and dry well. Some flowers, like daisies and pansies, work beautifully, but ensure they won’t wilt or discolor easily.
How long do the flowers last once pressed?
Pressed flowers can last for months to years when cared for properly. Keep them away from direct sunlight to prolong their vibrancy.
Is it safe to use real candles?
While real candles can add a lovely ambiance, using battery-operated tea lights is a safer choice, especially if you want to avoid any fire hazards.
Can I create this lantern with kids?
This project can be a wonderful experience to share with children. Just keep the hot glue gun for adult use, and guide them through the flower arrangement.
How can I fragrance the lanterns?
If you’d like a soft scent, consider adding a few dried lavender or rosemary stems within the glass. This will create a gentle aroma when the light warms it up.
A Gentle Note Before You Go
As you reflect on your pressed flower lantern, take a moment to embrace the journey. Creating is not merely about the end result; it’s about the peaceful moments spent gathering, arranging, and seeing beauty bloom under your hands.
Allow yourself to enjoy the slow pace of crafting and the simple joy of being present. Each lantern tells a story, a captured glow from nature, reminding you of the quiet beauty that surrounds us. Let your creativity flow authentically, and may each project bring you serenity, warmth, and a gentle ease.
Print
Pressed Flower Lantern
- Total Time: 15 minutes
- Yield: 1 lantern
- Diet: N/A
Description
A tranquil craft that transforms pressed flowers into a beautiful lantern, perfect for adding warmth to your home.
Ingredients
- Fresh or dried flowers (variety of colors and textures)
- Heavy books or a flower press
- Cardstock or thin paper
- Clear glass container or jar (candle holder works well)
- Hot glue gun (optional)
- Battery-operated tea light candles
- Scissors
- Chain or string (optional)
Instructions
- Prepare the Flowers: Choose your flowers. Remove any leaves and stems that may overlap.
- Press the Flowers: Place your chosen flowers between sheets of cardstock or thin paper. Stack heavy books on top to press them down.
- Design the Lantern: Cut your cardstock or thin paper to your desired height and width.
- Arrange the Flowers: Lay out your dried flowers on the paper and experiment with their arrangement.
- Secure the Flowers: If preferred, use a glue gun to gently attach the flowers to the cardstock.
- Form the Lantern: Roll the paper to create a cylindrical shape and glue or tape it together.
- Place in the Glass Container: Position your lantern within the glass jar or container.
- Add the Light Source: Slide a battery-operated tea light candle into the jar.
- Finishing Touch: Optionally, attach a chain or string to hang your lantern.
Notes
Avoid direct sunlight to prolong the colors of your pressed flowers. Store in a cool, dry place wrapped in acid-free tissue.
- Prep Time: 15 minutes
- Cook Time: 0 minutes
- Category: Craft
- Method: Crafting
- Cuisine: N/A