

The sun filters through the leaves, casting gentle shadows that dance across a wooden table. Nearby, a selection of wooden clothespins rests with their textured surfaces catching the light. An array of colorful wings waits patiently, their vibrant hues whispering of the transformation to come. Simple decorations sit quietly, ready to breathe life into each piece. This is a moment of calm, a cozy invitation to create charming butterflies that could flutter with imagination. These little creations, made with care, are perfect for display or playful adventures, promising joy and a sense of accomplishment.
The Heart Behind This DIY
Creating beautiful things often brings us back to ourselves. As you gather wooden clothespins, colorful wings, and simple decorations, consider how the act of making helps slow the mind and nurture your spirit. This DIY project is comforting, filled with gentle movements and soft colors. Each step allows for moments of reflection, enhancing your senses and grounding you in the here and now.
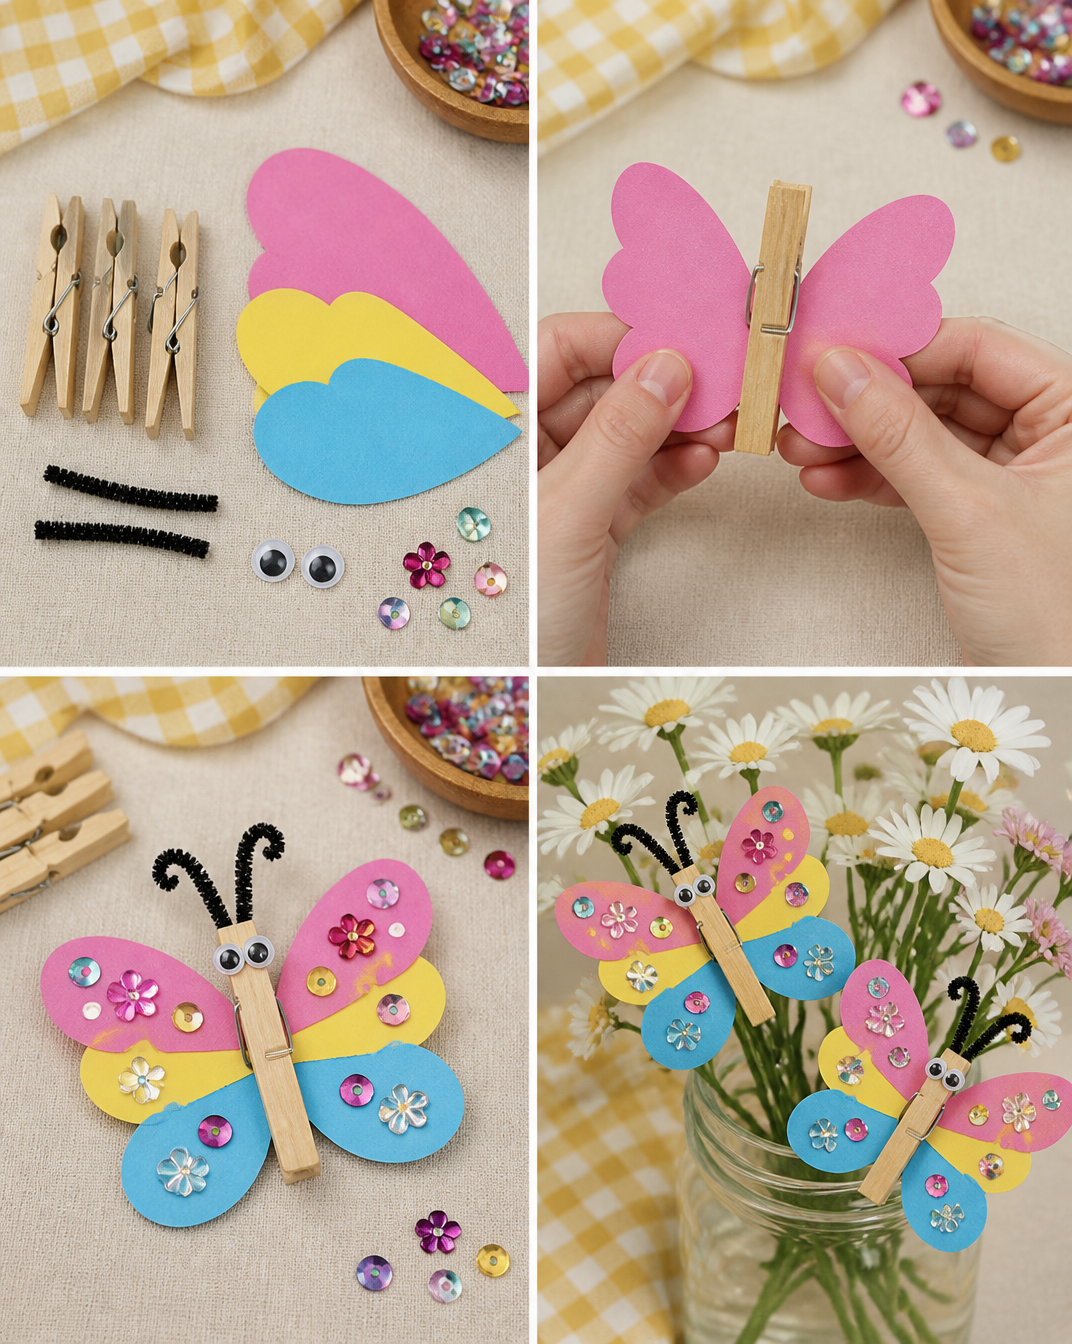
The materials involved, from the smoothness of the clothespins to the vibrant textures of the wings, invite touch and eye. The process is not just about the end result. Engaging with each element, feeling the weight of the clothespins and marveling at the colors before you, brings a delightful sense of peace. It is this simple yet profound connection to the project that opens up space for calmness and creativity in our lives, effortlessly weaving a blanket of warmth around our thoughts and feelings.
A Gentle Look at the Process
Before diving into this lovely endeavor, take a moment to visualize the soothing flow of creation. Imagine your fingers gliding over the materials. The soft sound of scissors snipping, the gentle rustle of paper, and the subtle scent of glue warm the air.
This project unfolds simply. You will feel the satisfaction of assembling colorful wings onto wooden clothespins, creating whimsical butterflies that come to life with each careful touch. There is no rush here. Just a gentle exploration of art and imagination, where every moment spent brings a little more joy and a lot more beauty to your space.
Materials You’ll Need
- Wooden clothespins (easy to find at craft stores)
- Colorful paper or fabric for the wings (any vibrant, textured options work well)
- Scissors (keep handy for smooth cutting)
- Glue (craft or school glue is perfect)
- Markers or paint (for additional details)
- Optional embellishments like sequins or stickers (let your creativity roam)
As you gather these materials, allow yourself to enjoy the tactile experience of each item. The clothespins feel sturdy, while the colorful wings offer a sense of playfulness just waiting to be unleashed.
Step-by-Step Directions
-
Start by selecting your clothespins. Feel their smooth surfaces and consider how they will become the foundation of your butterflies.
-
Take a piece of colored paper or fabric. Use scissors to cut out two wing shapes for each butterfly. Experiment with different sizes and designs. Enjoy the sound of the paper as it gives beneath the blade.

-
Once you have your wings, it’s time to attach them to the clothespins. Use glue along the top of the clothespin. Feel the cool, sticky texture as you apply it evenly.
-
Carefully place the wings on the glued area, pressing gently to ensure they stick. Take a moment to appreciate how they begin to resemble butterflies.
-
After the wings are secured, add any details using markers or paint. You might choose to embellish the wings with stripes, dots, or patterns. Let your imagination guide you, as you express yourself freely.
-
If you have chosen to use embellishments, gently adhere them where you feel they should go. The added textures provide a delightful aspect, inviting further sensory engagement.
-
Give your butterflies some time to dry. As you wait, bask in the satisfaction of your creative progress and reflect on each stage of the process.
Enjoying the Finished Piece
Once your butterflies are dry and complete, take a moment to appreciate their charm. You can display them on a shelf, letting their colorful wings brighten up your living space. Alternatively, they can become playful additions to children’s rooms or be used in storytelling scenarios, sparking the imagination of all who see them.
These butterflies are more than just decorations. They hold the warmth of your creative journey, serving as reminders of the calm and joy found in making something with your hands. Each time you glance at them, let their delightful presence bring you a moment of peaceful mindfulness.
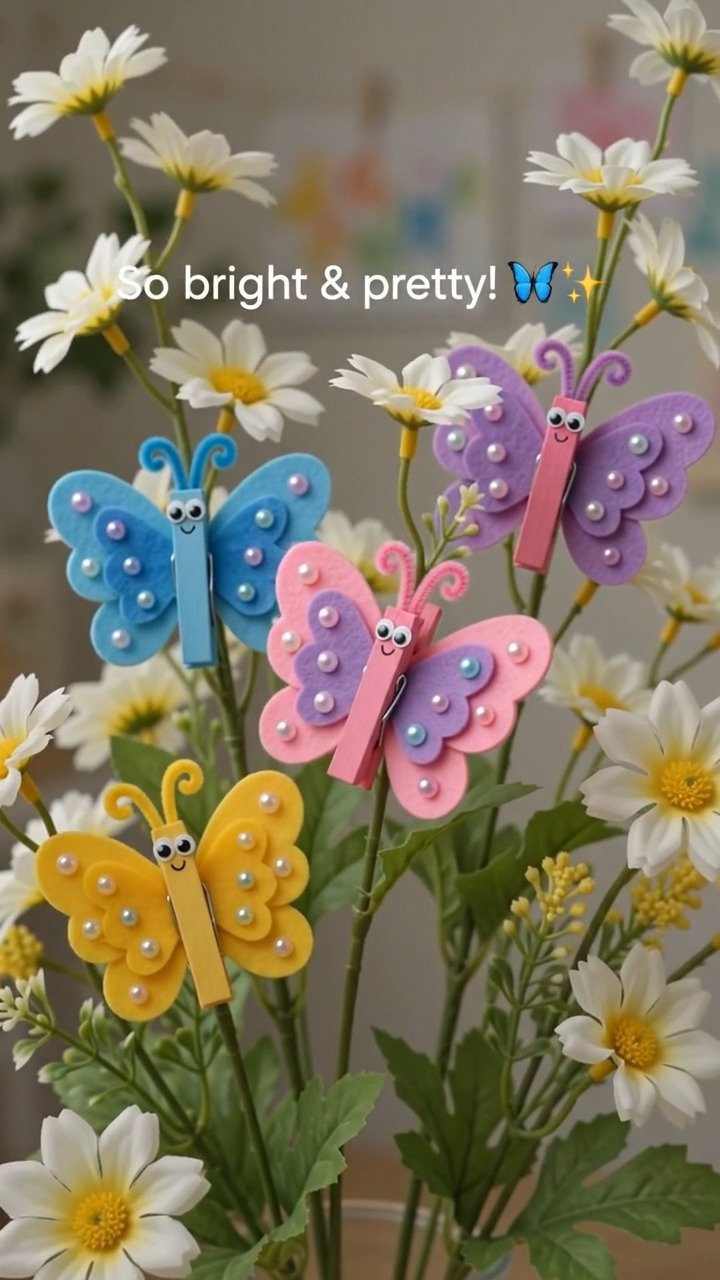
How to Store or Reuse Wooden Clothespins, Colorful Wings, and Simple Decorations
When it comes to caring for your charming butterflies, a gentle approach goes a long way. If you choose to store them, keep them in a soft, breathable bag or a box lined with tissue paper. This protects their delicate wings from damage while keeping them beautifully preserved.
If at any point you wish to reuse parts of your butterflies, the clothespins can be repurposed with new colors and designs. Simply remove the decorations, and you will have the perfect base for another round of creativity. The wings can also be refreshed or remade, inviting you to explore new artistic directions whenever you feel inspired.
Gentle Tips & Variations
-
Consider using natural materials for a rustic touch. Leaves, twigs, or dried flowers can add a captivating organic quality to your butterflies.
-
Experiment with different sizes of clothespins for unique aesthetics. Larger ones can create bigger butterflies, giving a playful twist to your project.
-
Invite friends or family to join in the fun. Each person’s creation will bring a special flair, and sharing the experience can deepen connections.
-
Try different color themes based on the seasons. Spring might inspire pastel wings, while autumn can call for deep oranges and browns.
-
For a magical twist, add tiny fairy lights behind the butterflies to create enchanting shadows and glimmers in your space.
FAQs About Wooden Clothespins, Colorful Wings, and Simple Decorations
Are there different types of wings I can use?
Absolutely! You can explore various materials like felt, fabric, or even leaves for wings. Each material offers a unique texture and visual appeal.
Can I paint the clothespins instead of using paper?
Yes, painting the clothespins opens up many creative possibilities. You can choose any color or pattern that resonates with your vision.
How do I ensure the wings don’t fall off?
Applying a generous amount of glue and allowing enough drying time will help ensure the wings stay secure. You might also consider reinforcing them with a little tape from the inside.
What if I want to create butterflies with kids?
This project is wonderful for kids! Supervise while using scissors and glue, and let their imaginations take flight.
Can I make these butterflies for a special occasion?
Absolutely! These butterflies can be a lovely addition to birthday parties, seasonal celebrations, or as thoughtful gifts. Personalizing them makes them even more special.
A Gentle Note Before You Go
As you complete your wooden clothespin butterflies, take a moment to breathe deeply and enjoy the calm that accompanies the act of creation. Each butterfly represents more than just a delightful decoration; they symbolize the peaceful moments spent crafting and the joy of connecting with your creativity.
In the rush of daily life, these moments of quiet creation remind us to slow down and focus on what truly matters. Keep your butterflies close, as they embody your unique journey and reflect the warmth of your intentional making. Enjoy the process as much as the outcome, and remember to invite creativity into your life whenever you can.
Print
DIY Wooden Clothespin Butterflies
- Total Time: 70 minutes
- Yield: Multiple butterflies
- Diet: N/A
Description
Create charming wooden clothespin butterflies with colorful wings and simple decorations that inspire creativity and joy.
Ingredients
- Wooden clothespins
- Colorful paper or fabric for wings
- Scissors
- Glue
- Markers or paint
- Optional embellishments (sequins, stickers)
Instructions
- Select your clothespins and feel their smooth surfaces.
- Take a piece of colored paper or fabric, and use scissors to cut out two wing shapes for each butterfly.
- Once you have your wings, apply glue along the top of the clothespin.
- Carefully place the wings on the glued area and press gently.
- After securing the wings, add details using markers or paint.
- If using embellishments, adhere them to enhance your butterflies.
- Give your butterflies some time to dry before displaying.
Notes
Consider using natural materials for a rustic touch. This project is great for groups and can be themed for different seasons.
- Prep Time: 10 minutes
- Cook Time: 60 minutes
- Category: Craft
- Method: DIY
- Cuisine: N/A