

Creating a Pressed Flower Journal Cover invites you to pause and connect with the world around you. Imagine gently pressing fresh blooms between the pages of a heavy book, feeling their delicate petals yield against your fingers. The soft rustle of leaves and the faint aroma of earth blend in the air, wrapping around you like a warm blanket. This is not just a craft; it’s a moment to embrace stillness and intention.
The Heart Behind This DIY
The process of making a Pressed Flower Journal Cover serves as a gentle reminder to slow down. In our busy lives, we often overlook the beauty present in simple moments, like the flutter of a petal or the soft crunch of leaves beneath our feet. Working with pressed flowers allows you to cultivate mindfulness, turning nature’s artistry into a cherished piece of your life.
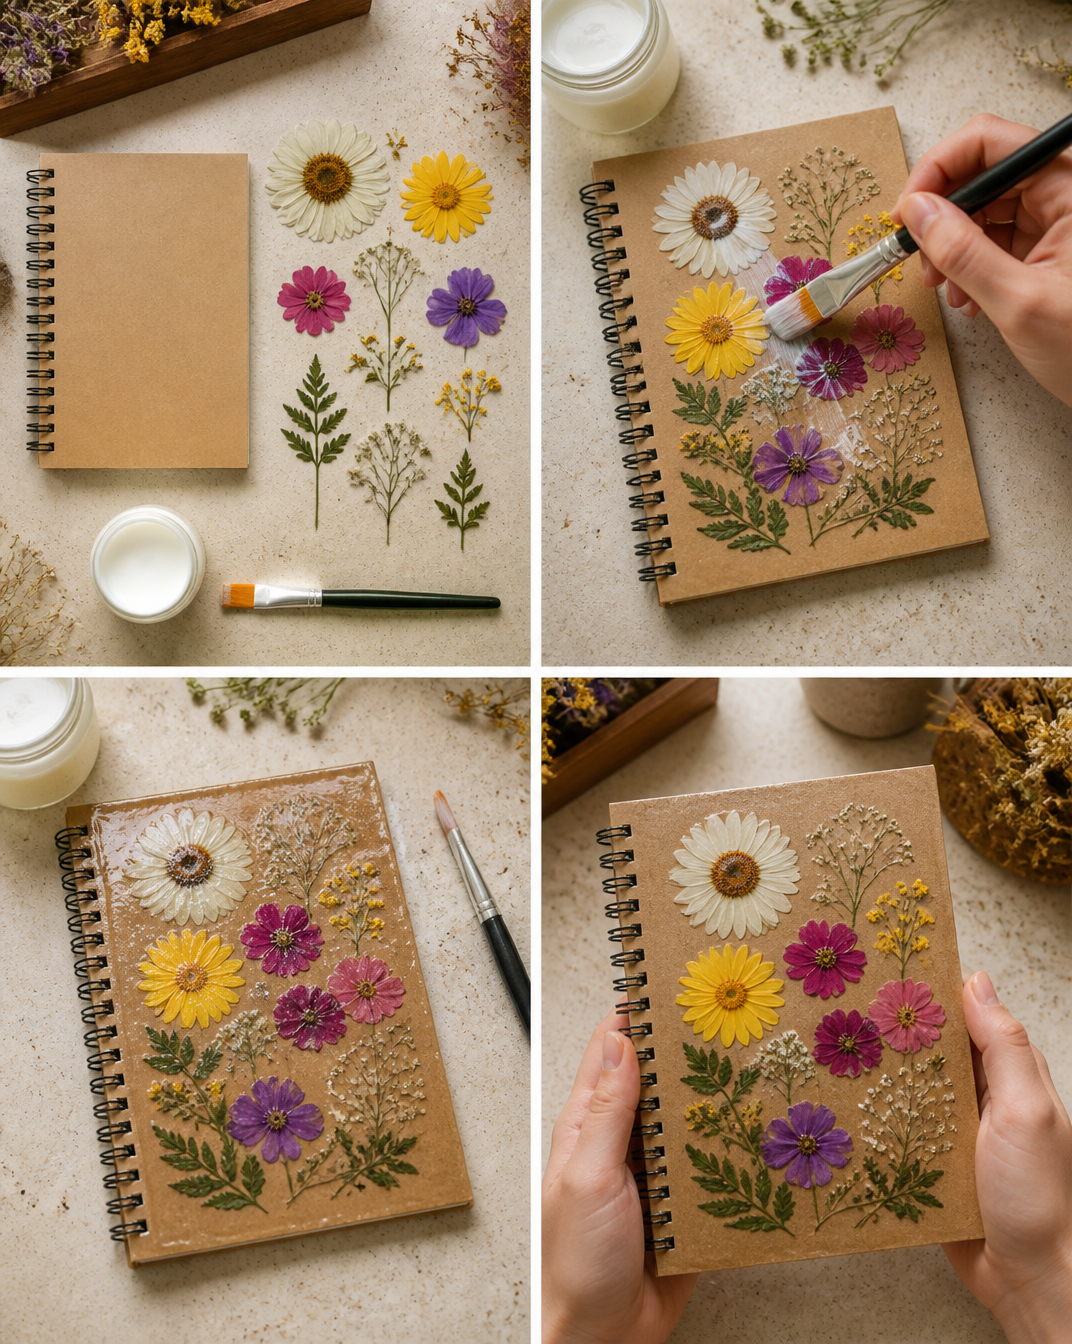
As you gather your materials and start the creation process, you’ll find yourself immersed in textures, colors, and scents. Each flower tells a story, capturing a season, a memory, or a fleeting moment of beauty. This project does not just occupy your hands; it calms your mind and nurtures your spirit. The rhythmic layering of flowers, the comforting feel of paper, and the glistening finish of Mod Podge all come together in a quiet dance of creation that grounds you in the present.
A Gentle Look at the Process
Creating a Pressed Flower Journal Cover is a soothing experience, nothing rushed or frantic. You will move through a series of tactile moments, each step inviting you to engage with the world around you. The first gentle act of collecting flowers moves into the careful pressing and designing of your layout. Each petal’s softness, the coolness of pressed paper, and the smoothness of the Mod Podge all create a sensory flow that guides you through the crafting ritual.
Throughout this process, you might hear the satisfying sound of paper crinkling and feel the breathtaking difference in textures as you arrange your flowers. You create sequences with the colors and shapes, allowing your creativity to shine gently and freely. And then there’s the moment of transformation, as your pressed flowers become a part of your journal cover, solidifying a memory in a unique way.
Materials You’ll Need
Gather these simple supplies before you start:
- Fresh flowers (small blooms work best)
- A heavy book (to press flowers)
- Parchment paper (or regular paper for pressing)
- A blank journal or notebook
- Mod Podge or clear-drying glue
- Scissors
- Paintbrush (for applying Mod Podge)
- Craft foam or an old credit card (optional, for spreading glue)
- Wax paper (for preventing sticking during the drying process)
Each of these materials is easy to find and often found around your home. Fresh flowers will bring the essence of nature directly to your craft, so consider your local environment or garden as the first place to look.
Step-by-Step Directions
-
Choose Your Flowers
Select small, flat flowers like pansies, daisies, or forget-me-nots. Look for vibrant colors and interesting shapes that speak to you. Feel the smooth surfaces and breathe in the fresh scent.
-
Press the Flowers
Place your chosen flowers between two sheets of parchment paper. Open your heavy book and insert the parchment-covered flowers inside. Close the book carefully, ensuring even pressure, and set it aside in a quiet place for about a week. -
Prepare Your Journal
While the flowers press, enjoy your blank journal. Feel its sturdy cover and smooth pages. Use this time to think about how you want your pressed flowers to be arranged. -
Arrange the Flowers
Take the pressed flowers out and gently peel them from the parchment paper. Lay them out on the cover of your journal. Experiment with the placement until it feels just right, allowing your intuition to guide you. -
Glue the Flowers
Once content, carefully brush a thin layer of Mod Podge onto the back of each flower and press them onto your journal cover. Move slowly; take in the textures and colors, grounding your choices in the present. -
Seal the Cover
After arranging all the flowers, apply a light layer of Mod Podge over the entire cover. This creates a protective seal and enhances the flowers’ colors. Use a gentle touch, and enjoy the smooth brush against the surface. -
Let It Dry
Set your journal flat on wax paper in a dry spot. Watch as the Mod Podge dries clear, taking a moment to admire the pressed flowers. You can feel the anticipation as they bond with the cover, transforming it into something uniquely yours. -
Finish and Enjoy
Once dry, your Pressed Flower Journal Cover is ready to use. Flip through the pages and run your fingers over the flowers, feeling the texture of your creation and appreciating your effort.
Enjoying the Finished Piece
Your Pressed Flower Journal Cover transforms not just the look of your journal, but the entire experience of using it. Each time you open it to write, sketch, or document your thoughts, you bring a piece of nature into your daily routine, inviting a moment of calm reflection.
You may find yourself drawn to write in soft, quiet moments or enjoy doodling while wrapped in a cozy blanket. The beautiful arrangement of flowers serves as a reminder to savor small joys and embrace simplicity. Each glance at your unique cover can bring back fond memories or inspire fresh ideas.
Your journal becomes a comforting companion, reflecting your inner thoughts and creativity. Display it on a shelf or desk, letting it remind you of your connection to nature and the beauty of mindful crafting.
How to Store or Reuse Pressed Flower Journal Cover
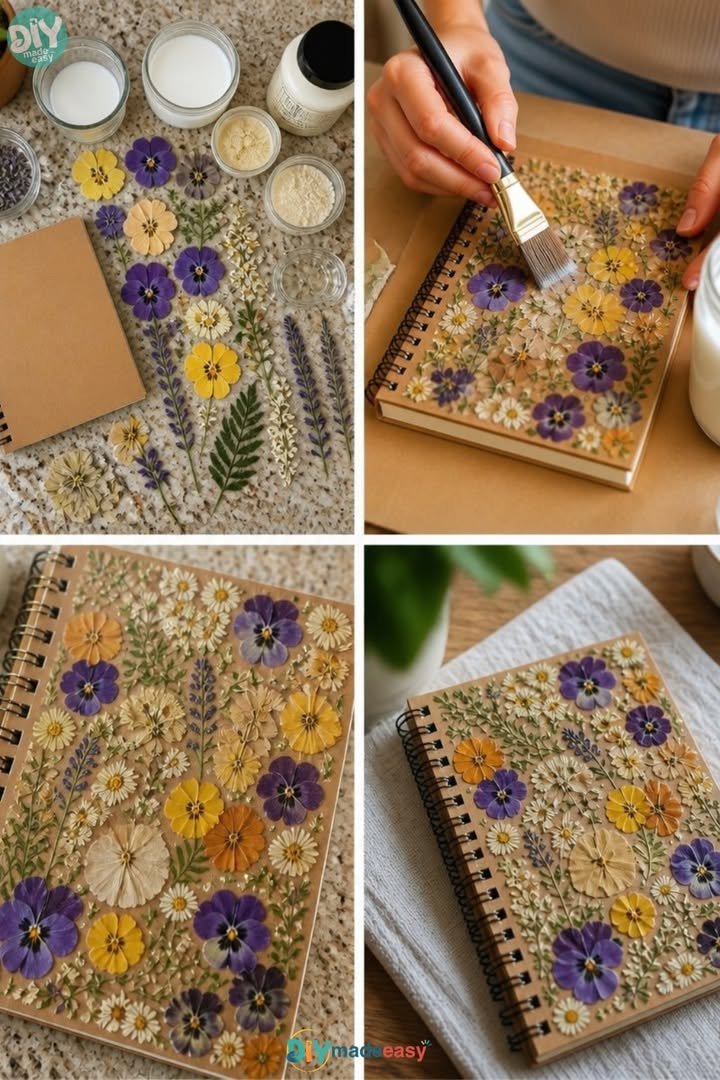
To keep your Pressed Flower Journal Cover looking lovely for years, store your journal in a dry place, away from direct sunlight. This helps preserve the colors of the pressed flowers and prevents fading.
If you find that you’re finished using this journal, consider reusing it for another purpose. You might transform it into a scrapbook, a gift journal, or even a recipe book. The sturdy cover and pressed flowers lend themselves beautifully to any new journey you choose.
Gentle Tips & Variations
-
Change Up the Flowers
Explore different flowers for unique textures and colors. Wildflowers, dried blooms, or even leaves can add interesting variations to your design. -
Add Colorful Backgrounds
Instead of a plain journal cover, consider adding painted patterns or stenciled designs behind your flowers to enhance the overall look. -
Use Transparent Paper
Try layering flowers between transparent paper for a floating effect. This technique can create a stunning visual that melds nature with your creativity. -
Create a Series
Consider making multiple journals, each with different seasonal flowers. Document your thoughts, drawings, or observations throughout the year, leading to a charming collection. -
Gift Your Creation
Share your pressed flower creations as gifts. Personalize each journal cover for loved ones, letting them feel the warmth and mindfulness of your creative process.
FAQs About Pressed Flower Journal Cover
Can I use dried flowers instead of fresh ones?
Absolutely! Dried flowers create an equally lovely effect. Just ensure they are arranged carefully to avoid breaking during the gluing process.
How do I press thicker flowers, like roses?
For thicker flowers, slice them in half or flatten them with a heavy press before placing them in the book. This ensures they dry evenly and fit neatly on the cover.
Can I add embellishments, like glitter or sequins?
Certainly! If you feel inspired, adding light embellishments can enhance your design. Just make sure they complement the beauty of the pressed flowers.
How do I clean the Mod Podge from my brushes?
Clean your brushes in warm water while the Mod Podge is still wet. For dried Mod Podge, soaking the brushes in warm water can help loosen the residue.
A Gentle Note Before You Go
As you wrap up your journey of making a Pressed Flower Journal Cover, take a moment to reflect on the beauty of the process. Every step was filled with intention and connection, weaving your creativity with nature’s grace.
Embrace this experience not only for the lovely journal in your hands but for the peaceful moments spent crafting. Each time you use or see your journal, let it remind you to pause, breathe, and appreciate the unique story you’ve created. This is your cozy contribution to the world, a piece of art that nourishes both your spirit and the memory of the flowers you’ve lovingly pressed.
Print
Pressed Flower Journal Cover
- Total Time: 15 minutes + pressing time
- Yield: 1 journal cover
- Diet: N/A
Description
A mindful craft project that transforms fresh flowers into a beautiful journal cover.
Ingredients
- Fresh flowers (small blooms work best)
- A heavy book (to press flowers)
- Parchment paper (or regular paper for pressing)
- A blank journal or notebook
- Mod Podge or clear-drying glue
- Scissors
- Paintbrush (for applying Mod Podge)
- Craft foam or an old credit card (optional, for spreading glue)
- Wax paper (for preventing sticking during the drying process)
Instructions
- Choose your flowers.
- Press the flowers.
- Prepare your journal.
- Arrange the flowers.
- Glue the flowers.
- Seal the cover.
- Let it dry.
- Finish and enjoy.
Notes
Store your journal in a dry place to preserve the colors of the pressed flowers.
- Prep Time: 15 minutes
- Cook Time: 0 minutes
- Category: Craft
- Method: Crafting
- Cuisine: N/A