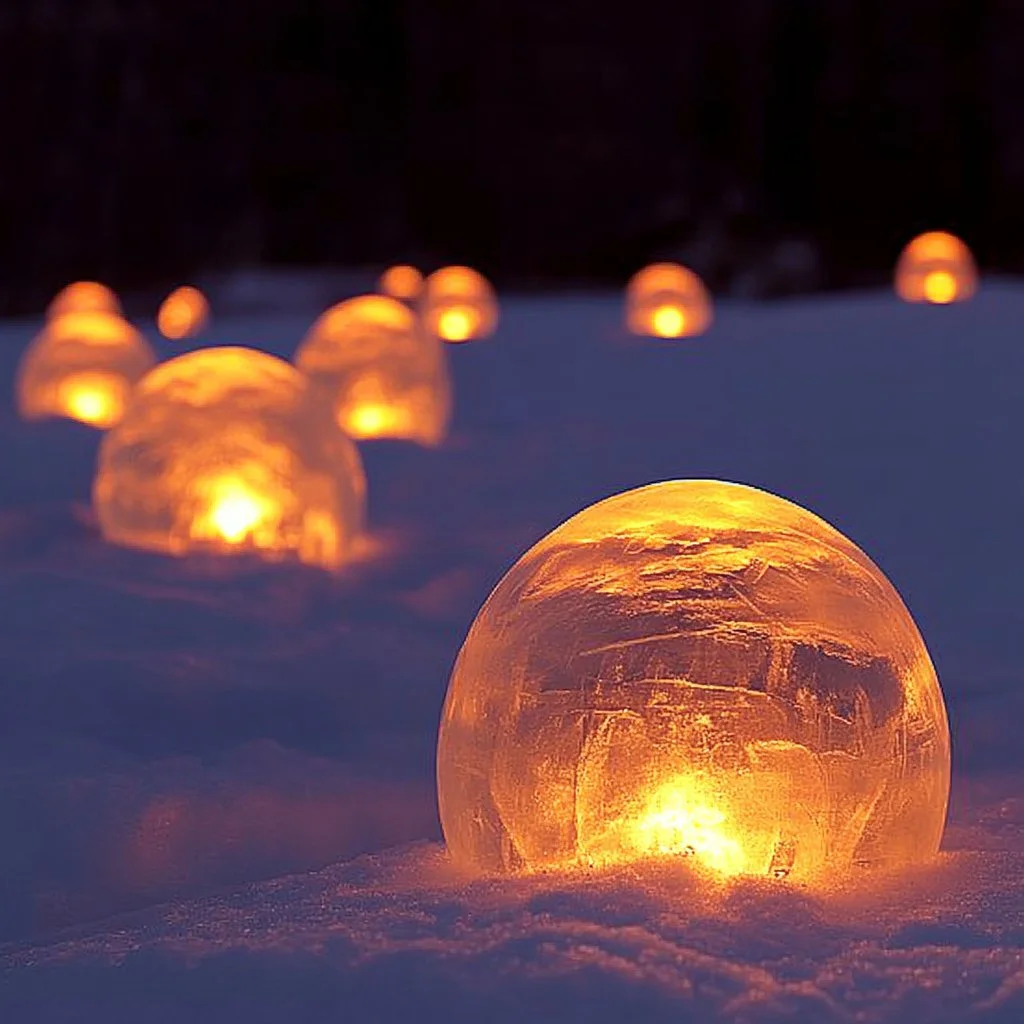
Creating ice luminaries can transform your winter nights into a magical wonderland. Whether you’re looking to beautify your garden, decorate for a special occasion, or simply enjoy a cozy evening ambiance, these delicately illuminated ice structures are a delightful project. As the ice glows in the dim light, it creates a soothing atmosphere, perfect for gatherings or intimate moments. Plus, this craft is simple enough for the whole family to engage in, making it a great way to bond while unleashing your creativity. Grab your materials and get ready to make some stunning ice luminaries!
Why You’ll Love This Ice Luminaries:
- Easy and Fun: A straightforward project suitable for all ages.
- Unique Decor: Offers a special touch to any event or atmosphere.
- Natural Aesthetics: Employs natural elements you can find outside.
- Customizable: Personalize with different shapes and additions.
- Eco-Friendly: Made from water, it doesn’t contribute to waste.
Materials:
- Clean, empty container (plastic or glass)
- Water
- Natural elements (leaves, berries, flowers)
- A larger container filled with ice or snow (if needed)
- Tealight candles or LED tea lights
Full Step-by-Step:
Preparing the Containers:
- Select Your Containers: Choose various sizes for an appealing arrangement.
- Fill with Water: Pour water into the container until it’s about halfway full.
- Add Natural Elements: Place your chosen plants and flowers inside the water.
Freezing:
- Create a Freeze Base: Place your container inside a larger one filled with more water or ice to support the freezing process.
- Let it Freeze: Leave your setup outside or in the freezer for several hours, ideally overnight.
Unmolding:
- Check for Complete Freezing: Ensure the ice is solid; it should feel firm all around.
- Remove Ice from Container: Gently pull the container away or run it under lukewarm water for a few seconds to loosen.
Adding Light:
- Place a Light Source: Put a tealight candle or LED light inside the hollowed-out ice.
Tips & Variations:
- Customize Your Luminaries: Experiment with different colors and shapes of natural elements.
- Layering: For a more intricate design, freeze layers gradually with different items.
- Lighting Alternatives: Use colored LED lights for an enchanting glow.
- Create Icicle Edges: Dip the edges in warm water to create a decorative drip finish.
Frequently Asked Questions:
Q1: What if the ice doesn’t come out of the container?
A1: Try warming the outer container with warm water or gently tapping it to release the ice.
Q2: Can I use food coloring in the water?
A2: Yes! Adding food coloring can create beautifully colored luminaries.
Q3: How long do the luminaries last?
A3: Depending on the weather, they can last a few hours to a couple of days.
Q4: Can I use electric lights instead of candles?
A4: Absolutely! LED lights are safer and provide longer-lasting illumination.
Suggestions:
- Combine multiple luminaries of varying heights for a stunning display.
- Use on pathways or in gardens to guide guests during evening events.
- Experiment by creating themed luminaries for holidays—think red and green for Christmas!
Final Thoughts
Ice luminaries are a perfect way to add a touch of charm to your space. We hope you enjoy making and displaying your own versions of this delightful craft. Please share your creations or leave a comment below about your experience!
Print
Ice Luminaries
- Total Time: 490 minutes
- Yield: Varies
- Diet: N/A
Description
Transform your winter nights with beautiful ice luminaries, perfect for adding a magical ambiance to any occasion.
Ingredients
- Clean, empty container (plastic or glass)
- Water
- Natural elements (leaves, berries, flowers)
- A larger container filled with ice or snow (if needed)
- Tealight candles or LED tea lights
Instructions
- Select your containers in various sizes for an appealing arrangement.
- Fill the selected containers with water about halfway full.
- Add natural elements inside the water.
- Place your container inside a larger one filled with more water or ice to support freezing.
- Leave it outside or in the freezer for several hours, ideally overnight.
- Check if the ice is solid and feels firm all around.
- Gently pull the container away or run it under lukewarm water to loosen the ice.
- Place a tealight candle or LED light inside the hollowed-out ice.
Notes
Customize your luminaries by experimenting with different natural elements, colors, and shapes. Use LED lights to create a safer light source.
- Prep Time: 10 minutes
- Cook Time: 480 minutes
- Category: Craft
- Method: Crafting
- Cuisine: N/A
Nutrition
- Serving Size: N/A
- Calories: 0
- Sugar: 0g
- Sodium: 0mg
- Fat: 0g
- Saturated Fat: 0g
- Unsaturated Fat: 0g
- Trans Fat: 0g
- Carbohydrates: 0g
- Fiber: 0g
- Protein: 0g
- Cholesterol: 0mg

