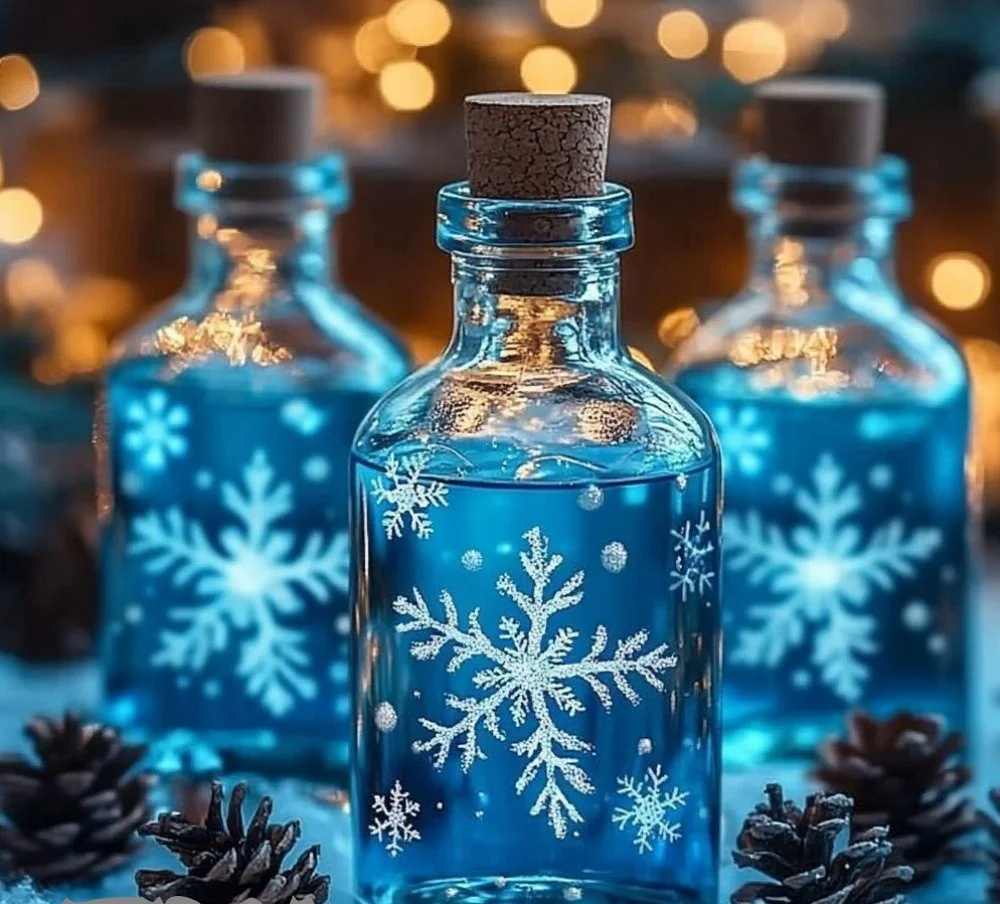
Winter isn’t just a season; it’s an experience filled with sensory delights. Imagine cozying up next to the fireplace, sipping a warm drink, and engaging your imagination through beautiful winter sensory bottles. These sensory bottles capture the essence of winter in a captivating way, making them perfect for both adults and children alike. They’re not only visually stunning but also serve as a soothing activity that can quiet the mind and stimulate creativity. Whether you’re using them for play, decoration, or relaxation, these DIY sensory bottles can transform any space into a winter wonderland. Let’s dive into creating your own winter sensory bottles that are bound to bring joy and comfort.
Why You’ll Love This Winter Sensory Bottles
- Stress Relief: The gentle movement of materials in bottles can have a calming effect.
- Visual Stimulation: Each bottle showcases the beauty of winter with festive and serene colors.
- Creative Expression: Customize your bottles to reflect your own winter theme.
- Engaging Activity: Great for kids’ fine motor skills as they shake and explore each bottle.
- Decorative Piece: Use them as winter-themed décor to brighten up your home.
Materials
- Clear plastic or glass bottles with lids (e.g., water bottles, mason jars)
- Glitter (white, blue, or silver for a winter effect)
- Artificial snow or white pom poms
- Liquid (water, clear gel, or baby oil)
- Food coloring (optional, blue or icy shades)
- Small winter-themed items (miniature pinecones, fake snowflakes, etc.)
- Funnel (for easy filling)
- Adhesive (optional, to secure the lids)
Step-by-Step Instructions
1. Prepare Your Bottles
- Clean your bottles: Ensure they are free of any residue.
- Choose the base: Fill the bottles about 1/3 full with your chosen liquid (water, baby oil, or gel).
2. Add Your Sensory Elements
- Incorporate glitter: Pour in a few tablespoons of glitter to mimic frost or snowflakes.
- Add artificial snow: Scoop in a generous amount of artificial snow or white pom poms for texture.
- Include winter decorations: Drop in pinecones, sprigs of evergreen, small ornaments, or fake snowflakes.
3. Finish the Bottle
- Top off the liquid: Fill the rest of the bottle with more liquid, leaving a little space at the top.
- Color it up (optional): Add a few drops of food coloring if you desire a colored effect.
- Seal the lid: Secure the lid tightly. If desired, use adhesive to prevent leaking.
4. Enjoy the Magic
- Shake and observe: Turn the bottle upside down to watch the glitter swirl and settle.
- Display: Place your sensory bottles in various locations for added winter charm.
Tips & Variations
- Color Theme: Experiment with different color palettes to create custom themes (e.g., red and green for Christmas).
- Scented Versions: Add a couple of drops of essential oils (like peppermint or pine) for a fragrant experience.
- Layering Technique: Instead of mixing everything in together, layer elements for a visually stunning effect.
- Larger Bottles: Create larger sensory containers using two-liter soda bottles for more impact.
Frequently Asked Questions
Q1: Can I use glass bottles for this project?
A: Yes, but be cautious with children around glass. Plastic bottles are safer for young kids.
Q2: What can I substitute if I don’t have artificial snow?
A: You can use white rice, cotton balls, or even flour as alternatives for a snowy effect.
Q3: How long will the sensory bottles last?
A: As long as sealed well, sensory bottles can last indefinitely. Just avoid exposure to direct sunlight.
Q4: What should I do if my glitter clumps together?
A: Use glycerin mixed with water to keep glitter suspended better and reduce clumping.
Serving Suggestions or Pairings
Pair your winter sensory bottles with hot cocoa, gingerbread cookies, or a cozy scarf for a delightful winter activity. They’re perfect for quiet afternoons or as a festive centerpiece during gatherings.
Final Thoughts
Making winter sensory bottles is both easy and rewarding, allowing you to create a personalized touch for your winter décor or sensory activities. We would love to see your versions, so feel free to share photos or leave a comment on how your sensory bottles turned out! Embrace the magic of winter and enjoy the whimsy of your creations.
Print
Winter Sensory Bottles
- Total Time: 15 minutes
- Yield: Varies by bottle size
- Diet: N/A
Description
Create enchanting winter sensory bottles filled with glitter, artificial snow, and winter-themed items for stress relief and visual stimulation.
Ingredients
- Clear plastic or glass bottles with lids
- Glitter (white, blue, or silver)
- Artificial snow or white pom poms
- Liquid (water, clear gel, or baby oil)
- Food coloring (optional, blue or icy shades)
- Small winter-themed items (miniature pinecones, fake snowflakes, etc.)
- Funnel
- Adhesive (optional)
Instructions
- Prepare your bottles: Clean and fill them about 1/3 full with your chosen liquid.
- Add sensory elements: Pour in glitter, artificial snow, and winter decorations like pinecones and fake snowflakes.
- Finish the bottle: Top off with more liquid, add food coloring if desired, and seal the lid tightly.
- Enjoy the magic: Shake the bottle and display it for added winter charm.
Notes
Experiment with color themes, add essential oils for scent, or use different sizes of bottles for variety.
- Prep Time: 15 minutes
- Cook Time: 0 minutes
- Category: Crafts
- Method: DIY
- Cuisine: N/A
Nutrition
- Serving Size: 1 bottle
- Calories: Varies by ingredients
- Sugar: 0g
- Sodium: 0mg
- Fat: 0g
- Saturated Fat: 0g
- Unsaturated Fat: 0g
- Trans Fat: 0g
- Carbohydrates: 0g
- Fiber: 0g
- Protein: 0g
- Cholesterol: 0mg

