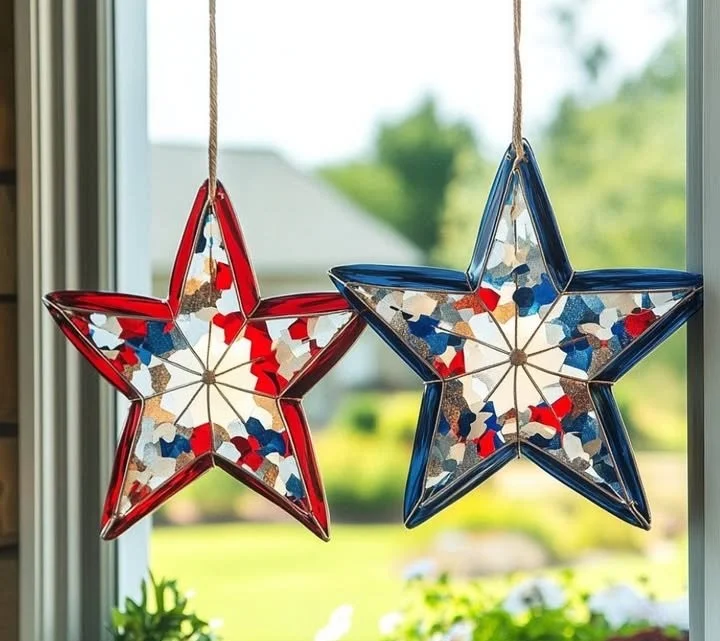
Creating beautiful star suncatchers at home is a wonderful way to brighten up your space and add a personal touch to your décor. This DIY project not only provides an opportunity for creativity and artistic expression but also results in a stunning addition to your windows. These suncatchers catch the sunlight, casting colorful reflections in your home and bringing a sense of warmth and joy to your environment. Whether you’re looking for a fun activity with the kids or simply want to engage your artistic side, these star suncatchers are the perfect choice. In this guide, we’ll walk you through the materials needed, step-by-step instructions, and tips to help you customize your suncatcher to reflect your unique style.
Why You’ll Love This Star Suncatchers
- Colorful Displays: Transform sunlight into vibrant colors that dance across your walls.
- Simple and Fun: Easy to make, making it a perfect project for all ages.
- Customizable: Personalize your suncatchers with different colors and designs.
- Eco-Friendly: Use sustainable materials and promote creativity in a green way.
- Great Gift Idea: Create unique, handmade gifts for friends and family.
- Enhances Home Décor: Adds a cheerful and artistic element to your living spaces.
Materials
- Clear plastic or glass sheets
- Water-based resin or Mod Podge
- Food coloring or acrylic paint
- Paintbrushes or droppers
- Craft knife or scissors
- Hole punch
- String or fishing line for hanging
- Wax paper
- Mixing container
- Plastic gloves (for mess-free handling)
Step-by-Step Instructions
Prepare Your Workspace
- Begin by laying down wax paper to protect your surface.
- Gather all materials for easy access.
Mix Your Colors
- In a mixing container, combine the resin or Mod Podge with your chosen colors.
- Use a paintbrush or dropper to blend colors gently, creating unique effects.
Create Star Shapes
- Cut the plastic or glass sheets into star shapes—feel free to use a template for precision.
- If you’re using a craft knife, ensure you’re careful and follow safety precautions.
Applying the Mixture
- Use the paintbrush or dropper to apply the colored mixture onto one side of the star shape.
- Experiment with layering different colors to achieve a textured look.
Add Holes for Hanging
- Once the mixture is applied, use a hole punch to make a small hole at the top of each star for hanging.
Let it Cure
- Allow your suncatchers to cure completely as per the product instructions. This usually takes a few hours to overnight.
Hang and Enjoy!
- String the stars onto fishing line or string, then hang them in a sunny window. Watch as they transform your space with colorful light!
Tips & Variations
- Customize Colors: Feel free to mix different shades or use glitter for added sparkle.
- Seasonal Themes: Create suncatchers that reflect different seasons or holidays by altering shapes and colors.
- Layered Effects: Experiment with multiple layers of colors to create depth.
- Nature-Inspired Designs: Incorporate pressed flowers or leaves between layers for a natural touch.
Frequently Asked Questions
1. Can I use other materials besides glass or plastic?
Yes! You can also use clear cellophane or even transparent packaging materials for a similar effect.
2. How do I clean my suncatchers once they are made?
Use a soft, damp cloth to gently wipe the surface of the suncatchers. Avoid using harsh chemicals.
3. What should I do if my mixture doesn’t cure properly?
Ensure you follow the mixing and curing instructions carefully. If it’s still not curing, it may be due to high humidity or incorrect proportions.
4. Can kids participate in this project?
Absolutely! This project is perfect for kids with adult supervision, especially when handling scissors and craft knives.
Serving Suggestions or Pairings
Pair your suncatchers with other DIY projects, such as homemade wind chimes or painted flower pots to create a cohesive and charming outdoor or indoor display. For a lovely afternoon, enjoy a refreshing lemonade or iced tea while crafting!
Final Thoughts
Making your own star suncatchers is not just a creative endeavor; it’s an enjoyable way to engage with family and friends. The satisfaction of seeing your artistic creation fill your space with color and light is truly rewarding. We encourage you to share your versions or leave a comment below with your thoughts, variations, and any tips you may have discovered along the way! Happy crafting!
Print
DIY Star Suncatchers
- Total Time: 240 minutes
- Yield: 4 suncatchers
- Diet: N/A
Description
Brighten up your space with beautiful DIY star suncatchers that catch sunlight and cast colorful reflections.
Ingredients
- Clear plastic or glass sheets
- Water-based resin or Mod Podge
- Food coloring or acrylic paint
- Paintbrushes or droppers
- Craft knife or scissors
- Hole punch
- String or fishing line for hanging
- Wax paper
- Mixing container
- Plastic gloves (for mess-free handling)
Instructions
- Prepare Your Workspace: Lay down wax paper to protect your surface and gather all materials.
- Mix Your Colors: In a mixing container, combine the resin or Mod Podge with your chosen colors.
- Create Star Shapes: Cut the plastic or glass sheets into star shapes.
- Applying the Mixture: Use the paintbrush or dropper to apply the colored mixture onto one side of the star shape.
- Add Holes for Hanging: Use a hole punch to make a small hole at the top of each star.
- Let it Cure: Allow your suncatchers to cure completely.
- Hang and Enjoy: String the stars onto fishing line or string and hang them in a sunny window.
Notes
Customize colors with glitter or seasonal themes for different occasions. Ensure children have adult supervision when using sharp tools.
- Prep Time: 30 minutes
- Cook Time: 0 minutes
- Category: Craft
- Method: Crafting
- Cuisine: Artisan
Nutrition
- Serving Size: 1 suncatcher
- Calories: 0
- Sugar: 0g
- Sodium: 0mg
- Fat: 0g
- Saturated Fat: 0g
- Unsaturated Fat: 0g
- Trans Fat: 0g
- Carbohydrates: 0g
- Fiber: 0g
- Protein: 0g
- Cholesterol: 0mg

