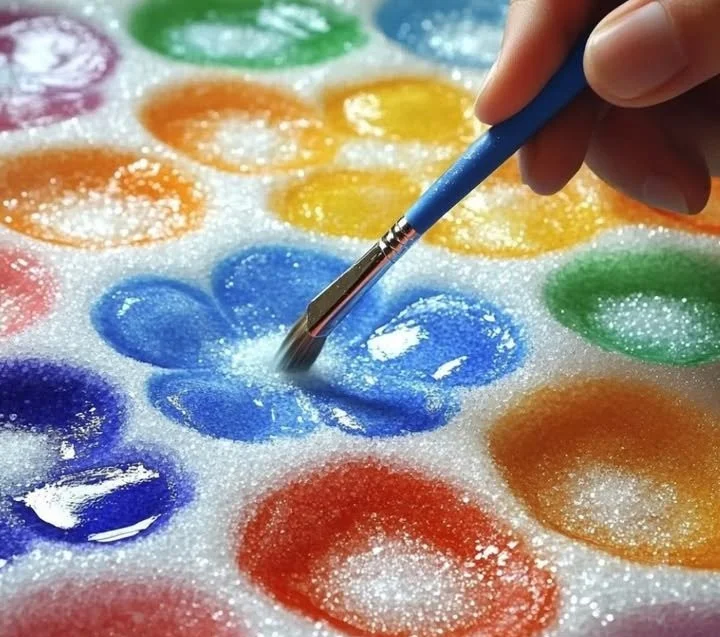
Salt painting is a delightful and creative activity that combines art with sensory exploration for kids. This hands-on craft is not just about creating vibrant masterpieces; it also introduces young artists to basic scientific concepts while engaging their fine motor skills. The process involves using a simple salt and glue mixture that, when painted over with colorful watercolors, results in mesmerizing textures and bright colors that captivate children’s imaginations. Whether you’re looking for a fun way to spend a rainy afternoon or an engaging educational project, salt painting is perfect for fostering creativity while allowing kids to experience and enjoy the beauty of art.
Why You’ll Love This Salt Painting for Kids
- Sensory Experience: Enhances tactile skills as children work with salt and glue.
- Creativity Boost: Encourages free expression through colors and patterns.
- STEM Learning: Introduces basic concepts of chemistry and color mixing.
- Low-Cost Materials: Utilizes simple supplies easily found at home or school.
- Easy for All Ages: Adaptable for various developmental stages, making it suitable for toddlers to tweens.
- Minimal Cleanup: Quick to set up and easy to clean up afterward.
Materials
- White school glue
- Table salt
- Cardstock or thick paper
- Watercolor paints
- Brushes (various sizes)
- Small containers for mixing
- Optional: Food coloring (for colored glue)
Step-by-Step Instructions
Prepare Your Canvas
- Create a Design: Use a pencil to lightly sketch a simple design or pattern on your cardstock.
- Apply Glue: Squeeze white school glue over the pencil lines, creating raised edges.
Add Salt
- Sprinkle Salt: Immediately sprinkle salt over the wet glue, covering the entire area. The glue should be wet enough for the salt to stick well.
- Shake Off Excess: Gently shake off any excess salt back into the container to avoid waste.
Painting Time
- Prepare Watercolors: In small containers, mix your watercolors with water until the desired consistency is achieved.
- Paint with Care: Using a brush, touch the colors to the salt. Watch as the colors spread into the salt, creating unique textures and blends.
Dry and Display
- Let Dry: Allow your salt paintings to dry completely before displaying them. This may take a few hours.
- Showcase: Hang up your artwork or display it in a shadow box!
Tips & Variations
- Colorful Glue: Add a few drops of food coloring to the glue before applying it to create colored salt paintings.
- Using Different Materials: Experiment with different textures by using sand or textured paper along with the salt.
- Themed Projects: Create seasonal or holiday-themed art by molding your designs around recognizable shapes (like pumpkins or snowflakes).
- Bigger Art: Work on a larger piece of cardboard for more expansive designs.
Frequently Asked Questions
Q: Can I use different types of glue?
A: While white school glue is best for adhering salt, you can experiment with other liquid glues, though they may not yield the same texture.
Q: What if my glue dries before I add salt?
A: If the glue dries, you can simply add a bit more glue and quickly apply the salt again to achieve your desired effect.
Q: Is this art safe for young children?
A: Yes, all materials used in salt painting are safe for children; however, adult supervision is advised to prevent ingestion of materials.
Q: Can we use other mediums besides watercolors?
A: Absolutely! You can try using liquid food coloring or diluted liquid acrylics for a different artistic effect.
Serving Suggestions or Pairings
Pair your salt painting activity with refreshing drinks like lemonade or fruit-infused water. Set up a cozy arts & crafts corner with comfortable seating and snacks like fruit slices or popcorn to keep energy levels high during your creative session.
Final Thoughts
Salt painting for kids is an inspiring and engaging way to blend art with science, promoting a sense of accomplishment as they express themselves creatively. This hands-on activity not only entertains but also teaches valuable skills. We’d love to see your masterpieces! Feel free to share your experiences or leave a comment about your salt painting adventure!
Print
Salt Painting for Kids
- Total Time: 15 minutes
- Yield: 1 beautiful piece of artwork
- Diet: Kid-friendly
Description
An engaging and sensory art activity for kids that combines creativity with scientific exploration using salt and glue.
Ingredients
- White school glue
- Table salt
- Cardstock or thick paper
- Watercolor paints
- Brushes (various sizes)
- Small containers for mixing
- Optional: Food coloring (for colored glue)
Instructions
- Create a Design: Use a pencil to lightly sketch a simple design or pattern on your cardstock.
- Apply Glue: Squeeze white school glue over the pencil lines, creating raised edges.
- Sprinkle Salt: Immediately sprinkle salt over the wet glue, covering the entire area. The glue should be wet enough for the salt to stick well.
- Shake Off Excess: Gently shake off any excess salt back into the container to avoid waste.
- Prepare Watercolors: In small containers, mix your watercolors with water until the desired consistency is achieved.
- Paint with Care: Using a brush, touch the colors to the salt. Watch as the colors spread into the salt, creating unique textures and blends.
- Let Dry: Allow your salt paintings to dry completely before displaying them. This may take a few hours.
- Showcase: Hang up your artwork or display it in a shadow box!
Notes
Consider adding food coloring to glue for a colorful twist and experimenting with different materials for unique textures.
- Prep Time: 15 minutes
- Cook Time: 0 minutes
- Category: Art Activity
- Method: Crafting
- Cuisine: N/A
Nutrition
- Serving Size: 1 child
- Calories: N/A
- Sugar: N/A
- Sodium: N/A
- Fat: N/A
- Saturated Fat: N/A
- Unsaturated Fat: N/A
- Trans Fat: N/A
- Carbohydrates: N/A
- Fiber: N/A
- Protein: N/A
- Cholesterol: N/A

