

Creating a Rainbow Crystal Love Tree brings to mind gentle evenings spent under soft, warm light. Imagine the delicate rustle of crystal beads as they shimmer in the sunlight, catching reflections that dance across your space. There’s a serene comfort in the way the colors blend, each piece contributing to a harmonious whole. This project wraps you in a cloud of calm, encouraging you to slow down and breathe deeply while you work with your hands to craft something beautiful and meaningful.
The Heart Behind This DIY
Creating a Rainbow Crystal Love Tree offers an opportunity to embrace the present moment. Each step encourages mindfulness, inviting you to focus on the textures and colors that surround you. As you string each crystal, consider the gentle shift in energy. The colors of the rainbow resonate with joy, hope, and love, gently reminding you of nature’s beauty and the positive energy it can bring into your life.
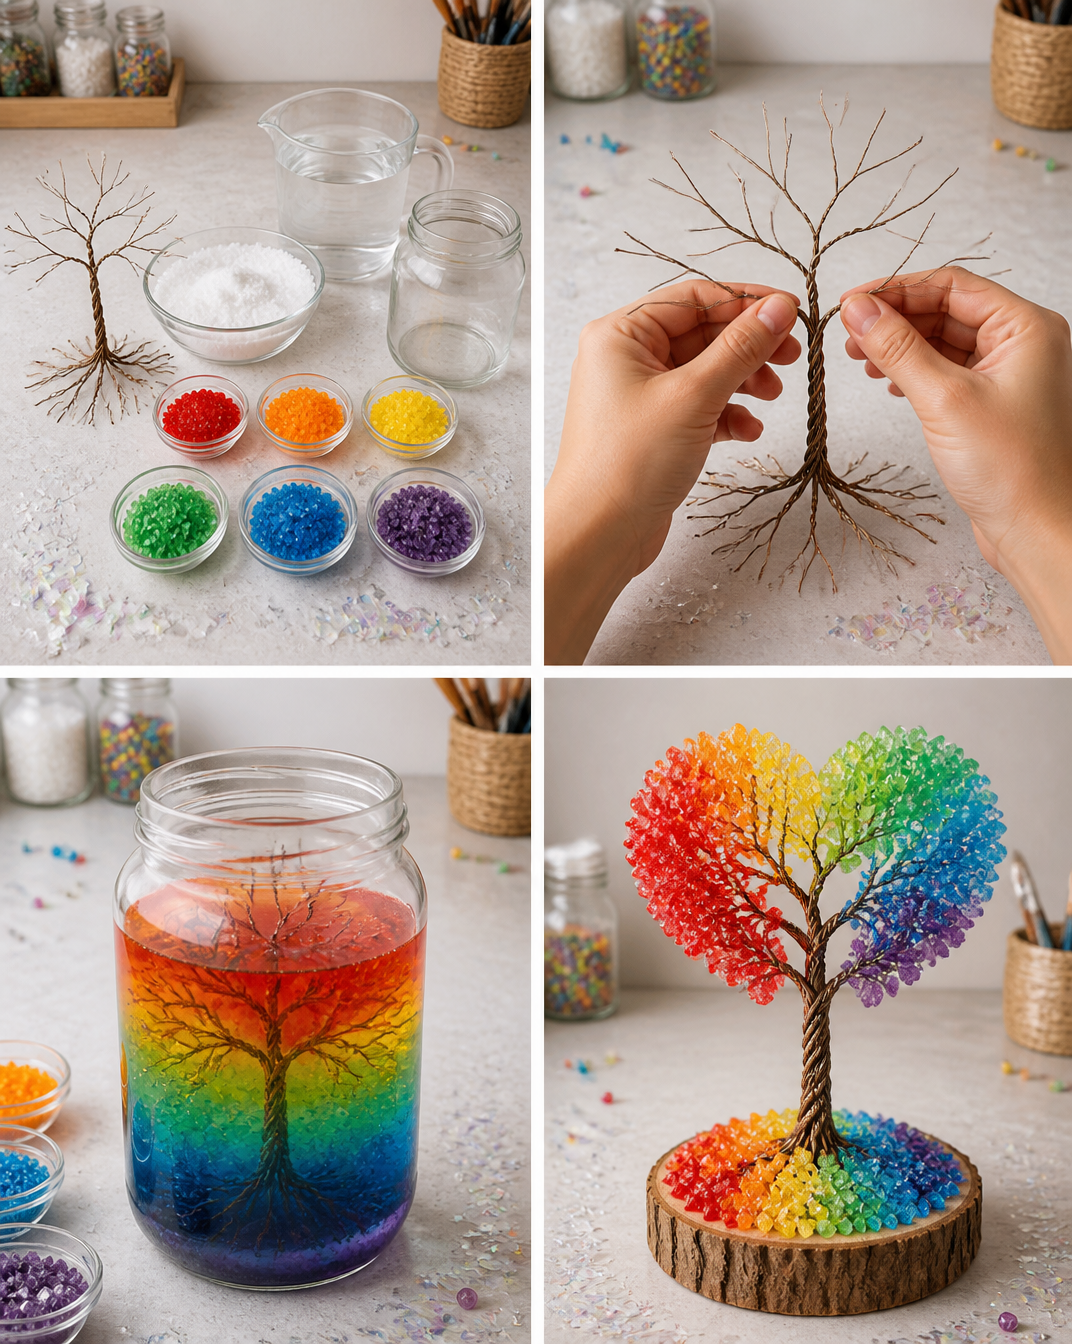
The act of crafting taps into your creativity, fostering a soothing rhythm. You engage your senses as you pick up smooth beads, feeling their coolness against your fingertips. This tactile experience grounds you, allowing your mind to quiet. The soft click of the beads as you thread them one by one becomes a meditative sound, further immersing you into the art of making. By focusing on this simple yet meaningful task, you cultivate a sense of peace and connection not only with your surroundings but also with your inner self.
A Gentle Look at the Process
As you begin the journey of creating your Rainbow Crystal Love Tree, allow yourself to savor the process. Picture gathering your tools and materials, each element serving a purpose in this serene experience. You’ll find a rhythm in your movements, each twist and turn bringing clarity and calm.
The process involves stringing crystals and attaching them to branches, creating a lively yet balanced piece. Listen to the soft sounds of the beads clicking together as they fill the air with a gentle melody. This flow allows you to enter a state of focus where thoughts can drift away, and creativity takes center stage. High and low shades of color blend until your tree becomes a vivid expression of joy and tranquility.
Materials You’ll Need
- Wire or sturdy branches (easy to find at craft stores or in nature)
- Colorful crystal beads (these can be purchased or collected)
- Twine or string (soft and easy to work with)
- Optional embellishments like ribbons or small charms
- A pair of scissors (for any trimming needed)
- Wire cutter (if using thicker branches)
These materials are simple, allowing you to focus on the act of creating rather than hunting for complex items. If you don’t have crystals on hand, consider substituting with colorful glass beads or even natural stones that speak to you.
Step-by-Step Directions
-
Start by cutting your wire or branches to your desired height. Think about how tall you want your tree to be and take your time measuring.
-
Gently begin to attach your twine or string to the top of the branch. A simple knot will do, anchoring your process and establishing your base with care.

-
Pick a bead that draws your attention. Feel its weight in your palm before you thread it onto the twine. Notice the smoothness of the crystal as it slides into place.
-
Continue adding beads, alternating colors as you go. Let the vibrant hues inspire you, mixing your favorites together while enjoying the visual spectacle taking shape.
-
As you reach the end of your branch, secure the beads tightly with another knot. This feels both satisfying and soothing, like wrapping up a comforting moment.
-
Once you’re happy with the beaded section, arrange the branches into a balanced position, ensuring that the crystals create a flowing pattern.
-
Place your finished Rainbow Crystal Love Tree in a well-loved spot in your home, where it can catch and reflect the light. Take a moment to appreciate the fruits of your labor.
Enjoying the Finished Piece
Once your Rainbow Crystal Love Tree stands proudly in your space, it offers more than just a visual delight. Its colors can bring joy and positivity to an area where you seek solitude or creative inspiration. You might find it sitting on your desk as a reminder to pause and take breathers during busy moments.
As sunlight filters through your crystals, it casts playful rainbows around the room, filling the atmosphere with warmth. This gentle light can foster a calm ambiance, perfect for reading, journaling, or simply being with your thoughts. You may even choose to place it at your meditation altar, letting that beauty influence your practice.
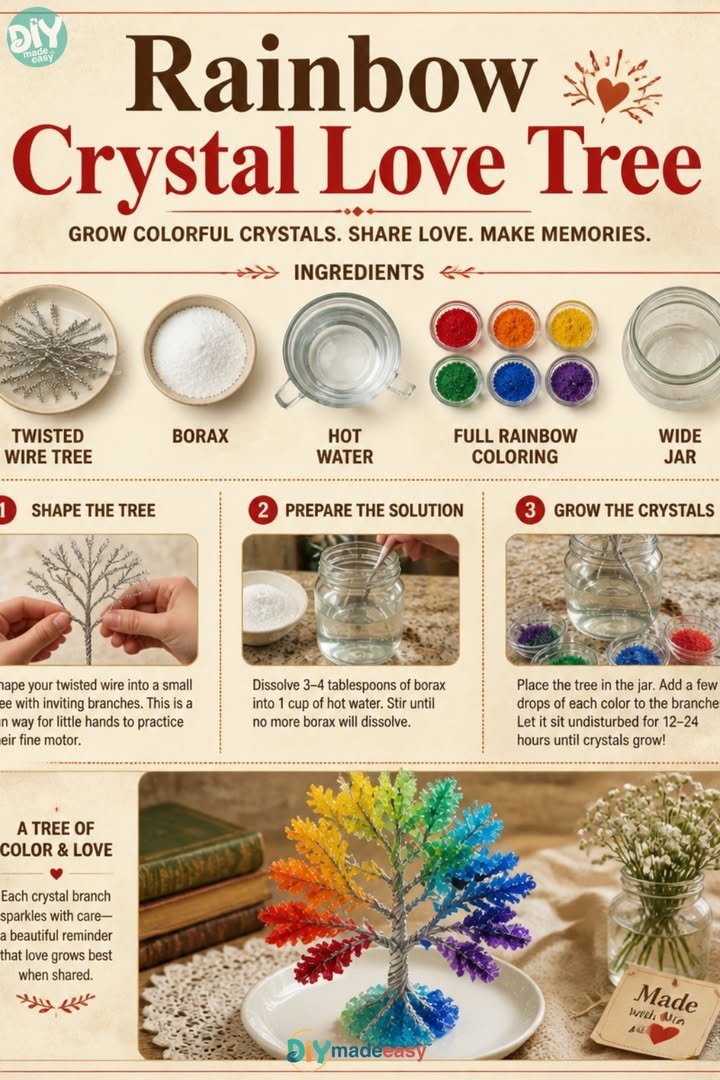
Keeping It for Later
Your Rainbow Crystal Love Tree can bring joy for many seasons to come with simple care. It’s best to keep it in a shaded area where direct sunlight won’t impact the colors over time. Dust it lightly with a soft cloth to maintain its sparkle, allowing the beads to shine bright in their soft, happy hues.
If in time you feel inspired to change or refresh your design, consider swapping out beads or adding more branches to breathe new life into your creation. Each alteration tells a new story, reflecting your evolving creativity.
Gentle Tips & Variations
- Experiment with different bead sizes to create a more varied texture on your tree. Larger beads can add an unexpected, playful element.
- If you are feeling particularly adventurous, try incorporating metallic or reflective beads alongside your colors. The shine can enhance the light effects of your creation.
- Consider personalizing your tree with charms that hold special meaning for you. They can symbolize dreams, memories, or aspirations as they dangle between the crystals.
- Try creating smaller versions for friends or loved ones as gifts. Each tiny tree can carry special wishes and thoughts, making them even more meaningful to the recipient.
- Use natural twigs or branches to give your tree a rustic feel. Nature’s imperfect shapes can add character and charm, enhancing the cozy vibe.
FAQs About Rainbow Crystal Love Tree
What type of crystals should I use?
Feel free to choose any type of colorful crystals that resonate with you. Options can include glass, acrylic, or natural stones like agate, quartz, or jades.
Can I make this project with children?
Certainly! This can be a lovely family project, allowing for soft guidance as they learn about colors and patterns while you create together.
How long does it take to make?
The time varies depending on how intricate you want your design. Savor every moment; it’s less about the clock and more about enjoying the process.
What should I do if a bead falls off?
It’s all part of the journey. Simply thread it back on, adjusting as needed. This can even be an opportunity to reflect on change and creating anew.
Where should I display my Rainbow Crystal Love Tree?
Any place that brings you joy! Consider your workspace, a favorite nook, or as part of a larger decorative arrangement. Let it be a vibrant reminder of your creativity.
A Gentle Note Before You Go
As you wrap up your experience with the Rainbow Crystal Love Tree, take a moment to appreciate the journey. Each bead strung holds a piece of your presence, a gentle reminder to slow down amidst the busyness of life. Celebrate the joy of creating, knowing that every time you look at your tree, it reflects a colorful tapestry of your creativity and calm presence.
Let this experience encourage you to explore further, to find beauty in every moment, and to embrace your creative spirit. The act of making is as significant as the object created, weaving threads of intention and warmth into your daily life. Allow yourself to linger in this cozy space, cultivating mindfulness and inspiration with your own gentle hands.
Print
Rainbow Crystal Love Tree
- Total Time: 90 minutes
- Yield: 1 Rainbow Crystal Love Tree
- Diet: N/A
Description
Craft a beautiful Rainbow Crystal Love Tree that brings joy, hope, and creativity into your space. This meditative DIY project invites you to engage your senses while creating a vibrant piece of art.
Ingredients
- Wire or sturdy branches
- Colorful crystal beads
- Twine or string
- Optional embellishments like ribbons or small charms
- A pair of scissors
- Wire cutter (if using thicker branches)
Instructions
- Start by cutting your wire or branches to your desired height.
- Gently begin to attach your twine or string to the top of the branch.
- Pick a bead that draws your attention.
- Continue adding beads, alternating colors as you go.
- As you reach the end of your branch, secure the beads tightly with another knot.
- Once you’re happy with the beaded section, arrange the branches into a balanced position.
- Place your finished Rainbow Crystal Love Tree in a well-loved spot in your home.
Notes
Keep your Rainbow Crystal Love Tree in a shaded area and dust it lightly to maintain its sparkle. Feel free to swap out beads or add more branches to refresh your design.
- Prep Time: 30 minutes
- Cook Time: 60 minutes
- Category: DIY Craft
- Method: Crafting
- Cuisine: N/A