

As the sunlight filters softly through your window, you may notice how it dances around the room, reflecting off the small bits of color that seem to shimmer and sparkle. Imagine the gentle idea of transforming old CDs into vibrant, glistening mosaic pieces, encircling a simple mirror. This DIY project invites you to embrace a slow, mindful approach, crafting something beautiful and personal. The reflective surfaces catch the light, bringing warmth and a cozy glow to your space. It becomes a peaceful reminder of your creative journey, a moment to pause and reflect both literally and figuratively.
The Heart Behind This DIY
Creating something with your hands has a way of grounding you. When you work with materials like old CDs, you tap into a familiar process that encourages mindfulness. Each intricate piece you cut and place becomes an act of intention, drawing you into the present moment. The cool, smooth surface of the CDs contrasts with the warmth of your hands as you manipulate them, inviting you to listen to the soft crinkle of the plastic when you shape it.
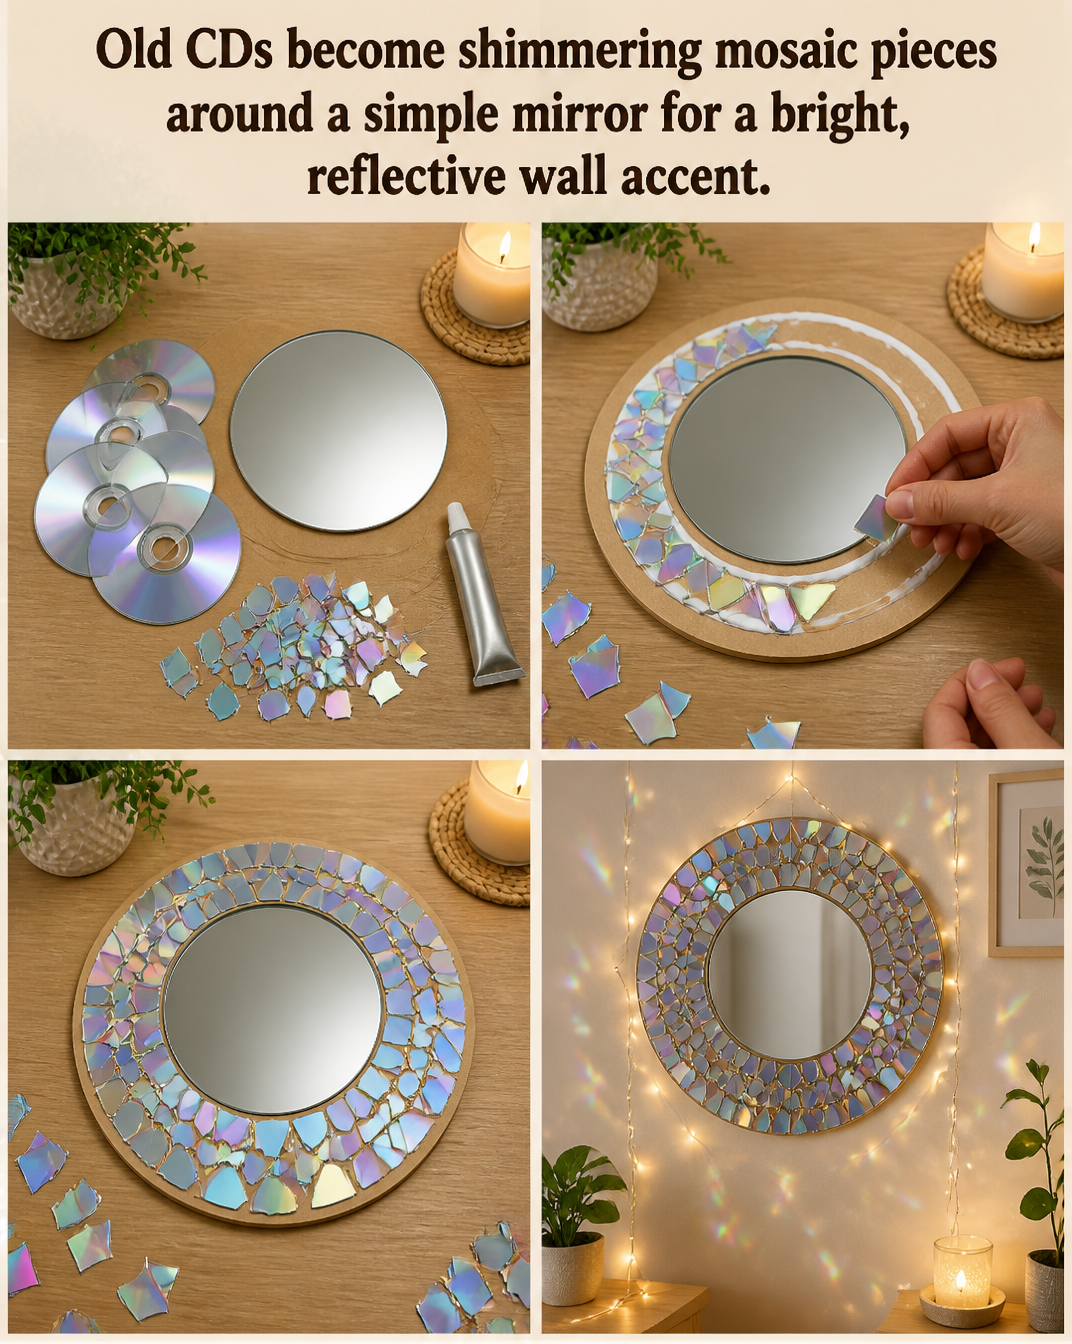
This project offers the joy of reimagining something that may have been forgotten. Instead of discarding those old CDs, which once held music and memories, you breathe new life into them. Each piece reflects not just light, but also your creativity and care. The rhythm of working on this project slows down time for a little while, creating a cozy haven for your thoughts and feelings. Embracing this simple task feels nurturing, allowing you to focus on the subtle beauty around you.
A Gentle Look at the Process
Before starting, imagine the sensory journey that awaits you: the gentle movements of cutting and gluing, the cool texture of the mirror, and the soft sounds of your tools as they come together in a harmonious flow. This project invites you to engage your senses fully as you layer each shimmering piece onto the mirror’s surface.
You will gather materials and begin the progression from ordinary to extraordinary. As you place each bit of CD carefully, you might feel a sense of calm wash over you. Allow yourself to breathe deeply, enjoying the colors as they shift and shimmer, reflecting your creativity. The entire process becomes an artful dance, a balance of movement and stillness.
Materials You’ll Need
- Old CDs (easy to find, perfect for recycling)
- A round mirror (or a mirror of your choice)
- Strong craft glue (or hot glue for quicker adhesion)
- Scissors (to cut CDs)
- A small paintbrush (for spreading the glue)
- Optional: a frame for your mirror (to add a finished touch)
- Optional: decorative elements like beads or stones (for added texture)
Collecting these supplies can feel like gathering the ingredients for a comforting recipe. Each item, even the old CDs, holds a promise of transformation.
Step-by-Step Directions
-
Begin by cleaning the old CDs with a soft cloth to remove any dust or residue. Feel the smoothness as you wipe them clean.
-
Use scissors to cut the CDs into various shapes—triangles, squares, or even freeform pieces. The soft snap of the plastic can be satisfying as you create your mosaic bits.

-
Once you have a variety of shapes, arrange them around your mirror. Play with the layout, shifting the pieces until you find a composition that feels just right.
-
Take your craft glue and use a small paintbrush to apply it to the back of each piece. Feel the coolness of the glue and the texture of the CDs as you prepare to place them.
-
One by one, gently press each CD piece onto the mirror’s surface. Take your time with this step, enjoying the way the pieces catch the light as they layer over one another.
-
Allow your creation to dry thoroughly. This time can be an opportunity to reflect on your project and the joy of transforming something old into something new.
-
If you choose to frame your mirror, carefully slide it into the chosen frame, enhancing the beauty of your finished piece.
Enjoying the Finished Piece
Once complete, your shimmering mirror becomes more than just a decorative item. It can serve as a focal point in a cozy reading nook or a bright accent in your entryway. Every glance at the mosaic pieces captures the playful dance of light, breathing life into the room.
Perhaps place it where you sit with a warm cup of tea or coffee, allowing the reflections to accompany your quiet moment of stillness. Whenever you pass by, let it remind you of the creative journey you embraced during its making.
How to Store or Reuse Old CDs Become Shimmering Mosaic Pieces Around a Simple Mirror for a Bright, Reflective Wall Accent
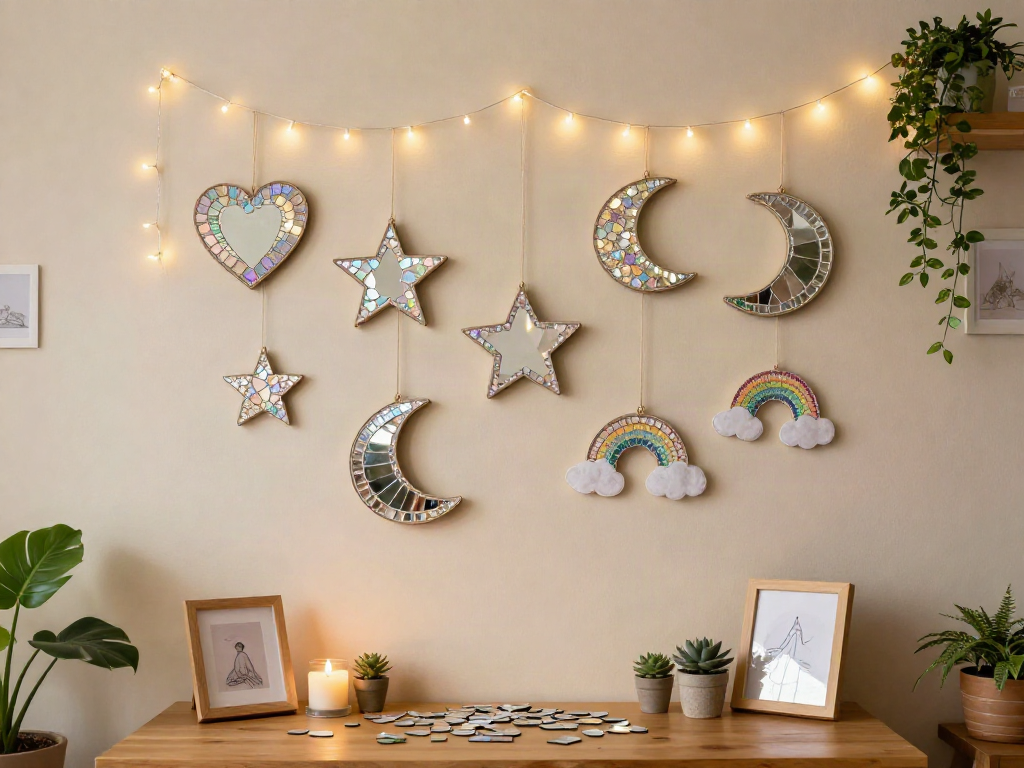
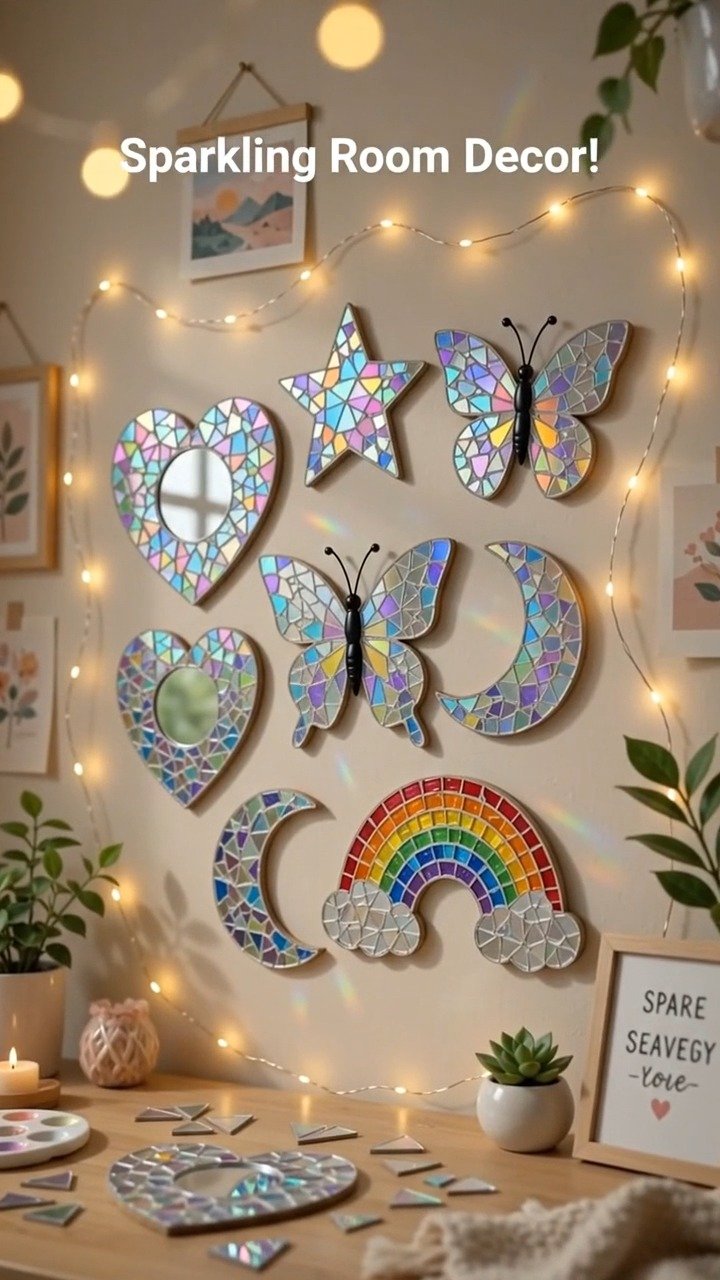
The beauty of this DIY extends beyond its finished form. If you ever feel the need for a change, your mosaic can easily adapt. Consider it a living piece of art. Its reflective beauty can shift with your seasonal decorations or personal style.
When storing the mirror, choose a dry place where it won’t be squished or knocked over. Wrapping it in a soft cloth will protect the delicate surfaces. As your style evolves, feel free to update the mosaic—incorporating new pieces, color swatches, or even personal touches that reflect your current mood.
Gentle Tips & Variations
- Experiment with the shapes of the CD pieces. Larger chunks create a bold look, while tiny pieces offer a delicate appearance.
- Consider painting or decorating the mirror frame to match the colors of your mosaic for a more cohesive design.
- If you’re feeling adventurous, add embellishments like beads or strips of fabric between the CD pieces for extra texture and warmth.
- Challenge yourself to use white or silver CDs for a more minimalist aesthetic while allowing the reflections to take center stage.
Each of these ideas invites you to personalize your piece further, making it uniquely yours without straying too far from your original vision.
FAQs About Old CDs Become Shimmering Mosaic Pieces Around a Simple Mirror for a Bright, Reflective Wall Accent
Q: Can I make this project with my kids?
A: Absolutely! This DIY can be a wonderful family project. Just supervise the cutting, and let their creativity flow in arranging the pieces.
Q: How do I clean the mirror after it’s finished?
A: Gently use a microfiber cloth with a mild glass cleaner to avoid scratching the surface. Enjoy the fresh shine that complements your mosaic.
Q: Is there a way to seal the mosaic for longevity?
A: If you’d like, a clear sealant can be applied over the mosaic. This protects it from dust and enhances the reflective quality, but it’s not necessary for aesthetics.
Q: What if I don’t have old CDs?
A: You can substitute with colorful paper or cardboard. Just remember that the reflective quality will vary, but you can still achieve something lovely.
A Gentle Note Before You Go
As you reflect on your journey through this mosaic project, allow yourself to appreciate the process as much as the final creation. Each step taken with care enriches not just your space, but also your spirit. Your shining mirror holds a world of light and creativity, reminding you that there is beauty in transforming the ordinary into the extraordinary. Breathe in this calm, let it envelop you, and carry this spirit of cozy creativity with you as you continue making your world a little brighter.
Print
DIY Shimmering Mosaic Mirror
- Total Time: 45 minutes
- Yield: 1 decorative mirror
- Diet: Non-Applicable
Description
Transform old CDs into a vibrant mosaic mirror, bringing warmth and creativity to your space with this mindful DIY project.
Ingredients
- Old CDs
- A round mirror
- Strong craft glue
- Scissors
- A small paintbrush
- Optional: A frame for your mirror
- Optional: Decorative elements like beads or stones
Instructions
- Begin by cleaning the old CDs with a soft cloth to remove any dust or residue.
- Use scissors to cut the CDs into various shapes—triangles, squares, or freeform pieces.
- Once you have a variety of shapes, arrange them around your mirror.
- Take your craft glue and use a small paintbrush to apply it to the back of each piece.
- One by one, gently press each CD piece onto the mirror’s surface.
- Allow your creation to dry thoroughly.
- If you choose to frame your mirror, carefully slide it into the chosen frame.
Notes
Feel free to update the mosaic with new pieces or colors to match your decor.
- Prep Time: 15 minutes
- Cook Time: 30 minutes
- Category: Craft
- Method: Crafting