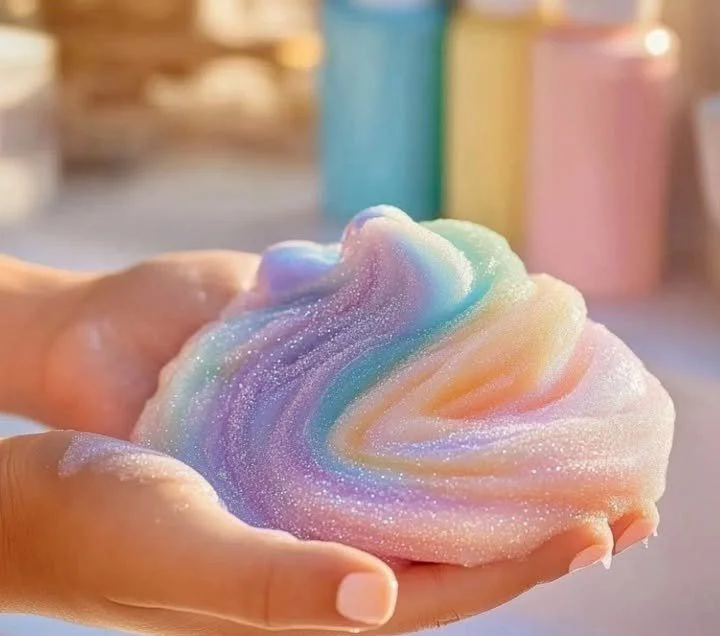
No-Glue Soap Slime
Growing up, I spent countless hours in my grandmother’s kitchen, where the aroma of warm, soapy bubbles often filled the air. It wasn’t just her famous apple pie that captivated me; it was her creativity with everyday items. One summer, she introduced me to a new kind of fun—not just for cooking but for play! We would whip up batches of no-glue soap slime, a delightful project that kept my little hands busy on long afternoons.
As the seasons change and summer gives way to fall, there’s a nostalgic joy in crafting playful recipes. This no-glue soap slime is not just a fun activity; it’s a great way to engage your kids while exploring textures and science together. Plus, it’s perfect for those rainy days when you’re stuck indoors and need a bit of creative sparkle in your life!
So, roll up your sleeves and let’s make this easy, mess-free slime that’s sure to bring smiles to faces of all ages!
Why You’ll Love This No-Glue Soap Slime
- Kid-Approved: Engaging and fun for children of all ages.
- No-Bowl Mess: Minimal cleanup, as it’s a quick, straightforward recipe.
- Sensory Play: Perfect for enhancing tactile skills and creativity.
- Customizable: Add your favorite scents and colors.
- Seasonally Fun: Great for parties, rainy days, or playdates.
Ingredients
- 1 cup liquid soap (like dish soap)
- 1 cup cornstarch
- 1 tablespoon water (optional, for consistency)
- Food coloring (optional)
- Essential oils (optional, for scent)
Step-by-Step Instructions
Prepare Your Work Area
- Choose a clean, flat surface to work on. Spread out some newspaper or a plastic sheet if you’re concerned about mess.
Mix Soap and Cornstarch
- In a mixing bowl, combine 1 cup of liquid soap with 1 cup of cornstarch.
- Stir with a spoon until the mixture begins to clump together.
Add Water (If Necessary)
- If the slime is too thick, gradually add 1 tablespoon of water to adjust the consistency. Mix well until smooth.
Color and Scent It
- If you want colorful slime, add a few drops of food coloring and essential oils. Mix thoroughly until the desired color and scent are achieved.
Knead and Play
- Once combined, knead the slime with your hands until it’s smooth and elastic. It should not stick to your hands or the surface.
Tips & Variations
- Color Variations: Mix in different food colors to create a rainbow of slime.
- Scent Options: Experiment with various essential oils for a more aromatic experience.
- Thickness Adjustment: Use less cornstarch for a more liquid slime and more for a thicker version.
Storage Instructions
- Store the no-glue soap slime in an airtight container at room temperature. For best results, use within a week. Do not refrigerate as it may harden!
Nutritional Information
- Prep Time: 10 minutes
- Total Time: 10 minutes
- Calories per serving: Not applicable (play recipe)
- Servings: Makes about 2 cups of slime
Frequently Asked Questions
1. Can I use any type of soap?
Yes, liquid hand soap or dish soap works well; just avoid gel soaps.
2. How do I fix slime that’s too sticky?
If your slime is sticky, slowly add cornstarch, mixing until the consistency improves.
3. Is this slime safe for children?
Yes, this slime is made from safe ingredients; just supervise younger kids during play.
4. Can I add glitter?
Absolutely! For a fun, sparkly effect, mix in some non-toxic glitter during the color mixing stage.
Serving Suggestions or Pairings
- Enjoy alongside a fun beverage like homemade lemonade or flavored water.
- Pair with some home-baked cookies for a delightful kids’ playdate!
Final Thoughts
This no-glue soap slime is not just a recipe; it’s a wonderful way to create memories with your family while celebrating the joys of crafting. I encourage you to share your silly slime creations in the comments below or let me know your favorite variations! Happy slime-making!

