

The sunlight gently filters through the window, casting soft patterns across a cozy workspace. A sense of quiet anticipation fills the air as you reach for materials that will soon come together in a beautiful creation. The idea of transforming old CDs into a mosaic plant pot stirs an excitement deep within. This Mosaic CD Plant Pot (Luxury Look DIY) is not just a project; it’s an invitation to slow down, breathe, and immerse yourself in the tactile joy of crafting something unique and beautiful.
The Heart Behind This DIY
Creating a Mosaic CD Plant Pot holds a certain charm that invites a gentle pause in your day. As you break the CDs into pieces, the sharp sounds contrast with the comforting texture of the shards, each piece glinting in the light like a tiny jewel. This act of breaking and arranging can feel therapeutic, allowing you to release any day’s tension.
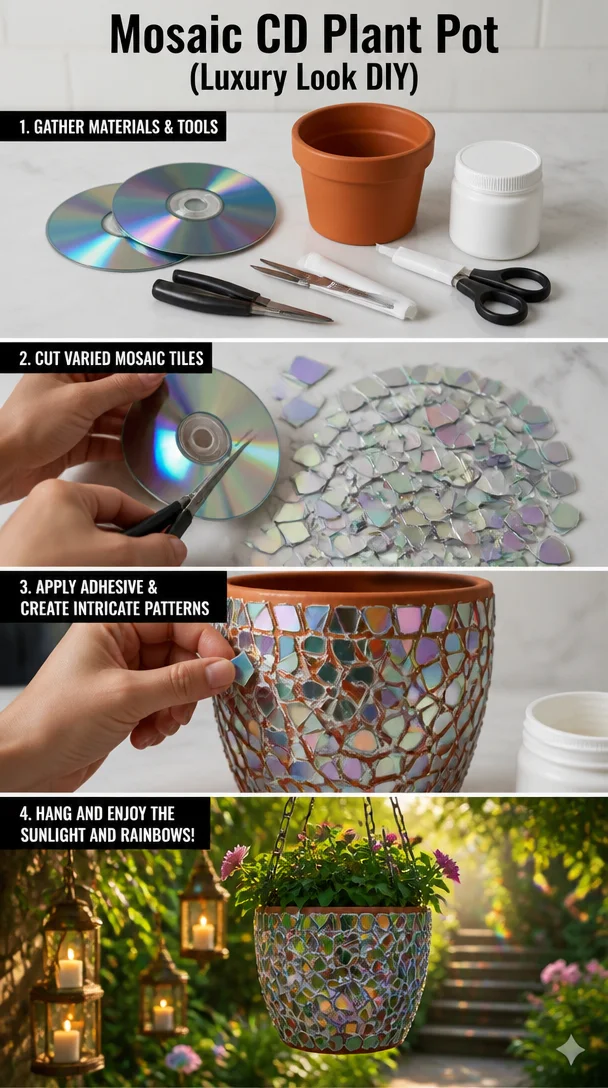
Working with your hands connects you to the present moment. Crafting this pot becomes more than a mere activity—it evolves into a calming ritual. You might catch the scent of the glue as you apply it, the slight stickiness grounding your thoughts. Each piece of glass-like material rests against the others, reminding you that beauty can emerge from discarded items, making this both an act of creation and healing.
A Gentle Look at the Process
The journey of making a Mosaic CD Plant Pot unfolds in a soothing rhythm, a dance between your hands and the materials. You start with the tactile experience of breaking CDs, and the sound is oddly satisfying—a crisp crack that feels freeing. Arranging the pieces is like piecing together a puzzle, where colors and textures meld intentionally.
As you layer the mosaic, you’ll find your focus sharpening. The world outside fades away, and the gentle repetition of the task becomes a meditative practice. Each stroke of glue feels deliberate and calming, inviting you to slow down and enjoy the movement of your hands. You may feel a sense of accomplishment grow with each piece you set in place.
Materials You’ll Need
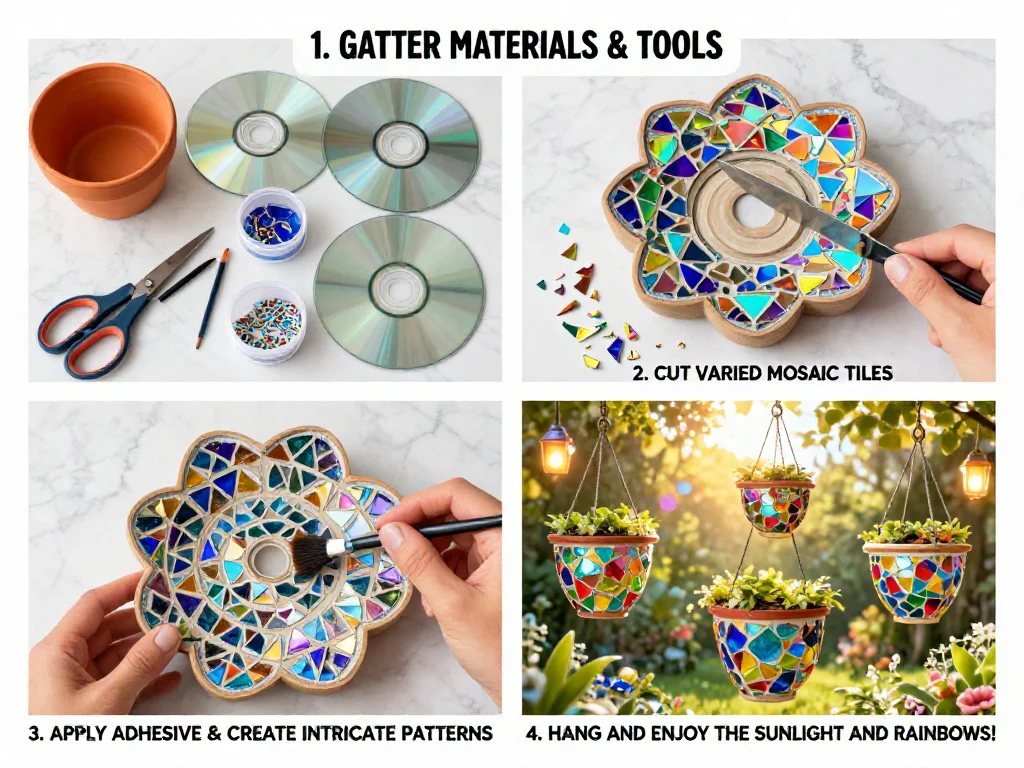
Gathering your materials helps create a peaceful environment before you begin your project. Here’s what you will need for your Mosaic CD Plant Pot:
- Old CDs or DVDs (easy to find at home or in thrift stores)
- A terracotta pot or any sturdy pot you prefer
- Strong glue (like E6000 or any craft glue that works well on plastics)
- Grout (optional, but it adds a polished look)
- Safety glasses (to protect your eyes while breaking CDs)
- A sturdy surface for breaking the CDs, like a towel or cutting mat
- A craft knife (for precise cuts, optional)
- A small sponge (for applying grout, optional)
- Paint or sealer (to finish your mosaic, optional)
Each material lends itself to the process in its own way, helping to transform your ideas into a vivid representation of creativity.
Step-by-Step Directions
-
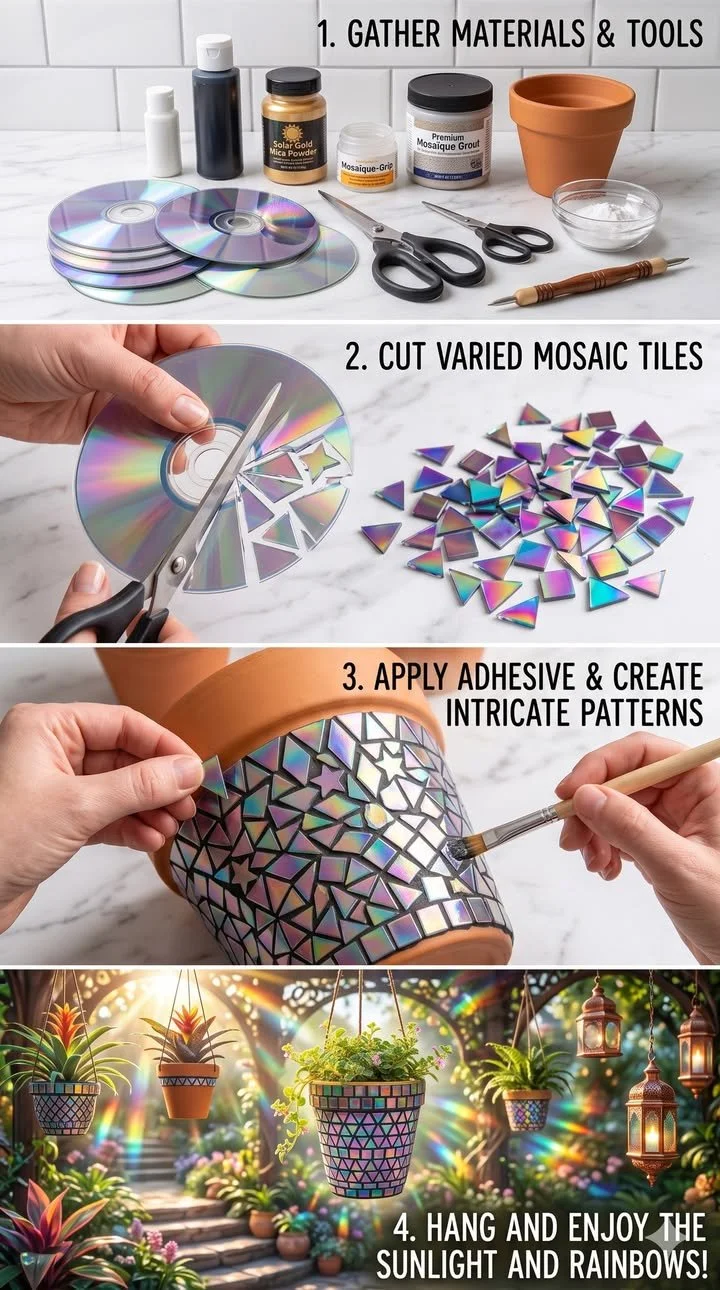
Begin by carefully breaking the CDs. Place them in a towel or sturdy bag to contain the mess. Use a hammer to gently tap the CDs, creating shards of various sizes. Be mindful of sharp edges.

-
Clean your terracotta pot with a damp cloth. This ensures the glue adheres correctly and any dust or dirt won’t disrupt your design.
-
Start arranging the CD pieces on the pot without glue first. This lets you play with patterns and colors, allowing your creative side to shine.
-
Once you are happy with the layout, take your glue and begin adhering the pieces one by one. Apply a thin layer of glue on the back of each shard and press it onto the pot. Allow for small gaps to show for a lovely mosaic effect.
-
Wait for the glue to dry completely before moving on to the next step. Patience allows each piece to hold firmly in place.
-
If using grout, mix it according to the package instructions. Carefully apply the grout between the gaps in your mosaic with a small sponge. Wipe off excess with a damp cloth.
-
After applying grout, allow the pot to dry thoroughly. Follow up with a sealant if desired, to protect your work and keep it looking fresh.
-
Finally, plant your favorite greenery in your beautiful new pot. The life of the plant brings warmth, enhancing the mosaic’s inviting charm.
Enjoying the Finished Piece
As you admire your completed Mosaic CD Plant Pot, the joy of creating it washes over you again. Find a cozy spot in your home where the light can dance through the mosaic. It may grace a windowsill, bringing life to a previously empty space, or perhaps it rests on your coffee table, sparking conversations.
Consider planting herbs like basil or mint, which could welcome fresh scents into your home. Alternatively, a colorful succulent can brighten up dull corners. The beauty of this creation lies not just in its appearance, but in the memories of the peaceful moments spent crafting it.
Keeping It for Later
To keep your Mosaic CD Plant Pot in the best condition, store it in a cool, dry place if you decide not to use it right away. Avoid extreme temperatures, which could compromise the glue and the materials. Regularly dust it with a soft cloth to maintain its sparkle, and if you live in a humid environment, check for moisture buildup.
If you ever want to update or refresh your pot, consider carefully replanning your design or changing the plants to mirror the seasons. Each time you revisit the pot, you reconnect with the cozy process of making.
Gentle Tips & Variations
Embrace these gentle invitations as you explore your creativity further:
- Experiment with different pot shapes and sizes. A tall, narrow pot offers opportunities for a unique design versus a wide, shallow one.
- Add a personal touch with paint. You might paint the base color of the pot before applying mosaic pieces.
- Consider varying textures by incorporating small pebbles or glass beads amidst the CDs to bring a new tactile element to your design.
- Use colored CDs for variance. Look for those that reflect different shades of blue or green to create a calming underwater effect.
Each unique element contributes to a personal journey, turning this project into your own creative expression.
FAQs About Mosaic CD Plant Pot (Luxury Look DIY)
Q: Can I use other materials besides CDs for the mosaic?
A: Absolutely! You can use broken tiles, glass, or even sea glass for a different texture and look. Just ensure they are sturdy enough to withstand being attached to the pot.
Q: What if I don’t have grout?
A: That’s perfectly fine! Many have achieved beautiful results without grout. Just leave small spaces between the pieces, and embrace the mosaic look.
Q: How do I clean my Mosaic CD Plant Pot?
A: Just give it a gentle dusting with a soft cloth. For more thorough cleaning, use a damp cloth, but avoid soaking it, especially if you used grout.
Q: Can I plant real plants in this pot?
A: Yes, you can! Just ensure there’s proper drainage at the bottom and consider placing a liner if preferred.
Q: How can I make sure the mosaic pieces stay secure?
A: The key is to allow adequate drying time for the glue and grout, and be mindful of placing your pot in a safe spot where it won’t get bumped.
A Gentle Note Before You Go
As you close this chapter on creating your Mosaic CD Plant Pot, take a moment to reflect on the experience. The textures, the sounds, and the calmness of the process all weave into the tapestry of your time spent making. This project offers not just a planter, but a precious moment of creation, allowing you to engage in your environment more mindfully and beautifully.
Let the finished pot inspire other cozy moments, inviting more creativity as you continue to explore and create in your calming sanctuary. Remember, the joy lies in both what you create and the serenity of the journey towards it.
Print
Mosaic CD Plant Pot (Luxury Look DIY)
- Total Time: 45 minutes
- Yield: 1 beautiful plant pot
- Diet: N/A
Description
Transform old CDs into a unique mosaic plant pot in a calming DIY project.
Ingredients
- Old CDs or DVDs
- A terracotta pot or any sturdy pot
- Strong glue (like E6000)
- Grout (optional)
- Safety glasses
- A sturdy surface (like a towel)
- A craft knife (optional)
- A small sponge (optional)
- Paint or sealer (optional)
Instructions
- Begin by carefully breaking the CDs.
- Clean your terracotta pot with a damp cloth.
- Start arranging the CD pieces on the pot without glue first.
- Once you are happy with the layout, take your glue and begin adhering the pieces.
- Wait for the glue to dry completely before moving on to the next step.
- If using grout, mix it according to the package instructions.
- After applying grout, allow the pot to dry thoroughly.
- Finally, plant your favorite greenery in your beautiful new pot.
Notes
Store in a cool, dry place and dust regularly to maintain sparkle.
- Prep Time: 15 minutes
- Cook Time: 30 minutes
- Category: Crafts
- Method: DIY
- Cuisine: N/A