Introduction
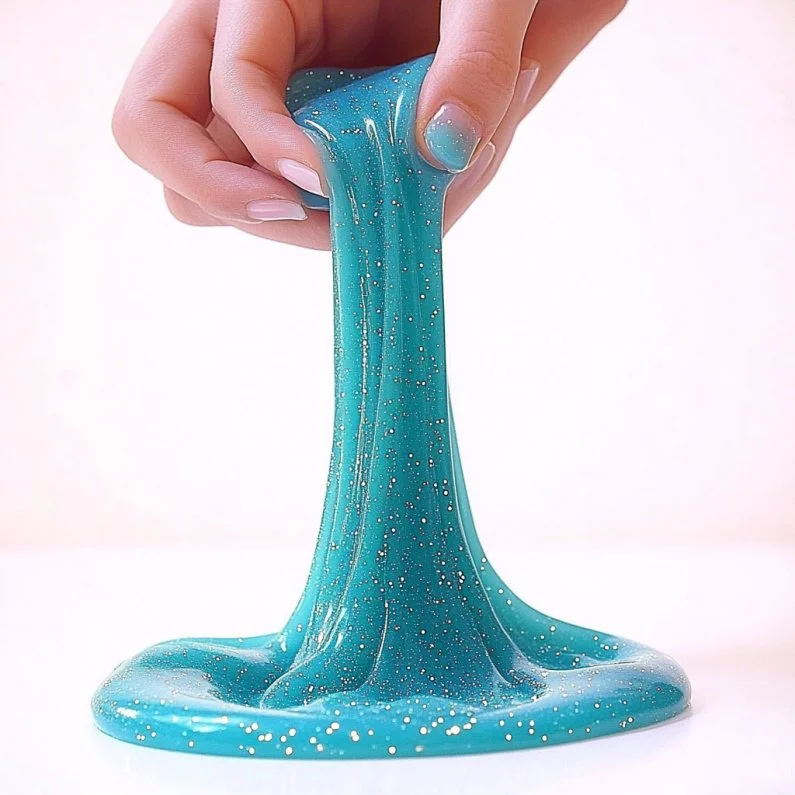
Mermaid slime is the perfect project for kids and adults alike, bringing a touch of ocean magic into your home. This delightful DIY recipe creates a tactile, shimmery slime that sparkles like the sea under sunlight. Whether you want to engage your children in creative play or create a stress-relieving sensory experience, this enchanting concoction is sure to impress. As you mix vibrant colors and incorporate shimmery details, the end result not only looks beautiful but also provides endless entertainment. Get ready to dive into the world of mermaid slime!
Why You’ll Love This Mermaid Slime
- Hypnotic Colors: Create a visually stunning array of colors that remind you of the sea.
- Tactile Experience: Fun to stretch, squish, and mold—great for sensory play.
- Calming Effects: Make slime as a calming activity; the repetitive motions can be soothing.
- Customizable: Personalize your slime with different colors and textures.
- Easy to Make: Simple ingredients and steps make this a breeze for all skill levels.
- Great for Gifts: Perfect for party favors or handmade gifts for friends and family.
Materials
- 1 cup white school glue
- 1 tsp baking soda
- 1 tablespoon contact lens solution
- Food coloring (blue, green, or purple)
- Glitter or shimmer powder
- Optional: perfume or fragrance oil for scent
- Mixing bowl
- Spoon or spatula
- Airtight container for storage
Step-by-Step Instructions
Step 1: Prepare Your Base
- In a mixing bowl, pour 1 cup of white school glue.
- Add 1 tsp of baking soda. Stir until completely blended.
Step 2: Add Color
- Drop in your choice of food coloring (blue, green, or purple).
- Mix until the color is uniform and vibrant.
Step 3: Introduce the Magic
- Gradually add 1 tablespoon of contact lens solution while mixing.
- Watch as the slime starts to form; it’ll become sticky at first.
Step 4: Knead It!
- Once mixed, knead the slime with your hands. This will improve the texture.
- If it’s too sticky, add a little more contact lens solution until it reaches desired consistency.
Step 5: Add Sparkle
- Incorporate glitter or shimmer powder. Knead again to evenly distribute.
Tips & Variations
- Color Combinations: Experiment with multiple colors for a swirling effect.
- Add-ins: Incorporate small shells or beads for extra texture.
- Scented Slime: A few drops of essential oils or fragrance oils can add a lovely aroma.
- Adjust Texture: For thicker slime, reduce the amount of contact lens solution slightly.
Frequently Asked Questions
Q1: Can I use clear glue instead of white glue?
Yes! Clear glue works wonderfully and can give a beautiful translucent effect.
Q2: What if my slime is too sticky?
If your slime is sticky, slowly add more contact lens solution while kneading until it reaches the desired consistency.
Q3: How do I store my slime?
Keep your slime in an airtight container. It should last for several weeks if stored properly.
Q4: Can I use homemade contact lens solution?
It’s best to use store-bought contact lens solution, as the homemade versions may not yield the same results.
Serving Suggestions or Pairings
Pair your mermaid slime with a refreshing drink like blue raspberry lemonade or sparkling water with a twist of lime. This colorful beverage can enhance your mermaid-themed party or get-together! Consider serving with snacks like ocean-themed cupcakes or blue Jell-O cups for that extra touch of fun.
Final Thoughts
Creating mermaid slime is not only a rewarding craft but also an engaging way to explore creativity and sensory experiences. Gather your materials, follow the steps, and let your imagination soar! We’d love to see your versions of mermaid slime—share your creations in the comments below! Happy crafting!
Print
Mermaid Slime
- Total Time: 10 minutes
- Yield: 1 batch 1x
- Diet: N/A
Description
Create a magical, shimmery mermaid slime that captivates both kids and adults. This tactile DIY project is perfect for sensory play and customization.
Ingredients
- 1 cup white school glue
- 1 tsp baking soda
- 1 tablespoon contact lens solution
- Food coloring (blue, green, or purple)
- Glitter or shimmer powder
- Optional: perfume or fragrance oil for scent
- Mixing bowl
- Spoon or spatula
- Airtight container for storage
Instructions
- In a mixing bowl, pour 1 cup of white school glue. Add 1 tsp of baking soda and stir until completely blended.
- Drop in your choice of food coloring (blue, green, or purple) and mix until the color is uniform and vibrant.
- Gradually add 1 tablespoon of contact lens solution while mixing. Watch as the slime starts to form; it’ll become sticky at first.
- Once mixed, knead the slime with your hands to improve the texture. If it’s too sticky, add a little more contact lens solution until it reaches the desired consistency.
- Incorporate glitter or shimmer powder and knead again to evenly distribute.
Notes
For thicker slime, adjust the amount of contact lens solution. Use clear glue for a translucent effect.
- Prep Time: 10 minutes
- Cook Time: 0 minutes
- Category: Craft
- Method: Mixing
- Cuisine: N/A
Nutrition
- Serving Size: 1 batch
- Calories: 100
- Sugar: 0g
- Sodium: 6mg
- Fat: 0g
- Saturated Fat: 0g
- Unsaturated Fat: 0g
- Trans Fat: 0g
- Carbohydrates: 25g
- Fiber: 0g
- Protein: 0g
- Cholesterol: 0mg

