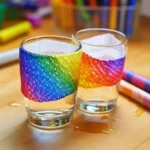
Creating a beautiful and colorful rainbow can be a truly enjoyable and educational experience for kids and adults alike. This how-to guide will walk you through an engaging craft recipe that encourages creativity while providing a hands-on approach to learning about colors, light, and science. Whether it’s a rainy day or a sunny afternoon, making your own rainbow can brighten up any atmosphere. Plus, it’s a fantastic way to spark conversations about natural phenomena and to share the joy of crafting together. Grab your materials, and let’s dive into this vibrant project!
Why You’ll Love This How to Grow a Rainbow
- Educational Fun: Learn about the science of colors and light while crafting.
- Creative Freedom: Personalize your rainbow with your favorite colors and designs.
- Sensory Experience: Enjoy the visual and tactile aspects of the materials.
- Family Bonding: Great activity to do together with kids or friends.
- Simple Steps: Easy-to-follow instructions make it accessible to all skill levels.
Materials
- White paper or canvas
- Watercolor paints or markers
- Paintbrushes (if using watercolors)
- Water container
- Paper towels
- Black marker (for outlining)
- Optional: Glitter, stickers, or other decorative items
Full Step-by-Step
Prepare Your Workspace
- Find a clean, flat surface to work on. Make sure it’s protected with newspapers or a plastic covering.
Sketch the Rainbow
- Lightly draw a semi-circle in the center of your paper with a pencil.
- Divide the arc into several sections for each color of the rainbow: red, orange, yellow, green, blue, indigo, and violet.
Paint the Colors
- Choose your first color: Start with red.
- Use a paintbrush to fill in the first section of your arc.
- Feel the texture of the paint on the brush and paper. Notice how the color transfers.
- Rinse the brush in the water container, then dry it on a paper towel before switching colors.
Layering Colors
- Repeat the painting process for the remaining colors, layering them from top to bottom.
- Enjoy the visual transformation as the colors blend and contrast.
Final Touches
- Once dry, outline your rainbow with a black marker for emphasis.
- Add glitter or stickers for extra flair!
Tips & Variations
- Color Swaps: Try using different shades of the same color for a unique effect.
- Use Pastels: Instead of watercolors, use pastels for a softer look.
- Add a Background: Paint the sky or clouds around your rainbow for extra dimension.
- Create a Rainbow Scene: Incorporate additional elements like sun, flowers, or animals for storytelling.
Frequently Asked Questions
1. Can I use other materials instead of watercolor paints?
Yes! You can use crayons, colored pencils, or even fabric scraps for a mixed media approach.
2. How long does it take for the paint to dry?
Drying time can vary, but typically it takes about 30 minutes to an hour for watercolor to dry completely.
3. What should I do if I don’t have all the colors?
Feel free to mix colors to create new ones. For example, mixing red and yellow can give you orange!
4. Is this craft suitable for toddlers?
Yes, with supervision, toddlers can participate by using washable paints or crayons and can enjoy the sensory experience.
Suggestions
- Display Your Rainbows: Hang your finished art in a window or on the fridge to show off your creativity.
- Theme Parties: Use this craft as part of a rainbow-themed party, complete with rainbow snacks and decorations.
Final Thoughts
Crafting a rainbow is not only a fun activity, but it also serves as a delightful way to explore color and creativity. We would love to hear about your experiences with this project! Share your versions or leave a comment below, and let’s keep the creativity flowing!
Print
How to Grow a Rainbow
- Total Time: 40 minutes
- Yield: 1 rainbow artwork
- Diet: N/A
Description
A fun and educational craft project for making your own colorful rainbow using watercolor paints or markers.
Ingredients
- White paper or canvas
- Watercolor paints or markers
- Paintbrushes (if using watercolors)
- Water container
- Paper towels
- Black marker (for outlining)
- Optional: Glitter, stickers, or other decorative items
Instructions
- Prepare your workspace by protecting it with newspapers or plastic.
- Lightly draw a semi-circle in the center of your paper with a pencil and divide it into color sections: red, orange, yellow, green, blue, indigo, and violet.
- Start with red, using a paintbrush to fill the first section of the arc. Feel the texture of the paint.
- Rinse the brush, dry it and switch to the next color, layering from top to bottom.
- Once dry, outline your rainbow with a black marker.
- Add glitter or stickers for extra flair!
Notes
This craft is suitable for all ages; supervision is recommended for younger children. Experiment with different materials for versatility.
- Prep Time: 10 minutes
- Cook Time: 30 minutes
- Category: Craft
- Method: Crafting
- Cuisine: N/A
Nutrition
- Serving Size: 1 artwork
- Calories: 0
- Sugar: 0g
- Sodium: 0mg
- Fat: 0g
- Saturated Fat: 0g
- Unsaturated Fat: 0g
- Trans Fat: 0g
- Carbohydrates: 0g
- Fiber: 0g
- Protein: 0g
- Cholesterol: 0mg

