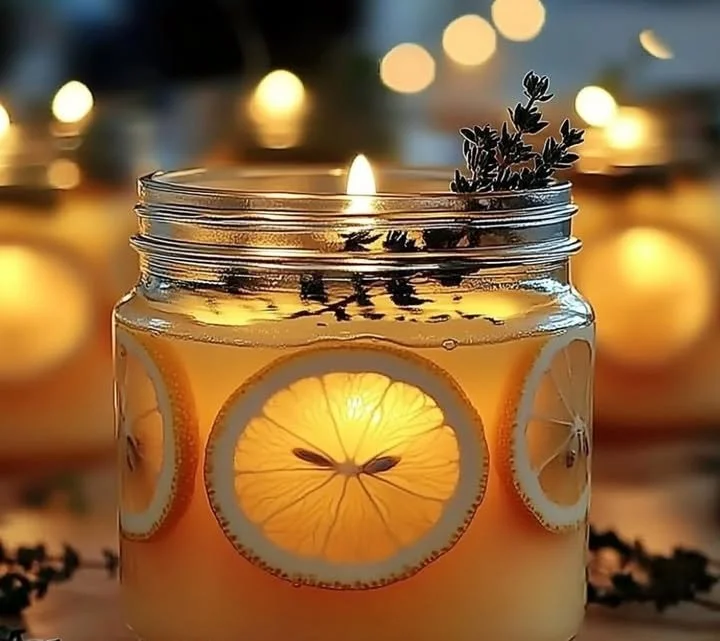
Creating your own homemade scented candles is not only a rewarding craft but also a wonderful way to fill your space with delightful fragrances tailored to your personal preferences. Whether you want to enhance your relaxation routine, set the mood for a cozy evening, or create a unique gift, DIY scented candles offer endless possibilities. The best part? You have complete control over the ingredients, ensuring that your candles are free from harmful chemicals commonly found in store-bought options. Plus, the process of making candles can be a therapeutic escape, igniting your creativity and allowing you to experiment with various scents and colors. In this guide, we’ll walk you through the simple steps of making your very own scented candles at home, so you can enjoy their warm glow and cozy aroma any time you choose.
Why You’ll Love This Homemade Scented Candles
- Customizable Fragrance: Mix and match scents to create your perfect aroma.
- Thoughtful Gifts: Handmade candles make heartwarming and personal presents.
- Natural Ingredients: Control what goes into your candles, avoiding toxins.
- Cost-Effective: Save money compared to purchasing commercial candles.
- Creative Outlet: Enjoy a fulfilling, hands-on activity that sparks creativity.
- Ambient Atmosphere: Enhance your home or events with soothing light and scent.
Materials
- Wax (soy, paraffin, or beeswax)
- Candle wicks
- Essential oils or fragrance oils
- Candle dye (optional)
- Containers (glass jars, tins, or molds)
- Double boiler or microwave-safe bowl
- Stirring utensil (wooden stick or spoon)
- Thermometer
- Scissors
Step-by-Step Instructions
Preparing Your Workspace
- Choose a clean, flat surface for your candle-making project.
- Gather all materials to ensure you have everything within reach.
Melting the Wax
- Measure the wax according to the size of your containers (use approximately 2 times the amount of wax as the container’s volume).
- Heat the wax using a double boiler method or a microwave. If using the microwave, heat in short bursts (30 seconds) until fully melted.
- Use the thermometer to check the wax temperature; it should be around 170-180°F (77-82°C).
Adding Scents and Colors
- Once melted, remove from heat. Let it cool slightly (to about 160°F or 71°C).
- Stir in your essential or fragrance oils (typically 1 ounce per pound of wax). Adjust based on your scent strength preference.
- If using candle dye, add a few drops and stir until fully mixed.
Pouring the Candles
- Secure the wick in the center of your container using a wick holder or by dipping it in molten wax.
- Carefully pour the wax into the container, ensuring the wick stays centered.
- Leave a small amount of wax in the pot for topping off later if necessary.
Setting and Finishing
- Allow the candle to cool completely; this may take several hours.
- Trim the wick to about 1/4 inch above the surface.
- Cure the candles for at least 24 hours before use for optimal scent throw.
Tips & Variations
- Scent Combinations: Try mixing vanilla with cinnamon for a warm, inviting aroma.
- Color Options: Use natural colorants like herbs or spices for an eco-friendly alternative.
- Container Choices: Experiment with different types of containers, such as teacups or tin cans, for a unique look.
- Wick Substitutions: Choose different widths of wicks based on the size of your container for a better burn.
Frequently Asked Questions
1. Can I use any type of wax?
Yes, you can use soy, paraffin, or beeswax, each providing different benefits and scents.
2. What if my candle doesn’t scent enough?
Double the amount of fragrance oil added or ensure that you’re using high-quality essential oils.
3. Can I make candles in cold weather?
Yes, but be aware that colder temperatures can affect the setting of the wax. Consider warming your room slightly.
4. How can I clean wax spills?
Use warm soapy water and a cloth to clean up wax spills before they harden.
Serving Suggestions or Pairings
Pair your homemade scented candles with a warm cup of herbal tea or a glass of wine for a relaxing evening. They can also complement a soothing bath routine or a cozy reading nook. Enhance the experience with soft music or a good book.
Final Thoughts
Making your own scented candles is a delightful and engaging experience that transforms your space and mood. You can indulge your senses with fragrances you’ll love and create beautiful pieces of decor and gifts. We’d love to see your candle-making creations! Share your versions or leave a comment below with your favorite scents and variations. Happy crafting!
Print
Homemade Scented Candles
- Total Time: 75 minutes
- Yield: 4 candles
- Diet: N/A
Description
Create your own scented candles at home with customizable fragrances and natural ingredients for a personal touch.
Ingredients
- Wax (soy, paraffin, or beeswax)
- Candle wicks
- Essential oils or fragrance oils
- Candle dye (optional)
- Containers (glass jars, tins, or molds)
- Double boiler or microwave-safe bowl
- Stirring utensil (wooden stick or spoon)
- Thermometer
- Scissors
Instructions
- Choose a clean, flat surface for your candle-making project. Gather all materials to ensure you have everything within reach.
- Measure the wax according to the size of your containers (use approximately 2 times the amount of wax as the container’s volume).
- Heat the wax using a double boiler method or a microwave. If using the microwave, heat in short bursts (30 seconds) until fully melted.
- Use the thermometer to check the wax temperature; it should be around 170-180°F (77-82°C).
- Once melted, remove from heat and let it cool slightly (to about 160°F or 71°C).
- Stir in your essential or fragrance oils (typically 1 ounce per pound of wax) based on your scent strength preference.
- If using candle dye, add a few drops and stir until fully mixed.
- Secure the wick in the center of your container and carefully pour the wax, keeping the wick centered. Leave a small amount of wax in the pot for topping off later.
- Allow the candle to cool completely, which may take several hours.
- Trim the wick to about 1/4 inch above the surface and cure the candles for at least 24 hours before use for optimal scent throw.
Notes
Experiment with different scents and container types for unique creations. If your candle doesn’t scent enough, double the amount of fragrance oil.
- Prep Time: 15 minutes
- Cook Time: 60 minutes
- Category: DIY
- Method: Candle Making
- Cuisine: None
Nutrition
- Serving Size: 1 candle
- Calories: 80
- Sugar: 0g
- Sodium: 0mg
- Fat: 4g
- Saturated Fat: 0g
- Unsaturated Fat: 4g
- Trans Fat: 0g
- Carbohydrates: 0g
- Fiber: 0g
- Protein: 0g
- Cholesterol: 0mg

