- Introduction
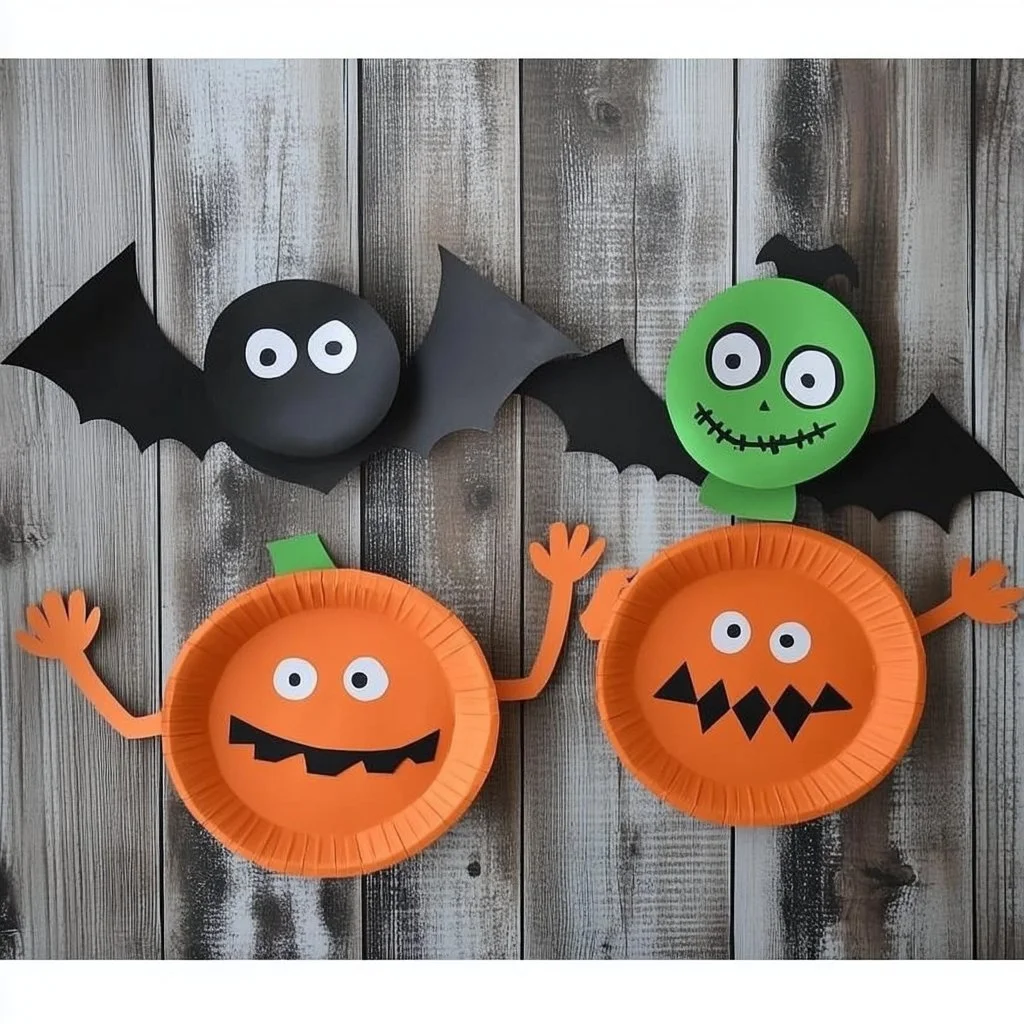
Halloween is a time for creativity and fun, especially when it comes to crafts and activities that engage both kids and adults. This year, why not get crafty with some delightful Halloween Paper Plate Characters? These whimsical decorations not only provide a thrilling activity for family and friends but also serve as festive decor for your home. Easy to make and customizable, these paper plate characters can be tailored to suit your unique Halloween spirit. Let’s dive into this exciting DIY project that will spark joy and imagination, allowing you to create ghoulishly fun masterpieces that everyone can enjoy!
- Why You’ll Love This Halloween Paper Plate Characters
- Easy to Make: Perfect for all ages, with minimal supplies needed.
- Customizable: Endless options for colors, characters, and themes to match your Halloween vibe.
- Eco-Friendly: Using paper plates creates less waste compared to other materials.
- Great for Group Activities: Perfect for parties, classroom crafts, or family gatherings.
- Improves Creativity: Encourages imaginative thinking and artistic expression.
- Budget-Friendly: Low-cost materials make it accessible to everyone.
- Materials
- Paper plates (preferably white or light-colored)
- Acrylic or tempera paints (various colors)
- Paintbrushes and sponge brushes
- Markers and crayons
- Glue
- Googly eyes
- Scissors
- Craft paper (black, orange, green, etc.)
- Optional: Glitter, stickers, or other embellishments
- Step-by-Step Instructions
Step 1: Prepare Your Workspace
- Lay down newspaper or a plastic tablecloth to keep surfaces clean.
- Gather all your materials so they are within reach.
Step 2: Paint the Base
- Use a paintbrush or sponge brush to cover the entire paper plate in a base color (like orange for pumpkins or green for monsters).
- Allow the paint to dry completely.
Step 3: Create Features
- While the base is drying, use craft paper to cut out eyes, mouths, and other features.
- Glue the cutouts and googly eyes onto the painted plate once it’s dry.
Step 4: Add Details
- Use markers and additional paint to add fun details like stripes, spots, or patterns.
- For an extra touch, sprinkle glitter or place stickers to make your character pop.
Step 5: Display Your Characters
- Once everything is dry, hang them up or place them around your home to celebrate Halloween!
- Tips & Variations
- Customization Options: Swap colors or patterns based on your favorite Halloween characters. Create a spooky ghost or a friendly witch!
- Material Alternatives: If you don’t have paint, consider using colored markers or crayons for quick designs.
- Glow-in-the-Dark: Use glow-in-the-dark paint for a spooky nighttime effect.
- Themed Sets: Create a full set of characters (e.g., spooky trio: ghost, witch, vampire) to display together.
- Frequently Asked Questions
-
What type of paint is best for paper plates?
Acrylic or tempera paints work well as they adhere nicely to paper plates and dry quickly. -
Can I use regular school supplies?
Absolutely! Markers, crayons, and even colored pencils can be used for decorating. -
How can I make these more durable?
To make the characters last longer, consider sealing them with a clear acrylic spray once dry. -
What if I don’t have googly eyes?
You can create eyes using paper or simply draw them on with markers.
-
Serving Suggestions or Pairings
Pair your Halloween Paper Plate Characters with themed treats like pumpkin spice cupcakes, bat-shaped cookies, or a spooky punch to complement your craft activity! -
Final Thoughts
Creating Halloween Paper Plate Characters is a fantastic way to unleash your creativity and have fun with others. We’d love to see your versions of these spooky crafts, so feel free to share your creations in the comments or tag us in your posts. Happy crafting and have a thrilling Halloween!

Halloween Paper Plate Characters
- Total Time: 15 minutes
- Yield: A set of Halloween Paper Plate Characters
- Diet: N/A
Description
Engage in a fun and creative activity by making delightful Halloween Paper Plate Characters, perfect for all ages.
Ingredients
- Paper plates (preferably white or light-colored)
- Acrylic or tempera paints (various colors)
- Paintbrushes and sponge brushes
- Markers and crayons
- Glue
- Googly eyes
- Scissors
- Craft paper (black, orange, green, etc.)
- Optional: Glitter, stickers, or other embellishments
Instructions
- Prepare Your Workspace: Lay down newspaper or a plastic tablecloth to keep surfaces clean and gather all materials.
- Paint the Base: Use a paintbrush or sponge brush to cover the entire paper plate in a base color and allow to dry completely.
- Create Features: Cut out eyes, mouths, and other features from craft paper, and glue them onto the painted plate once dry.
- Add Details: Use markers and additional paint for fun details, and optionally sprinkle glitter or apply stickers.
- Display Your Characters: Once everything is dry, hang them up or place them around your home.
Notes
Customization Options: Personalize with different colors or themes. For durability, seal characters with clear acrylic spray after drying.
- Prep Time: 15 minutes
- Cook Time: 0 minutes
- Category: Craft
- Method: Crafting
- Cuisine: Halloween
Nutrition
- Serving Size: 1 character
- Calories: N/A
- Sugar: N/A
- Sodium: N/A
- Fat: N/A
- Saturated Fat: N/A
- Unsaturated Fat: N/A
- Trans Fat: N/A
- Carbohydrates: N/A
- Fiber: N/A
- Protein: N/A
- Cholesterol: N/A

