Introduction
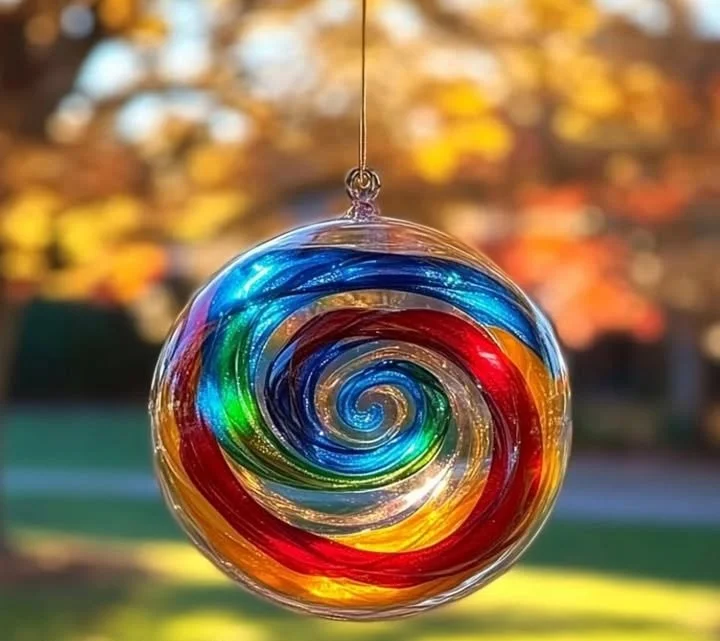
Creating a glue suncatcher is a delightful and simple way to brighten up your home while encouraging creativity and exploration. This craft activity is perfect for children and adults alike, offering a chance to unleash your artistic side using everyday materials. As the sunlight streams through your stunning creation, you’ll be amazed by the vivid colors and patterns that emerge, transforming any ordinary window into a beautiful display.
Not only is this craft easy to do, but it also provides an opportunity for bonding with family or friends. You can experiment with various shapes and designs, making it a fun and engaging project that can be adapted to any occasion. Whether you’re decorating for a holiday, celebrating a birthday, or simply looking to bring some joy into your living space, glue suncatchers are the way to go. So, roll up your sleeves and let’s get crafting!
Why You’ll Love This Glue Suncatcher Craft
- Easy and Accessible: Requires minimal materials that you likely already have at home.
- Customizable Designs: Personalize your suncatcher with different colors and shapes.
- Sensory Experience: Engaging for both kids and adults, incorporating tactile elements and visual beauty.
- Educational Value: Great for teaching colors, shapes, and fine motor skills to children.
- Perfect for Any Occasion: Suitable for seasonal decor, gifts, or as a fun rainy-day activity.
Materials
- White school glue
- Clear plastic sheet or wax paper
- Food coloring or liquid watercolors
- A paintbrush or sponge
- Scissors
- Glitter (optional)
- A tray or workspace covered in newspaper (to prevent mess)
Step-by-Step Instructions
1. Prepare Your Workspace
- Cover your work area with a newspaper to catch any drips or spills.
- Gather all materials within reach for a smoother crafting experience.
2. Create the Glue Mixture
- In a bowl, mix white school glue with a few drops of food coloring or liquid watercolors.
- Stir gently with a paintbrush or spoon until fully combined.
3. Design Your Suncatcher
- Take your clear plastic sheet or wax paper and place it flat on your workspace.
- Using a paintbrush or sponge, apply the colored glue in patterns, shapes, or designs.
- Sensory Cue: Feel the smooth texture of the glue as you spread it.
4. Add Glitter (Optional)
- If desired, sprinkle glitter on top of your colored glue for added sparkle.
5. Let It Dry
- Allow your creation to dry completely. This may take several hours or overnight for best results.
- Once dry, gently peel it off the plastic or wax paper.
6. Hang and Enjoy
- Use tape or suction cups to hang your suncatcher in a sunny window and admire how the light reveals its vibrant colors!
Tips & Variations
- Swap out Colors: Experiment with different shades or even glow-in-the-dark paint for a unique look.
- Shape Stencils: Use cookie cutters or printed shapes to create themed suncatchers.
- Layer Colors: Create depth by layering different colors of glue on top of one another.
- Seasonal Themes: Customize based on the seasons—use leaves for fall or flowers for spring!
Frequently Asked Questions
Q1: Can I use different types of glue?
A1: While white school glue is best, you can try clear glue or even fabric glue. Just consider how this may affect the transparency and texture.
Q2: What if I don’t have food coloring?
A2: You can use liquid watercolors, or even dilute acrylic paint with water for different coloring options.
Q3: How long does it take to dry?
A3: Drying times can vary but generally will take several hours to overnight, depending on thickness.
Q4: Can I use my suncatcher outdoors?
A4: It’s not recommended for extended outdoor use as sun exposure may degrade the glue over time. Use them in sunny indoor spaces instead.
Serving Suggestions or Pairings
- Create a suncatcher crafting party with iced tea or lemonade for a refreshing summer feel.
- Pair your craft session with light snacks like fruit skewers or vegetable sticks to keep the energy up!
- Consider making themed suncatchers during different seasons to enhance your decoration during holidays.
Final Thoughts
Crafting glue suncatchers is a wonderful way to express creativity and bring a burst of color into your home. As you hang your finished piece, you’ll feel a sense of accomplishment and joy every time the sunlight filters through it.
I invite you to share your versions of glue suncatchers or leave a comment about your crafting experience! What colors and shapes did you choose? Let the creativity flow!
Print
Glue Suncatcher Craft
- Total Time: 120 minutes
- Yield: 1 suncatcher
- Diet: N/A
Description
A delightful craft to brighten your home using glue and colors, perfect for all ages.
Ingredients
- White school glue
- Clear plastic sheet or wax paper
- Food coloring or liquid watercolors
- A paintbrush or sponge
- Scissors
- Glitter (optional)
- A tray or workspace covered in newspaper
Instructions
- Prepare Your Workspace: Cover your work area with newspaper and gather all materials.
- Create the Glue Mixture: Mix white school glue with a few drops of food coloring and stir until combined.
- Design Your Suncatcher: Place the plastic sheet flat and apply colored glue in designs.
- Add Glitter: Sprinkle glitter on top of the colored glue if desired.
- Let It Dry: Allow the creation to dry completely, which may take several hours or overnight.
- Hang and Enjoy: Use tape or suction cups to hang your suncatcher in a sunny window.
Notes
Experiment with colors, shapes, and themes for endless creativity. Not recommended for outdoor use.
- Prep Time: 15 minutes
- Cook Time: 0 minutes
- Category: Craft
- Method: Art & Crafting
- Cuisine: N/A
Nutrition
- Serving Size: 1 craft
- Calories: 0
- Sugar: 0g
- Sodium: 0mg
- Fat: 0g
- Saturated Fat: 0g
- Unsaturated Fat: 0g
- Trans Fat: 0g
- Carbohydrates: 0g
- Fiber: 0g
- Protein: 0g
- Cholesterol: 0mg

