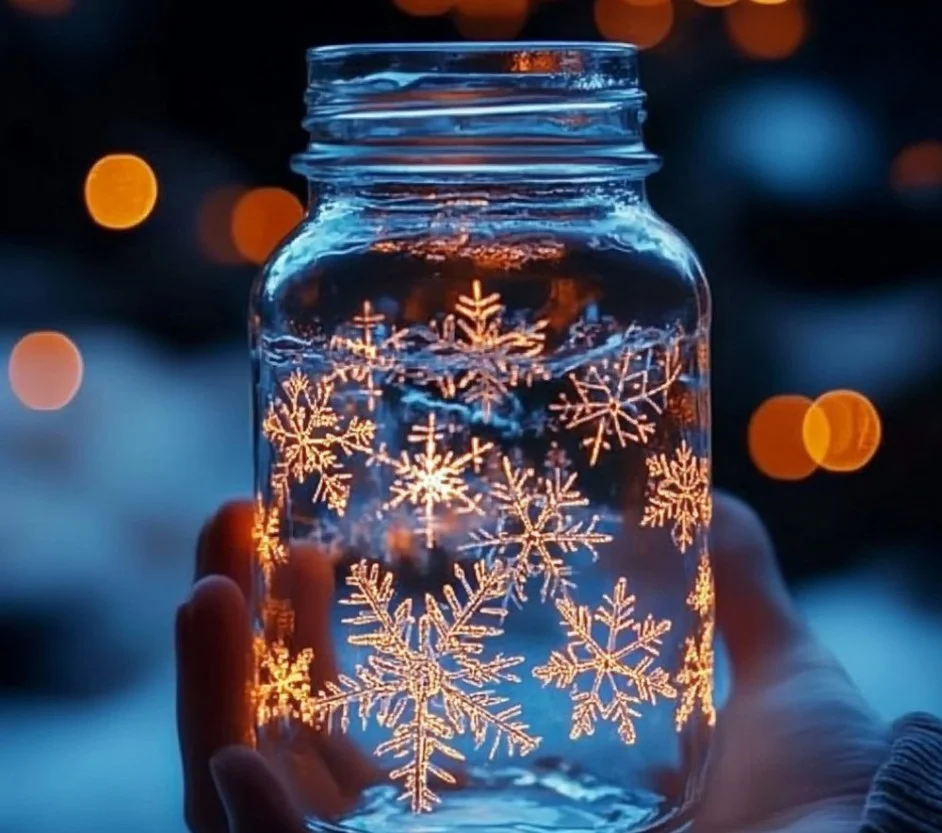
Crafting a glowing ice crystals jar is not just a delightful hands-on activity, but it also brings a touch of whimsical beauty into your space. This fun and easy craft project offers a magical glow reminiscent of glistening ice, perfect for decorating your home or as a thoughtful gift. Whether you want to create a cozy nightlight, an enchanting centerpiece, or a charming winter-themed decoration, this activity can inspire creativity in both children and adults alike. With accessible materials and straightforward steps, glowing ice crystals jars can be a rewarding addition to your crafting repertoire. Let’s dive into why you’ll absolutely love making your own glowing ice crystals jar.
Why You’ll Love This Glowing Ice Crystals Jar:
- Easy to Make: No complex techniques required.
- Customizable: Tailor colors and designs to match your decor.
- Great for All Ages: Fun for kids, teens, and adults alike.
- Beautiful Glow: Creates an enchanting atmosphere.
- Inexpensive Materials: Most supplies are affordable and easily accessible.
- Perfect for Gifts: An ideal handmade gift for friends and family.
Materials:
- Clear glass jar (small or medium size)
- Epsom salt or coarse salt
- Glow-in-the-dark paint or glow sticks
- Water
- Spoon for mixing
- String lights (optional)
- Decorative elements (like faux snowflakes or glitter)
Full Step-by-Step:
Step 1: Prepare Your Jar
- Clean the glass jar thoroughly and make sure it is completely dry.
- If using string lights, position them in the jar first before adding other materials.
Step 2: Create the Glow Mixture
- In a mixing bowl, combine one part glow-in-the-dark paint with two parts water.
- If using glow sticks, break them open and pour the contents into the bowl.
Step 3: Add Epsom Salt
- Gradually stir in Epsom salt until you achieve a slushy consistency.
- Feel the cool, gritty texture of the salt!
Step 4: Fill the Jar
- Carefully spoon the mixture into the glass jar, layering it if desired for added effects.
- Sprinkle with additional decorative elements like faux snowflakes or glitter for extra sparkle.
Step 5: Let it Set
- Allow the jar to set for at least 2 hours to firm up.
- Once set, place it in a dark area to enjoy the glowing effect!
Tips & Variations:
- Customize Colors: Experiment with different glow paint colors or add food coloring to the mixture.
- Use Different Jars: Opt for varying sizes or shaped containers for unique effects.
- Add Aromatics: Infuse with essential oils for a multi-sensory experience.
- Change Up Your Decor: Integrate seasonal elements like leaves for autumn or seashells for summer themes.
Frequently Asked Questions:
Q1: What type of jar is best to use?
A: Any clear glass jar works well! Mason jars and old candle holders can be charming options.
Q2: Can I use regular paint instead of glow-in-the-dark paint?
A: Regular paint won’t provide the same glowing effect, but it can be used for decorative purposes if layered underneath the glow mixture.
Q3: How do I recharge the glow?
A: Expose your jar to natural sunlight or a light source to boost its glow later!
Q4: Is this safe for kids?
A: Yes, with adult supervision. Just ensure they handle glass jars carefully.
Suggestions:
- Use the glowing ice crystals jar as a night light in a child’s room.
- Incorporate seasonal decor by switching the elements inside to match different holidays or events.
- Pair multiple jars of different sizes for an eye-catching display.
Final Thoughts
Crafting your own glowing ice crystals jar is a fantastic way to enjoy a little creativity. The end result is not only visually stunning but offers a warm and inviting ambiance to any space. We encourage you to share your versions or leave a comment below about your experience with this craft! Happy crafting!
Print
Glowing Ice Crystals Jar
- Total Time: 130 minutes
- Yield: 1 jar
- Diet: N/A
Description
Create your own glowing ice crystals jar for a magical ambiance in your home. This easy craft is perfect for all ages and customizable to fit your decor.
Ingredients
- Clear glass jar (small or medium size)
- Epsom salt or coarse salt
- Glow-in-the-dark paint or glow sticks
- Water
- Spoon for mixing
- String lights (optional)
- Decorative elements (like faux snowflakes or glitter)
Instructions
- Clean the glass jar thoroughly and make sure it is completely dry. If using string lights, position them in the jar first before adding other materials.
- In a mixing bowl, combine one part glow-in-the-dark paint with two parts water. If using glow sticks, break them open and pour the contents into the bowl.
- Gradually stir in Epsom salt until you achieve a slushy consistency.
- Carefully spoon the mixture into the glass jar, layering it if desired for added effects. Sprinkle with additional decorative elements like faux snowflakes or glitter for extra sparkle.
- Allow the jar to set for at least 2 hours to firm up. Once set, place it in a dark area to enjoy the glowing effect!
Notes
Experiment with different colors and add essential oils for a unique touch. Use varying sizes of jars for a stunning display.
- Prep Time: 10 minutes
- Cook Time: 120 minutes
- Category: Craft
- Method: Crafting
Nutrition
- Serving Size: 1 jar
- Calories: 50
- Sugar: 0g
- Sodium: 0mg
- Fat: 0g
- Saturated Fat: 0g
- Unsaturated Fat: 0g
- Trans Fat: 0g
- Carbohydrates: 12g
- Fiber: 0g
- Protein: 0g
- Cholesterol: 0mg

