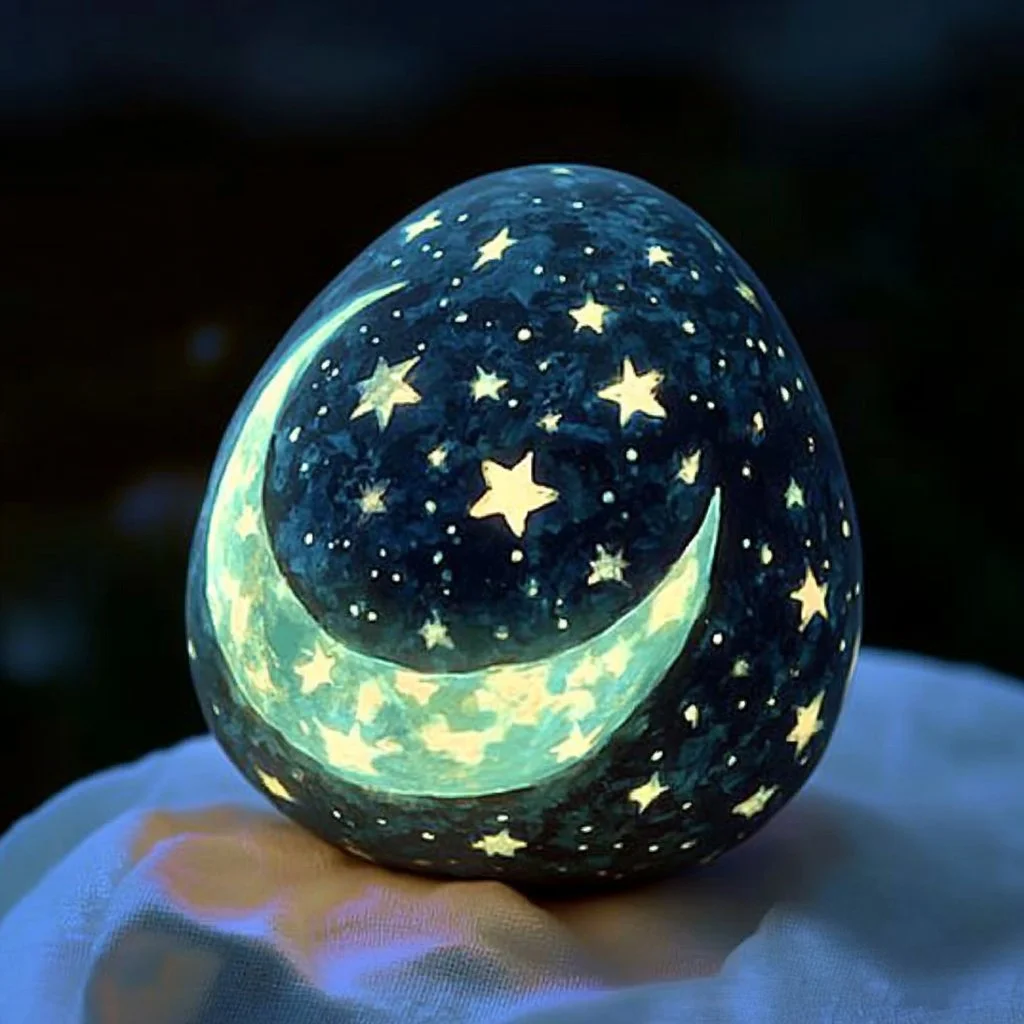
Creating magical glow-in-the-dark night sky rocks is not only an enchanting craft for kids and adults alike, but it also adds a touch of whimsical charm to your home décor. These luminous stones can be used in gardens, as decorative accents, or even as gifts that radiate a little celestial magic. Imagine your own personal collection of glowing stars that light up your surroundings when the sun goes down! This crafting activity encourages creativity, enhances fine motor skills, and allows you to unwind while creating something beautiful and functional.
With just a few simple materials, you can customize your own set of night sky rocks, allowing for a unique expression of art. Not only are they easy to make, but they also spark imagination and provide a delightful nighttime ambiance. So gather your supplies, roll up your sleeves, and dive into this exciting craft project that will surely illuminate your creativity!
Why You’ll Love This Glow-in-the-Dark Night Sky Rocks:
- Simple and Fun: Easy to follow steps make this craft perfect for all ages.
- Customizable: Personalize your rocks with different colors and designs.
- Glow Effect: Watch your creations come to life at night with a magical glow.
- Versatile Use: Perfect for home décor, garden accents, or thoughtful gifts.
- Eco-friendly Option: Use natural stones and non-toxic paint for a sustainable craft.
Materials:
- Smooth, clean rocks (various sizes)
- Glow-in-the-dark paint (non-toxic)
- Acrylic paint (optional, for base coat)
- Paintbrushes (various sizes)
- Paper plates (for paint palette)
- Clear sealer spray (optional)
- Dish soap (for cleaning rocks)
- Water (for rinsing)
Full Step-by-Step:
Step 1: Prepare Your Rocks
- Clean the Rocks: Rinse the rocks under warm water with a little dish soap. Scrub off any dirt and let them dry completely.
Step 2: Base Coat (Optional)
- Paint the Base: If desired, apply a thin layer of acrylic paint to your rocks. This step provides a solid background color. Let it dry thoroughly.
Step 3: Create Your Designs
- Apply the Glow Paint: Using a brush, paint your desired designs with glow-in-the-dark paint. Consider stars, moons, or abstract patterns.
- Sensory Cue: Feel the smooth surface as you paint, noticing how the colors brighten.
Step 4: Drying Time
- Let Them Dry: Place the painted rocks in a warm, dry area. Allow them to rest for several hours or overnight for the best glow effect.
Step 5: Sealing (Optional)
- Seal Your Rocks: If you want to protect your designs, lightly spray the rocks with a clear sealer. Make sure this step is done in a well-ventilated area.
Tips & Variations:
- Mix Colors: Combine different glow-in-the-dark colors for a vibrant effect.
- Shape Variation: Use different shapes of rocks (flat vs. round) to add variety to your designs.
- Use Stencils: Create intricate designs using stencils or stamps for a polished look.
Frequently Asked Questions:
1. How long does the glow effect last?
The glow will vary, but with good quality glow-in-the-dark paint, expect it to last for several hours after being charged by light.
2. Can I use regular paint instead of glow-in-the-dark paint?
No, regular paint will not provide the same luminous effect. Ensure to use specifically designed glow-in-the-dark paint.
3. How do I recharge the glow?
Simply expose the painted rocks to natural or artificial light for several minutes to recharge the glow effect.
4. What can I use besides rocks?
You can also apply this technique to other smooth surfaces, like pieces of wood or ceramic, for a different craft experience.
Suggestions:
- Use these glowing rocks to create a stunning garden path or decorative element in children’s rooms.
- Consider making a set as a gift for friends or family with personalized messages or designs.
Final Thoughts
Creating glow-in-the-dark night sky rocks is a delightful way to express your creativity while enjoying a calming crafting experience. We hope you’re inspired to make your own shimmering stones! Share your creations, variations, or any questions in the comments below. We’d love to hear about your glowing masterpieces!
Print
Glow-in-the-Dark Night Sky Rocks
- Total Time: 15 minutes
- Yield: Varies based on number of rocks used
- Diet: N/A
Description
Create enchanting glow-in-the-dark night sky rocks that add a whimsical charm to your home décor and ignite creativity.
Ingredients
- Smooth, clean rocks (various sizes)
- Glow-in-the-dark paint (non-toxic)
- Acrylic paint (optional, for base coat)
- Paintbrushes (various sizes)
- Paper plates (for paint palette)
- Clear sealer spray (optional)
- Dish soap (for cleaning rocks)
- Water (for rinsing)
Instructions
- Clean the Rocks: Rinse the rocks under warm water with a little dish soap, scrub off any dirt, and let them dry completely.
- Paint the Base: If desired, apply a thin layer of acrylic paint to your rocks for a solid background color. Let it dry thoroughly.
- Apply the Glow Paint: Using a brush, paint your desired designs with glow-in-the-dark paint. Consider stars, moons, or abstract patterns.
- Let Them Dry: Place the painted rocks in a warm, dry area, and allow them to rest for several hours or overnight for the best glow effect.
- Seal Your Rocks: If you want to protect your designs, lightly spray the rocks with a clear sealer in a well-ventilated area.
Notes
Mix different glow-in-the-dark colors for a vibrant effect and consider using stencils for intricate designs.
- Prep Time: 15 minutes
- Cook Time: 0 minutes
- Category: Craft
- Method: Crafting
- Cuisine: N/A
Nutrition
- Serving Size: 1 rock
- Calories: 0
- Sugar: 0g
- Sodium: 0mg
- Fat: 0g
- Saturated Fat: 0g
- Unsaturated Fat: 0g
- Trans Fat: 0g
- Carbohydrates: 0g
- Fiber: 0g
- Protein: 0g
- Cholesterol: 0mg

