

The soft glow of twinkling lights dances on the walls as the gentle hum of evening settles in. You take a deep breath, feeling the warmth of your surroundings seep into your very being. The cozy atmosphere wraps around you like a soft blanket, inviting stillness and reflection. In the center of this serene space sits a Glow Fairy Jar, shimmering and inviting. Its presence encourages a sense of calm, transporting you to a world where creativity flows like a river, gentle and soothing, much like the flickering light within.
Why Make This Glow Fairy Jar
Creating a Glow Fairy Jar feels like an act of gentle self-care. As you gather materials and begin to focus, the world outside fades away, leaving only the tactile joy of your hands at work. The act of crafting invites you to slow down, to appreciate each step as it unfolds. This DIY project serves more than just an aesthetic purpose; it acts as a doorway into a quieter, more mindful existence.

As you layer visual textures and colors, you experience the calming rhythm of creation. Each element you add becomes a part of your story. The light emanating from the jar holds the promise of peaceful evenings spent in reflection or imagination. Holding this jar can evoke sweet memories or saplings of hope, reminding you of the magic that resides in everyday moments. It’s not just about the glow; it’s about the comfort you cultivate through the simple act of making.
A Gentle Look at the Process
As you prepare to create your Glow Fairy Jar, imagine the textures and sounds accompanying each movement. Picture yourself gently pouring soft glue over the glass, the sound a soft bubbling as it interacts with the surface. You will find various materials, each inviting you to engage with them mindfully.
Take the time to admire the shimmer of glitter or the softness of fabric as you choose the elements for your design. This DIY unfolds in layers, each step a calming melody inviting you to breathe deeper and feel more connected. Allow the process to flow naturally, leading you to an extraordinary outcome that mirrors your unique touch.
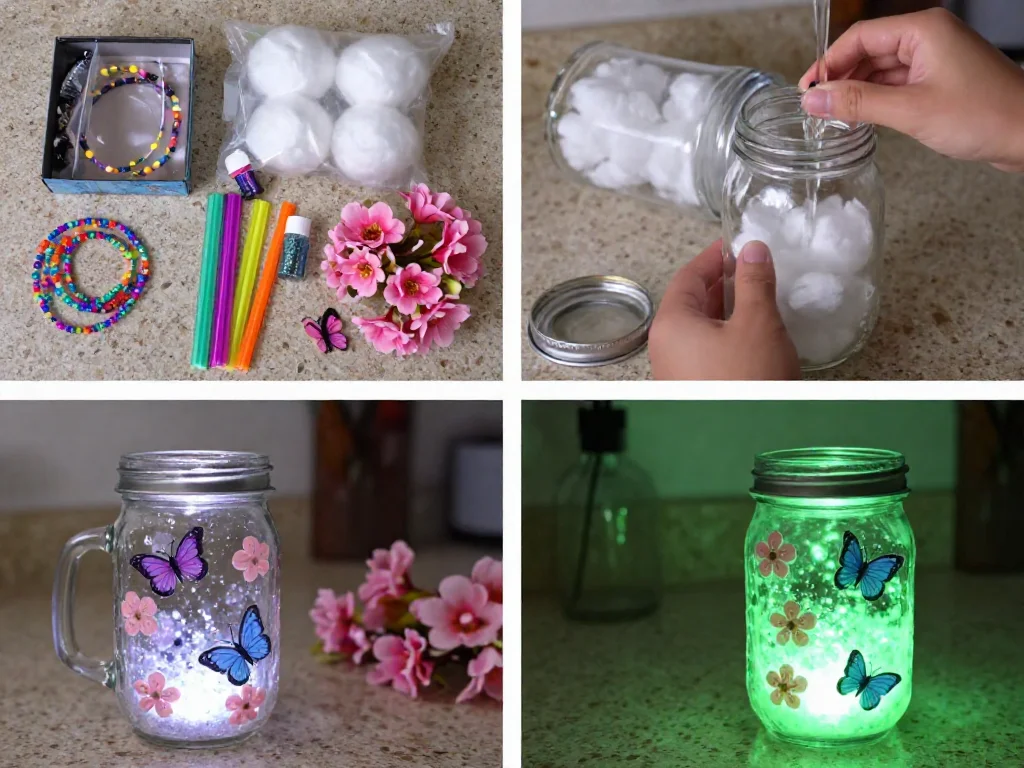
Gathering Your Materials
To create your Glow Fairy Jar, you will need the following supplies:
- A clear glass jar (any size you prefer)
- Fairy lights (battery-operated is best)
- Mod Podge or glue (easy to find at craft stores)
- Soft brushes or sponge applicators
- Glitter (any color that sparks joy for you)
- Tissue paper or thin fabric (optional for a layered effect)
- Scissors (for trimming any excess)
- Optional decorations (like ribbons or natural elements)
Each item will help you craft your personal touch on this glowing treasure. Feel free to explore what you have at home; crafting is an expression of your creativity, allowing for substitutions that let your character shine.
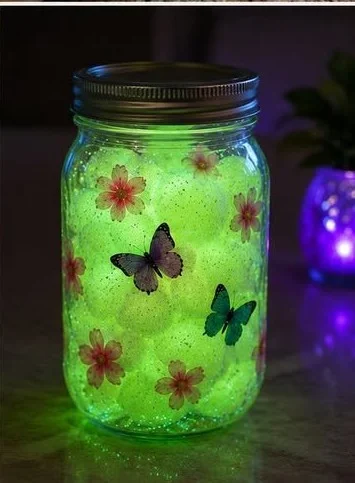
Step-by-Step Directions
-
Begin by cleaning your glass jar. Wipe it gently with a soft cloth, ensuring the surface is clear and smooth, ready to receive your magic.

-
If you choose to use tissue paper or fabric, cut it into small squares or strips. The soft sound of scissors slicing through will echo your focus on the task.
-
Take your brush and dip it into the Mod Podge or glue. Apply a thin, even layer onto the outside of the jar, working slowly and deliberately. Feel the smoothness as the brush glides over the surface.
-
Begin placing your fabric or tissue pieces onto the glued surface. Layer them slowly, observing how they stick and adjust as you go. You might enjoy the playful sound of the fabric crinkling softly under your fingertips.
-
Next, sprinkle glitter over the areas you’ve glued. Watch as it catches the light and dances on top of the glue, twinkling like stars. This layer adds a touch of magic, transforming the jar into something extraordinary.
-
Once you’ve completed your layering, apply another thin layer of Mod Podge over the top to secure the glitter and fabric. Allow this to dry completely before moving on.
-
Once dry, carefully place the fairy lights inside. You can gently loop them around or arrange them how you prefer, finding comfort in the creative process.
-
Your Glow Fairy Jar is ready! Find a cozy spot in your home, and feel the warmth it brings into your space.
Enjoying the Finished Piece
Now that your Glow Fairy Jar shines beautifully, consider where it can have the most impact in your life. You might place it on your bedside table, offering soft light as you wind down for the evening. Alternatively, it can embellish a quiet corner of your living room, inviting anyone who passes to pause and breathe. The gentle glow promotes a feeling of peace, making contemplative moments feel more accessible.
In shared spaces, it becomes a catalyst for conversation, encouraging loved ones to reflect on their own stories. Think of it as a warm companion during those chilly evenings, offering not just illumination but companionship.
Making This DIY Last
After you’ve crafted your Glow Fairy Jar, you may wonder how to ensure it maintains its charm. First, place it in a spot where it is less likely to be knocked over or exposed to excessive moisture. A dry environment helps preserve its beautiful elements.
If you decide to change your decor seasonally, update the content within the jar. You can replace the fairy lights with new colors, swap out decorative touches, or add seasonal glitter. Each change offers a moment to reflect on the passage of time, providing a fresh perspective while lending life to a familiar piece.
Calm Customization Ideas
Personalizing your Glow Fairy Jar allows your creativity to shine even brighter. Here are a few gentle suggestions to inspire you:
-
Consider using a mix of textures. Natural elements like dried flowers or twigs can add a rustic charm. Feel the smoothness of the wood against the glass as you layer them in.
-
Play with different lighting options, like color-changing fairy lights, to enhance the mood each night. You might enjoy the soothing shift of colors as the day fades.
-
Add a personal touch by writing a quote or phrase on the jar using a permanent marker. Your words can resonate calmly, reminding you of what brings you joy.
-
Experiment with scents by adding a cotton ball soaked in essential oils to the bottom of the jar before placing the lights. The calming scent can enhance the experience for all your senses.
These ideas serve as invitations to explore your creative side, letting your personality blend beautifully with the glow of your jar.
FAQs About Glow Fairy Jar
Can I use LED lights instead of fairy lights?
Absolutely! LED lights work beautifully. They often have a long battery life, ensuring your jar stays lit for longer.
How do I clean the jar if it gets dusty?
Gently dust the outside with a soft cloth. If needed, you can use a damp cloth but avoid soaking the jar to protect the internal elements.
Can I make this project with children?
Yes, this can be a lovely project for children. Just ensure young ones are supervised while using scissors and glue.
What if I don’t have Mod Podge?
You can use a mix of glue and water as a substitute. It works similarly and keeps everything in place.
Where else can I use my Glow Fairy Jar?
You can use it in various places! It makes a great nightlight, or you can incorporate it into table settings for special occasions.
A Gentle Note Before You Go
As you complete your Glow Fairy Jar, allow yourself to linger in the quiet satisfaction of what you’ve created. Remember, the journey of making is just as important as the final product. Let it remind you of the magic of gentle moments and the beauty of slowing down.
Each time you turn on the light, take a moment to enjoy the warmth it evokes inside you. Embrace this space of creativity and presence, allowing your spirit to flourish in the soft glow of your new creation.
Print
Glow Fairy Jar
- Total Time: 15 minutes
- Yield: 1 Glow Fairy Jar
- Diet: N/A
Description
Create a captivating Glow Fairy Jar that serves as a soothing nightlight and a reminder of the magic in everyday moments.
Ingredients
- A clear glass jar (any size)
- Fairy lights (battery-operated)
- Mod Podge or glue
- Soft brushes or sponge applicators
- Glitter (any color)
- Tissue paper or thin fabric (optional)
- Scissors
- Optional decorations (like ribbons or natural elements)
Instructions
- Begin by cleaning your glass jar with a soft cloth.
- If using tissue paper or fabric, cut it into small squares or strips.
- Take your brush and dip it into the Mod Podge or glue, applying a thin layer onto the jar’s exterior.
- Begin placing the fabric or tissue pieces onto the glued surface, adjusting as needed.
- Next, sprinkle glitter over the glued areas.
- Once you’ve finished layering, apply another thin layer of Mod Podge to secure everything in place.
- Once dry, place the fairy lights inside, arranging them as desired.
- Your Glow Fairy Jar is ready! Find a cozy spot for it in your home.
Notes
Feel free to personalize your jar with various textures and colors. This project is perfect for all ages, just supervise children during crafting.
- Prep Time: 15 minutes
- Cook Time: 0 minutes
- Category: DIY Craft
- Method: Crafting
- Cuisine: N/A